Music-playing devices today support streaming or playing audio files from portable storage media. Our offline music lives in external drives, USB sticks, or SD cards.
That's why it feels as if you can listen to your favorite tracks from everywhere. And then you realize your old car's audio system can only play CDs. Nothing more, nothing less. And that upgrading its audio system for the modern era would cost much more than a CD/DVD "burner" and a dozen optical discs.
So, let's see how you can turn your modern MP3s into old-school Audio CDs, just like the older folks did back in the day
How Do Audio CDs Work?
CDs are all but obsolete today. Those little discs were a combination of a protective plastic layer and a thin metallic surface. Data was stored on an imperceptible spiral track on the metallic surface as a sequence of pits. A laser head in a CD reader could then "scan" that track and, depending on the elevation of each point, "read" data as zeroes and ones.
Commercial CDs were pressed, literally, from a master disc. The pressure was what created the track and pits on their surface.
Writable discs had a thermo-sensitive chemical structure. Writing on them was achieved thanks to a powerful laser in CD writing devices, which heated their surface to create those pits. That's why such devices were also called "CD burners".
What all optical discs had in common was how sensitive they were to damage, which is why we suggest you also bookmark our guide on how to repair damaged CDs or DVDs and recover data.
We're explaining all this because you'll have to keep in mind some limitations inherent to audio CDs' very nature that we'll see next.
Audio CD Limitations: How to Avoid Whine, Skips, and Maximize Compatibility
CD writing devices kept evolving and, in the process, speeding up until they reached speeds up to 72x. However, such rotation rates also demanded high-quality optical media. Cheap discs could even explode when used with devices that exceeded writing speeds over 42x. And no, we're not exaggerating.
An extra problem was that the faster a CD writer "rushed" to write on a disc, the less defined the spiral tack on them.
This wasn't a problem when using CDs for data storage and accessing them on your PC. However, audio CD players were primarily designed for commercial pressed discs with well-defined tracks. Some could play written CDs just fine, but many would produce an audible whine, skip tracks, or fail to recognize a written CD.
Re-writeable optical media were even more quirky. Those never caught up because of higher prices, lower speeds, and even more flakey compatibility. Their "re-writability" required a different metallic surface than "normal" CDs. That's why such discs, signified by an "RW", are almost wholly incompatible with most audio CD players.
On top of the above, you should keep standards in mind. With "standards", we refer to the strictly defined rules on how data should be ordered on media for a particular purpose. The short version is that "data was ordered in a different way" on CDs with data than with audio (and we're grossly oversimplifying for clarity's sake).
So, although a CD you write will be readable by most optical drives for PCs, if you want to play it in an audio CD player, you should:
- Write it at the lowest possible speed supported by your CD writer. For optimal results, you should stay under 4x. Many modern CD writers, though, are so fast they can't drop to speeds lower than 8x or 10x.
- Use the highest-quality writeable media you can find.
- Make sure said media is labeled CD-R and not CD-RW.
- Choose that you want to create an Audio CD, and write everything on it in one go, as a single (and "closed") session, to ensure maximum compatibility with the Audio CD format and standards.
Of course, you will also need a CD writing device. All devices that work with similar optical discs are compatible with CDs. Thanks to this, you can also use a DVD or Blu-Ray writer. Emphasis on the "writer" bit, for you might have a device that can only read optical discs.
Note that if you want to perform the opposite, to bring your CDs into the modern age by converting them to MP3s, we've got you covered, too. Check our article on how to rip a CD to MP3 (and auto-name the files correctly).
Download and Install ImgBurn
With the necessary information out of the way, it's time to write some music on your CDs. For this article, we're taking for granted that your PC is equipped with a CD writer and that you have a handful of audio files and blank CDs available.
For the software side of things, we'll be using ImgBurn. ImgBurn is compatible with most popular audio file formats, like AAC, FLAC, WAV, PCM, WMA, OGG, APE, and of course, MP3. More importantly, it's free.
So, visit ImgBurn's official site. Download the application and install it on your PC, then run it.

Place an "empty" CD in your CD writer, and prepare to burn some music.
How to Make a Cue File
The music on Audio CDs is stored in sequence, track after track. In the realm of CD writing, that sequence is called the "CUE," from the popular CUE & BIN format combination. Think of it as a playlist for a media player, defining how tracks will be placed on the disc.
-
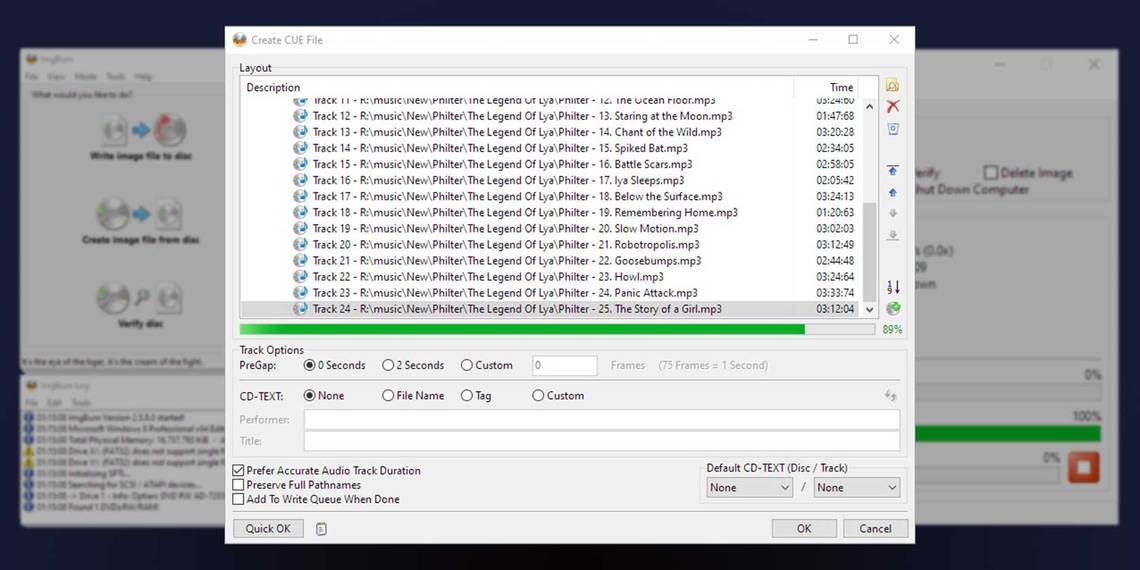
To create such a CUE from a bunch of audio files with ImgBurn, choose Create CUE File from the app's Tools menu.

-
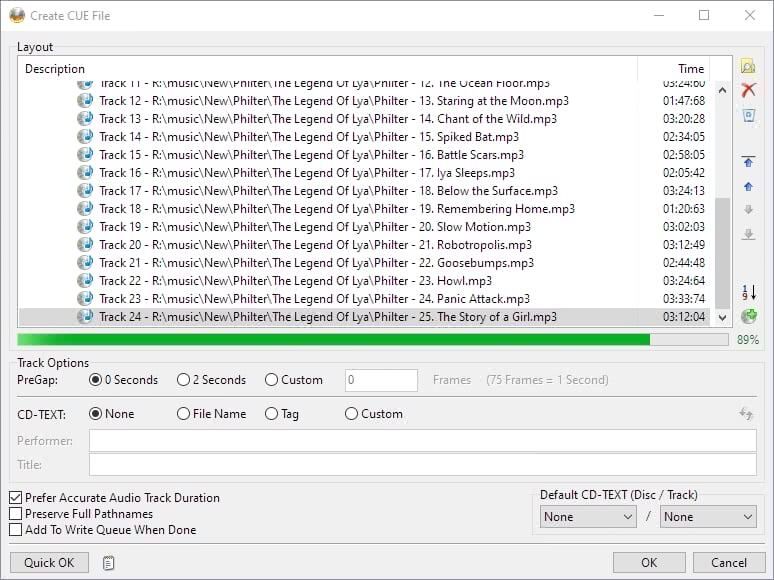
Drag and drop your audio files from a file manager on ImgBurn's Create CUE File window. You'll see them in serialized sequence inside the Layout part of ImgBurn's window.
-
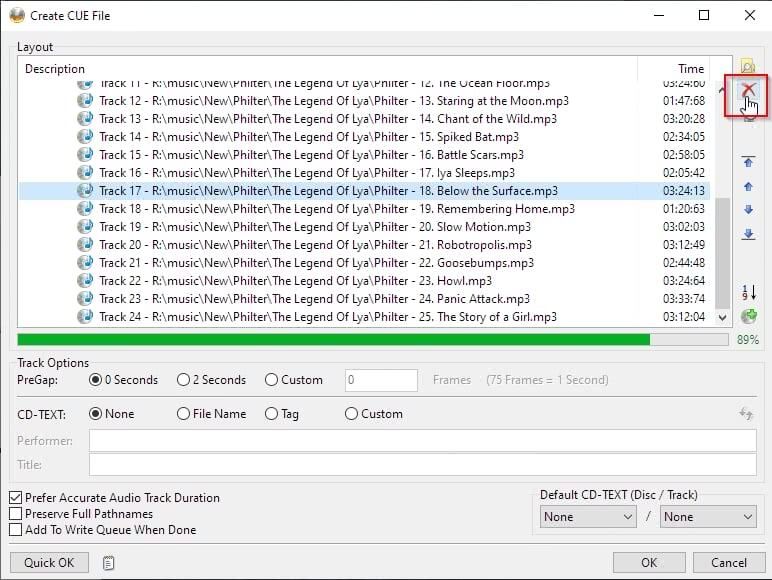
If you want to remove a file from your Audio CD, select it in the Layout and click on the button with the red "X" on the right. Audio CDs can hold up to 70 minutes of audio. If your files add up to more, you should remove some of them, or ImgBurn won't be able to write them on an Audio CD.
-
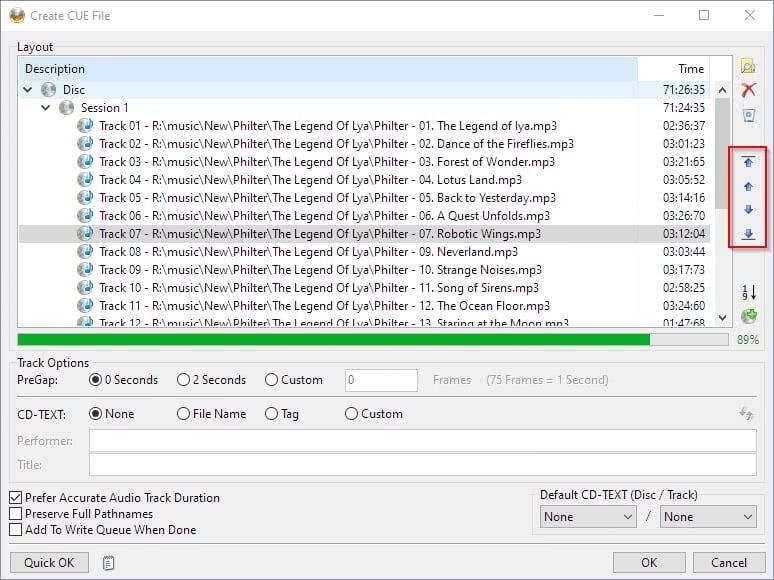
You can use the arrow buttons on the right of the window to change the placement of files in the CUE sequence.
-
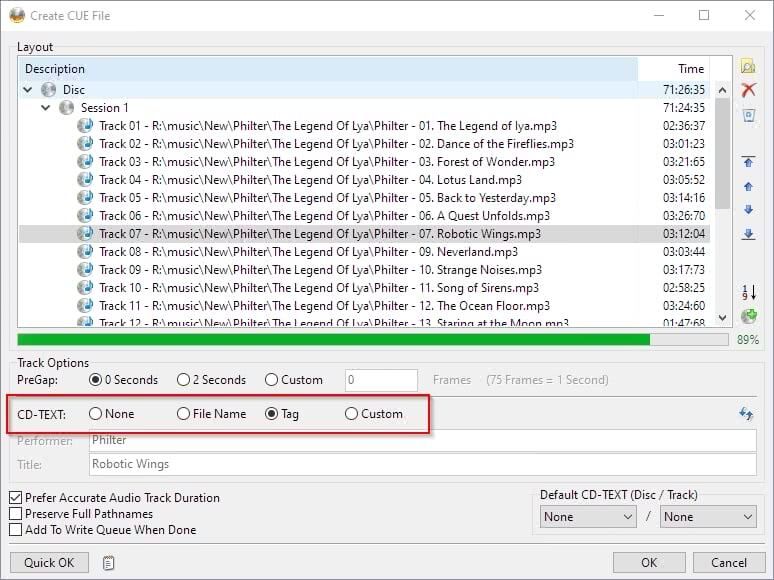
Most Audio CD Players will display information about the playing track on their screen. You can choose what they should show from the CD-TEXT section under the Track Options. If you don't want to enter information for your music manually, go for either File Name or Tag.
-
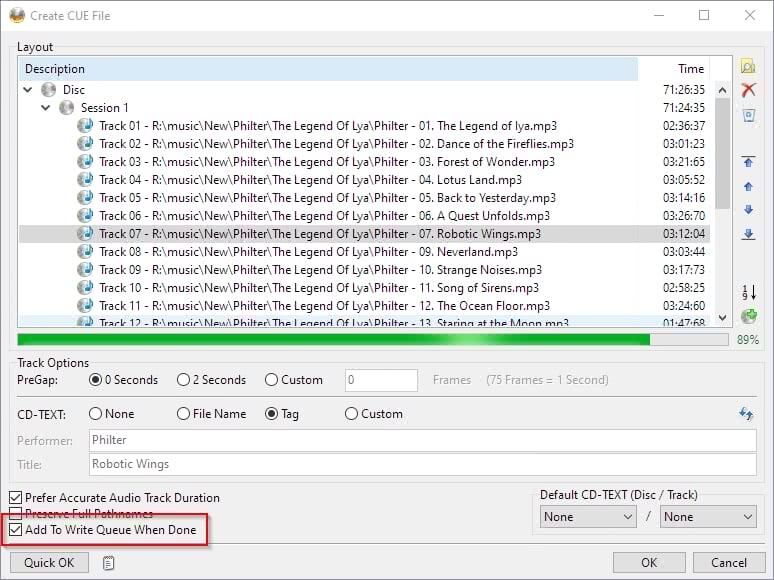
Enable the option Add To Write Queue When Done on the bottom left of ImgBurn's window. Then, click on OK to save your CUE file and have it "forwarded" to the CD writing section of the app.


How to "Burn" Your Music Onto a CD
When back at ImgBurn's main interface, you can now have the app convert on-the-fly and write your music to an Audio CD.
-
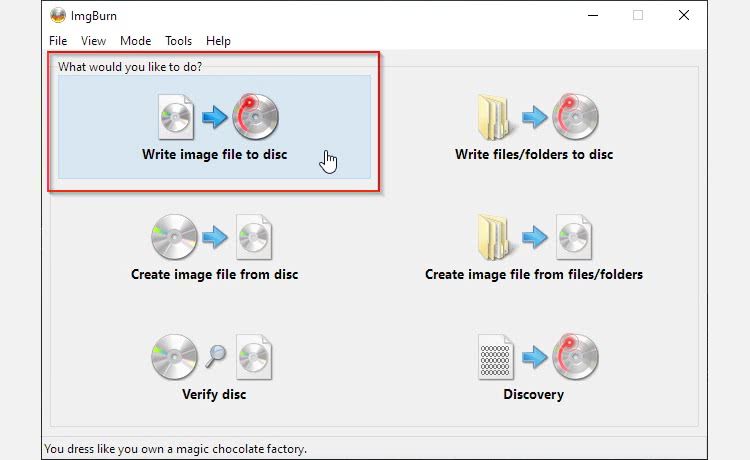
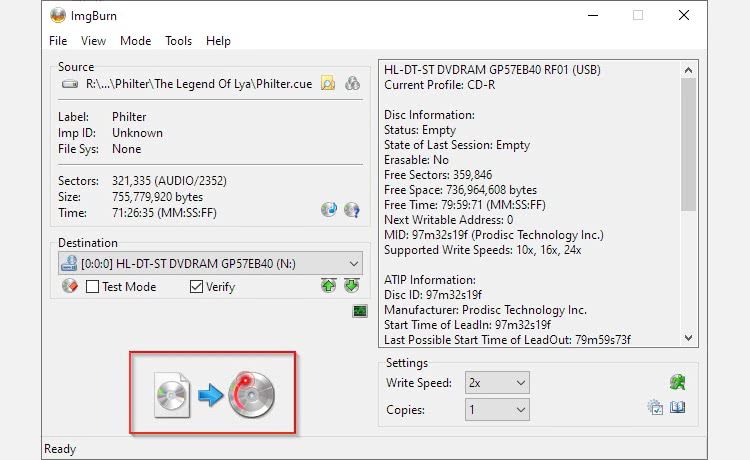
With an "empty" writeable CD inside your CD writer, click on Write image file to disc.
-
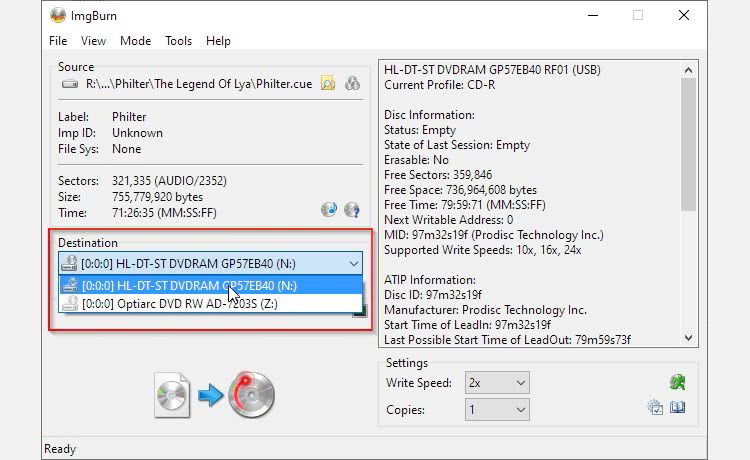
If you have more than one optical disc writing device on your PC, select the correct one under Destination.
-
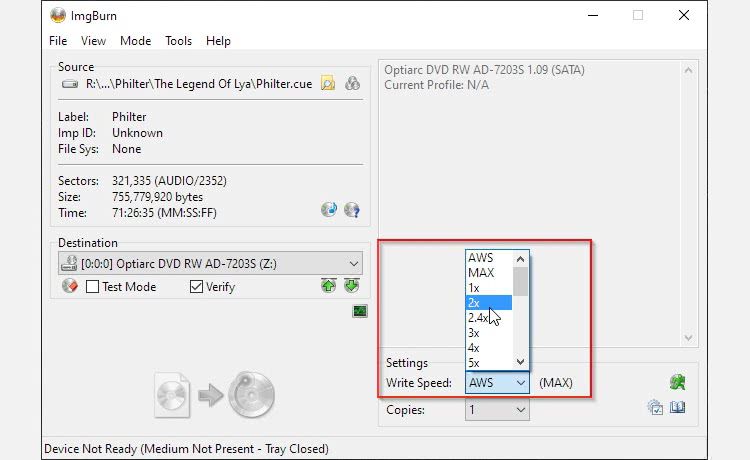
Turn your attention to the bottom right of ImgBurn's writing window. Change the Write Speed under Settings to 4x or even lower for optimal results.
-
Click on the large button on the bottom left of ImgBurn's writing window to start the burning process.
-
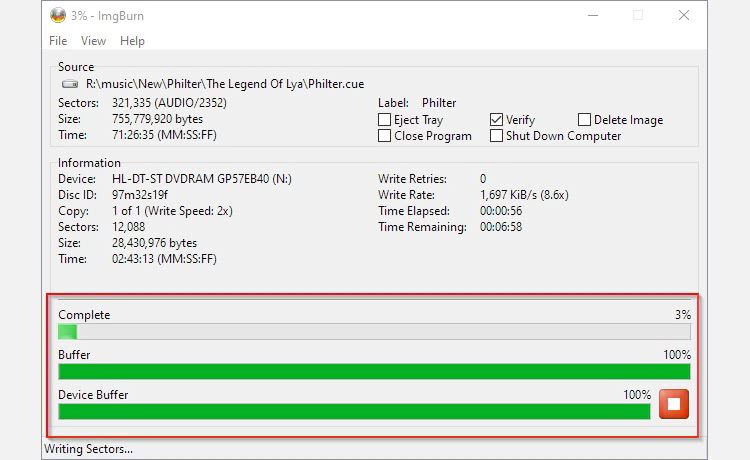
ImgBurn's main window will "morph" again to show you the writing process progress. Your Audio CD will be ready when the bar under Complete fills up. Depending on your settings and hardware, your CD tray may eject when the writing completes.


Listen to Music the Retro Way With ImgBurn
There's no arguing that modern digital formats and streaming are much more sensible in the long run, and enjoying them comes with zero effort. And yet, the restrictions of the Audio CD format have the positive side-effect of making a ritual out of the process of listening to music.
With CDs restricted to around 70 minutes of audio, you must prioritize, think, and plan. To choose the tracks that matter the most. To carefully consider the melodies and lyrics that are more appropriate for an event, a mood, or a state of mind.