Tweak These Four Settings On Your iPhone Camera To Get Better Photos

Gone are the days when you needed to lug around DSLR cameras to get pro-looking photos. These days, the iPhone camera can capture and produce images that are indistinguishable from DSLR output in terms of quality. But excellent photography depends as much on technique as it does on the equipment. In the hands of an amateur, even the best cameras end up creating very mediocre images, so it's important to know how to optimize the features available to you on your iPhone camera.
Some of the knobs and dials for controlling your camera's output are pretty obvious — you're greeted with them as soon as you open your Camera app. If you're not new to the iPhone, you're probably familiar with the exposure dial, viewfinder grid lines, zoom, aspect ratio, and mode switches (like using night mode for getting bright shots in low-light conditions, or Portrait mode for bokeh shots). If you haven't been taking advantage of these features, you could probably use this guide to taking better photos on your iPhone.
But there are other not-so-obvious settings hidden within your iPhone that can significantly improve the quality of the photos you take with your camera. Let's check out some of them.
Turn off View Outside the Frame
On the iPhone 11 and later, there's a feature called "View Outside the Frame" that's enabled by default. With it on, your iPhone will display a full-screen version of your composition. This means when you're trying to frame a shot, you'll see elements outside of the borders of your eventual photo. The lowered opacity in the top and bottom frames, which would otherwise be black, will serve as a visual cue for the areas that won't be included in the shot.
The feature used to be "Capture Outside the Frame," and it would use the ultra-wide lens to not only show you what's outside the frame but also capture it when you take a shot, allowing you to crop out and reframe your pictures if you wanted. It was a nifty addition for making the most of your shots, but Apple removed it with the release of iOS 14.
With the capture function gone, the option to view what's outside the frame is pointless at best and distracting at worst. It makes it more difficult to frame a shot, so it's just best to turn it off. To do so, open Settings > Camera, then turn off View Outside the Frame under the Composition section (via Apple).
Turn on Prioritize Faster Shooting
In cases where you need to shoot several photos from the same scene, you can take advantage of the Faster Shooting feature available on iPhone XS, XR, and later. Typically, your iPhone delays the shutter reset for a few seconds to allow the image processing software to compute and process the photo you just took. But this can be a handicap if you're capturing a rapidly changing scene, so the Faster Shooting feature reduces processing time and allows you to capture more photos when you rapidly tap the Shutter button.
This means that you'll sacrifice photo quality for speed, so the resulting shots might not be as crisp or as detailed as the ones you'd get with the feature turned off. It's quite similar to Burst Mode, but with less chance of ending up with totally blurry results. Prioritize Faster Shooting is on by default, but you can confirm that it's enabled in Settings > Camera, then under the Photo Capture section, check that the Prioritize Faster Shooting toggle is turned on.
You can leave the feature enabled even when you're not using it — your camera will process photos as normal when you tap the shutter button slowly; Faster Shooting is only activated when you tap the shutter rapidly.
Enable Mirror Front Camera
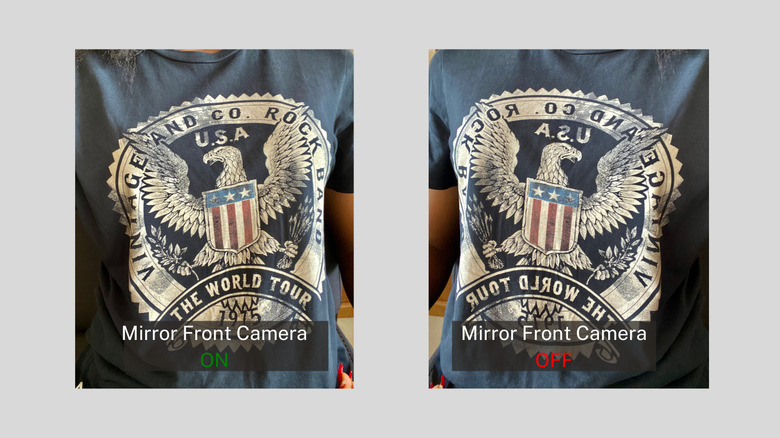
When you're taking a selfie with the iPhone's front-facing camera, the preview shows you what you'd see in a mirror, but the eventual photo becomes an inverted image. This means, instead of seeing your face as you would when you're looking at yourself, you'd get an image of what your face looks to others, which is a lot different than you might think. You'll notice the difference even more when there's text in the shot — in your viewfinder it'll read correctly, but after you take the shot, you'll find that the text now reads backward. Sure, you can fix this by using the Flip tool in your built-in camera editor, but there's a way to prevent it from happening in the first place.
In iOS 14 and later, you can tweak your camera settings to ensure that your front camera preview and output are the same, with no inversions. To do this, go to Settings > Camera, then toggle on the "Mirror Front Camera" option from the Composition section.
Turn off Scene Detection
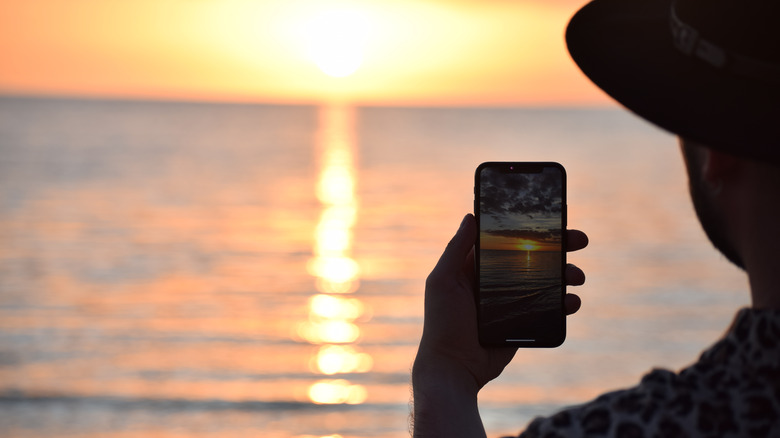
On iPhone 12 models and later, there's a Scene Detection setting that intelligently identifies the subject of a photo and tries to adjust the camera settings in order to make the best of the scene. For example, if you're taking pictures of nature, your Camera might turn up the greens and blues to create a richer, more vivid shot. For sunset shots, you might get more HDR action so that the many colors are accurately captured.
But this tool isn't always accurate in its detection, which means your camera might mess up some of your shots. iPhone 12 users frequently complain about getting banding in photos of clear skies, mainly because the AI photo optimization tool is processing a single color as multiple.
Scene Detection is on by default, and it's a tad inconvenient that you cannot simply switch off this setting from your Camera preview, but you can regain control of your photography by turning off the option permanently. To turn off Scene Detection, go to Settings > Camera, then turn off Scene Detection.