5 Things To Do To Ensure Your Home Is Ready For Exterior Paint

A splash of fresh paint is an excellent way to liven up any abode and boost its curb appeal. In addition to elevating your property's aesthetic and boosting its value, CertaPro Painters also says a new coat of exterior paint can protect your home from the elements and help it stand the test of time against weather and insects.
As simple as a new paint job can be, it's also a big commitment. Exterior paint jobs can be costly due to the large surface area and quality of paint needed, which is why it's so important to ensure the job is done right. Properly preparing your home's exterior for paint is essential in ensuring paint can be applied properly and will prevent unevenness in texture and finish — which can save you a lot of time, money, and headaches down the road. Taking the steps to ensure your home is ready for exterior paint will help the finished product look professionally done, even if you plan on doing it yourself.
Wash it
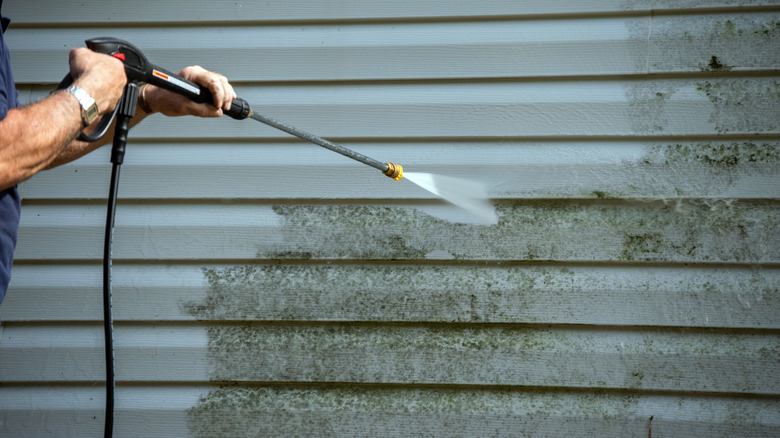
Before painting, a simple but important step is to wash the exterior of your house. According to Old House Online, wet paint won't properly adhere to siding with dirt and mildew. In addition to providing a smoother, cleaner surface for paint, washing your home's exterior can also help remove any surface stains — which aren't always able to be covered completely with a fresh coat of paint, particularly if you've chosen a lighter color.
Though power washing your house is a quick, easy, and effective way to rid it of dirt, grime, and even old, chipped paint, Norton Saint-Gobain Abrasives warns that using one on a house with soft wood siding can easily cause damage. If your home's exterior is made of soft wood such as cedar or redwood, it is best to stick to washing it by hand with water and dish soap. Though this might take longer than simply spraying the dirt and cobwebs away, taking the time to properly and safely clean your home's exterior will not only provide a better, cleaner canvas for the paint but will also prevent costly repairs should you inadvertently damage the siding.
Additionally, Old House Online says that if you are handling a power washer as a novice, you run the risk of breaking windows and driving water underneath the siding of your house if you aren't careful. If you don't have prior experience with power washing, you might want to consider hand washing it.
Scrape the old paint
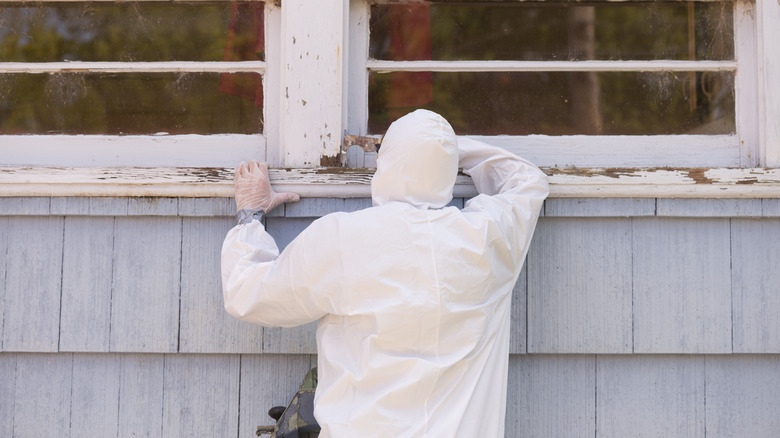
Even if you've chosen to power wash your home to help speed up the paint removal process, you will likely still need to scrape off the remaining chipped and peeling paint by hand, as paint won't properly adhere to a surface that has been made uneven by old, peeling paint.
Be aware that if your home was built prior to 1978, Angi warns that this part could get a little tricky, as the old paint could contain lead. For around $25, you can buy a home-testing kit that will alert you to lead contaminants in the old paint. If the paint does test positive for lead, there are additional precautions you need to take prior to removing it to ensure your health and safety.
When exposing yourself to paint chips containing lead, you should take the proper precautions to protect yourself. Wearing an N100 mask as well as a professional grade respirator with HEPA grade filters can protect you from breathing in any lead contaminants, while a protective suit will protect your skin and clothing (per Angi). In addition to protecting yourself, protect the environment by using a drop cloth to gather any fallen paint chips and dispose of them in a tightly sealed trash bag.
Sand it

In addition to making sure your home's exterior is clean and free of any old, chipped paint, you will also need to sand it prior to adding any new paint. Sanding your home's exterior walls is an essential step in paint prep, as it will help all additional coats of paint properly adhere to the surface. According to Norton Saint-Gobain Adhesives, sanding the siding on your house creates a bond between every coat of paint you apply, which prevents visible flaws from surfacing through the paint in the future.
If you are painting wood that is weathered, you can use medium-grit sandpaper, whereas if you are painting exterior features such as doors and window trim that call for glossy or semi-gloss paint, you should smooth and refine the area even more with fine-grit paper. When sanding a large surface area like the facade of your home, Angi recommends using an orbit sander to speed up the process and opting for 100 to 120 grit sandpaper to buff out any remaining scratches.
Make any necessary repairs
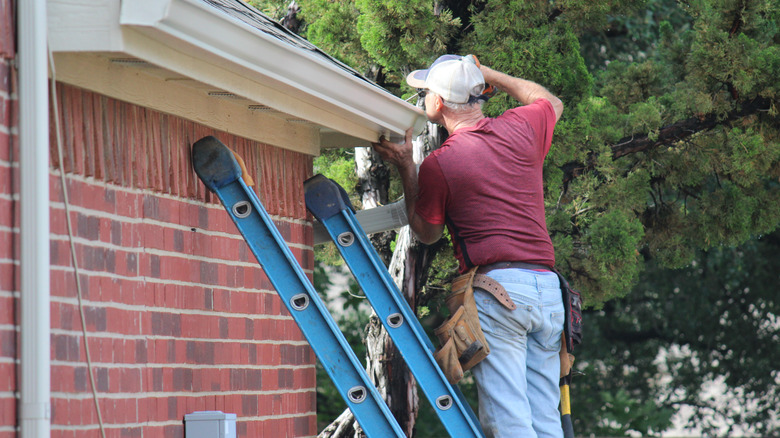
A new paint job is the perfect excuse to take care of any necessary home repairs that you have been putting off, as all repairs should be done prior to adding new paint. Painting over repairs can conceal and delay the detection of any underlying issues your home has that need to be addressed. Taking care of your repairs before you paint will also save you from having to paint again later if the damage worsens or becomes more serious and the siding needs to be disturbed to address it.
According to H.D.F Painting, rotted wood and cracked plaster are common issues many homeowners will need to address before painting, with Norton Saint-Gobain Adhesives adding that this is also the time to fill any holes and re-caulk any areas that need it. Smaller areas of wood rot – roughly six inches or less – can simply be patched with epoxy. Larger, more substantial cases of wood rot will likely need to be replaced completely (per H.D.F. Painting).
You can easily repair cracks and holes with joint compound and a putty knife, keeping in mind that larger blemishes may require more than one application. After the compound dries, you should sand the area to make it even with the rest of the exterior wall.
Protect landscaping and trim with cloth and tape
The final step in ensuring your home is ready for exterior paint is taking the proper precautions to ensure your landscaping and any areas of your home that you don't want painted are protected from unwanted paint and accidental messes.
Since the last thing that your blooming rosebush needs is a paint shower, any areas of landscaping that you don't want to risk spilling paint on should be covered with a drop cloth. This will keep your garden looking beautiful and prevent any unnecessary damage to your precious plants – particularly those that are less than hardy.
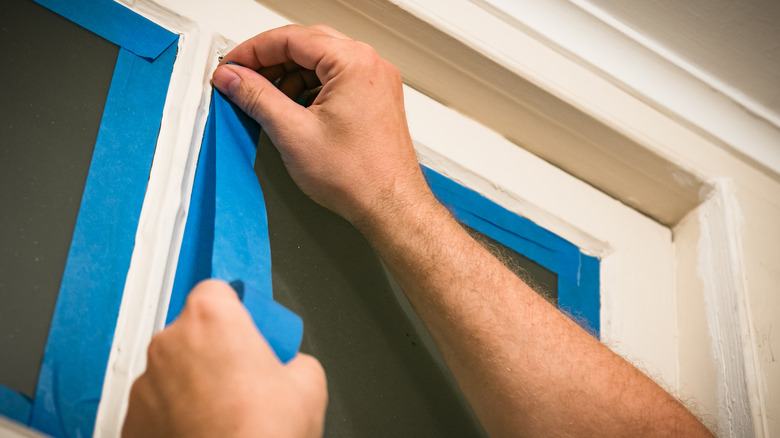
Taping off areas of your home's exterior that you don't want to accidentally get paint on — such as trim around windows and exterior doors — can also help keep your paint job mess and accident free. According to Behr, you should take into account your home's exterior surface and only use painter's tape that is recommended for that particular finish. When laying down painter's tape, tear off pieces that are no longer than your arm, as larger pieces will be difficult to work with. Ensuring the tape is straight, carefully press it into surface edges that you don't want to accidentally get paint on when edging, being mindful not to overstretch the tape, as this can cause paint to seep. Using a putty knife or even your fingernail and sliding it along the tape can help seal it and ensure paint will not leak underneath.