What To Know Before You Buy Ceiling Paint
When painting a room, it's all too easy to focus on choosing the perfect paint color and trim treatment, but what about the ceiling? The ceiling is often an afterthought (if we think about it at all), but it's definitely worth putting some time and effort into as well. Fresh ceiling paint could brighten up a room and cover imperfections, according to Forbes Advisor.
Thinking of painting the ceiling in a specific room or all the rooms inside a home? Find something that complements the general design model of the home. The Farmhouse Life suggests painting ceilings a primary color in red, yellow, or blue to create a pop of uniqueness. Bright colors go well with neutral home colors. Unsure about bright colors? Try to go pastel to tone down the tint, or you could go with a classic neutral for a calming feel. You could also paint ceilings a complimentary color to the walls in a room so as not to have the room appear too dark. There are ways to accomplish picture-perfect painted ceilings with these steps.
Types of ceiling paint
When it comes to ceiling paint, three different finishes usually look the best. Look for flat, satin, and semi-gloss paints at local painting or home stores. Sheldon & Sons, Inc. notes that flat paint covers ceiling flaws, especially with drywall-constructed ceilings where taping isn't sanded properly. Flat paint is also saturated and has a velvety finish. Another good thing about flat paint is that it doesn't reflect light or cause any glare. Though flat paint is aesthetically pleasing, it shouldn't be used to paint ceilings in high-humidity rooms because the paint may crack and peel.
For those who prefer a bit more of a sheen, try a satin paint. While satin finishes are glossier than flat paint, they take longer to dry, but the finish looks great up against textured wall designs (via Mark's Painting). Thinking of painting the ceiling of a bathroom? Buy semi-gloss paint, which works well in humid rooms. Neat Ceiling explained that semi-gloss paint dries quickly as well to cut back on wait time.
It's also worth noting that there are paints specifically formulated for ceilings. Ceiling paints are generally thicker than wall paint to reduce dripping and running.
What to pay
With ceiling painting, there are people who prefer to work on the project as a DIY instead of having professional help. To do so, keep in mind that paint costs $20 to $60 per gallon. as stated by Home Advisor. One gallon of ceiling paint could cover a room measured 12 feet by 12 feet. Want to remove the popcorn off a ceiling to have a smooth ceiling? The cost could be somewhere between $800 to $2,500. Though removing popcorn is expensive, the cost of paint per square foot for most ceilings is $1 to $3.
Looking for a professional to do the job? The cost to hire a professional is dependent on the size of the room as well as how much the contractor charges per hour for their work. DIY Painting Tips said a room that measures eight feet by eight feet or nine feet by nine feet costs about $250 to $375 to paint the full ceiling. A room that measures anywhere from 10 feet by 10 feet to 12 feet by 12 feet costs $375 to $500. Have a large room? Rooms that go between 12 feet by 12 feet to 18 feet by 18 feet cost between $500 to $750 to paint the ceiling. With larger projects like these, contractors need an entire day to paint as well as time to gather needed materials such as ladders, pole extensions, and paint sprayers.
Prevent ceiling paint from dripping
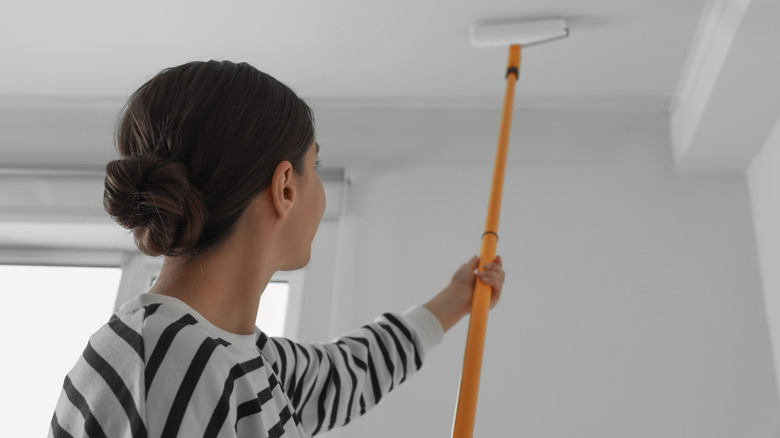
Nothing is more annoying than having messy splatters or drips coming from a painting project. To prevent these messes, Paintzen suggested using a shallow paint tray and a small amount of paint on a roller. Using this technique may take longer to paint a specific area, but it's a helpful way to ensure that you have more control when painting. Make straight lines with slow and steady strokes when using a paint roller. Don't press too hard onto the ceiling. To prevent paint from going onto the carpets and furniture, place drop cloths onto the floor and furniture. Remove and unplug light fixtures from the room. The fewer obstacles you have to paint around, and the fewer things that might be dripped on, will make the job less stressful overall.
What to do when spotting paint splatters? Lowe's advises that if the spot is still wet, wipe it off with a cloth and continue painting the ceiling. If the spot is dry, take a sander to scrape off the area. Use a damp cloth to clean off the sanded particles, and then repaint the area if needed.
Finding unique colors

Ceilings are thought to be the fifth wall in a room with four enclosed walls. To capture the essence of liveliness in home design, paint ceilings with captivating colors. For a classic and timeless look, The Spruce said to paint the ceiling white to create a sense of depth in a room. Dark ceilings create a visual stopping point between the wall and ceiling color, which can make the room feel a little more closed in. White paint is easy to find in hardware stores and straightforward to use for touch-ups.
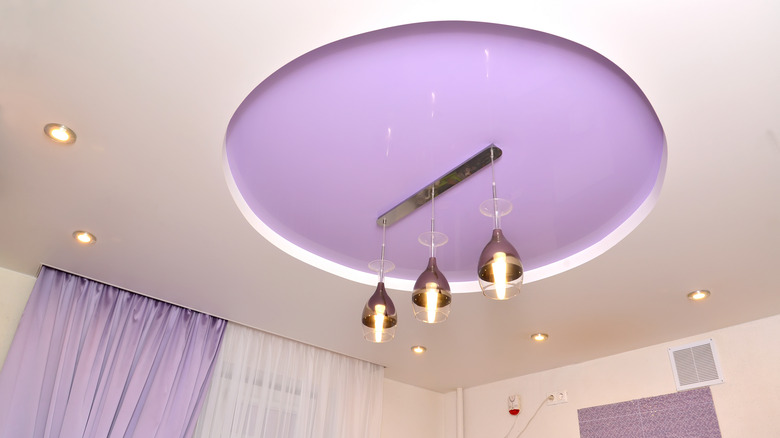
You can also consider brighter colors. Try painting the ceiling yellow to create a sunny atmosphere alongside neutral walls. To create feelings of coziness and warmth, paint a ceiling brown for that "at home" vibe. Instead of bright fire-engine red, go for shades of burgundy or maroon. Burgundy ceilings look appealing against white or gray painted walls.
One way to establish a feeling of calm is to paint with silvery-blue ceiling paint (via Better Homes and Gardens). Blue is a popular color for home design and can be found in various paint shades. For a more masculine essence, dark green painted ceilings do the trick. Dark green would be perfect for an at-home office and study.
How to get started

Confused about how to begin a ceiling painting project? The first step would be to clear the room of anything that could get stained or ruined in the painting process. Sharper Impressions Painting Co. recommends removing wall hangings and covering curtains. Keep furniture centered and cover it with a drop cloth, or place it in another room. Buy painter's tape to cover windows and wood furnishings from paint splatter. Purchase spackle to cover holes and cracks before painting. Make sure to have a steady ladder or someone holding the ladder in place before going up high to correct imperfections on the ceiling.
Before officially getting started, make sure to have the right materials used for painting. Check out local paint and hardware stores to buy stir sticks, rags, putty knives, and paint trays. A strong paint primer could work to cover stains. The primer acts like a topcoat and adhesive for the ceiling paint.
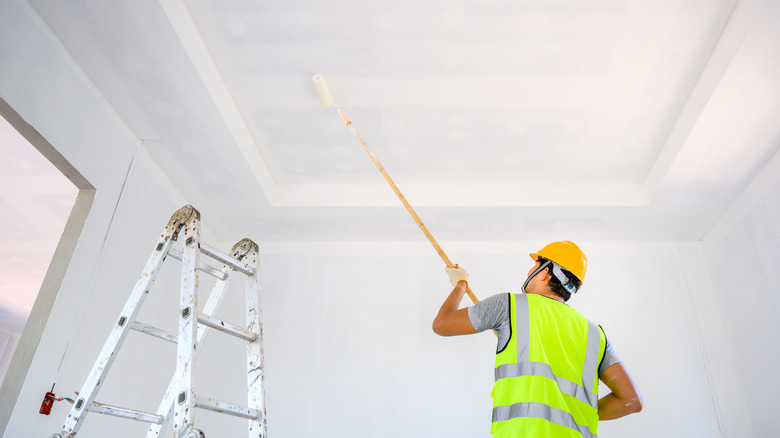
Rolling versus spray painting

Paint rollers and paint sprayers both have their benefits when using them to paint ceilings. According to Pittsburgh Spray Equipment Co., using a paint sprayer is faster and doesn't leave marks behind. Though using a paint sprayer doesn't have as much control as a paint roller, it works well for uneven ceiling textures. Paint rollers enable more hold control. They're low-cost, so multiple paint rollers could be bought if needing to paint multiple walls.
Bob Vila notes that another advantage to using paint sprayers is that they reach where brushes can't reach. However, that means that the paint can get everywhere. It's vital to protect other surfaces while spraying the ceiling paint. Everything should be masked off and covered when using a paint sprayer to paint a ceiling so as not to experience any overspray. Wanting to paint the whole room? Wagner notes that paint sprayers are more efficient than paint rollers when doing a major paint project.
Tips from professionals

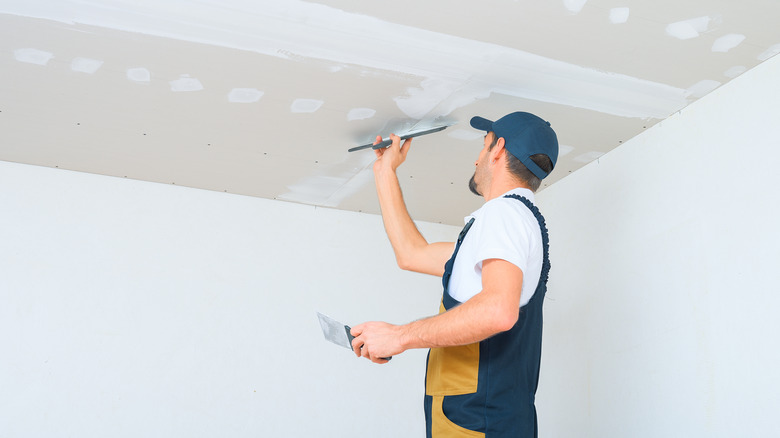
Painting a ceiling or multiple ceilings is challenging work. Family Handyman notes the importance of taking the time to prepare the surface, including sanding, filling any holes or gouges, and even washing the ceiling if it's very dirty to ensure that the paint adheres well. All of this will result in a better, more professional-looking paint job. Family Handyman also shares that, instead of using drop cloths, professionals tend to use cardboard to cover the floors from dripping paint. Cardboard is sturdier and stays in place better.
To completely alleviate the feelings of stress and worry, hire a professional to do a ceiling painting project. Renovation Find advises that getting a professional usually guarantees a quality job well done. Professionals typically have experience and the right tools for the project. This can be especially important if you have very high ceilings, because the safety concerns might be better-handled by a pro who has all of the necessary safety equipment. For additional information on home design, talk to professionals because they know what works well to create the best aesthetic for any given situation.
Various kind of paints to choose

When painting a ceiling, there are plenty of colors and finishes to choose on the market. With a plethora of options, what works most effectively? For ceilings that have water spots due to rain, find a stain blocking ceiling paint, according to Decorated Life. These kinds of paints could go on easily with a paint sprayer in one to two coats. Instead of matte paint colors, find a ceiling paint color in a metallic finish for a decorative touch. Metallic finishes dry quickly, but could be costly. There are homeowners who prefer to use metallic paint colors in living rooms and entertainment spaces.
Need to paint the ceiling of a bathroom? Family Handyman recommends finding paints that are specifically-designed for high-moisture environments. How about painting a ceiling made from wood? Look for oil-based paints in satin and semi-gloss finishes. These kinds of finishes could work well in one coat if applied correctly.
Drying time

Once the job is done, all you have to do is wait for the paint to dry... which is about as exciting as it sounds. If you're doing multiple coats, you'll want to let it dry between each coat for the best result. Paint usually takes about 30 to 90 minutes to dry completely, according to Forbes Advisor. However, drying time could vary. Paint brushes hold more paint and cause paint to go on thicker, which means taking longer to dry. And "dry to the touch" is not the same as "dry enough to apply another coat."
To apply a second coat of paint, wait about four to six hours to do so. With oil based paintings, drying time may take up to a day. The same article suggested to try to do painting projects in the fall or the spring. Since the weather isn't too cold or too humid, a window could be opened to allow in air to quicken the drying process. If the room doesn't have any windows, a fan could do the job. Buy a dehumidifier to expel moisture from a room to enable the painted ceiling to dry.
Don't forget to sand and cut in
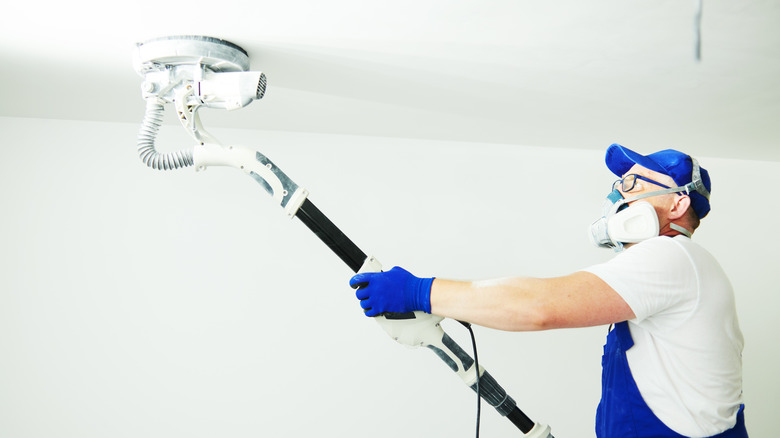
To erase any bumps or other imperfections on the ceiling, don't forget to sand before painting. Sanding before painting enables the paint to bond better to the ceiling. Family Handyman suggests doing a quick sanding with 100-grit drywall sandpaper with a sanding pole. Make sure to have safety gear readily available prior to sanding the ceiling. Real Estate advises that masks, goggles, and coveralls function as a protection against flying sand particles. Doorways should be closed or blocked off. Windows need to be closed or covered as well. When sanding, remember to sand in one direction. Vacuum and wipe away any dust-coated surfaces.
Cutting in the edges of a ceiling isn't complicated (via The Saw Guy). Fill a container with paint and use a paint brush to dip into the paint. Be sure not to overly soak the paint brush to prevent an excess of paint from going all over. Brush across 12-inch strokes evenly on top near the ceiling trim and repeat. This helps you get a neat, crisp edge between your wall or trim and your ceiling.
Try to avoid these mistakes

Though painting may turn into something innovative, make sure to go into the project knowing what to do and have a plan before making big changes. Painting a ceiling requires great care, and without planning, it's easy to make mistakes. One of the most important things to do may be to bring home sample paint pots. Love & Renovations recommends bringing home sample paint pots from a paint store to paint one-foot squares on the walls. The goal is to see how the assorted paint colors look in different lighting. You can do the same thing with ceiling paint, though it could be trickier if you have very high ceilings. In that case, consider painting your sample onto a piece of cardboard and placing it high up on the wall to get a general idea of the color.
As obvious as it may seem, make sure the paint is stirred in the cans. Find paint sticks at hardware and painting stores and use them to stir. If the paint isn't stirred properly, it may go on in various shades of the color instead of one whole color.
Don't rely heavily on painter's tape because paint could still seep through. While painter's tape works as a guide, it's still a good idea to paint slowly and carefully and use an angled brush to precisely get into corners.
Maintaining ceiling paint
Maintenance may be tough due to wear and tear as well as age when it comes to painted ceilings. House Painting Tutorials advises that, if there are holes and scratches on a ceiling, they should be filled with spackle and sanded down once dried. After the area is dried, spread paint primer across the spots before repainting the area. Primer should be used before repainting because sometimes paint won't stick to an area that hasn't been primed. Without priming an area first, the paint could flake off. Blotchy spots could also form on the ceiling causing an uneven, messy appearance.
Once the area is dried, repaint with the same shade of paint used previously. If the paint can was discarded, try to replicate the color of paint by buying a similar shade at a home supply store. Make sure the paint is stirred before repainting the spots. Don't need to repaint whole damaged area? Grab a few Q-tips and dip them into paint to cover small scuff marks if necessary.
Painting a popcorn ceiling
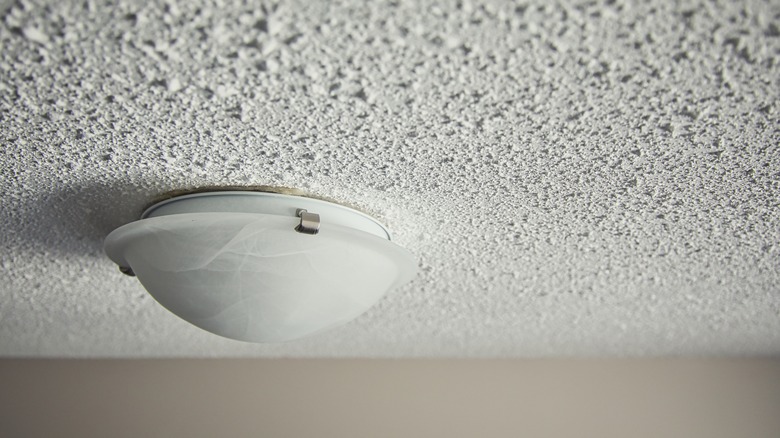
Ceiling textures that look like bumpy popcorn kernels were popular in the past. Even to this day, there are houses that may still have ceilings that look like this. To paint a popcorn ceiling, first find out the measurements of the room that needs to be painted. If the room measures 10 feet by 12 feet, multiply the figures to get 120 square feet. This number is multiplied by two to get 240 square feet. With this number being doubled, it's the amount of paint per gallon used to cover the popcorned area, according to ReStore. As always when painting, make sure furniture and other home décor is removed from the room. Anything that can't be removed should be covered with drop cloths. Use vacuum attachments on a vacuum hose to retrieve any cobwebs on the popcorn ceiling before painting over it.
Interior acrylic latex paint works best on popcorn ceilings (via The Spruce). Flat or matte finishes are the best, because glossy finishes tend to take longer to dry. Popcorn ceilings aren't as prevalent now with home designs due to some containing asbestos, which could cause cancer and other debilitating health defects. Use an at-home asbestos kit or hire an asbestos specialist to test the popcorn ceiling before you attempt to remove it.
Reasons to paint a ceiling
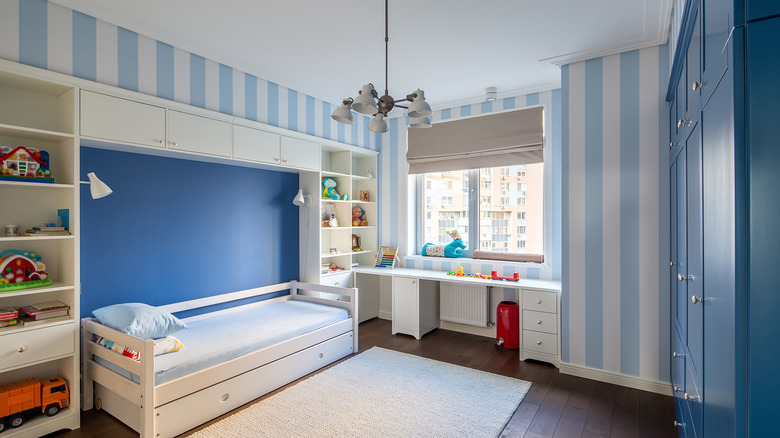
What makes homeowners want to paint a ceiling in the first place? According to Ecos Paints, painting a ceiling could make a small room look larger by creating a sense of depth. Darker colors in shades of greens, blues, and grays could give the illusion that the ceiling is higher than it really is. This technique would work well in low-ceilinged rooms. To tie a room's aesthetic together, don't neglect painting a ceiling, because it may add a special touch to an otherwise simple room.
Think of what color to paint a ceiling in the family room or living room. Ecos Paints notes that a white ceiling looks best for primary living spaces. If white is too stark, try painting a ceiling with a beige or a tan color. To add a sense of sophistication, go for a ceiling paint color that is two to three shades darker than the painted walls of the room. A dark blue painted ceiling would look excellent against light blue painted walls. This style looks great with crown molding. Paint the ceiling the same color as the walls to accomplish a seamless look. Striped bedroom walls could look classic with a pale painted ceiling. There's no limit to what color or finish to paint a ceiling, so be as creative and innovative as you like, and you'll be well on your way to having a space that's a joy to spend time in.