How To Build a Modern Wooden Floor Lamp
Updated: Jun. 02, 2023
Make your own statement light fixture with this elegant woodworking project.
Two days
Intermediate
$251-500
Introduction
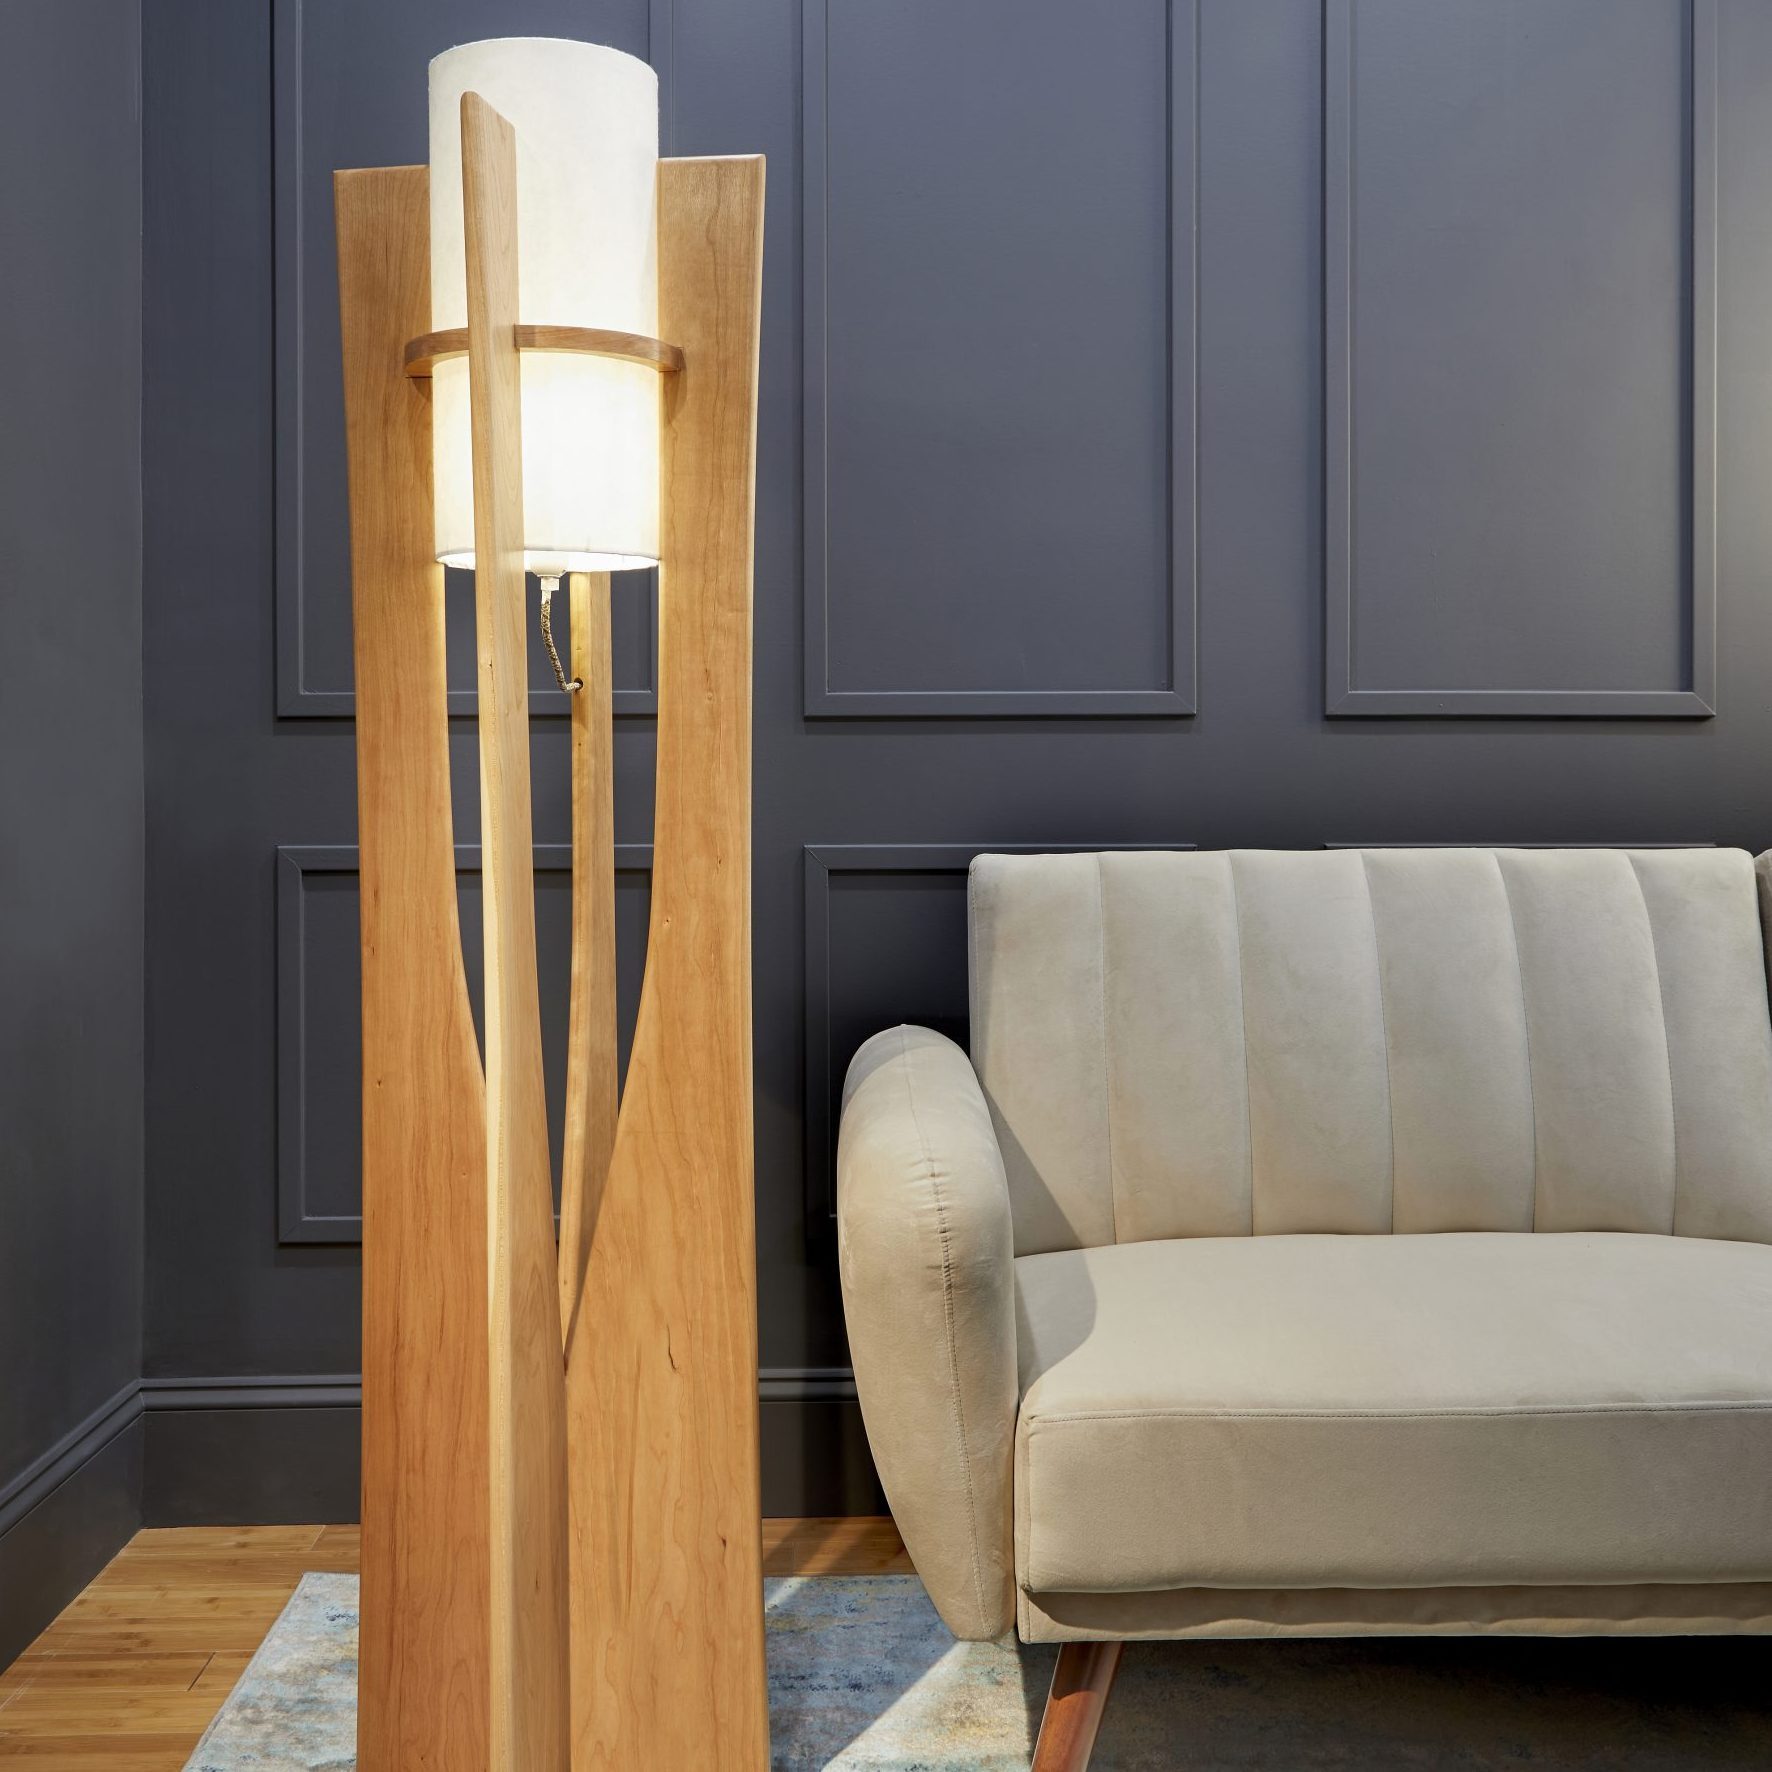
I wanted a wooden floor lamp by my reading chair, but I couldn’t find one at the giant light fixture retailer near me — there were no wooden lamps at all. I saw a sleek cherry lamp online that cost nearly $3,000. So I decided to make my own, including the lampshade.
This elegant wooden floor lamp is a simple project that gives woodworkers creative flexibility. Make a taller floor lamp or a table lamp. Go with more dramatic curves. Lampshade fabric opportunities abound. And the lamp cord? I’ll show you how to hide it.
Tools Required
- Dowel jig
- Drill
- Hand saw
- Jigsaw
- Orbital sander
- Router
- Router table
- Screwdriver
- Table saw
- Wire stripper/cutter
Materials Required
- 3/8" dowels
- 4/4 cherry
- Double-sided tape
- lamp paper
- lampshade rings
- Sandpaper
- styrene paper
- Wood glue

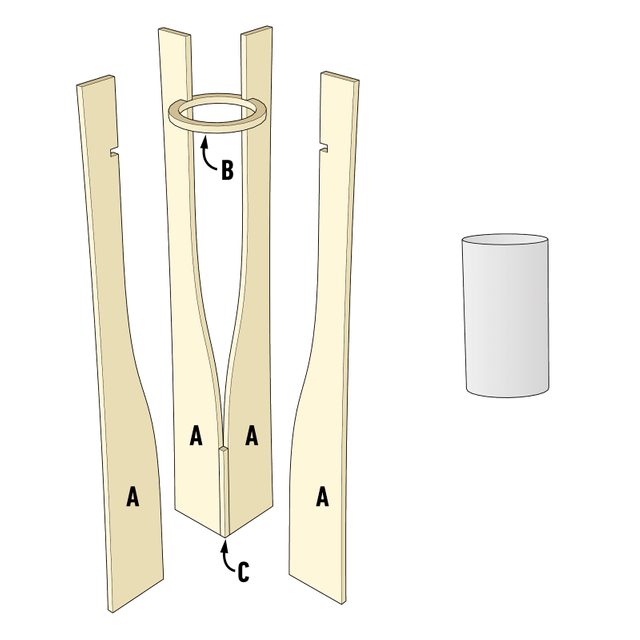
Figure A: Art Lamp
Overall dimensions: 16-in. W x 16-in. W x 60-in. H
Cutting List
| KEY | QTY. | DIMENSIONS | PART |
| A | 4 | 7/8″ x 7-9/16″ x 60″ | Lamp legs |
| B | 1 | 10″-diameter circle | Cherry lampshade circle |
| C | 1 | 7/8″ x 7/8″ x 8″ | Joining strip |
There are three phases to building this artful wooden floor lamp:
Phase 1: The Lampshade (Steps 1 through 3)
Building the lampshade first helps you size parts of the wood structure later. You can make your lampshade from nearly any type of fabric or paper. I chose Japanese shoji paper for its elegant simplicity.
You’ll back the shoji with styrene, a sturdy, adhesive-backed paper that comes in rolls. Styrene adds structure and acts as a fire-resistant layer. Narrow lampshades can retain heat if you use a high-wattage light bulb, making styrene essential here.
Phase 2: The Wooden Floor Lamp (Steps 4 through 15)
This is the longest phase. It takes you through each step, from making a template to sanding and finishing the piece.
Phase 3: The Wiring (Steps 16 through 18)
This is the phase that makes the wooden floor lamp work.
Project step-by-step (18)
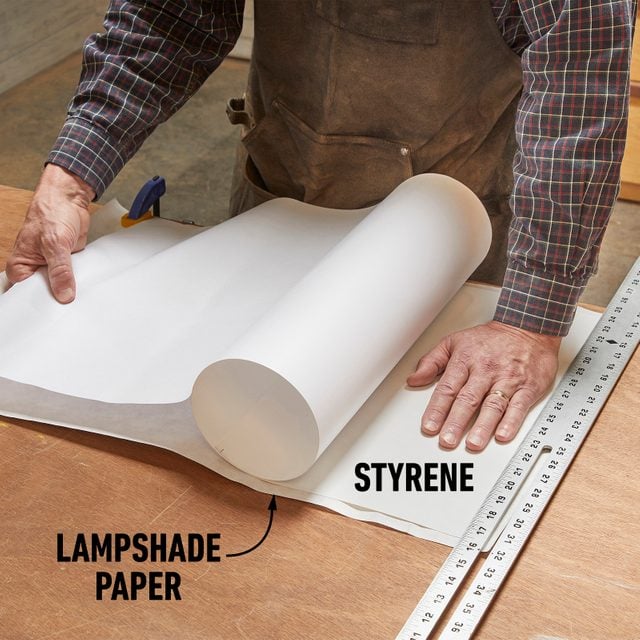
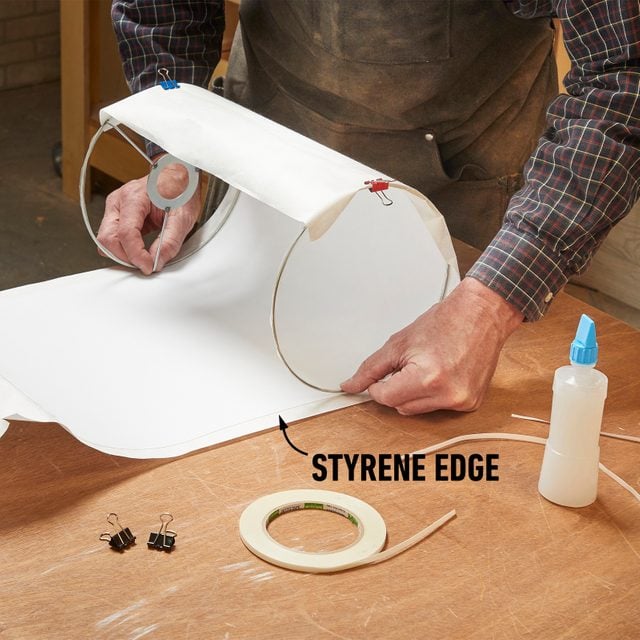
Attach Styrene to Lampshade Paper
- For my 17.5-in.-tall and 8-in.- diameter lampshade, my styrene needed to be 17.5-in. by 25.12-in. (that’s 8 in. x 3.14).
- The lampshade paper needed an extra 1/2-in. or less on the top and bottom to wrap around the lamp rings, and 1/2-in. on one edge to overlap the completed circle.
- Lay the paper face down on a clean work surface. Set the styrene on top, adhesive side down and still covered.
- Peel adhesive backing from one end that’s flush to the lamp paper, slowly removing the backing while pressing the styrene to the paper. Smooth out wrinkles and bubbles as you go.
Connect the Lamp Rings
- Apply double-sided tape to both rings. With your lamp paper and styrene face down, place each ring on edge, one at the top and one at the bottom of the styrene.
- Slowly roll the rings along the edges of the styrene to form a lampshade drum. Binder clips help secure the styrene to the taped rings.
- When you complete the circle, wrap your extra paper tab over and secure it with a clear-drying glue.
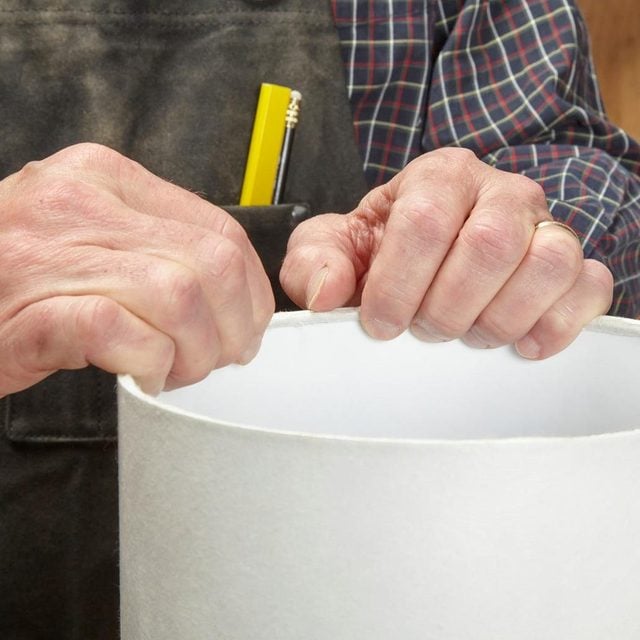
Finish the Shade
- Wrap the extra 1/2-in. of lamp paper around both rings, pinching the paper carefully as you go. Fabric would be easier to work with here than delicate shoji paper.
- Make small cuts in the paper to wrap around any metal bracing arms.
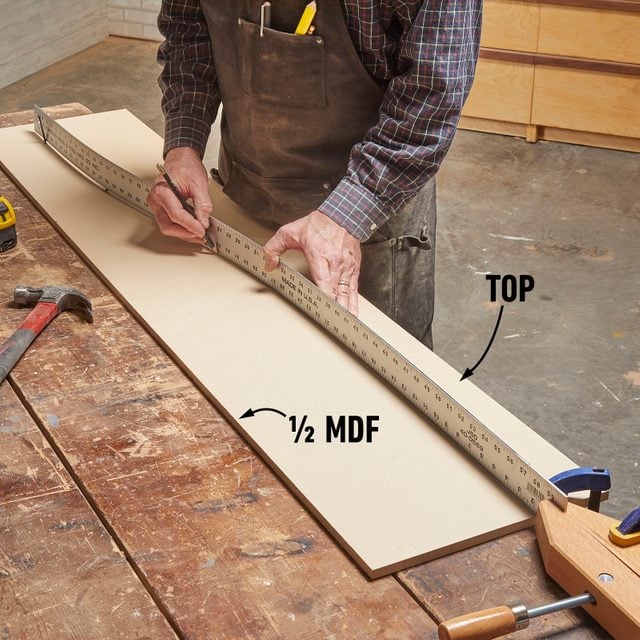
Make a Template
- Creating four identical wooden floor lamp legs, tall and gracefully curvy, is best done with a template.
- These 60-in.-tall legs are four inches wide at the top and 7-9/16-in. wide at the base. That makes a 16-in.-wide lamp around an 8-in. lampshade.
- The outside edge of each leg has one gentle curve top to bottom.
- Inside, a gradual curve begins about 15 inches from the top and ends eight inches from the bottom.
- The straight edges at each end will hold the lampshade (top) and act as a joining surface (bottom).
- Shape the curves to your liking. I used a five-foot straightedge, a clamp and a few nails to help establish my shapes.
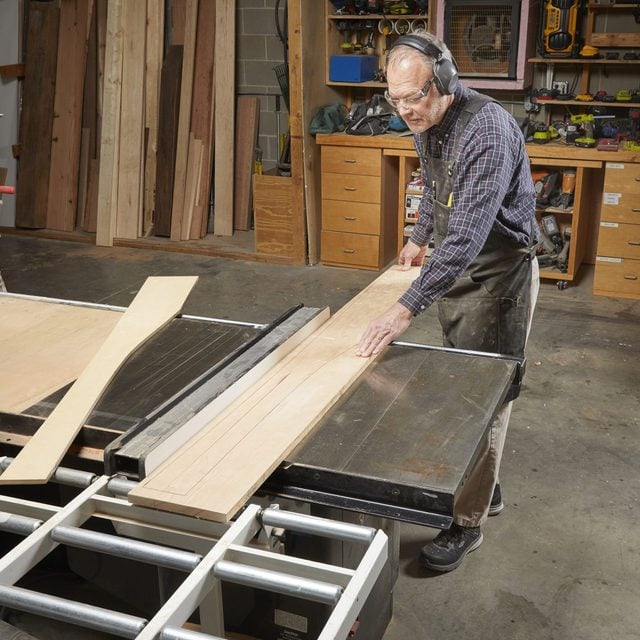
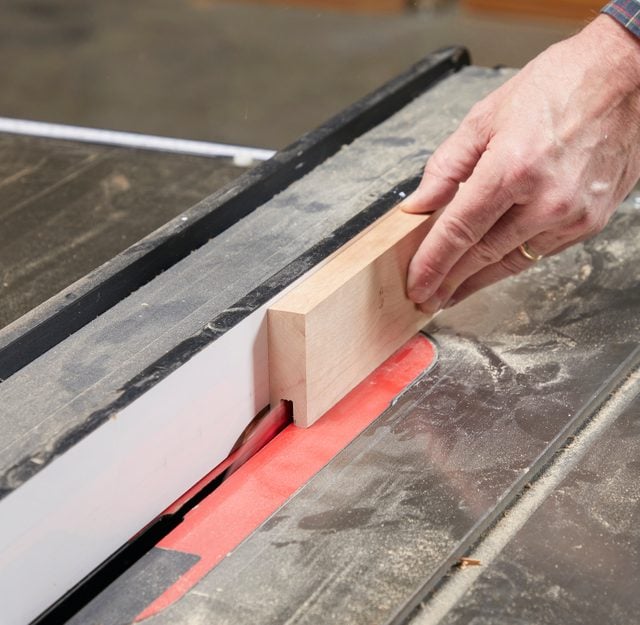
Rip One Leg
- Before cutting any curves in the legs, rip one leg to create a channel for hiding the lamp cord. You need the straight outside edge for that. The channel needs to be near the center of the narrowest part of the leg.
- I measured two inches from the outside edge and ripped off a two-inch strip. You’ll glue this back in place after you cut the wire channel.
Note: Portable lamps are covered under UL 153. That permits a cord to pass through wood or other insulating material, not less than 3/64-in. (1.2 mm) thick, with a smoothly rounded inner surface equivalent to a bushing.
Create A Wire Channel
- On that ripped cherry, cut a 1/2-in. channel beginning at the bottom and stopping about 14 inches short of the top. I made a few passes on the table saw to create this channel, but you can use a router if you like.
- The lamp cord will run through that channel from the plug end at the floor to the lamp socket end inside the lampshade.
- Later you will drill a 1/2-in. hole on the side of the base to allow the lamp cord out, then another hole on the inside edge 14 in. from the top where the cord will exit to connect to the lamp socket.
Glue It Together
- After ensuring the wire channel is smooth inside and big enough for the cord to easily pass through, glue the ripped strip back onto the leg so you can begin cutting the curves.

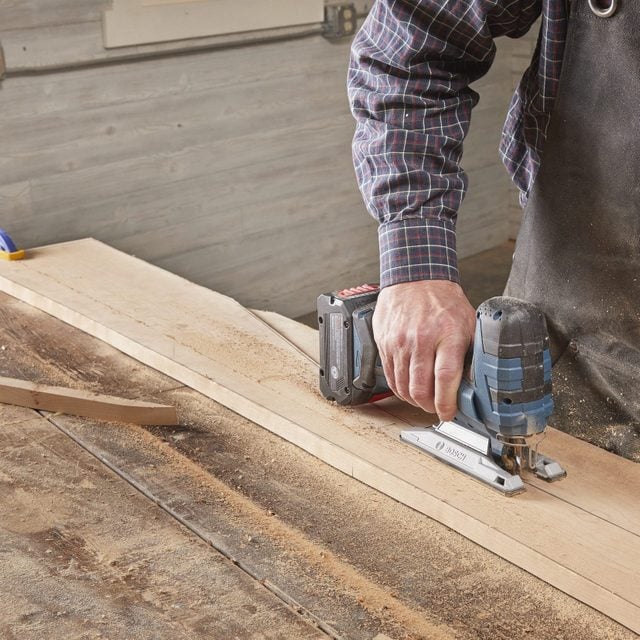
Cut The Curves
- Cutting long curves into cherry takes patience. Mark your curve lines well.
- Prep your jigsaw to make square cuts with a sharp blade. You could use a band saw to cut these, but you’ll finish with a router and sandpaper so a jigsaw works well here.
- Cut no more than 1/8-in. proud of the curve line. With your template and a pattern bit in a router table, you’ll finish these curves.
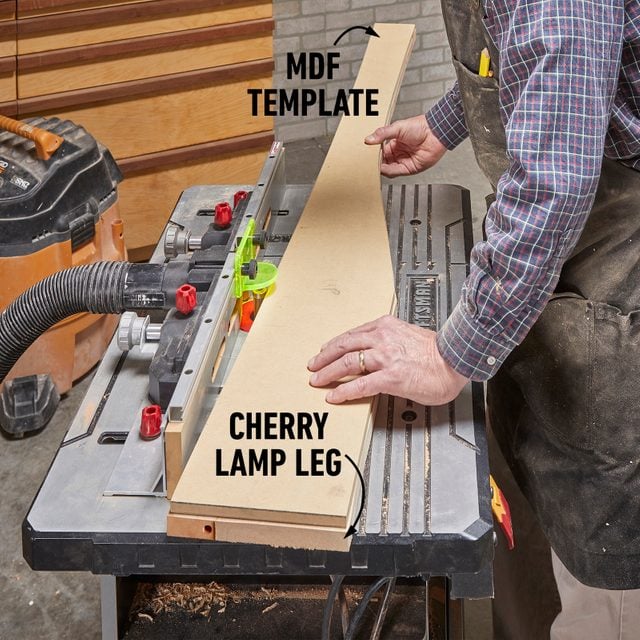
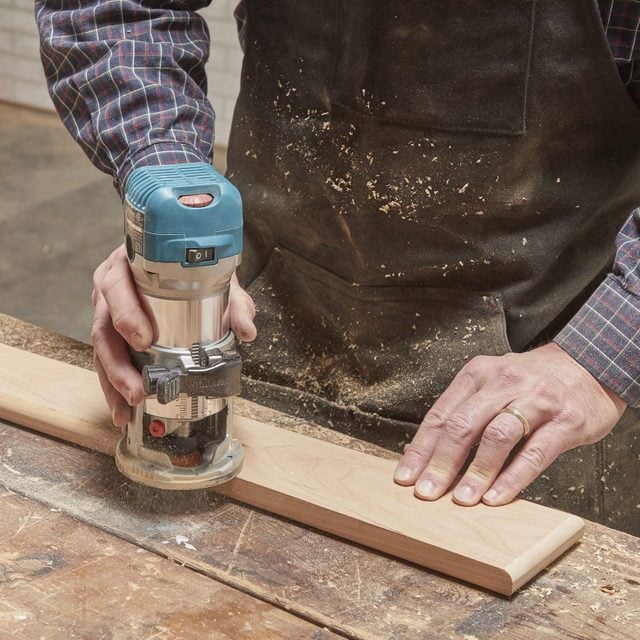
Pattern-Rout The Legs
- I used a few dabs of hot glue to adhere the template to each leg. Glue is easy to remove and leaves no marks.
- Rout in the direction of the wood grain. Using a double-bearing pattern bit, I could flip my wood over to control that direction and avoid tear-outs that can happen when you’re routing against the grain.
Round The Edges
- I wanted radiused edges on the legs. With a 1/2-in. round-over router bit, I radiused all the sharp corners.
- However, I left the legs square on the bottom eight inches where the four legs will unite.
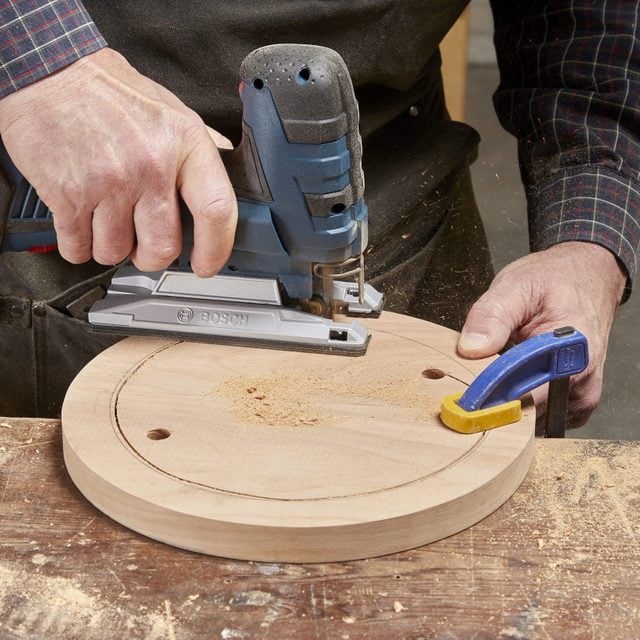
Cut The Lamp Circle
- On a square piece of the same cherry stock, draw a 10-in. (outside diameter) circle and an 8-in.-dia. concentric circle. You’re making a cherry doughnut.
- Use your 8-in.-dia. lampshade as a guide for the inside circle.
- Using a jigsaw, cut this doughnut proud of both lines, then sand the outside and inside edges to the final size. Leave the edges square.
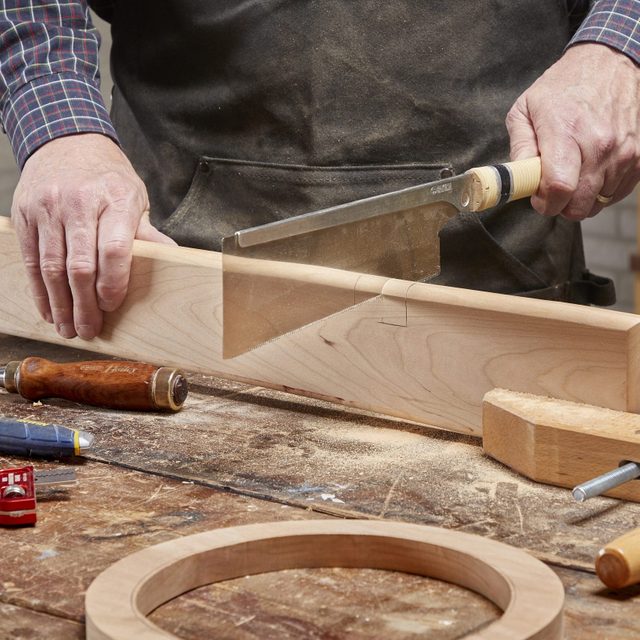
Cut The Notches
- Use your circle to mark the four notch cutouts. Measure down from the top of each leg to ensure the circle will be level.
- Cut these notches by hand with a jigsaw or a handsaw.
- With a sharp chisel, clean up the joining surface. Test-fit the circle — you’ll place it later.
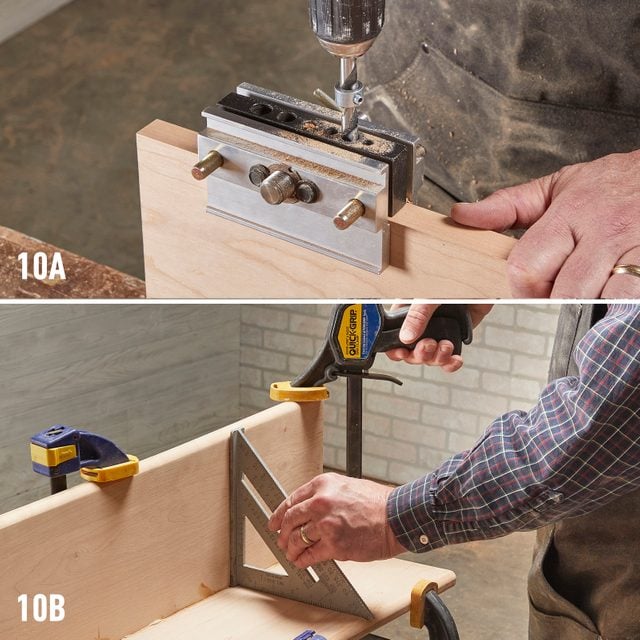
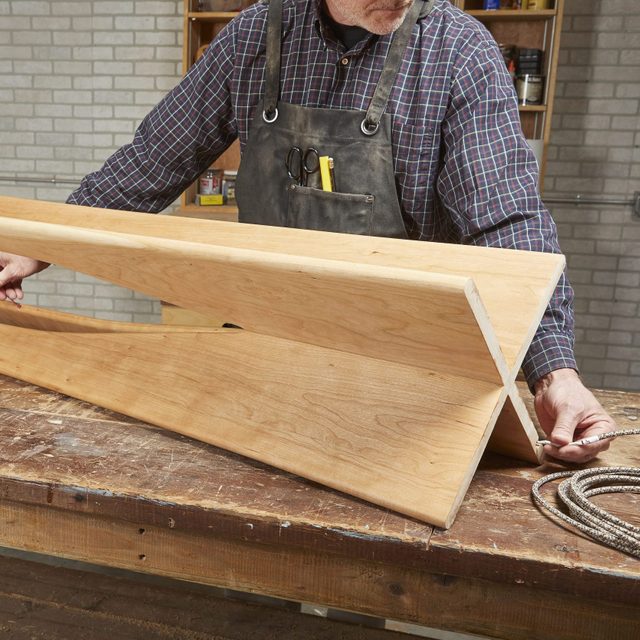
Join The Legs
- Cut a squared strip of cherry that’s as thick as your finished legs and eight inches long, or as tall as each leg’s squared base. That strip will fit inside the space where the legs come together.
- Using a doweling jig (Photo 10A), drill two holes on each leg. Use dowel centers to mark dowel holes around the joining strip.
- Offset the holes so the dowels don’t hit each other.
- Glue two opposite legs and clamp them, then glue a third leg in place (Photo 10B) and clamp it. Don’t add the final leg yet.
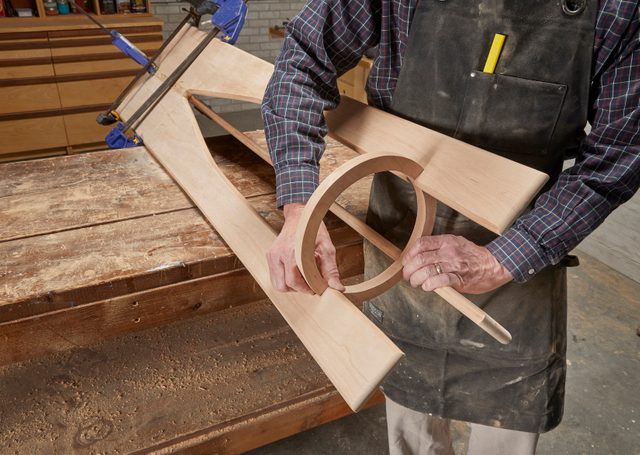
Place The Circle
- After you’ve glued three of the legs at the base, place the circle inside the notched cutouts. I used a chisel to make each notch slightly concave to cleanly accept the circle.
- You won’t need glue or nails to secure this. Then you can secure the fourth and final leg in place.
The Wooden Floor Lamp Gel Finish
Sand the entire lamp, finishing with 220-grit paper. Finish the wooden floor lamp as you like. I chose General Finishes Gel Topcoat. I like what it does to cherry, and I wanted to match Brad’s Danish modern chair.
This oil-based product leaves a satin finish. With its thick consistency, it’s easy to apply. I used a chip brush to apply the finish, then wiped off the excess with a clean, soft towel. The finish does require a long drying time, followed by light sanding in between. I repeated this process four times. I was pleased with the result but tired of sanding.
Feed The Wire Up The Leg
- Though I decided to hide the cord, I bought a decorative lamp cord from Color Cord Co., which has lots of attractive wiring options. I still want the cord to look nice as it runs from the lamp and across the floor.
- To fish the cord through the lamp, wrap one end in electrical tape and feed it up the channel you cut.
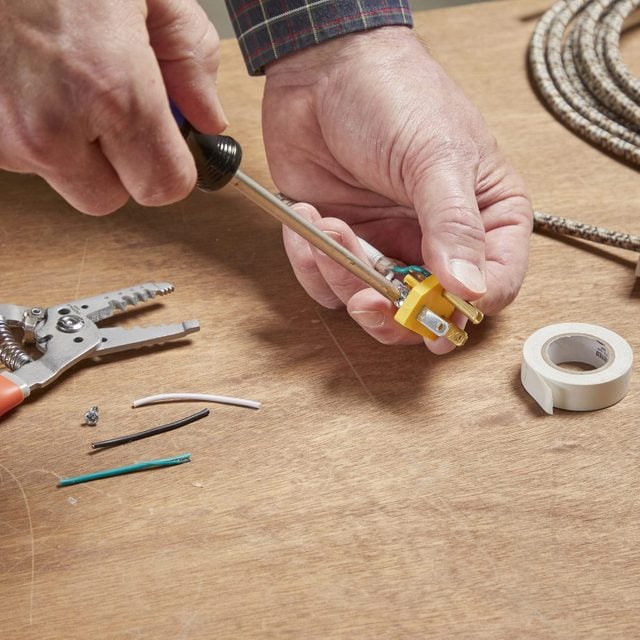
Wire The Plug End
- Color Cord Co. makes it easy to buy the right pieces and connect them. Follow the instructions to create secure connections at the plug and socket.
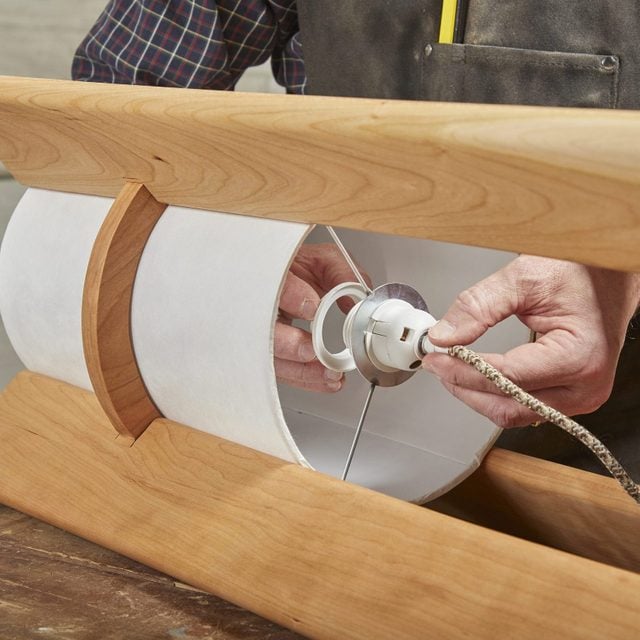
Connect The Socket End
- For the socket end of the wiring, I bought shade-ready sockets that fit with European-style lampshade rings.
- If you’re using a lampshade with U.S.-style rings, you’ll also need to buy the saddle and harp pieces of the lampshade. A company called I Like That Lamp sells kits on Etsy and Amazon.