REVIEW – 3D printing is something I have always been enamored with. I think it is amazing that you can take a file, load it into a machine, and sometime later have a fully three-dimensional model. But, I have also been a little apprehensive because of the steep learning curve. When I received an offer to review the Voxelab Aquila S2 FDM 3D Printer, I decided it was time to take the plunge into the world of 3D printing. And boy am I glad I did.
What is it?
The Voxelab Aquila S2 is a 3D printer that offers high-cost performance at a mid-range price.
What’s in the box?
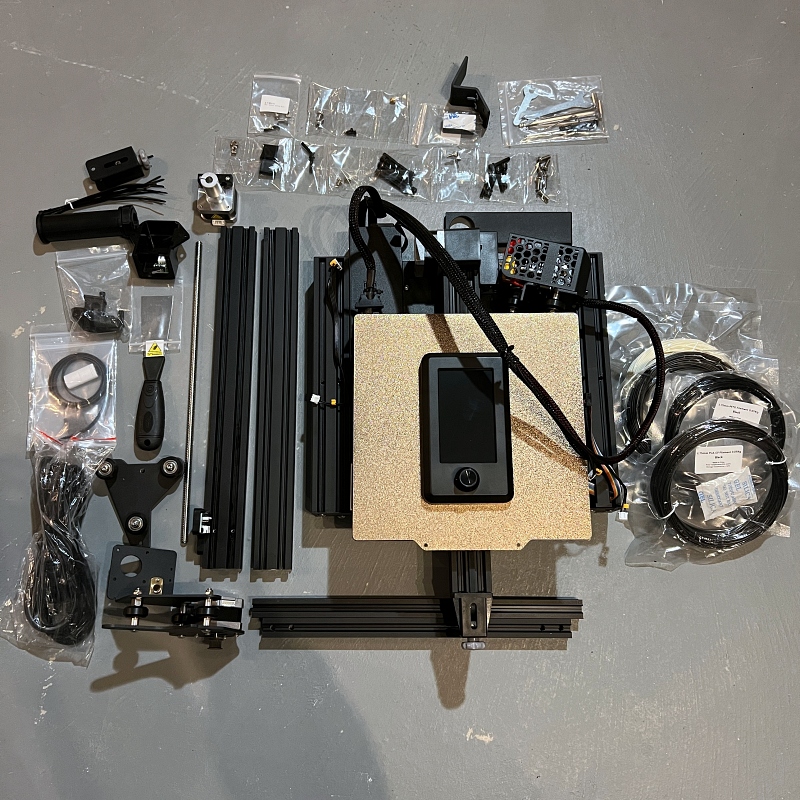
- Voxelab Aquila S2 3D printer
- Power cable
- 4-inch screen
- Screw kit
- Filament spool rack
- Wrenches and screwdrivers
- Removal tool
- Storage card and card reader
- Cable ties
- Nozzle needle
- Nozzle
- 50g filament
- User manual
Hardware specs
- Extruder Quantity: 1
- Nozzle diameter: 0.4mm
- Maximum extruder temp: 300º C
- Print speed: 180mm/s, 30-60mm/s
- Maximum platform temp: 110º C
- Filament compatibility: PLA, ABS, PLA-CF, PETG, PETG-CF, PA12-CF, PA, PC, TPU
- Print volume: 220 x 220 x 240mm
- Layer resolution: 0.1mm-0.4mm
- Print resolution: ± 0.2mm
- Software/Communication
- Connectivity: USB / Memory card offline printing
- Software: Cura / Simplify 3D / Voxelmaker
- Output: G file
- Input: AMF / STL / OBJ
Device
- Measurements: 19.09 x 13.54 x 15.83 (w/spool holder) inches
- Screen: 4.3 inches
- Net weight: 17.64 lbs.
- Gross weight: 20.72 lbs.
- Input: AC 115 / 230 V 50 / 60HZ
- Output: 24V, 13.3A
- Power: 350W
Others
- Running noise: 50dB
- Working environment: 15-30ºC
- Resume print function: Yes
- Language switch: English / Chinese
Design and features
The base of the S2 comes preassembled, so you only have to put together the upper print assembly. This consists of the Z and Y axis, the extruder kit, the synchronous belt, and the screen kit. Assembling the printer is fairly simple. What made it difficult was the user manual. In a word, it is terrible, especially if you have never built a 3D printer before. And none of the parts or screws in the screw kit are labeled. With the help of a friend, I was able to fully assemble the printer in just over an hour. If you don’t have a second pair of hands, I recommend laying the printer on its side on a padded surface during assembly.
Three features make the Aquila S2 stand out from its predecessors, high-temperature printing, direct extruding, and a PEI magnetic print plate.
Typical 3D printers have a max extruder temperature of around 250ºC. The S2’s high-temperature printing means the extruder can reach temps up to 300ºC. This means you can print with various filaments like ABS, PLA-CF, PETG, PETG-CF, PA12-CF, PA, PC, and TPU.
If you are new to 3D printing, here is a great video that explains the different types of filament and what they are used for.
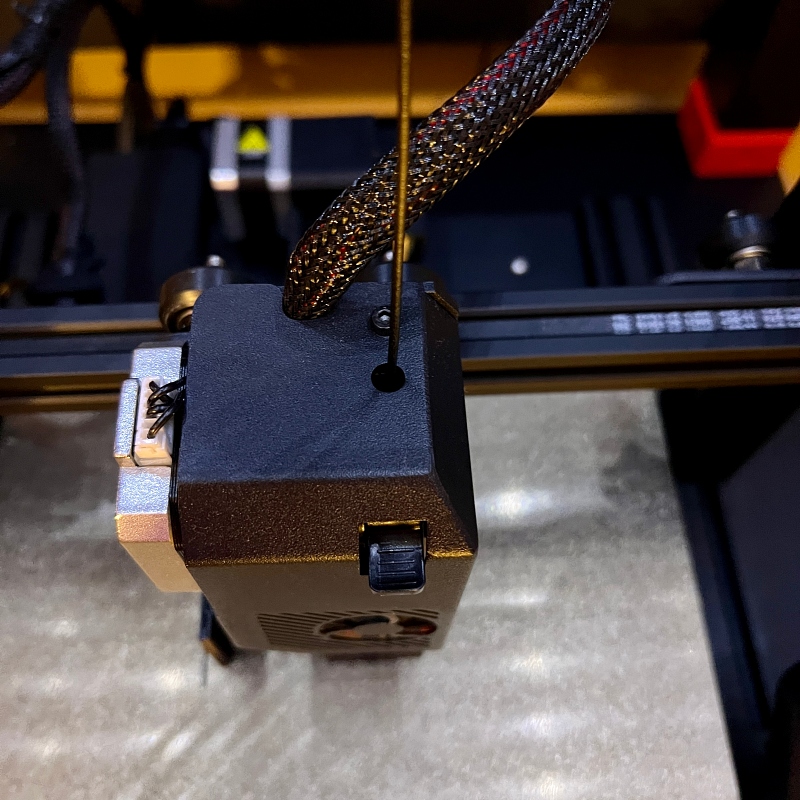
Direct extruding offers quick manual loading of the filament and better fluent extrusion by vertical loading.
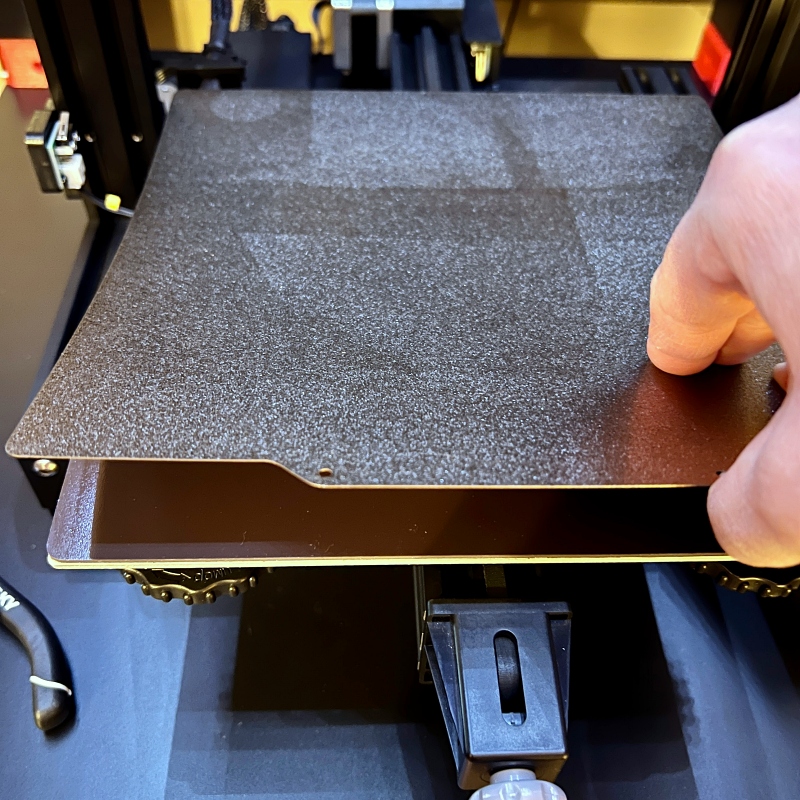
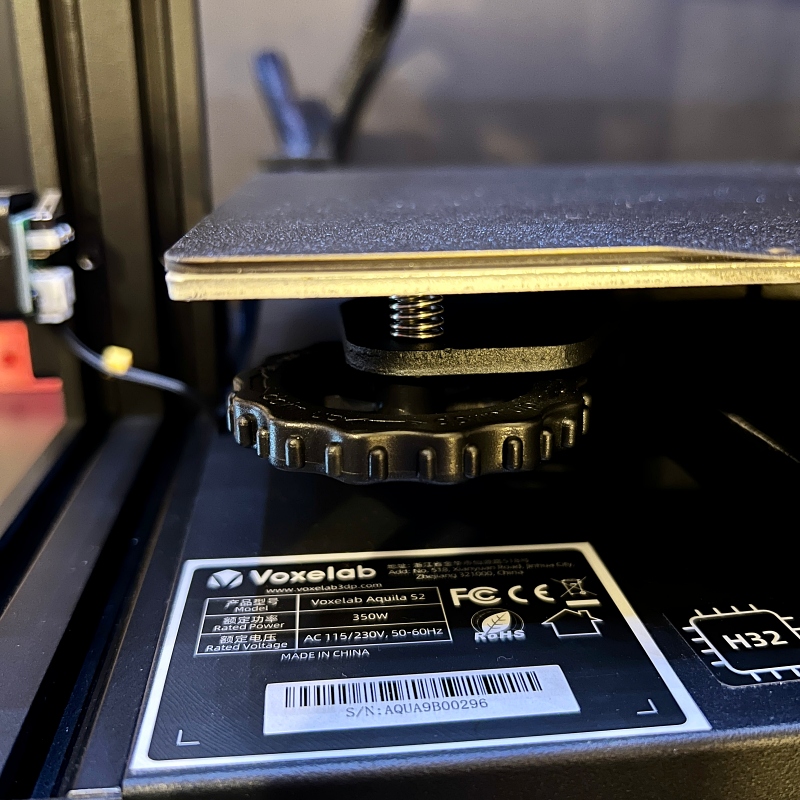
The PEI magnetic print plate offers better filament adhesion and easy removal of prints without tools.
The 4.3-inch color control screen is easy to read and navigate using the rotary knob.

Leveling
Before you can start printing with the Voxelab Aquila S2 FDM 3D Printer, you need to level the print bed. Leveling the print bed is very important. If it is not leveled properly, it will adversely affect the print quality. Again this is where the manual fails to be very helpful. Fortunately, there are plenty of good leveling tutorials that you can watch on Youtube. The process is actually easy. The large knobs on the bottom of the print bed allow you to raise or lower each corner until the bed is level.
Before printing a file you must load the filament and preheat the extruder and the print bed. Using the rotary knob on the screen, navigate to Control and select Preheat PLA. This setting heats the nozzle and bed to the optimal temperature to print using PLA filament (200ºC / 60ºC). To load the filament, select Automatic Load. The extruder will heat to 235ºC and, when it is ready, the screen will direct you to load the filament. The S2 has direct drive extrusion, which loads the filament directly into the top of the print head. Loading the filament this way is quicker and smoother. It also helps to reduce nozzle blocking.
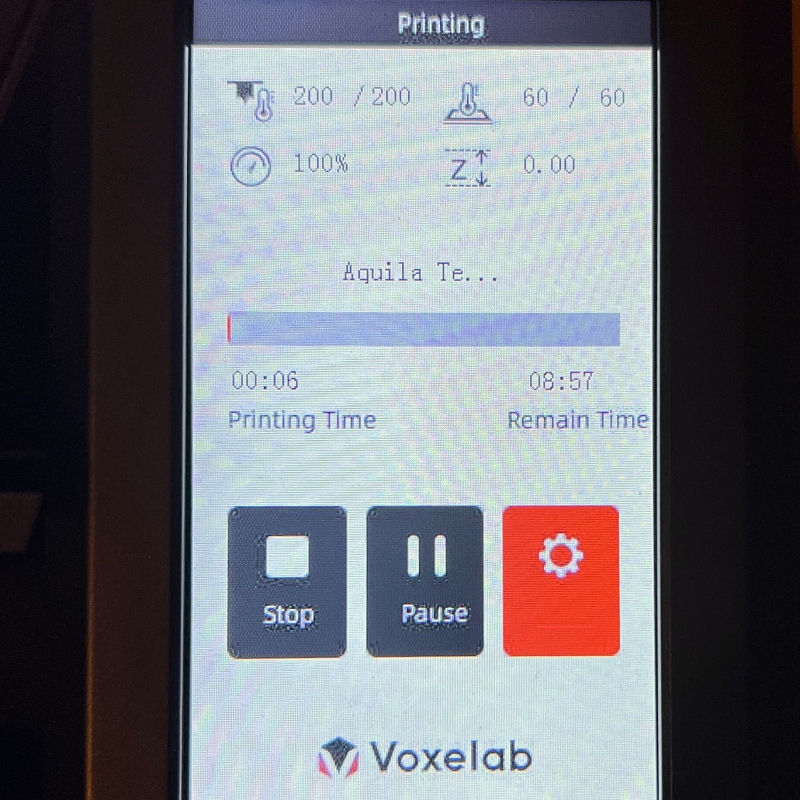
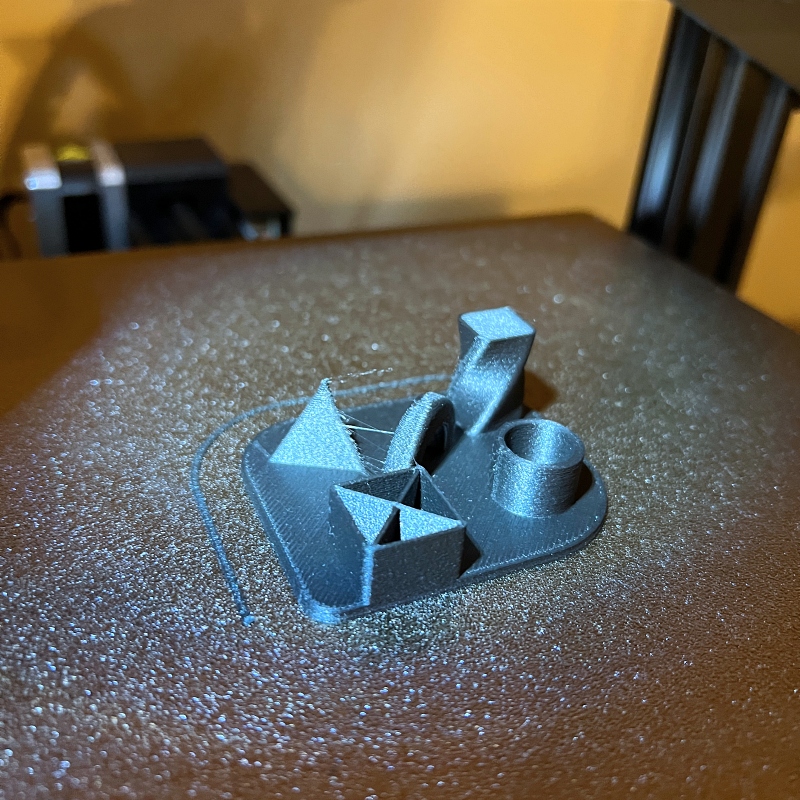
There are two ways you can print files with the S2, micro SD card, or a micro USB port. I chose to print a test file from the included micro SD card. I inserted the card into the port on the front of the printer. I used the knob switch on the screen to select Print and then chose the Aquila Test File. I printed it using the sample PLA Voxelab sent with the printer. While printing, the screen will display the nozzle temperature, bed temperature, print speed, and the Z-axis. In the center of the screen, you will see the name of the file being printed and a progress bar. It also displays the Printing Time and Remaining Time. The Remaining Time can be misleading in the beginning. But, after a while, it will show a more accurate estimation. Notice in the picture that the Remaining Time is over 8 hours. However, the actual print only took about 45 minutes. At the bottom of the screen, there are options to Stop or Pause print. You can also select Settings and adjust the nozzle and bed temperatures mid-print.
While printing, the Voxelab Aquila S2 FDM 3D Printer was surprisingly quiet. The printer is in my bedroom, and I can easily watch tv while the printer is running. I did end up building an enclosure for it, which I will talk about later in the review.
The Aquila test file was printed in about 45 minutes without issue.

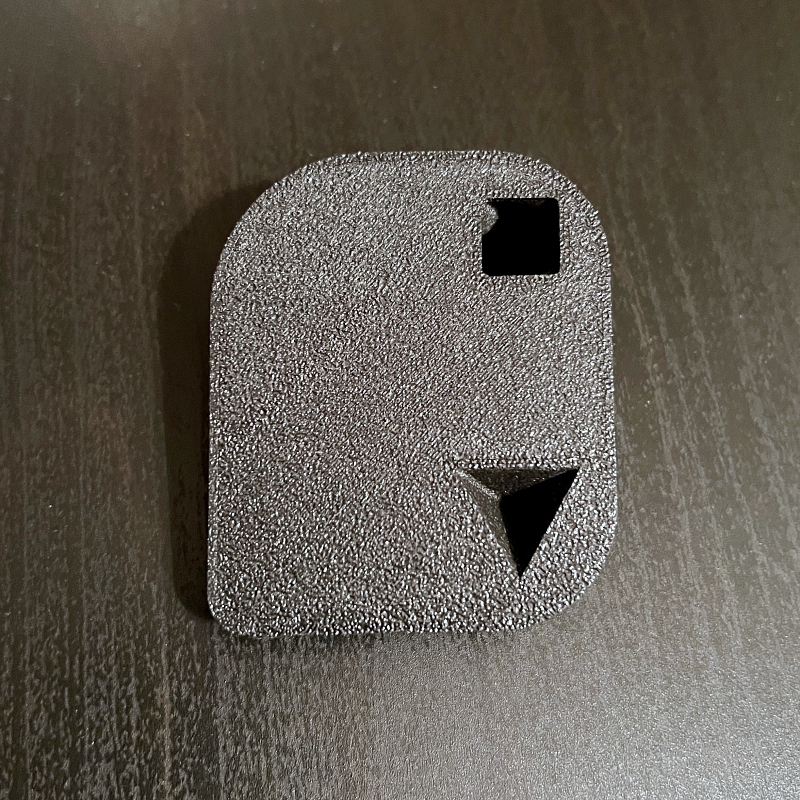
Removing the model from the magnetic build plate was easy. I let the print cool for a couple of minutes, and the model popped right off.
The build plate also gives the bottom of the model a nice texture.
The file printed out a model with various geometric shapes and, at least to my untrained eye, looked great. There was a little stringing, but that was easy to clean up. I printed up another file from the SD card, a test hook. But this time, I used a silk PLA that I purchased from Eryone. Again the file was printed without issue and came out looking very good.
Software
To print a downloaded file, you have to change it into a printable file (G-code) using slicing software. I used the VoxelMaker slicing software that was provided on the SD card. The software has two modes, basic and expert.
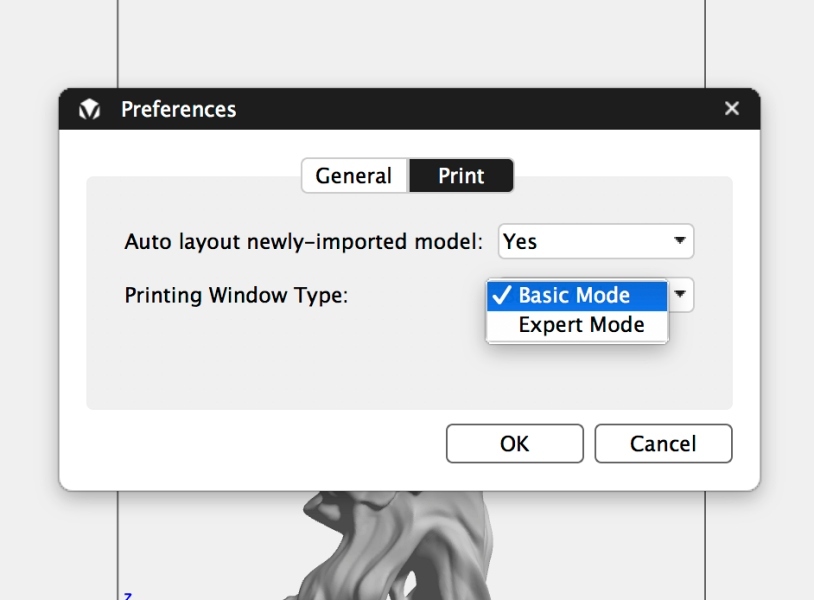
In Basic Mode, most of the printing parameters are set for you to make it easier for beginners. Expert Mode allows you to access and adjust nearly all the print settings available. Because I am new to 3D printing, I used the Basic Mode.

I downloaded a Wraith Ghost file from Thingiverse and loaded it into the VoxelMaker software. You can manipulate the file in the software, but I chose to leave it as is.
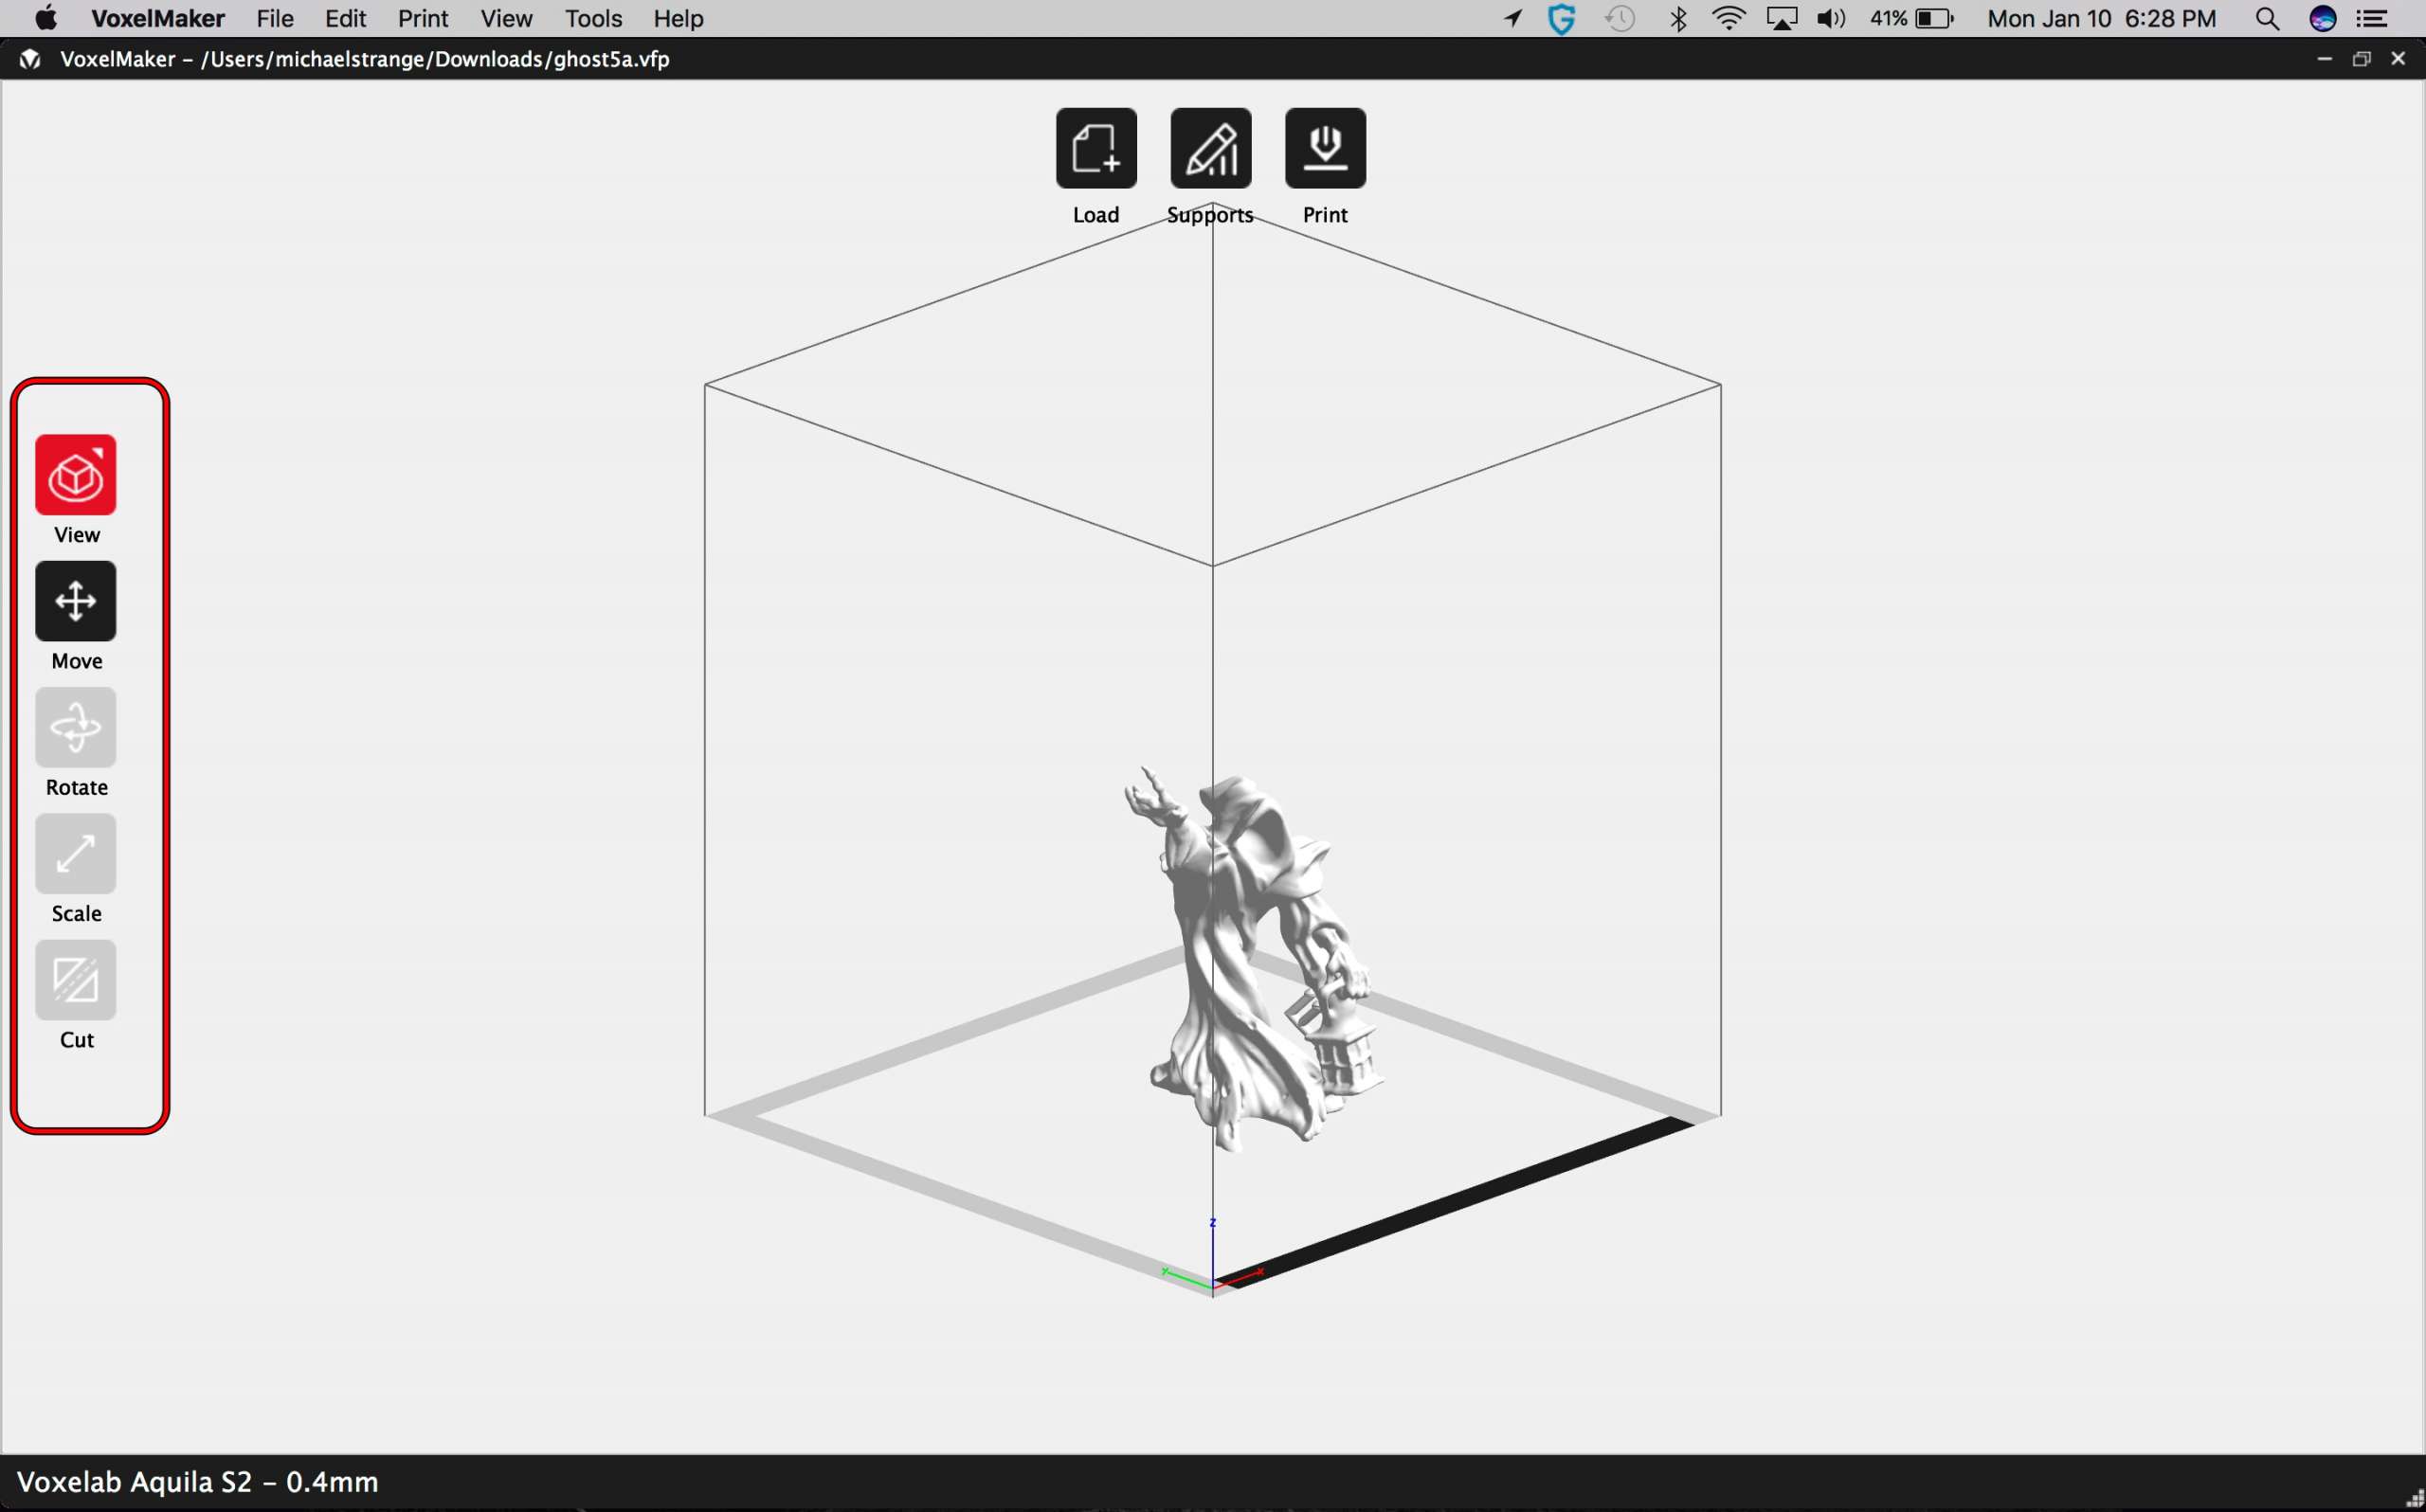
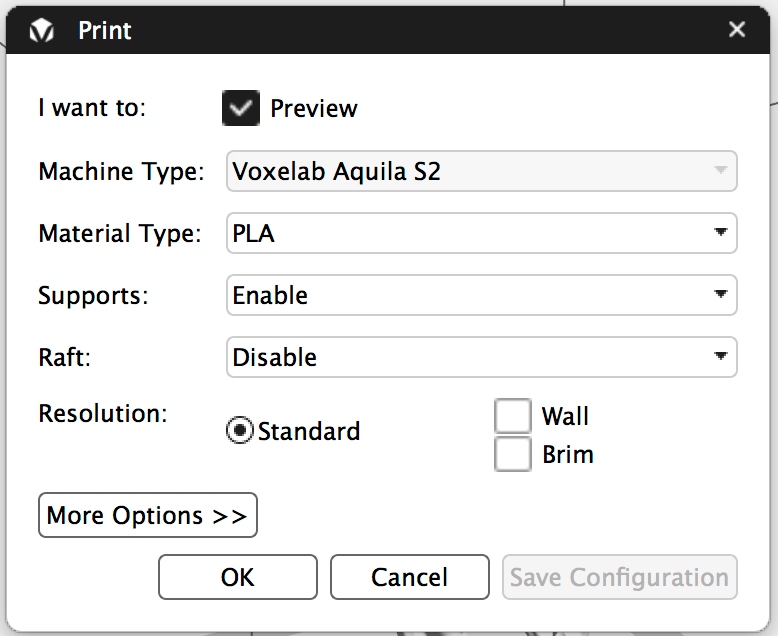
I then saved it to the micro SD card. After saving a file, the software displays how the model will look on the print bed. It also displays how many layers will be printed along with estimated print time, estimated material used, estimated weight, and slicing info.
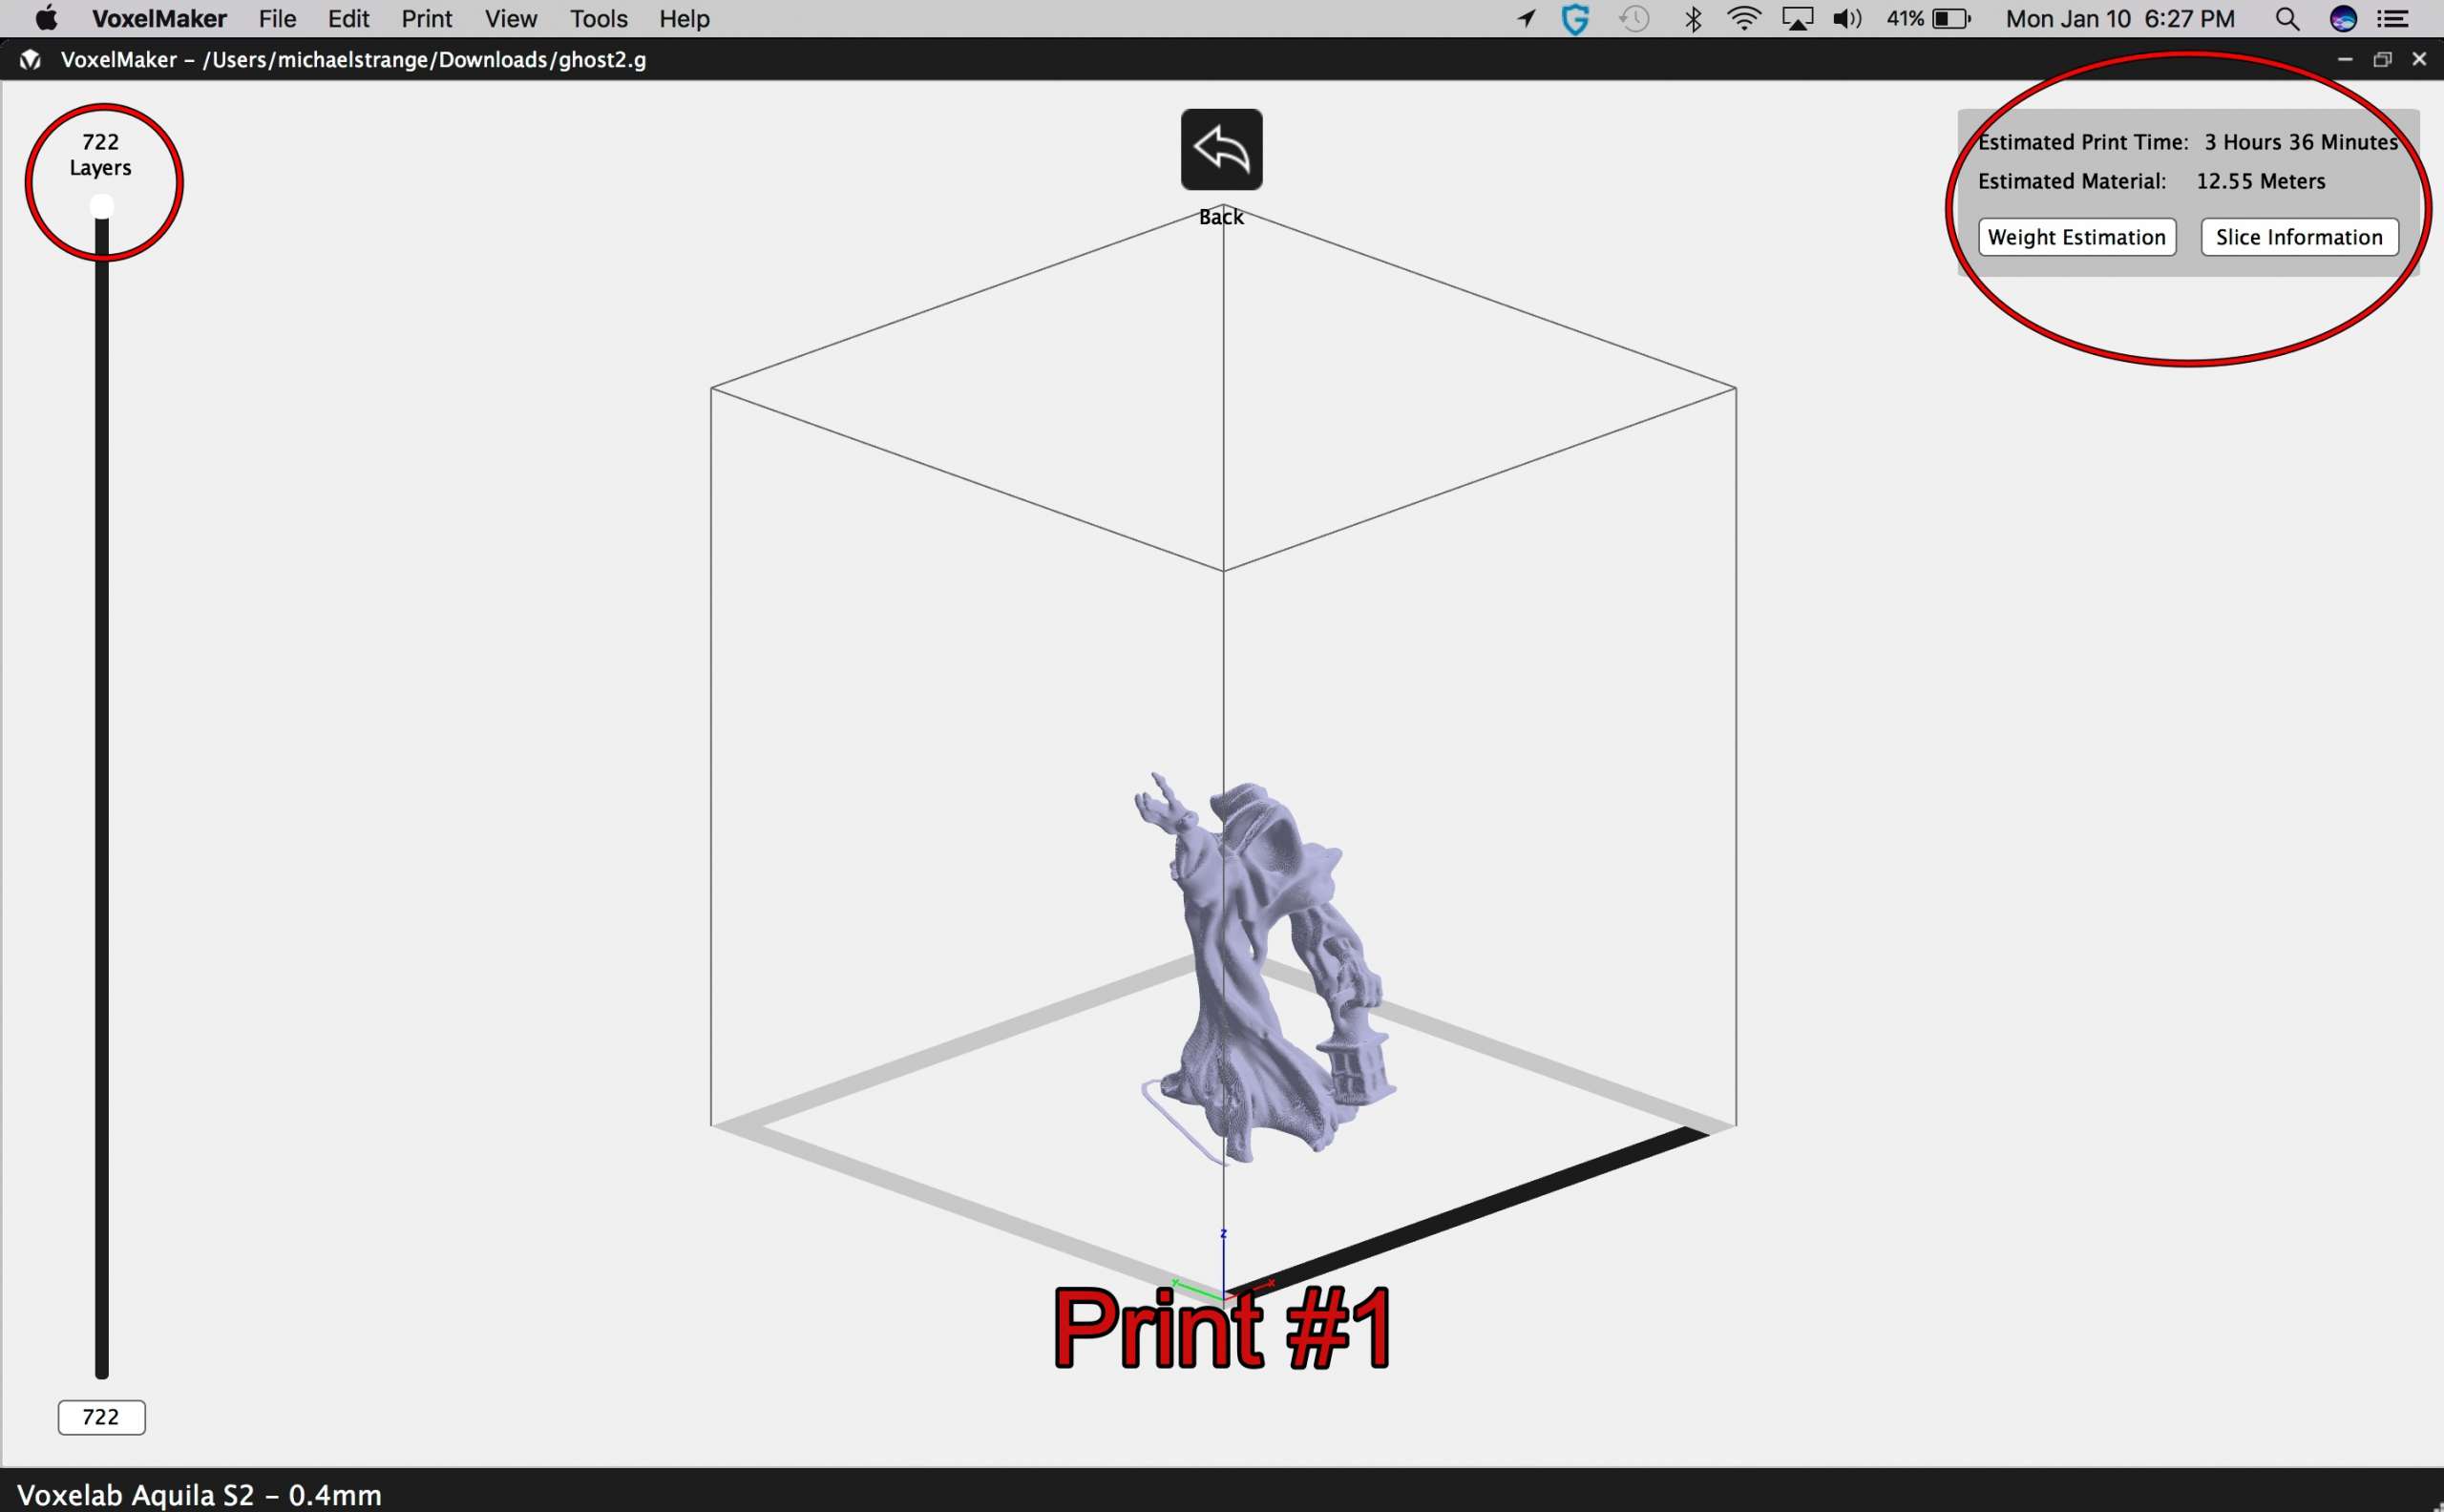
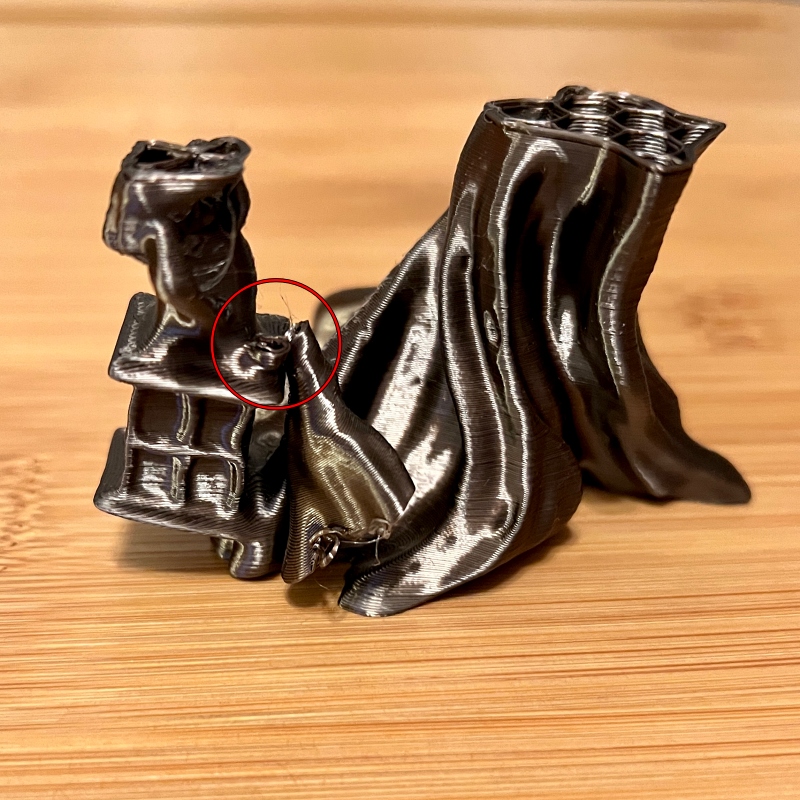
I inserted the SD card into the printer and selected the ghost file. Everything was going well until about 11/2 hours in. That is when the ghost’s left arm snapped off. I Stopped printing and removed it from the bed.
This is how I learned about using supports. They can be added in the slicing process to keep prints with large overhangs from sagging or breaking. There are two options for supports, tree and linear. I chose to use tree supports and selected Auto Supports in the menu. In Auto Supports, the software automatically generates supports where they are needed and adds them to the model. When using supports, it is best to print using a raft. A 3D printed raft is basically a throwaway horizontal surface that sits under your model. The raft gives the supports something to adhere to during the printing process. Both the raft and supports can be easily removed in post-print. After adding the supports, I saved the file and started a new print.
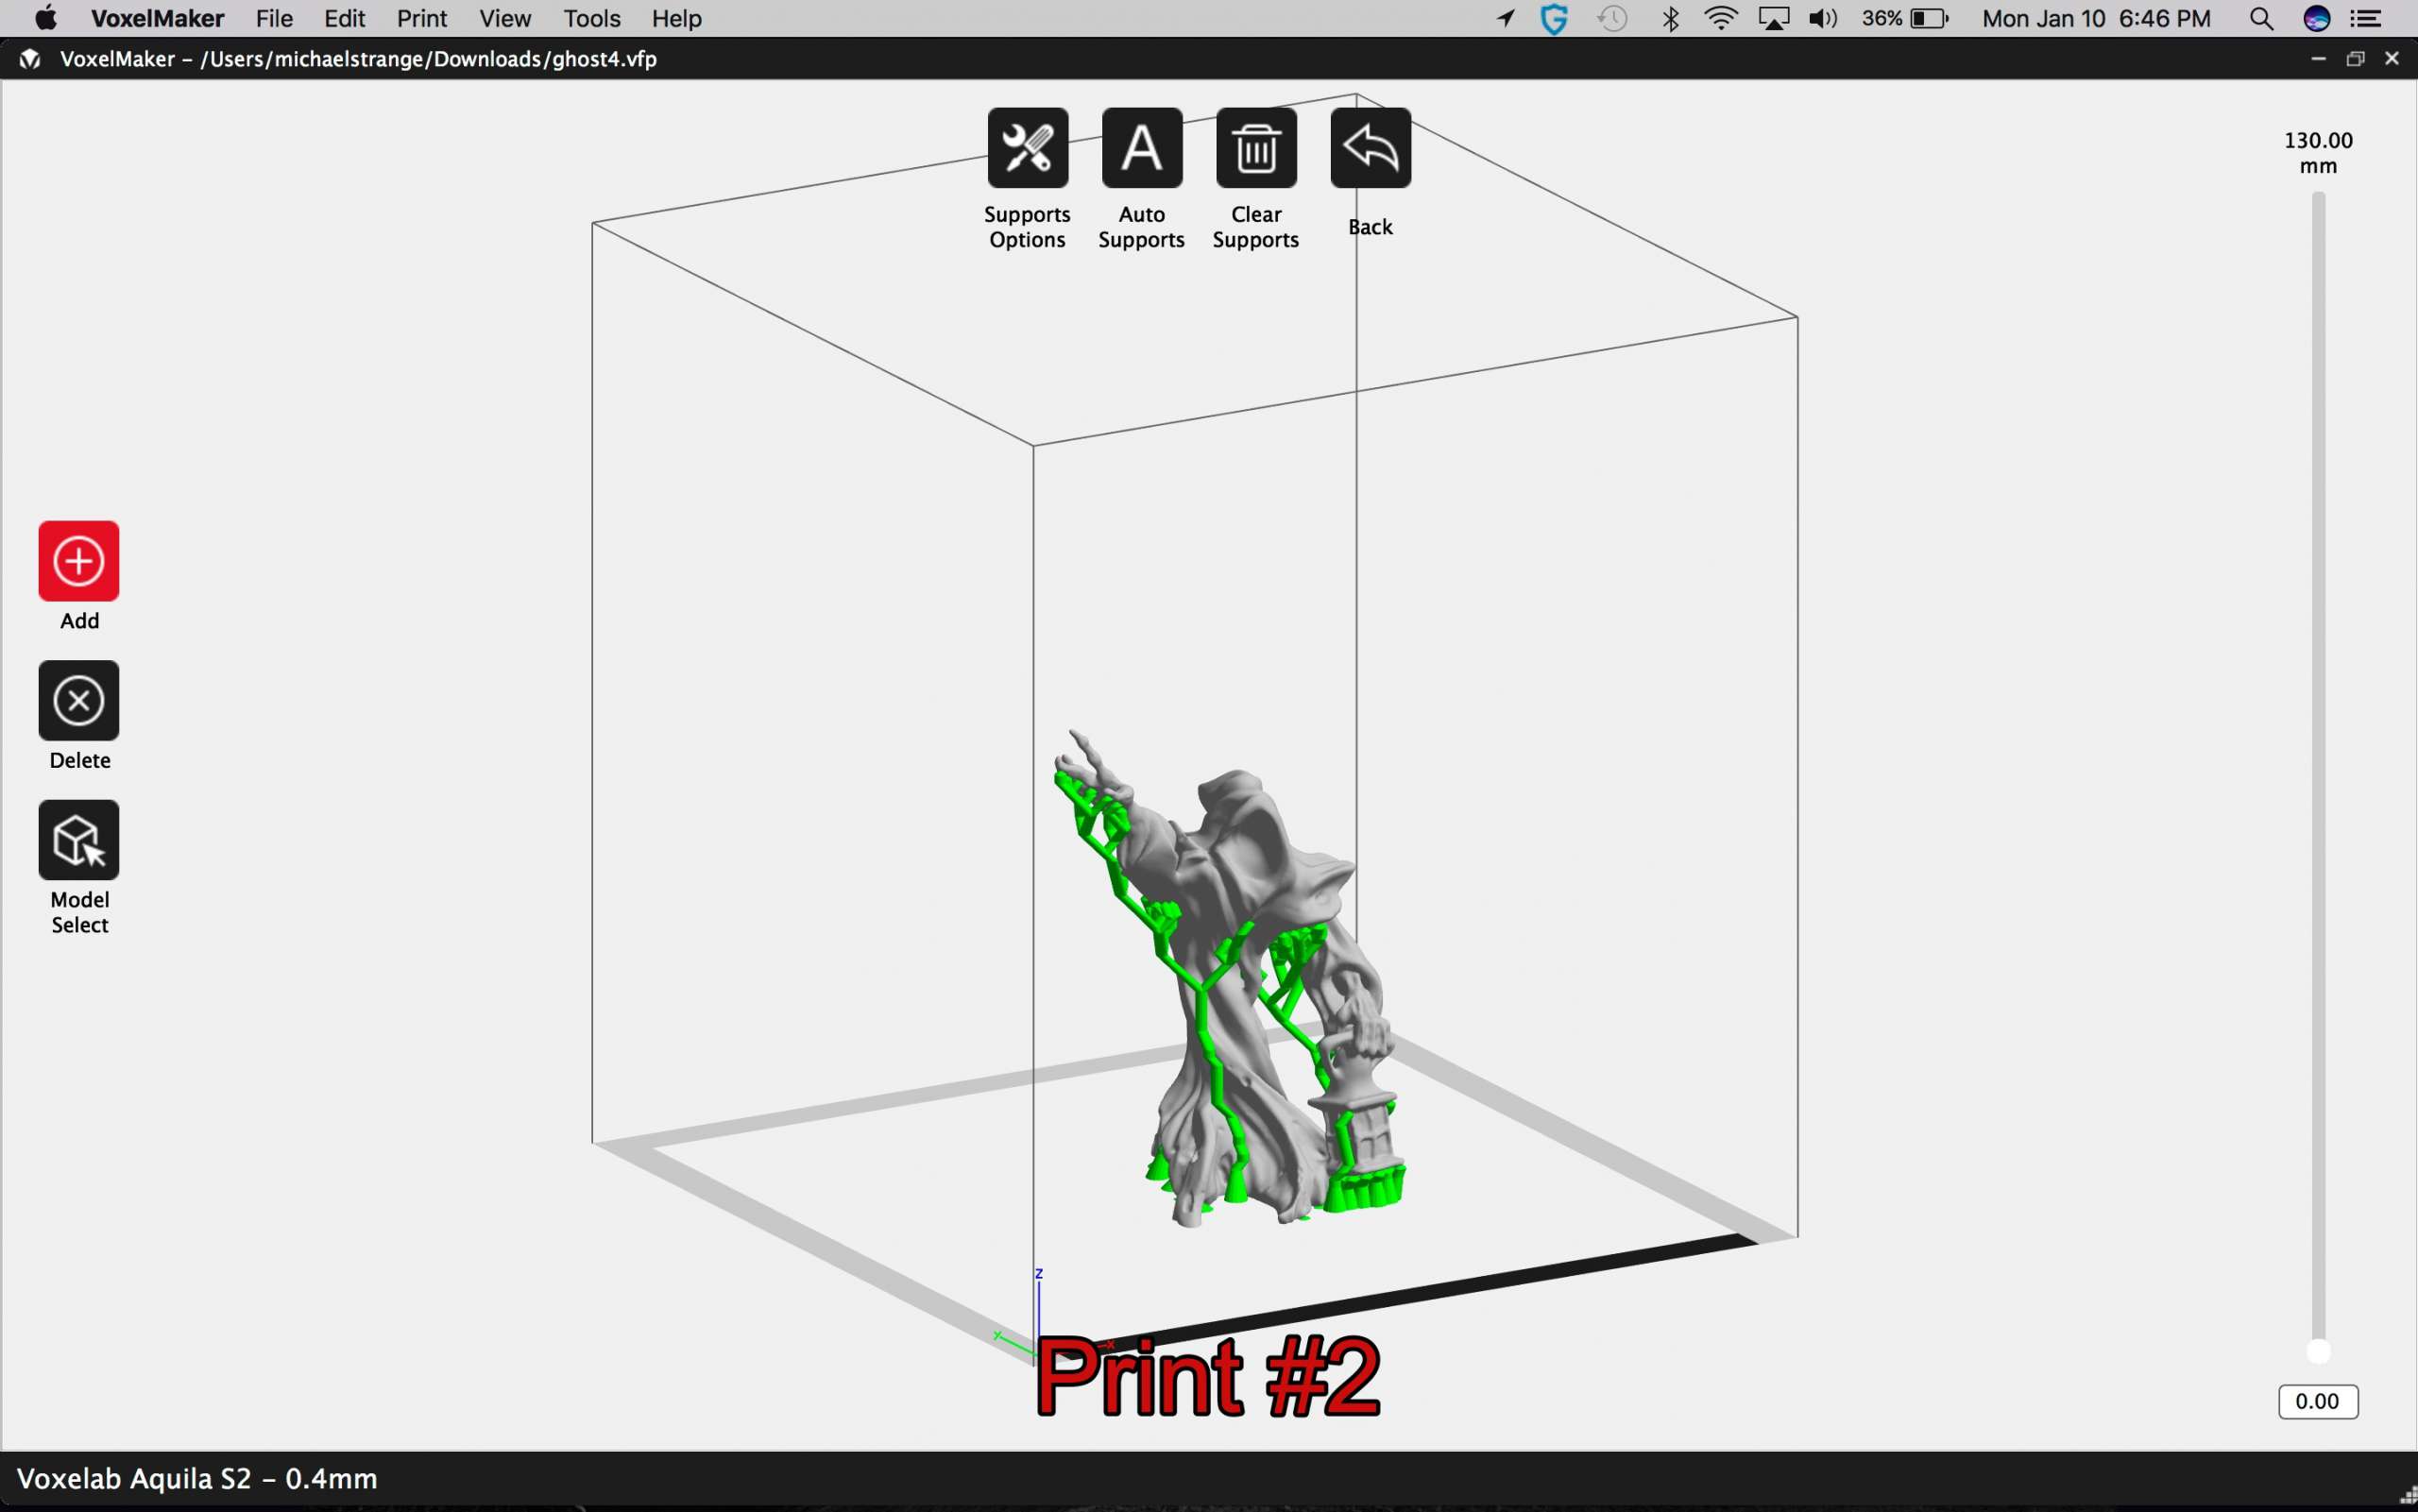
About 21/2 hours into the second print, the nozzle became caught up on one of the supports. And broke the model again. UGH! Undaunted, I went back to the drawing board. I decided this time that I would delete all the supports except those under the arm that snapped off during the first print.
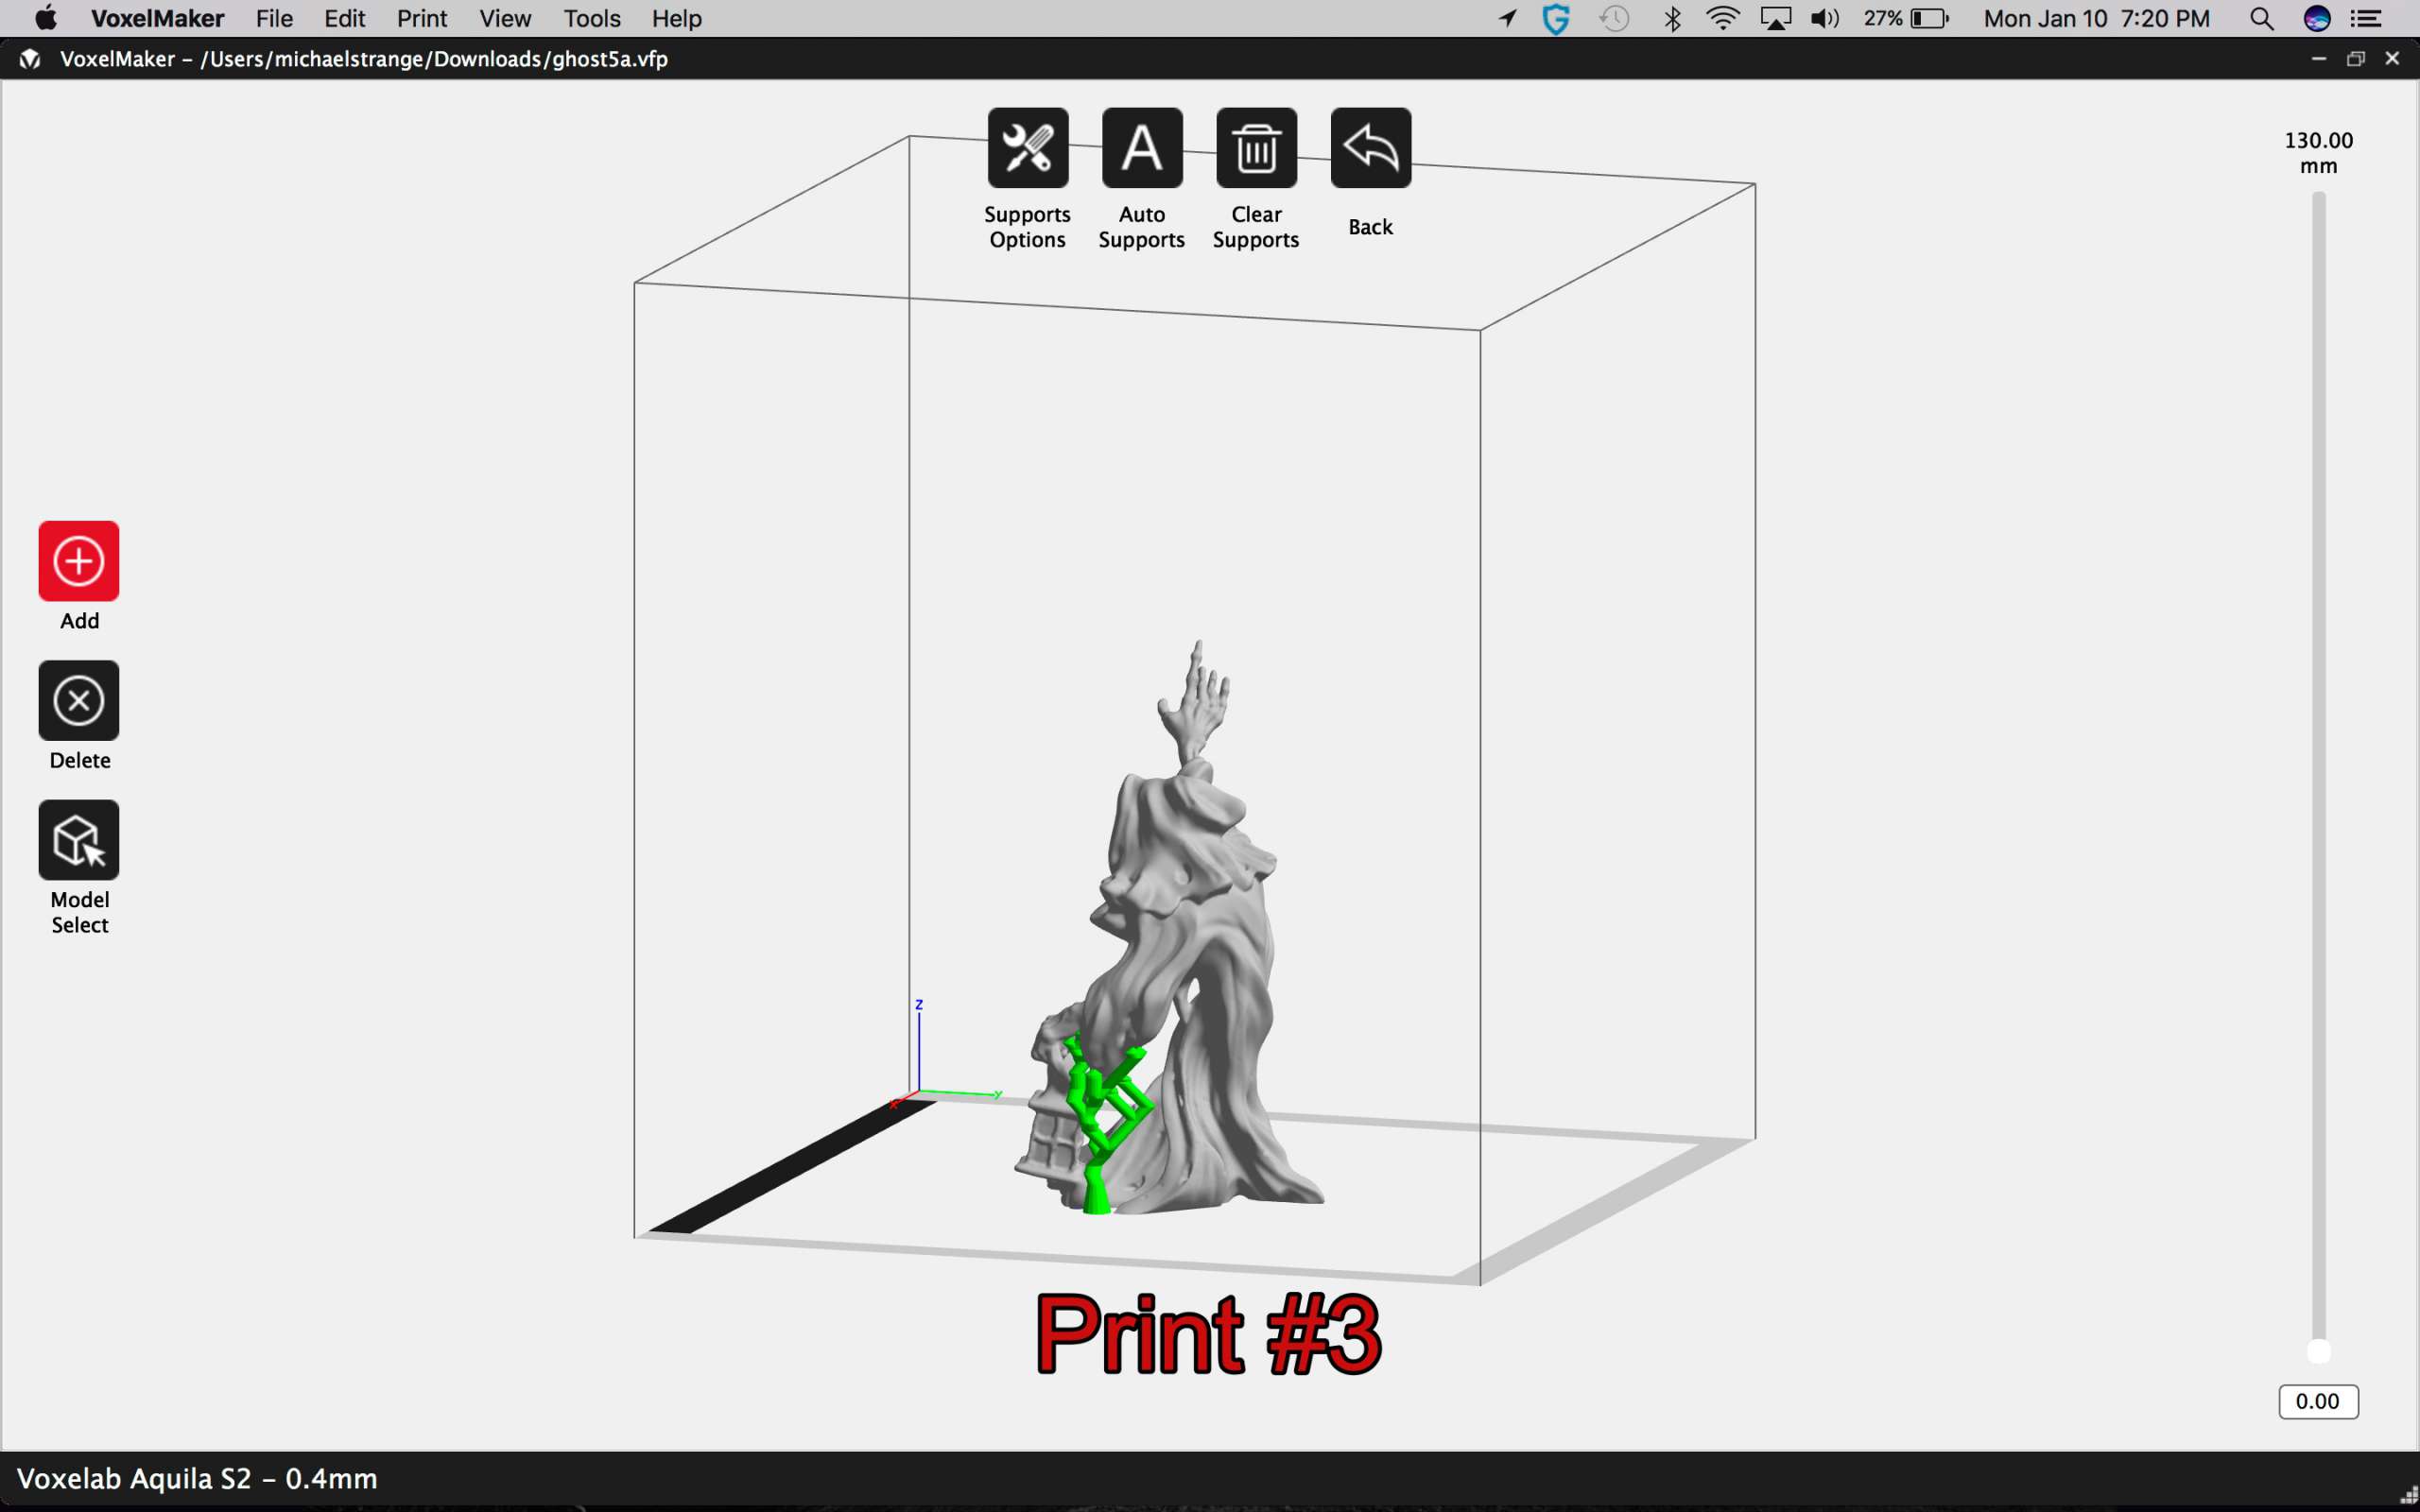
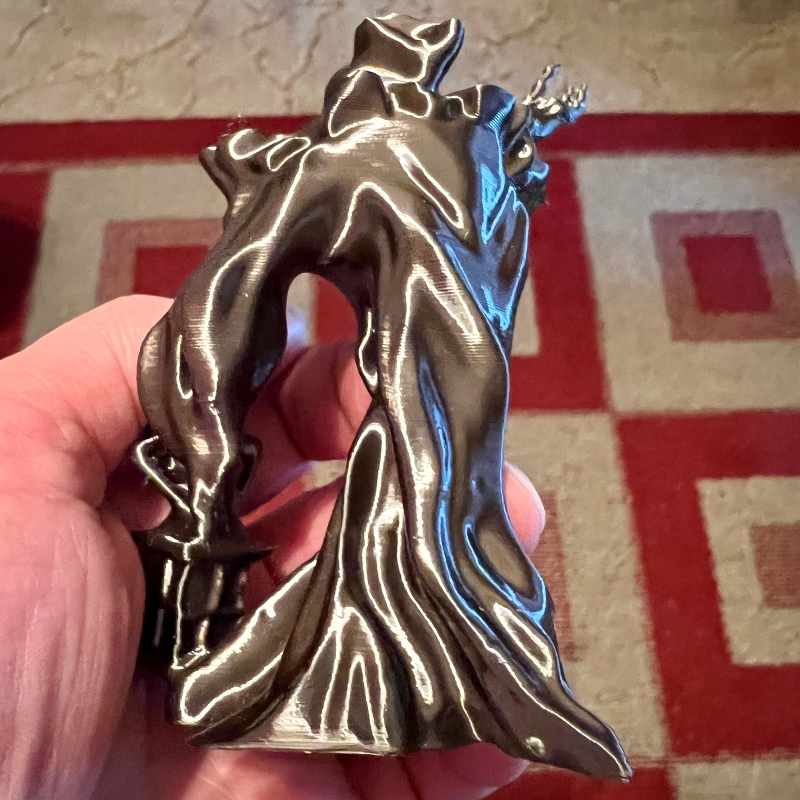
I printed the model a third time. And after 4 hours, I had a successful, awesome-looking model. The ghost model really highlights what the S2 is capable of. As you can see in the pictures, it has a lot of intricate details throughout, and the printer handled them beautifully. 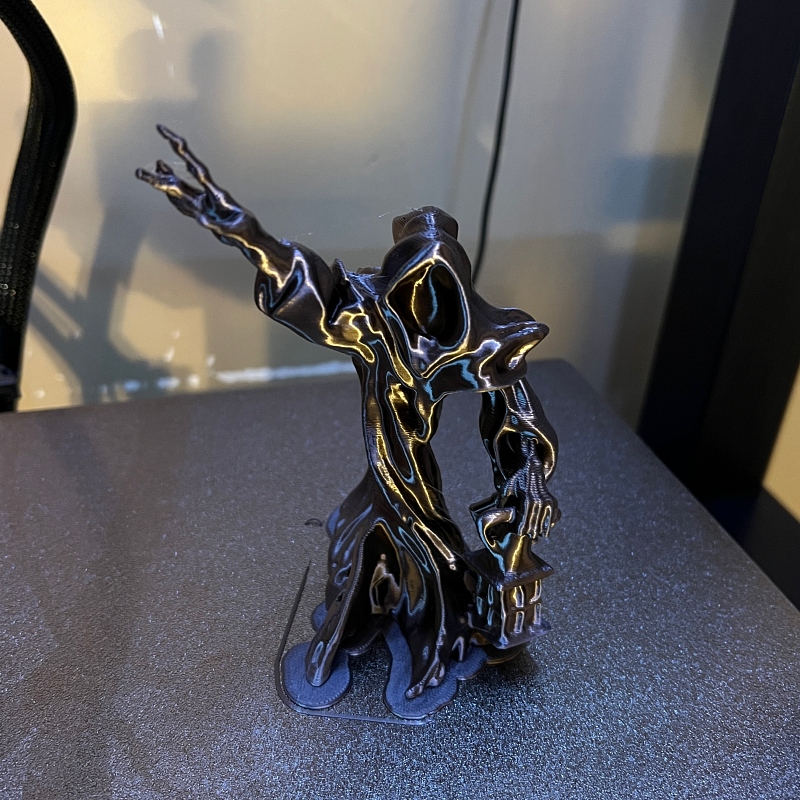
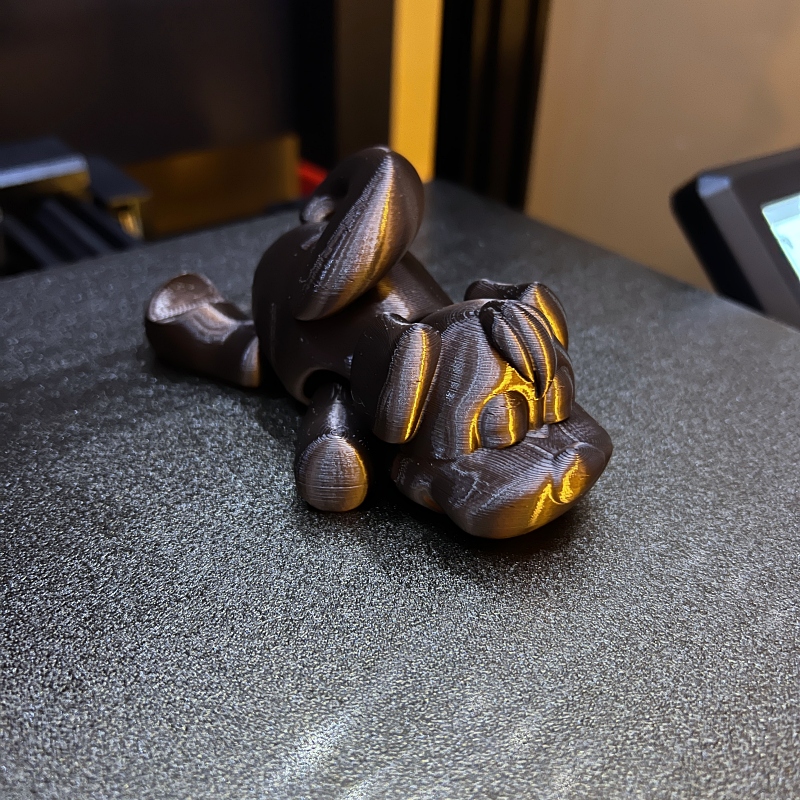
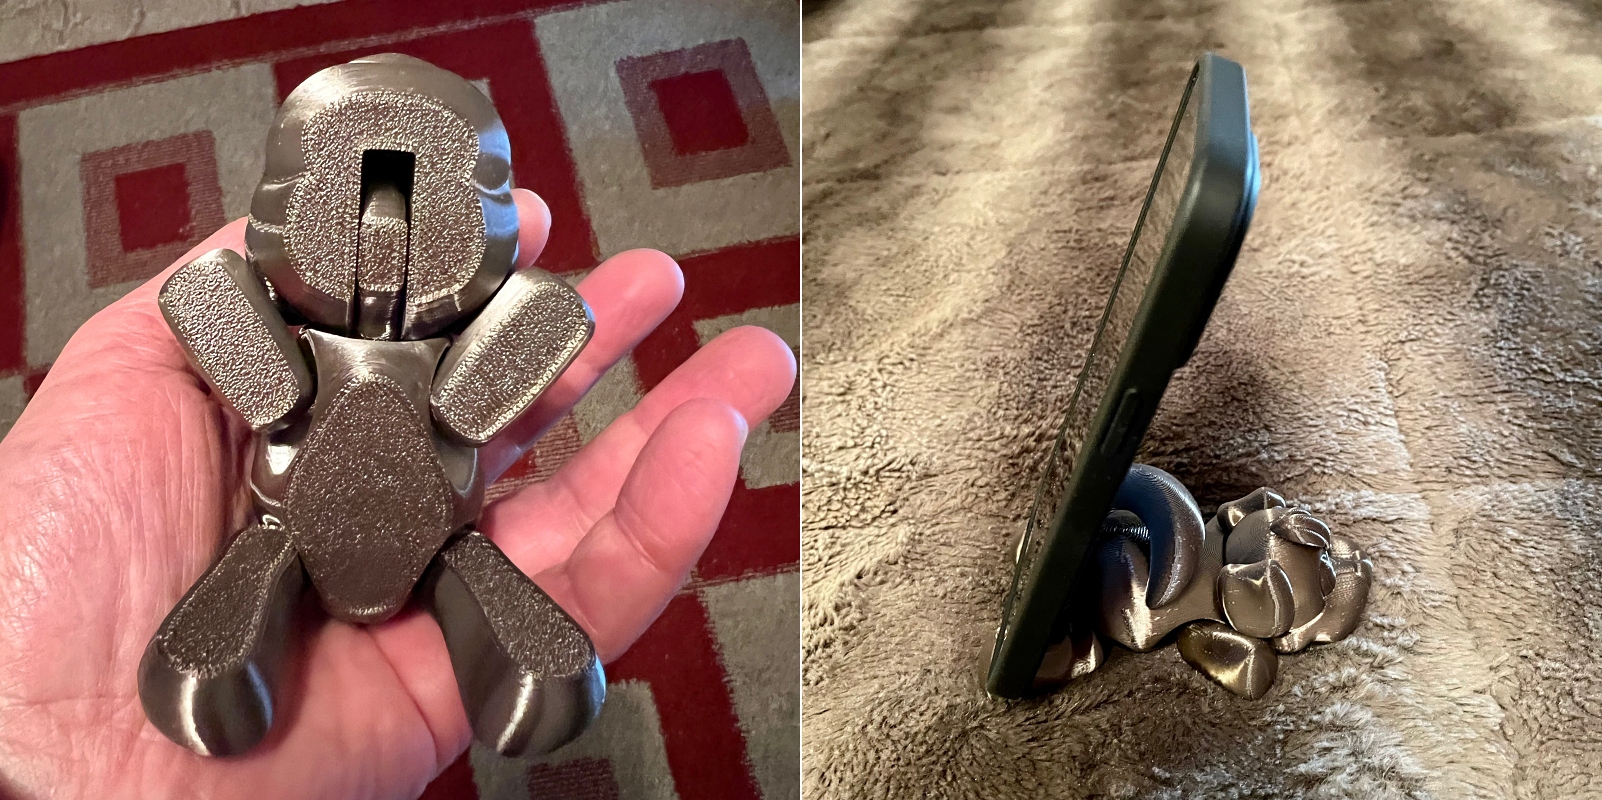
Since that first print, I have printed various models, and parts and all of them printed up wonderfully. I have over 50 hours of print time on the Voxelab Aquila S2 FDM 3D Printer, and I have not run into a single issue. The most impressive thing about it is how well it manages a variety of prints. I printed an articulated Flexi-Puppy model from Cults3D that requires a lot of intricate printing. The model’s head and legs all move. The model took 61/2 hours to print, and when I popped it off the bed, I was amazed at how smoothly the articulated pieces moved. The puppy even doubles as a phone stand.
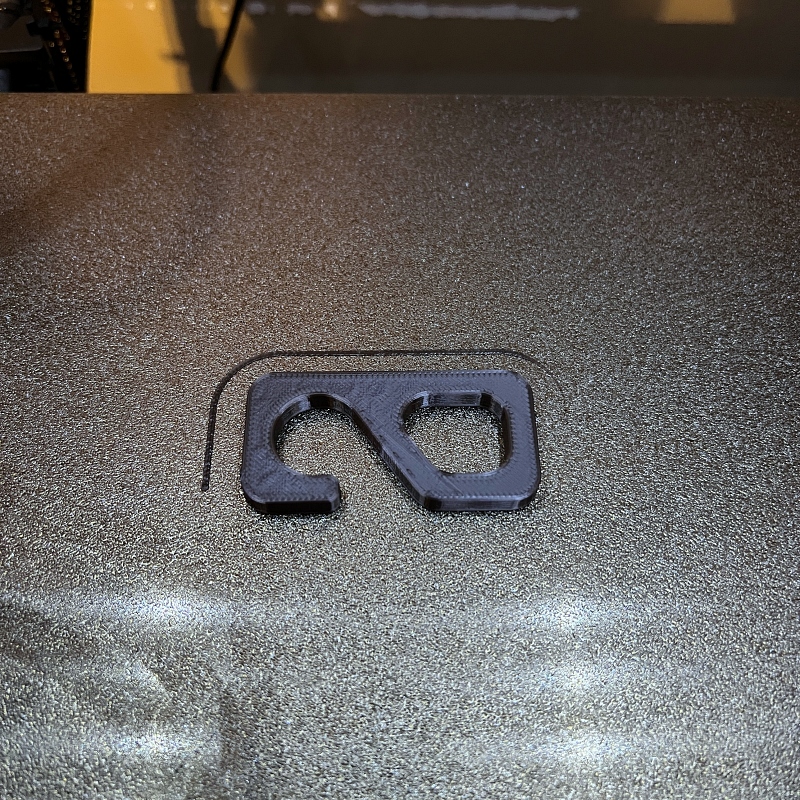
 The S2 also handles printing precision parts well. I printed about 30 parts I needed to build my enclosure, and each one was flawless and precise. It took several hours to print all the parts, but it saved me nearly $30 in building cost.
 The bottom line here is that the Aquila S2 has handled everything I have thrown at it so far without issue.
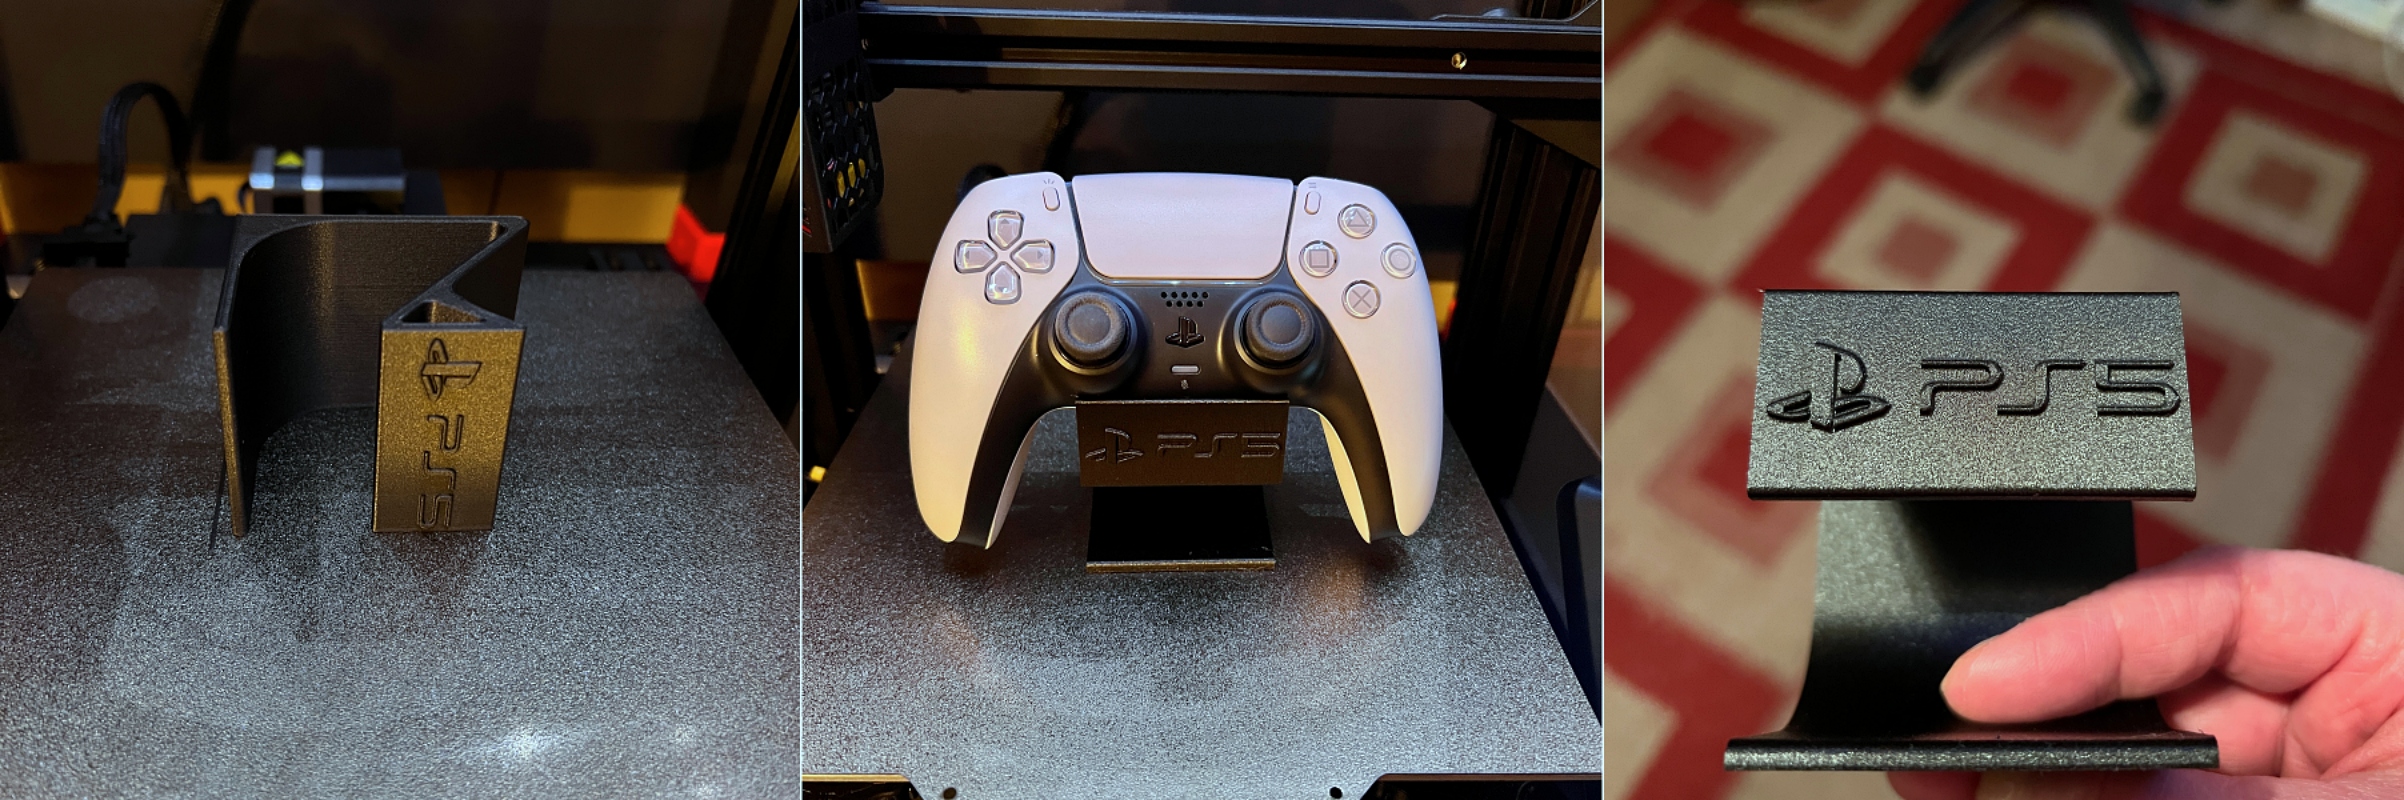
For my last print for this review, I wanted to print a file using one of the high-temperature filaments Voxelab sent me.
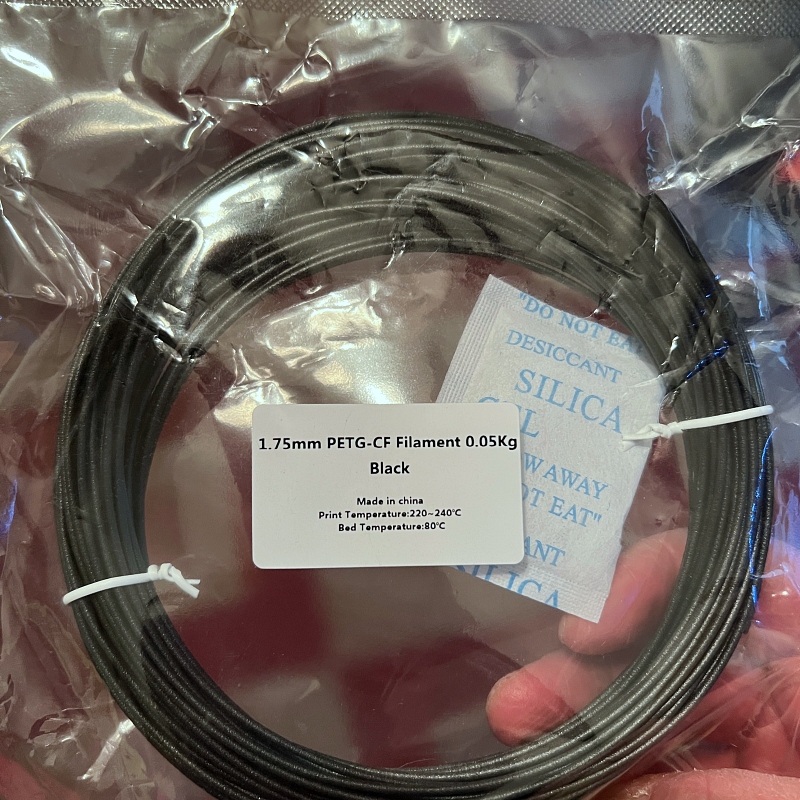
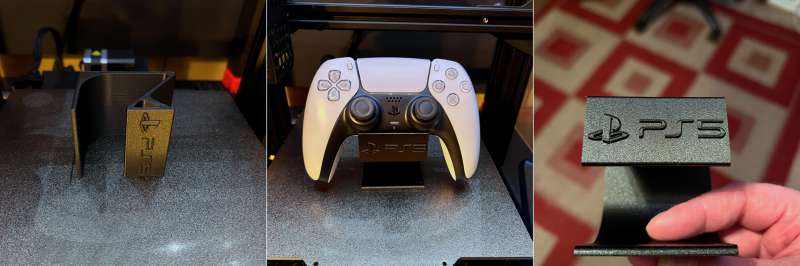
I chose to use the PETG-CF (carbon fiber) filament, which requires a print temp of 220ºC-240º and a bed temp of 80ºC. I printed a stand for my PS5 Dual Sense Controller. The print took about 4 hours, and the results were flawless.
 Enclosure
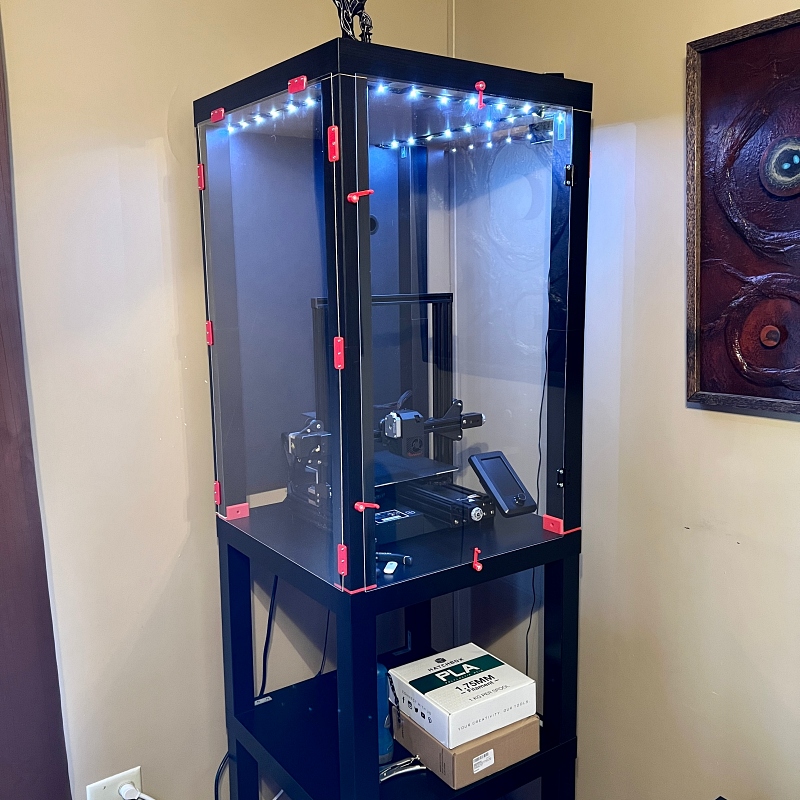
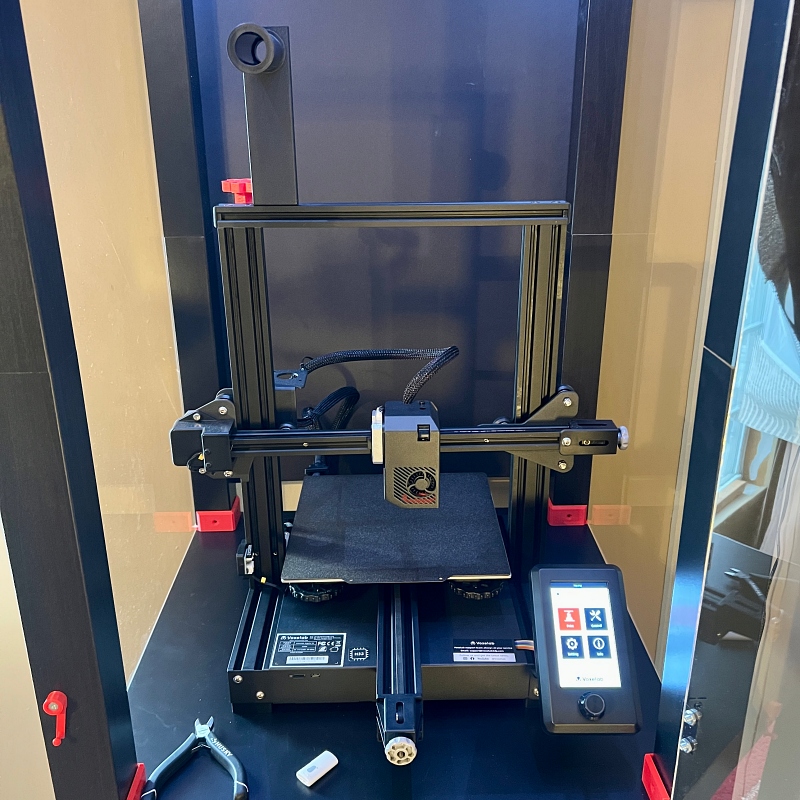
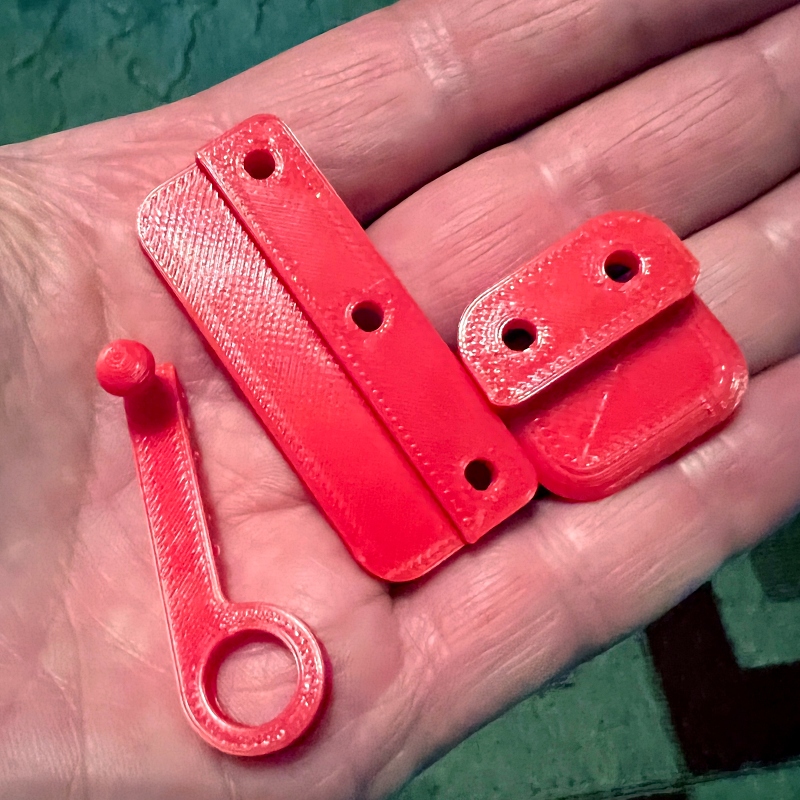
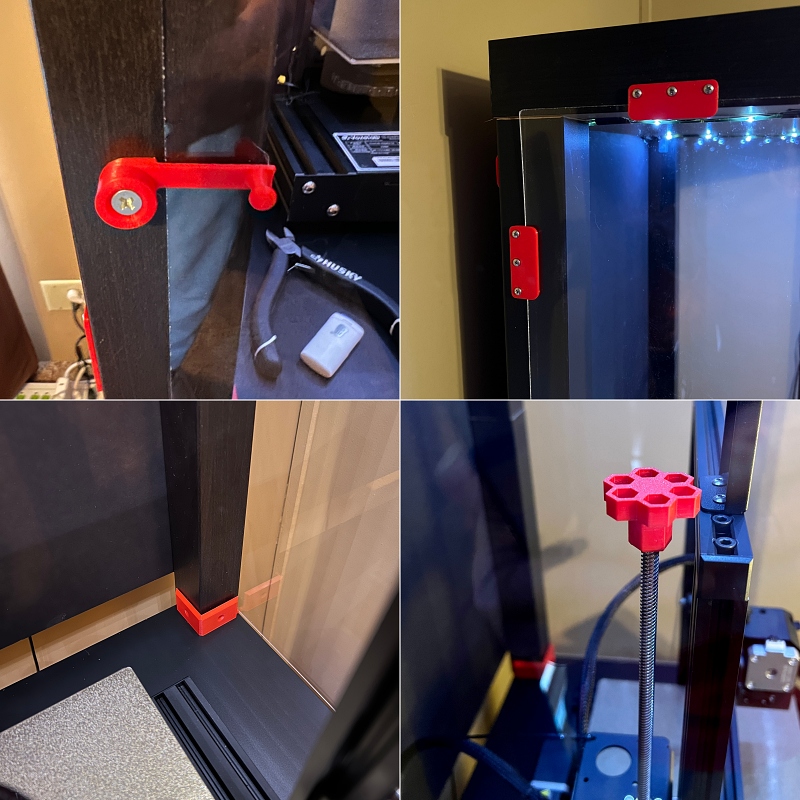
As I mentioned earlier, I built an enclosure for my Voxelab Aquila S2 FDM 3D Printer. It is made using tables from Ikea. It’s easy to make and pretty inexpensive. The vertical build is perfect because I do not have a lot of space in my house. The enclosure is functional as a workstation, and it also has room for storing things like filament and tools. It also cuts down on dust and any residual noise from the printer. And it makes a great display case to show off your 3D printer. There are several different versions of this enclosure. You can find them by simply going to YouTube and searching Ikea Lack Enclosure. Also, note that all the red pieces you see were printed using the Aquila S2.
What I like
- Easy to assemble
- Easy to use
- Quiet operation
- Direct drive extruding
- PEI magnetic build plate
- Great performance
- Supports multiple filament types
What I’d change
- A more comprehensive user manual
Final thoughts
Overall, the Voxelab Aquila S2 FDM 3D Printer is a very impressive 3D printer. It is easy to assemble (despite the awful user manual). It is quiet, easy to use, and offers a lot of value, especially for under $300. In my opinion, the S2 is easy enough for beginners but offers features that even advanced users will appreciate. I would highly recommend it to anyone looking to get started with 3D printing. I can tell you this, it has me addicted already.
Price: $279
Where to buy: Voxelab and Amazon
Source: The sample for this review was provided by Voxelab.
Gadgeteer Comment Policy - Please read before commenting
Michael, I looked on their website and they have two versions. The H32 and N32 with a $10 difference. Do you know which you have and what the difference is?
Hi Carl,
Both are open source and support DIY mods. There’s really only one difference between them, which is which development tools they require to carry out those mods.
The H32 mainboard will be modifiable with Eclipse or Keil development tools, while the N32 will be modifiable with VSCode. I’m new to the 3D printing world so I am not sure how this all works, but that is the answer. Hopefully, I answered your question. Thanks for reading and commenting!