How to block ads and trackers on Xbox
Take a little control over your online experience on your console.
If you go online, you're going to encounter ads and trackers. It's just the way of the world, but it doesn't necessarily mean you have to like it. Especially on your games console.
Browsing the web on the TV isn't for everyone, but while it can be done you should at least enjoy it and for many, that will mean blocking unsightly advertisements. And we could all do better about keeping tabs on how we're being tracked.
On the Xbox Series X, Xbox Series S, and Xbox One, you can easily block ads and trackers and make your online time a little less irritating. Here's what you need to do.
How to block ads and trackers on Xbox with AdGuard DNS

AdGuard is one of the world's biggest adblocking services with apps and extensions that cover all platforms. What is possibly less well known is the provision of a public DNS, much like those provided by Google and Cloudflare, with the big difference being that the AdGuard DNS servers filter out ads and trackers.
There will always be a question of "can I trust this service?" And that's good, you should be asking those questions. AdGuard has done nothing to suggest it isn't trustworthy, but for added peace of mind, you're free to look over the project on Github. Even if you don't personally understand the code, someone does, and being on GitHub is usually a good sign nothing is being hidden.
There are likely other similar services that could be used, and the steps in this guide would apply to any other such adblocking DNS server. I've used AdGuard here because it's a service I've personally used and trust, as well as having verified works as advertised.
To implement the DNS server on your Xbox console, follow these steps.
Get the Windows Central Newsletter
All the latest news, reviews, and guides for Windows and Xbox diehards.
- Open the Settings app on your Xbox.
- Select General.
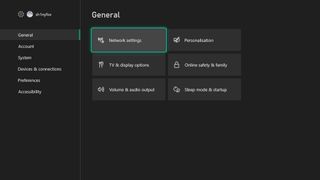
- Select Network settings.
- Select Advanced settings.
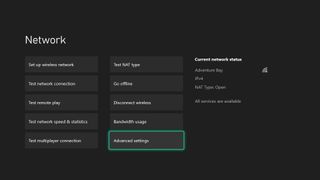
- Select DNS settings.
- Choose Manual.

- Enter 94.140.14.14 for the primary DNS address.
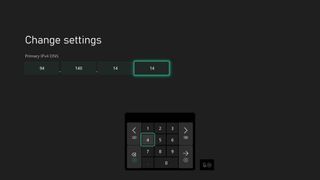
- Select the right arrow button to continue.
- Enter 94.140.15.15 for the secondary DNS address.
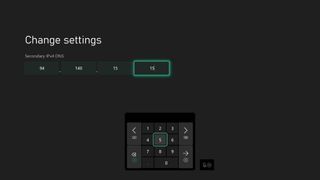
From this, it's a good idea to then reboot your Xbox console to refresh the connection and ensure that the new settings are working properly. Now you shouldn't see ads when browsing the web inside Microsoft Edge and other applications, and it even seems to take care of the sponsored tiles on the Xbox dashboard and in the Store.
Sure, you see a grey tile now instead of the ad, but there are enough people out there who object to being shown ads by Microsoft on their console that this could be just the ticket.
Using a Pi-Hole or AdGuard Home
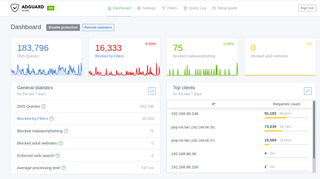

- How to set up AdGuard Home on a Raspberry Pi
- How to set up a Pi-Hole
You can of course get more radical and block ads and trackers across your entire home network with something like a Pi-Hole or AdGuard Home on a Raspberry Pi. These have a similar effect, replacing your existing DNS and filtering out the nasties. Or you could apply AdGuard DNS to your home network if you're looking for something a bit less techy.
Whichever you choose, the process involves going into your router settings, and naturally, all of these are different. But you'll be looking for the same settings as on your Xbox console, manually setting the DNS to something that's going to block ads and trackers for you.

Since Game Pass Ultimate gives you access to several games on play on phone, tablet, or PC that means it's also accessible on the ROG Ally. When subscribed, you'll gain access to a list of classic hits as well as brand new titles.

Richard Devine is a Managing Editor at Windows Central with over a decade of experience. A former Project Manager and long-term tech addict, he joined Mobile Nations in 2011 and has been found on Android Central and iMore as well as Windows Central. Currently, you'll find him steering the site's coverage of all manner of PC hardware and reviews. Find him on Mastodon at mstdn.social/@richdevine
