
9to5Mac is brought to you by MacStadium. Migrate to M1 easier with Orka and MacStadium. Orchestrate macOS VMs with Kubernetes in a mixed cluster of M1 and Intel Macs. Watch the tech preview and sign up to be a beta participant.
Along with the shinier features that launched with macOS Monterey are several subtle ones to help keep your Mac secure and private. Let’s look at how to customize and use Mac privacy features in the latest version of macOS.
Table of contents
Privacy and security have long been core values for Apple and the Mac has received a number of improvements in that regard with macOS Monterey.
Like we’ve seen added to iPhone and iPad, Macs now show an indicator when the mic is being used by an application. Also new are Mail Privacy Protection, Hide My Email, as well as iCloud Private Relay.
How to customize and use Mac privacy features with macOS Monterey
Menu bar mic indicator
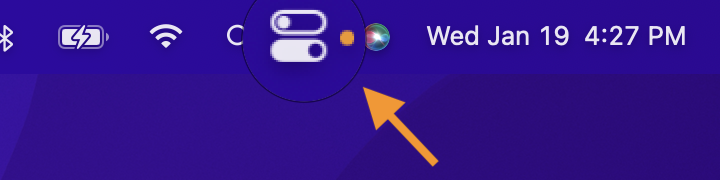
While Macs have long included a green indicator light when the camera is in use, macOS Monterey adds an orange indicator for the microphone in the menu bar. It appears even when the menu bar is hidden (top right corner).
Here’s how Apple describes the feature:
Control Center lets you find out which apps have access to your mic. And you’ll see the new indicator on your screen whenever an app is accessing your microphone.
The menu bar mic indicator is automatically on (and actually can’t be turned off for now) with macOS Monterey, here’s how it looks:
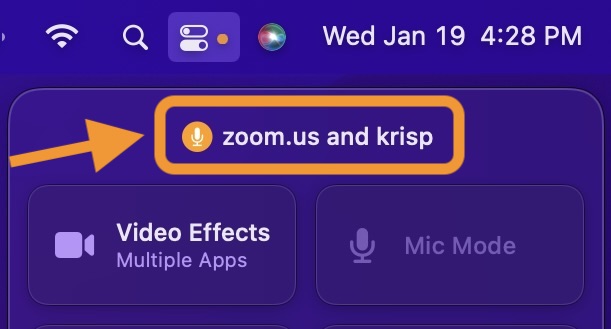
Click on Control Center in the menu bar (double cylinders) to see which app(s) are using the microphone:
You can also control what apps can access your microphone, camera, and more by heading to System Preferences > Security and Privacy.
Mail Privacy Protection
This feature is also turned on by default in macOS Monterey and offers valuable privacy and security features. Here’s how Apple describes it:
Mail Privacy Protection hides your IP address, so senders can’t link it to your other online activity or determine your location. And it prevents senders from seeing if and when you’ve opened their email.
Keep in mind you’ll need to be using Apple’s Mail app to take advantage of Mail Privacy Protection.
Hide My Email
Hide My Email is available as part of the new iCloud+ features which are unlocked with any of the paid iCloud plans.
It’s an extension of “Sign in with Apple” that first arrived in 2019 and now the email privacy aspect of that is being offered as a standalone feature.
To use Hide My Email in macOS Monterey:
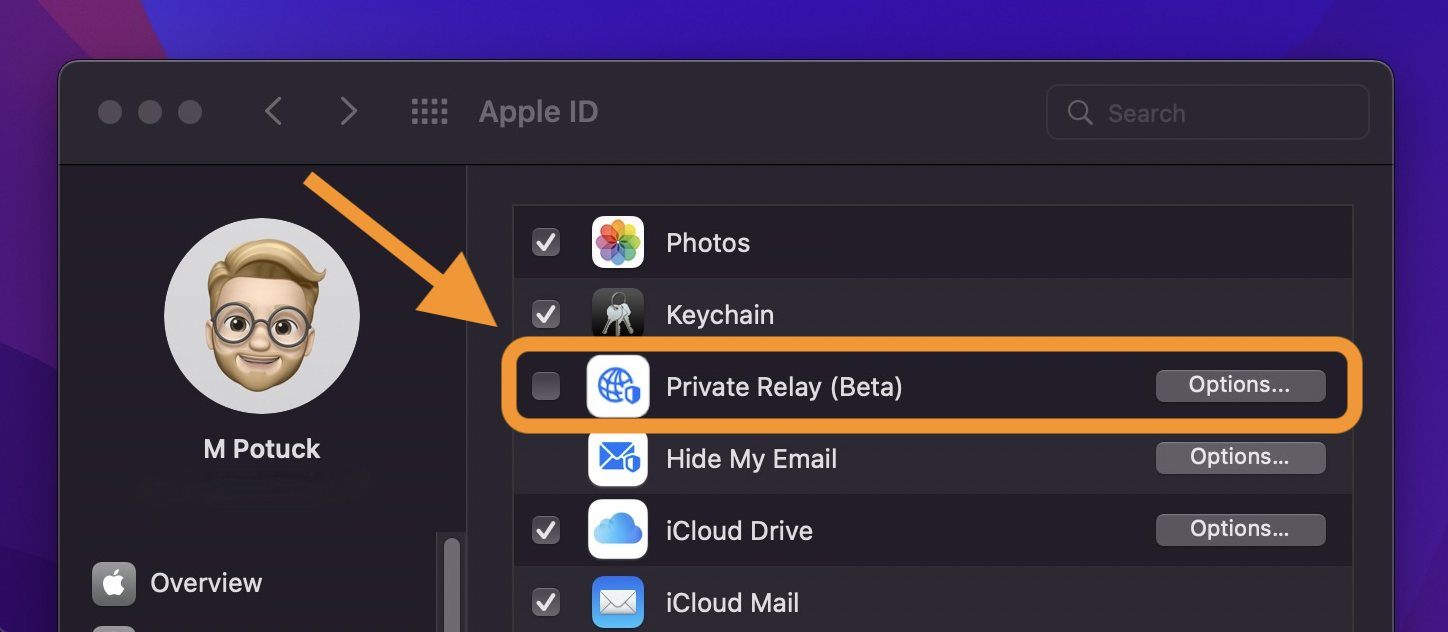
- Open System Preferences on your Mac
- Click Apple ID in the top right corner, then select iCloud on the left-hand side
- Next to Hide My Email, choose Options
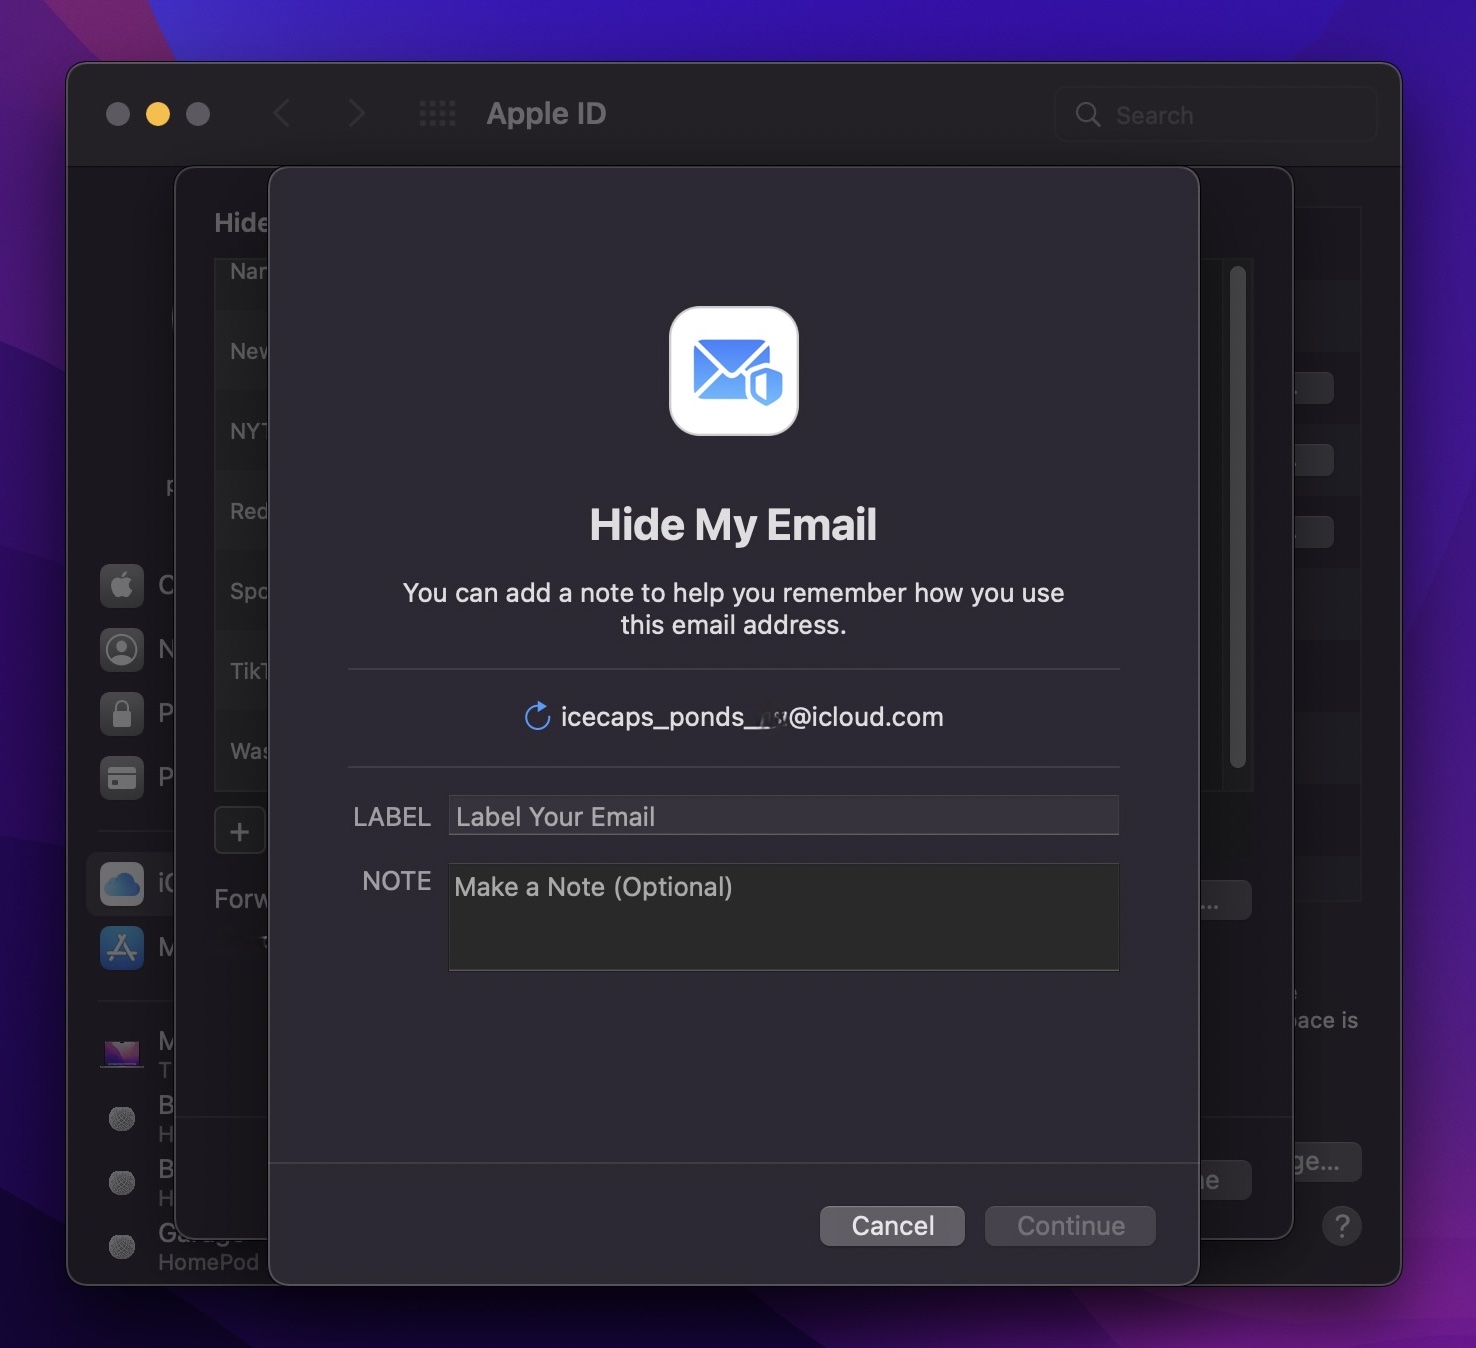
- Now you can see existing email aliases you’ve used or create a new one
- Click the + icon in the bottom left to create a new email alias
- Along with labeling each alias, you can add a note them too
iCloud Private Relay
This Mac privacy feature is another iCloud+ exclusive so you’ll need to be on a paid plan. iCloud Private Relay – still in beta – is different from a VPN as your web traffic goes through two relays. That means even Apple doesn’t know who you are and what sites you’re visiting.
However, iCloud Private Relay doesn’t work to spoof your location to get around restrictions for things like streaming video.
Per Apple, here’s how browsing with iCloud Private Relay operates:
All the user’s requests are then sent through two separate internet relays. The first assigns the user an anonymous IP address that maps to their region but not their actual location. The second decrypts the web address they want to visit and forwards them to their destination. This separation of information protects the user’s privacy because no single entity can identify both who a user is and which sites they visit.
And here’s how to turn it on:
- Open System Preferences
- Click Apple ID at the top
- Select iCloud on the left
- Now click the iCloud Private Relay checkbox (paid iCloud plan required)
- Head back here to turn off the feature off
One thing to keep in mind, it’s possible for websites or services to block access when iCloud Private Relay is turned on. Also, some users have experienced slow browsing with the feature, so it may not be something you want to use all the time.

9to5Mac is brought to you by MacStadium. Migrate to M1 easier with Orka and MacStadium. Orchestrate macOS VMs with Kubernetes in a mixed cluster of M1 and Intel Macs. Watch the tech preview and sign up to be a beta participant.
FTC: We use income earning auto affiliate links. More.


Comments