Did you know that you can use Blender as 2D animation software?
You heard it here first. The Blender Grease Pencil is your ticket into an entire world of 2D stroke creation, allowing you to draw much like you would in any other traditional 2D animation program.
Here's how you can make the most of the Grease Pencil in Blender.
What Is the Blender Grease Pencil?
The Grease Pencil in Blender is used to draw within the 3D viewport. Grease pencil animation, Blender drawing, and more, all become possible through this incredibly versatile tool.
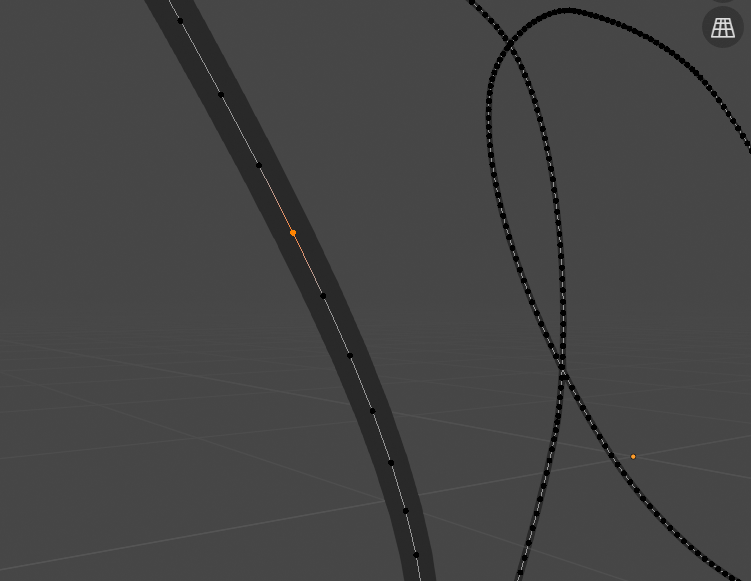
With the Grease Pencil, Blender drawings come to life as vectorized stroke objects, complete with points of control strung all the way along.
A couple of things that the Grease Pencil lets you do in Blender:
- 2D animation
- Hybrid animation
- Cut-out animation
- Onion skinning
- Motion graphics
- Storyboarding
- Creating 2D line art out of 3D objects
- Dope sheets
- Drawing
Blender recommends using a tablet or a display with a touchscreen interface for reasons that should be more than obvious. You can simulate a conventional 2D animation workflow, all within Blender itself.
Strokes created with the Blender Pencil tool can be modified, shaded, and filled in, just like in any other vector drawing application. Here's how to get started.
How to Draw in Blender With the Grease Pencil
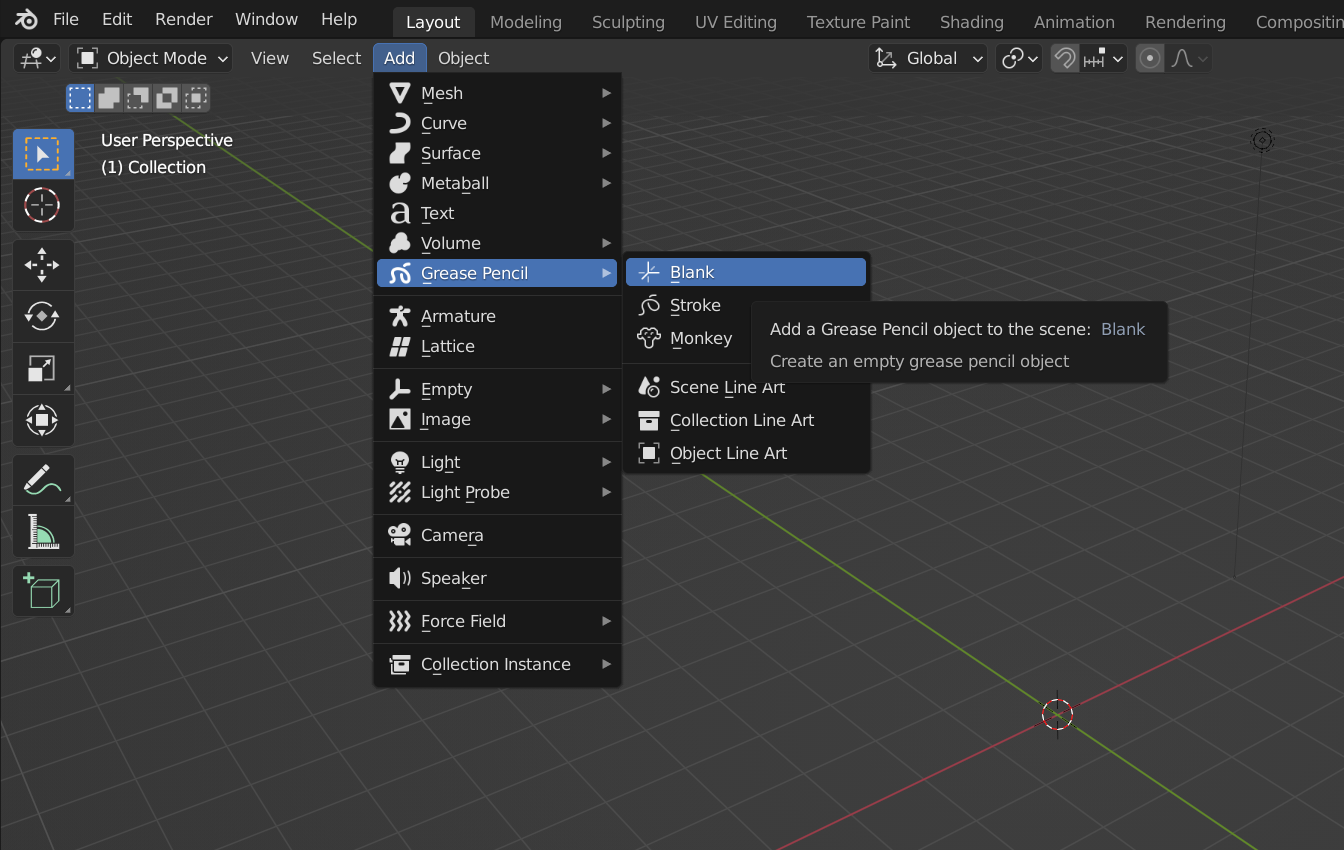
First, you'll need to create a new Grease Pencil object in Object Mode.
Use Shift + A or pull the option down from the toolbar above: Add > Grease Pencil, where you'll see a couple of different choices:
- Blank, which creates a null Grease Pencil object.
- Stroke, which includes a stylized demo stroke as an example.
- Monkey, akin to the 3D Blender Monkey primitive—this one is an Easter egg, but it also provides some insight into how Grease Pencil art in Blender functions.
For this Blender Grease Pencil tutorial, we're going to create a new Blank Grease Pencil object.
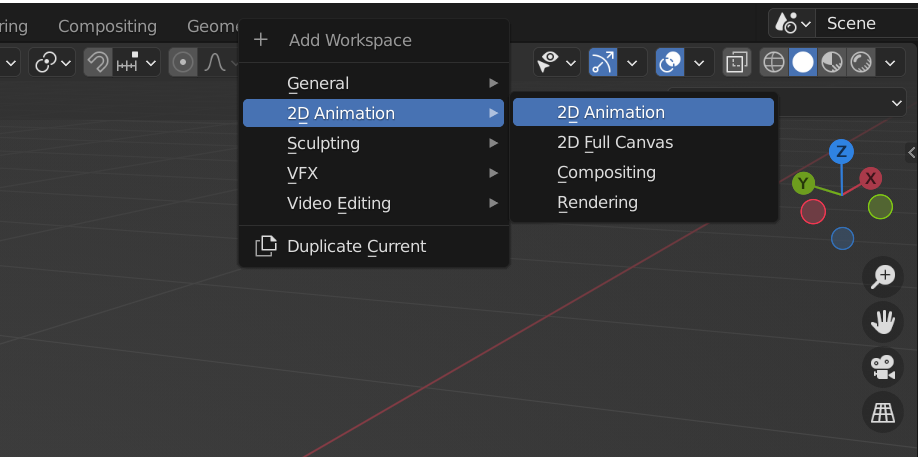
Once you've created a Blank Grease Pencil object, hop on over to the 2D Animation workspace. Click into the plus dropdown, pull out the 2D Animation menu, and select 2D Animation.
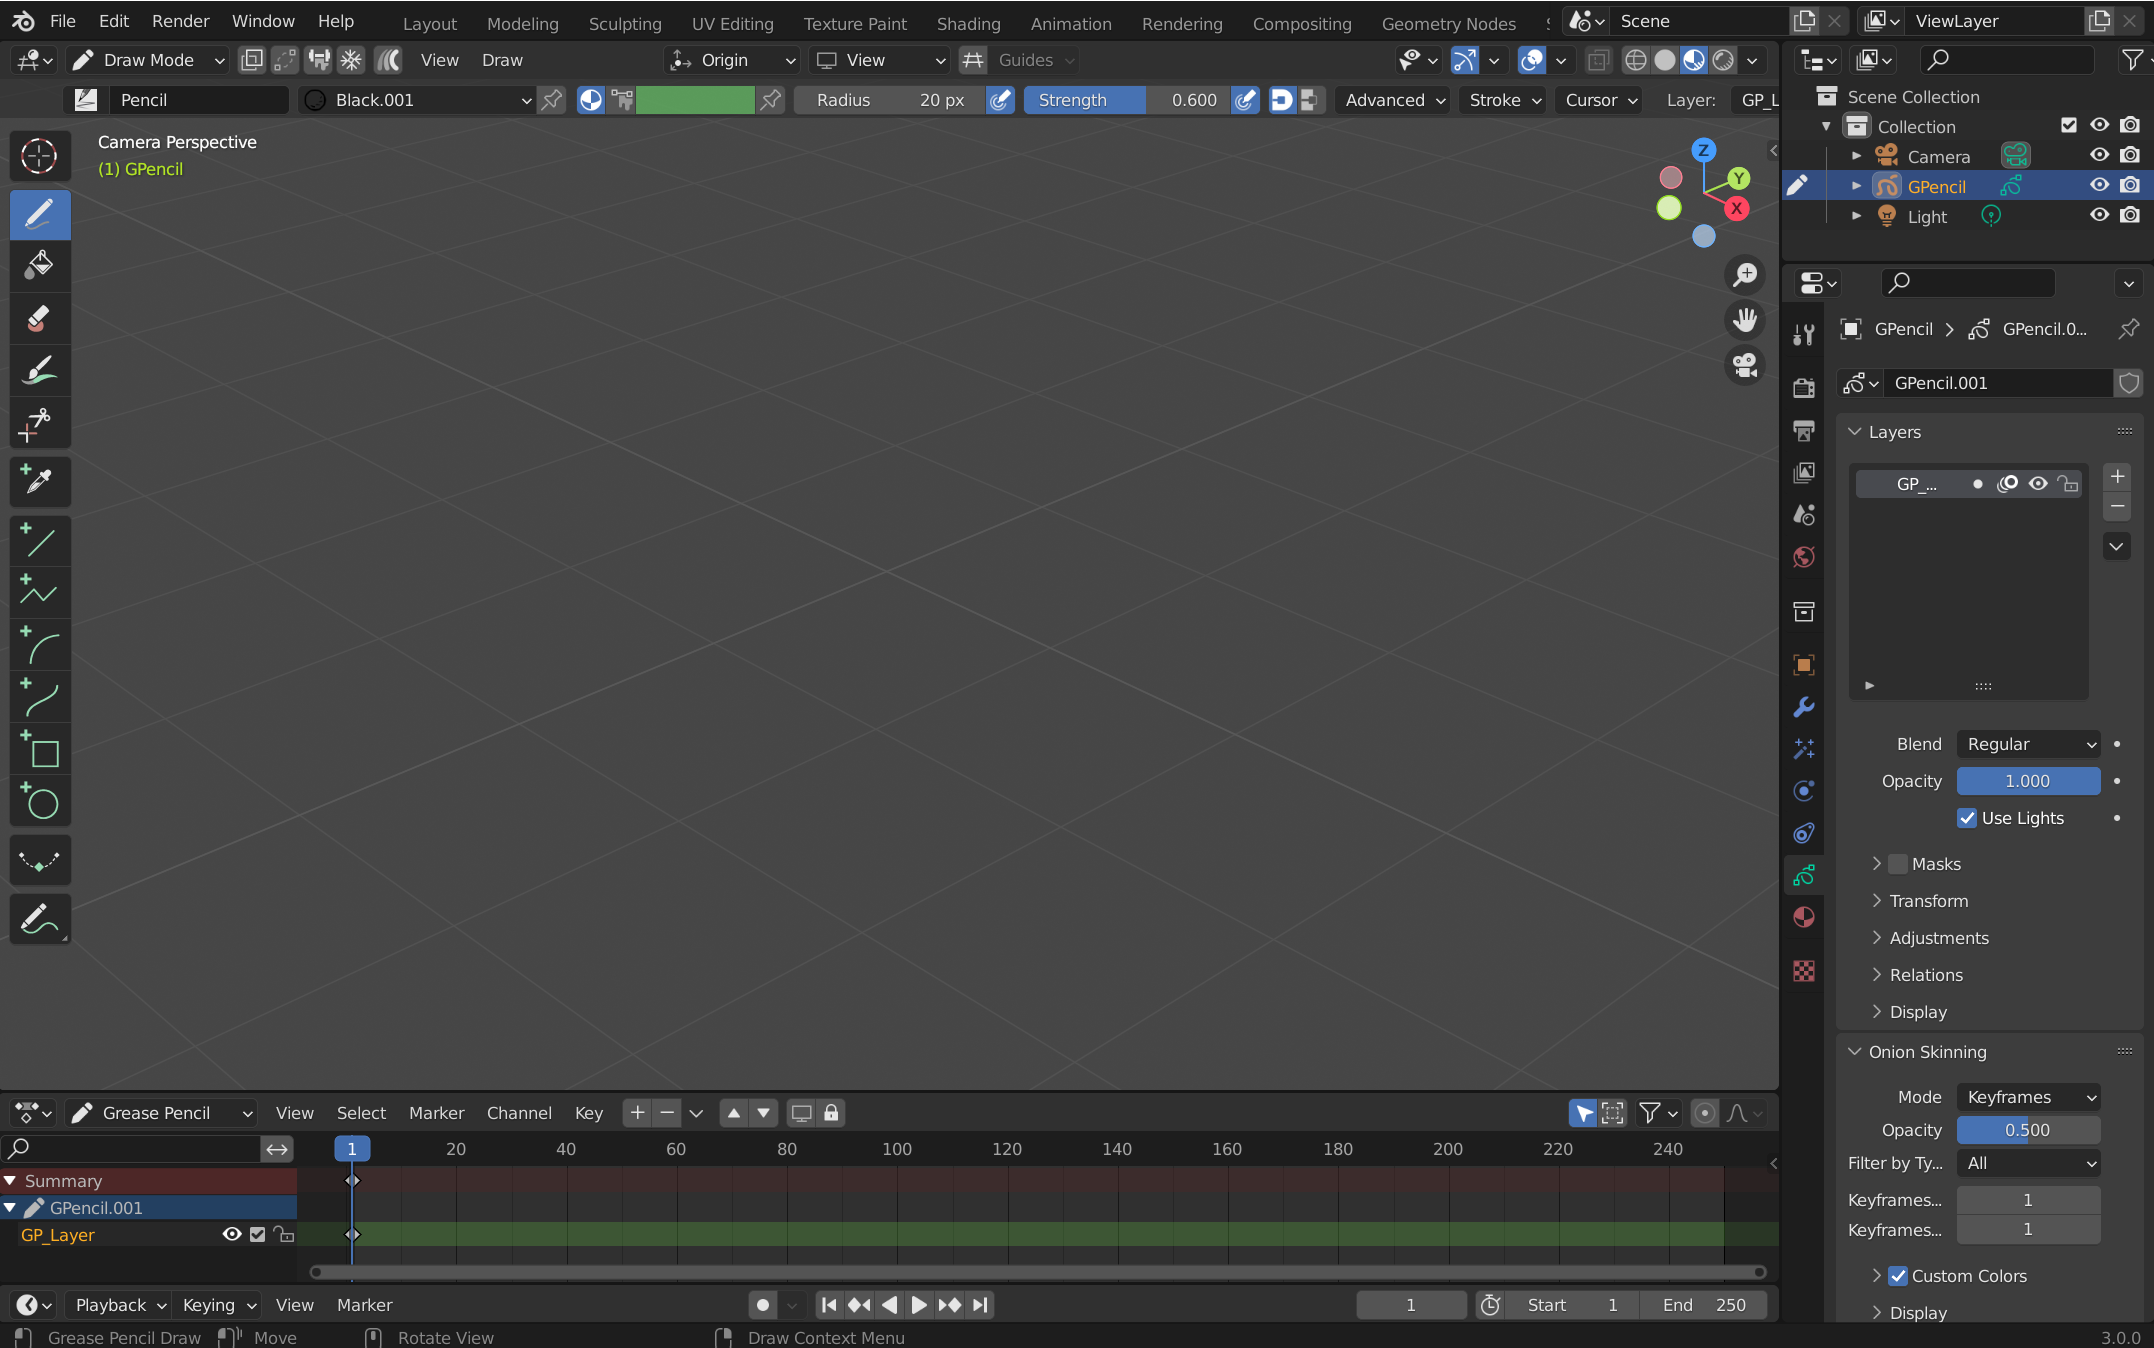
You'll notice that you're no longer in Object Mode or Edit Mode—instead, this Blender workspace drops you right into Draw Mode, an arena tailored to the Blender Grease Pencil workflow.
Now, your Blender UI should look like this: an all-in-one 2D animation studio, ready for business.
Draw Mode and Tools
Before getting into any of the other tools here, let's try out the Draw tool. It's the top-most pencil icon to your right, and it should be enabled by default when you call up the Blender 2D workspace.
There are no gimmicks or tricks here—simply use your mouse or stylus to pen something in, et voilà. Your first Grease Pencil drawing in Blender.
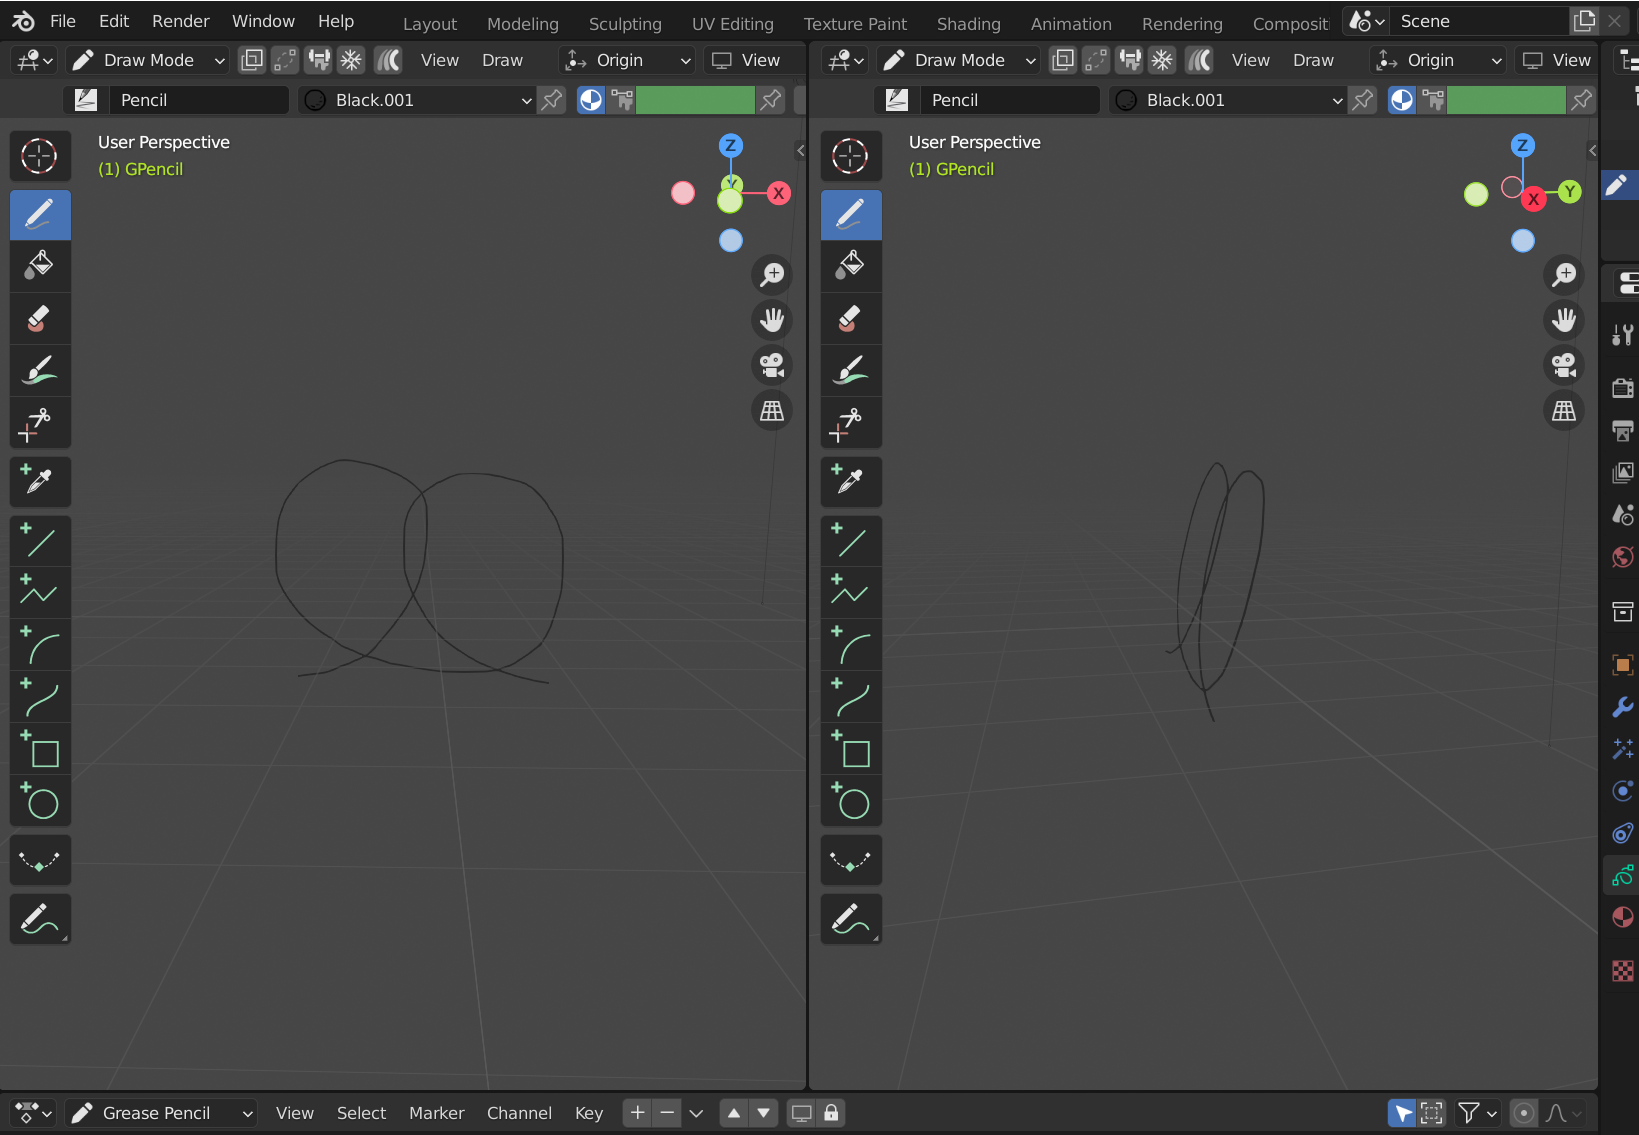
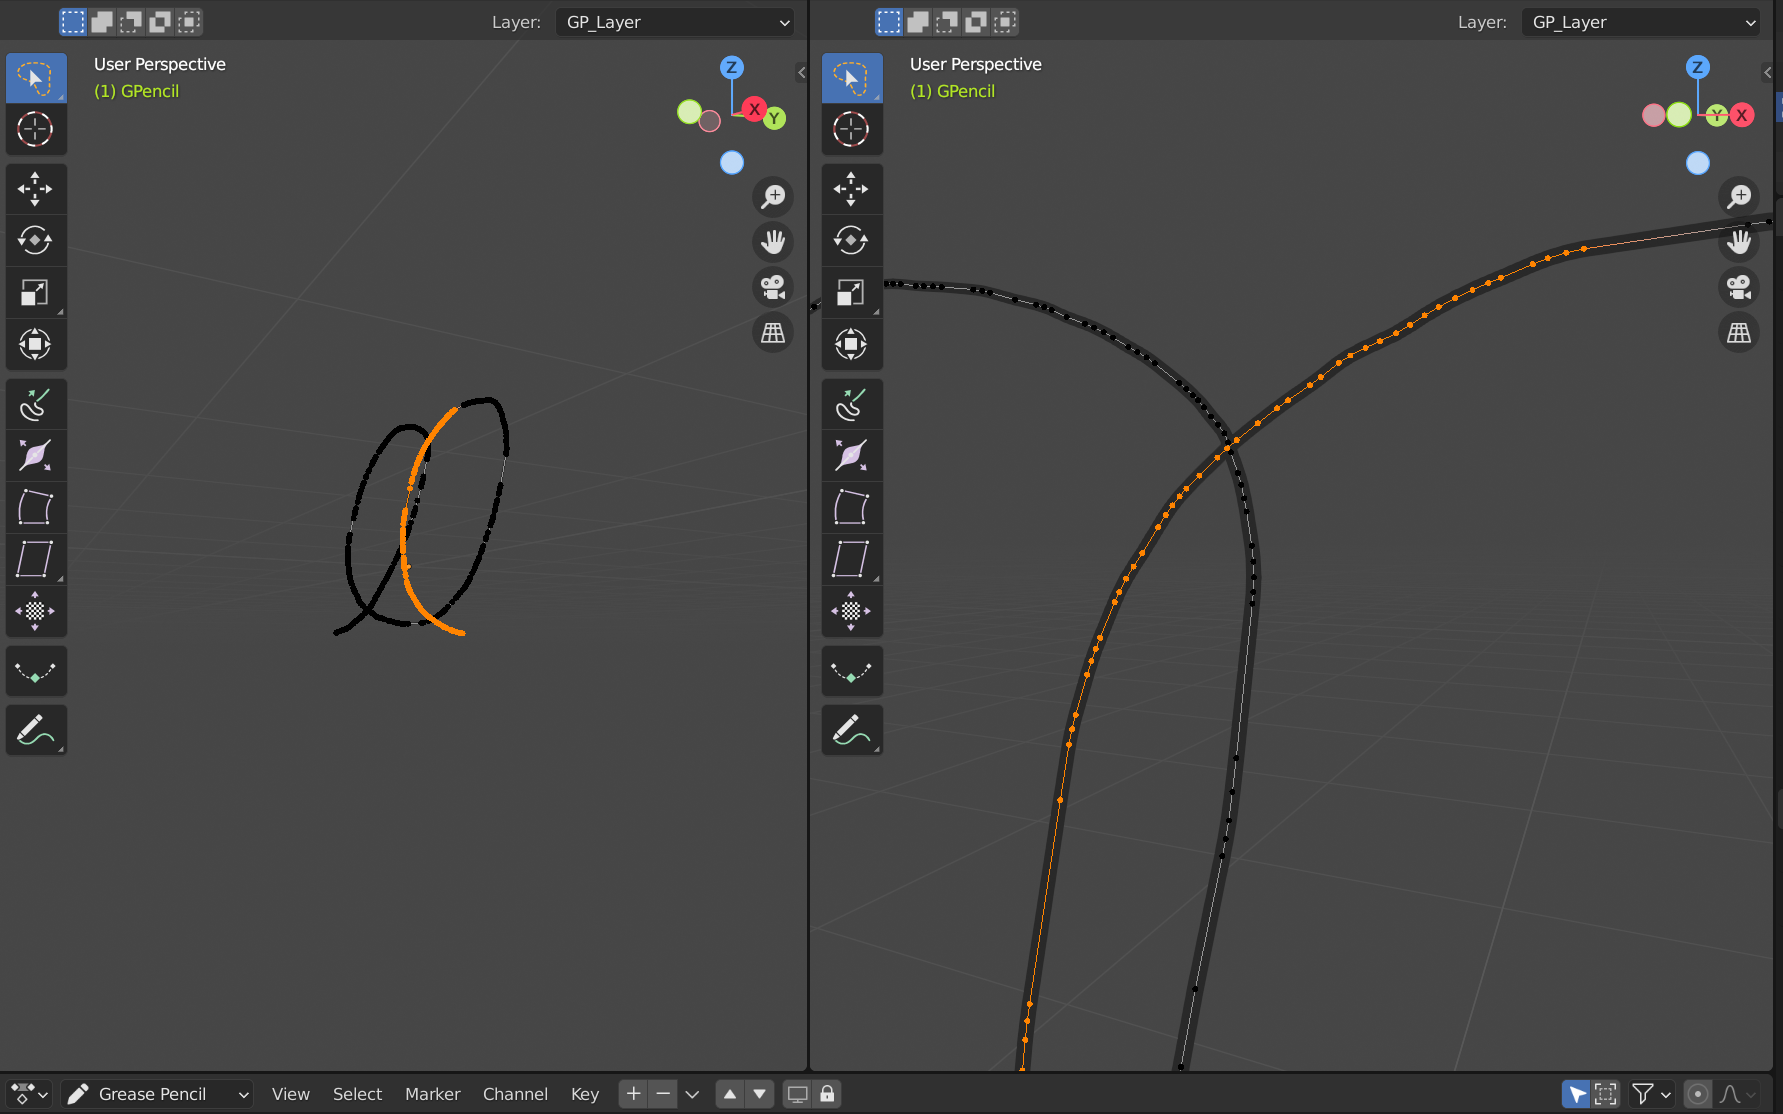
Here, you can see one handsome little pretzel standing tall and proud. Literally. Grease Pencil strokes in Blender are two-dimensional, but our drawing exists fully as a 3D object.
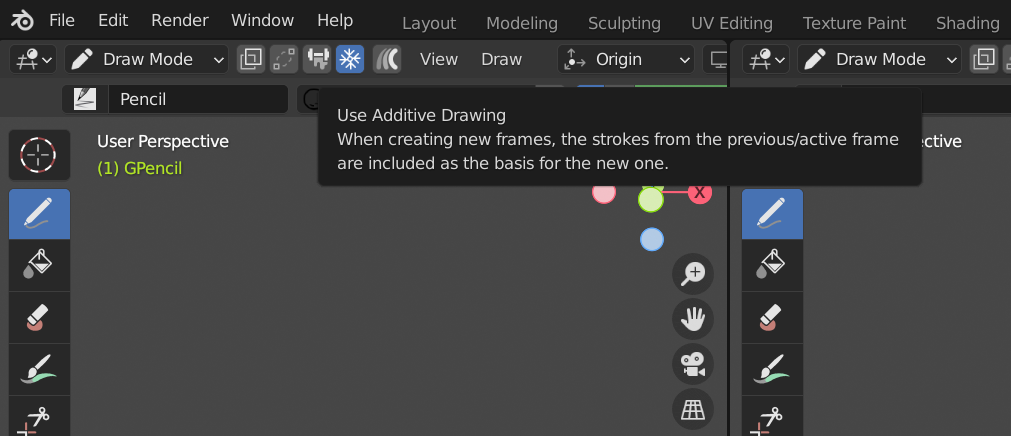
Adding another viewport window by dragging either rounded corner at the bottom of the staging area reveals the truth. You can build in 3D space by adding more strokes. Be sure to select Additive Drawing at the top if you want each subsequent stroke to join those beneath automatically.
This simple Grease Pencil tutorial can be used to lay the foundation for 2D animation or even just conceptual art and planning. You can also bend these 2D strokes to your will in 3D space through Edit Mode, which can be a lot of fun.
As for the rest of the Draw Mode tools to your right, many are self-explanatory:
- Fill, your average paint bucket tool.
- Erase, used to erase strokes that you've already drawn.
- Tint, used to paint onto strokes in order to change their base color.
- Cutter, used to target points between intersecting strokes.
- Eyedropper, used to pull references for a material that you would like to create.
- Line, used to make straight lines.
- Polyline, where you can create compound vector paths with sharp corners.
- Arc, to create arc lines.
- Curve, for a more traditional Bézier experience.
- Box and Circle, for simple quadrilaterals and circles.
- Interpolate, which averages out two keyframes in order to create a third, intermediary keyframe; this new breakdown keyframe will include additional, supporting geometry for a finer sense of control over your 2D animation.
If you're drawing to create 2D art or animation, you'll find a lot to play with here. What about those who need to convert a Grease Pencil object to mesh, though?
How to Use Grease Pencil Objects in Edit Mode
One of the coolest things you can do with Grease Pencil drawings in Blender is working with them as 3D meshes. How? We're glad you asked.
Once you've got something interesting in front of you, Tab on over to Edit Mode to see how your stroke exists as a 3D object in Blender.
Just like with any other object, you've got a couple of ways to interact with the geometry of a Grease Pencil stroke. At the top of Edit Mode, you'll see the usual suspects replaced with Grease Pencil-specific selection modes:
- Select Only Points, used to move individual points in the stroke.
- Select All Stroke Points, for selecting every point in a single, continuous stroke object.
- Select Points in Between, where you'll be able to select a string of points within a specified span.
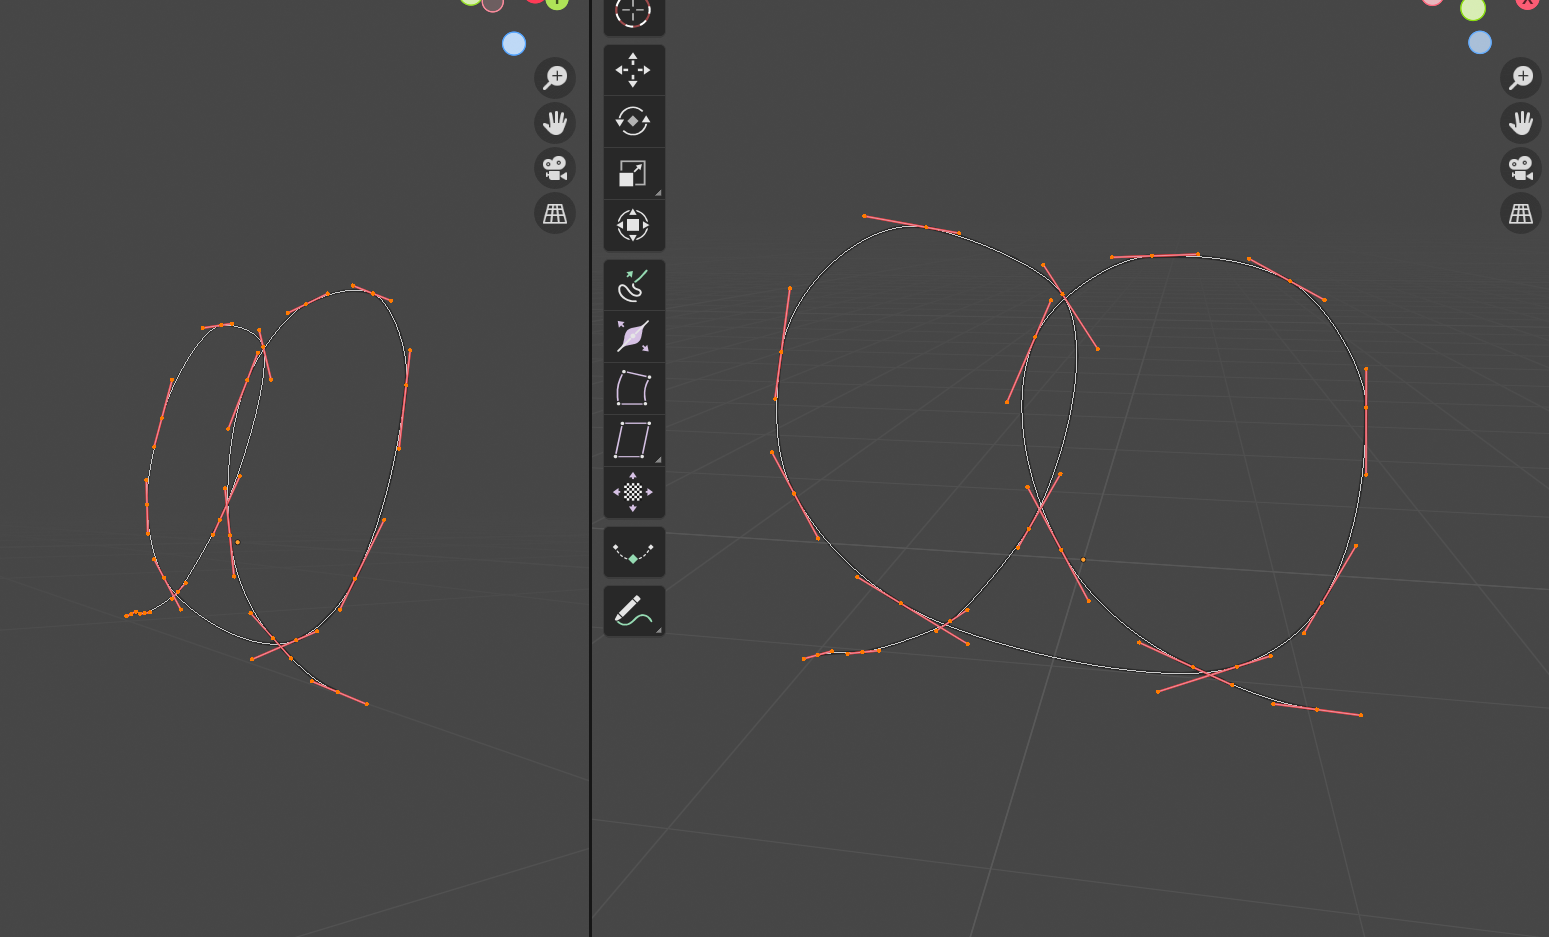
You'll also find Curve Editing here, as well, giving you Bézier curve handles to control the pitch of every slope with precision. It also happens to be one great way to clean up your Blender Grease Pencil mesh.
After hitting the Curve Editor and using the A command, you'll see every Bézier curve of your Grease Pencil drawing. You'll see significantly fewer points, the least amount possible while maintaining the integrity of the drawing.
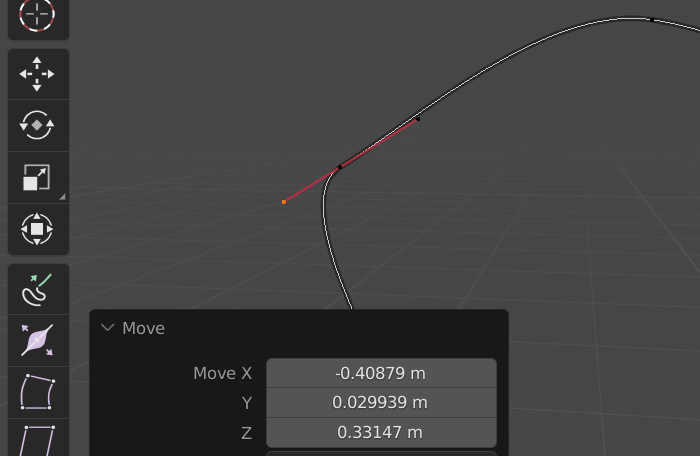
To adjust each Bézier curve's interpolation, select a single point on the mesh. Then, select one of the Bézier handles attached to either side.
Use G to guide each curve into place in 3D space. Once you're satisfied, toggle the Curve Editor back off. You should now have a totally uniform distribution of geometry points to work with, resulting in a Grease Pencil mesh that will be much easier to sculpt to perfection.
To remove extraneous points in your new Grease Pencil mesh, select the points that you'd like to remove and hit Delete. You don't want to delete any points, however. Instead, choose Dissolve, Ctrl + X, or any of the other Dissolve-related options below. The selected geometry will be removed, all without leaving a hole behind.
You can see how easy it would be to create artistic wireframe puppets or interesting secondary effects using Grease Pencil strokes. Hit O to enable Proportional Editing for an even more organic, natural, and granular experience.
We Love the Grease Pencil
When you step outside of the box of geometric primitives and Platonic solids, the world will be your oyster. This will be especially true if you're working with a tablet or any other touch-enabled display. The workflow is simple and intuitive; it's an incredibly inspiring way to build.
This tool allows you to draw freely in three dimensions, but we definitely encourage you to explore everything that the Grease Pencil has to offer in the way of 2D animation and design, as well. It's basically the magic wand that we've been waiting for our entire lives.

