
Ableton Live is a DAW that needs no introduction, and its combination of performance and production features mean it’s as popular with performers and DJs as it is with creators.
Live 11 Lite is a cut-down version of Ableton Live, with all of the essential workflows, instruments and effects, but with limited track count, and for many years this has been bundled with apps and hardware products. This month, you can grab a free copy of Ableton Live 11 Lite with the latest issue of Computer Music Magazine.
To mark this momentous occasion and also to get you started using this fabulous software, we’ve put together a series of tutorials that run through everything you need to get acquainted with Ableton Live 11 Lite, so you can learn how to build a track from scratch.
Our tutorials are primarily for new users, but that said, we’ll also flag some of the new features you’ll find in Live 11 Lite, so even if you’ve used Live Lite before, there may be some things for you to learn here.
Finally, although Live 11 Lite is awesome software, there are more fully featured versions of Ableton Live available on Ableton's website. So, let’s get creating in Live 11 Lite!

Step 1: Session View can also handle audio, and although you might not want to record a full vocal performance this way, it’s ideal for capturing smaller audio parts. Here we’re going to add two audio parts, a guitar riff and a shaker. Both parts will be mono, so to get started we select a single input (Input 1 for us) on the track.

Step 2: With our source plugged in, we can activate the Auto Monitor option on the track. Select the Record button and get ready to record. We also want a count in, so head to the application top bar and next to the time signature choose the drop-down menu and select your required count in. We’ve chosen one bar.

Step 3: To start recording a new audio clip, simply click on the Record button in an empty clip slot. Once you’ve recorded your part, hit Stop on the main transport and you’ll see your audio in the Sample Editor at the bottom.

Step 4: Although we’ve recorded a full 8-bar section, on listening back we’ve decided to loop just bars 3 and 4, so the first thing to do is set these loop points. As before, we can do this using the loop parameters, or simply by dragging in the markers in the Clip Display to create a loop brace.

Step 5: Our 2-bar guitar riff sounds OK, but we can tighten the timing by shifting a few notes. This is incredibly easy in Live Lite and creating new ‘warp markers’ is as simple as double-clicking in the marker area above the waveform. You can see the orange warp markers and we’ve adjusted these to improve the timing.
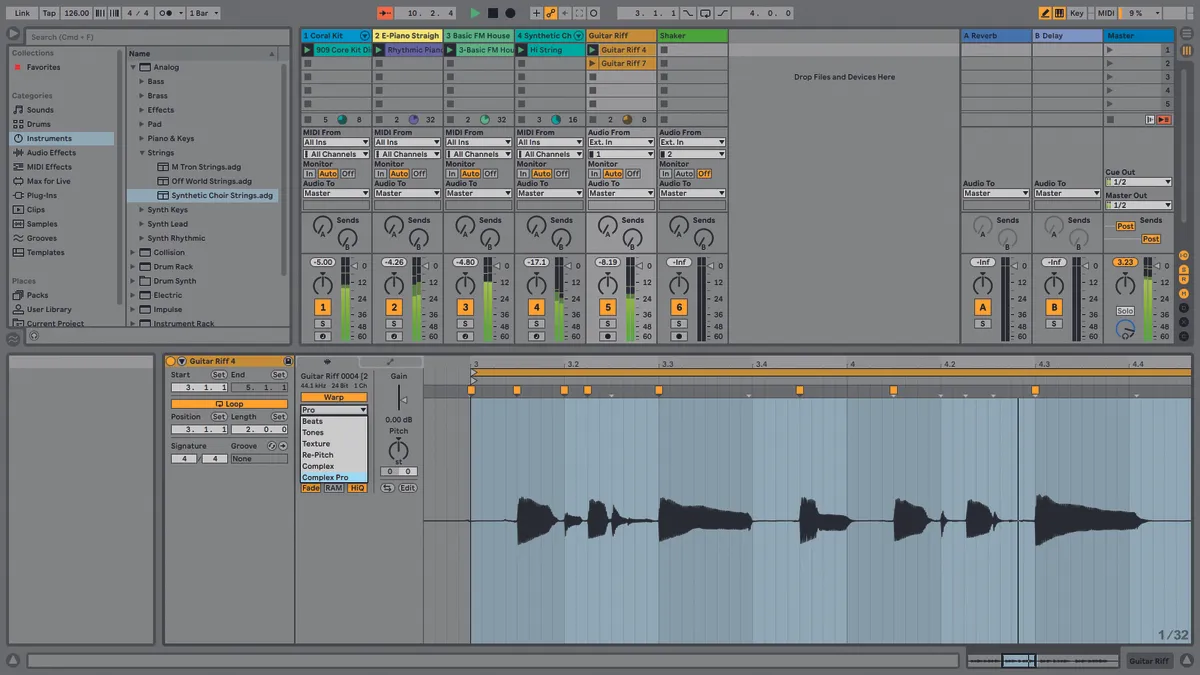
Step 6: Importantly, Live Lite incorporates various different time-stretching algorithms. Using the warp markers to fix the timing of the guitar part makes use of this and it’s important you use the one that sounds best. You’ll find this to the left of the Sample Editor and we’ve opted for the Complex Pro setting.

Step 7: When we recorded our guitar riff, we actually did two different versions, one low octave and one high octave. We’re now going to edit the higher octave in the same way. Again, the timing has been adjusted using the warp markers and a suitable timestretch algorithm selected.

Step 8: Now let’s record the shaker. Select the next audio track and assign the input. We have our mic connected to Input 2 so for us this is Input 2. As before, activate the Record Arm button at the bottom, select an empty clip and start recording by clicking on its Record button.

Step 9: Once again, we’ve chosen a couple of bars we like and set our loop points accordingly. The timing could be a bit better, but this time we’re going to use quantise to fix it. Select a 2-bar section and open the quantise dialogue as before. Here we’ve selected 1/16ths and only 80% to leave some feel.


