

Over the years, Connected Devices has become better and better with closer connections between your Chromebook and your Android phone. With advances in Phone Hub, our phones and Chromebooks work better together now than they ever have before, and more cool stuff is planned for the future, too. It shouldn’t be too long before we begin seeing the new Eche feature in play that will allow for messaging apps like WhatsApp to simply mirror your phone’s built-in interface in a pop-up window on your Chromebook for basic app interactions.
Sometimes things go sideways
But all that cool collaboration can’t happen if your phone won’t connect to your Chromebook in the first place, and that’s exactly what happened to me recently. I’m testing out the Samsung Galaxy Z Fold 3 and even though it shows up in my Google account and is registered in all the proper ways, it absolutely would not show up as an eligible device for my Chromebook to select for the Connected Devices section.
This has happened to me once before and I never found a way around it in the past, so this time I was determined to find a solution. After all, if my device is clearly showing up in my Google account, the Messaging app is syncing between the two and everything else lines up, there’s no reason Connected Devices and Phone Hub on my Chromebook shouldn’t work.
If this is the place you find yourself, there is a relatively-quick fix that worked for me and I’ve even had to do it twice in the past few days, so I can confirm it is a solid solution to the problem. Thanks to a simple post in the Chromebook Help forums, there is a process you can do that only takes a couple minutes, but isn’t intuitive in the slightest. Once you are done, you should be up and running pretty quickly. So let’s get into it.
Get the Google Phone app
I tried this process with the built-in Samsung dialer application and it didn’t work, so I’d recommend just downloading the Google Phone app for this process as you can simply delete it later if you don’t want it around. With this being the Google-made dialer application, there are likely a few dialer-specific codes that will only work with it, so your quickest route will be installing this app and doing the first step with it instead of your default phone app.

Once you have the Google Phone app installed, open the dialer and enter *#*#2884936#*#* via the number pad. After doing so, you will see a quick toast notification on your screen that should say “Forcing CryptAuth enrollment” and you are already done with step one. If you’d like, you can remove the Google Phone application from your device at this point.
Sync your Chromebook’s device enrollment
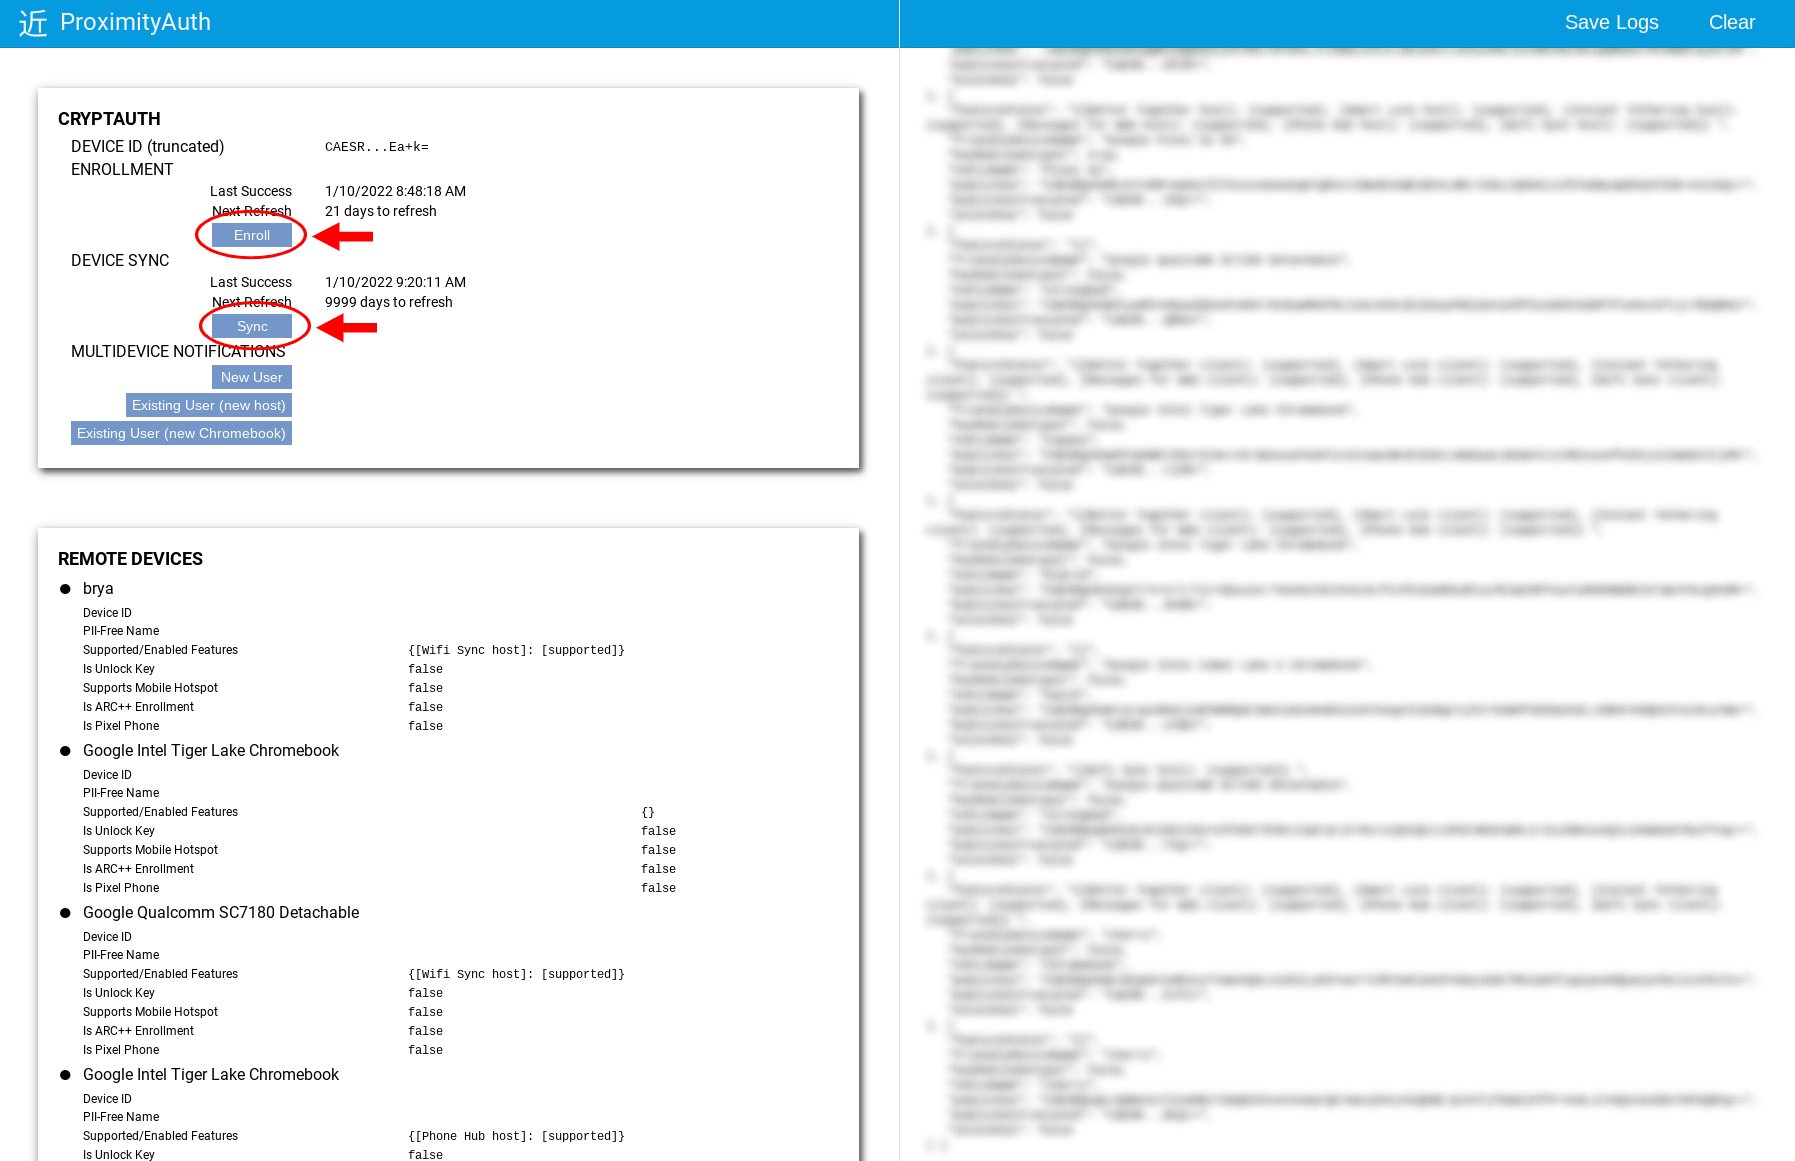
The next step takes place on your Chromebook and needs to be done after the step listed above. You’ll simply need to head to chrome://proximity-auth and from there, hit the Enroll button followed by the Sync button. This should only take a few seconds on each, but let the processes finish up before moving on.
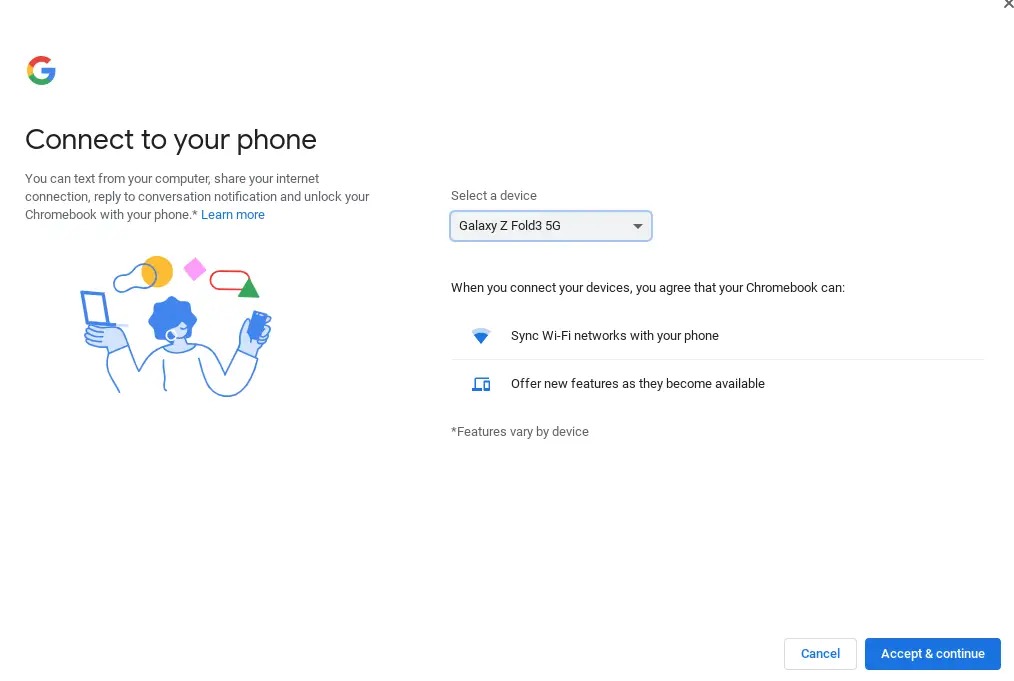
Find your phone in Connected Devices
Finally, you should now be able to head over to your Chromebook and go to Settings > Connected devices > Set up and once you hit that button, a drop-down menu with only your recent devices should be seen.
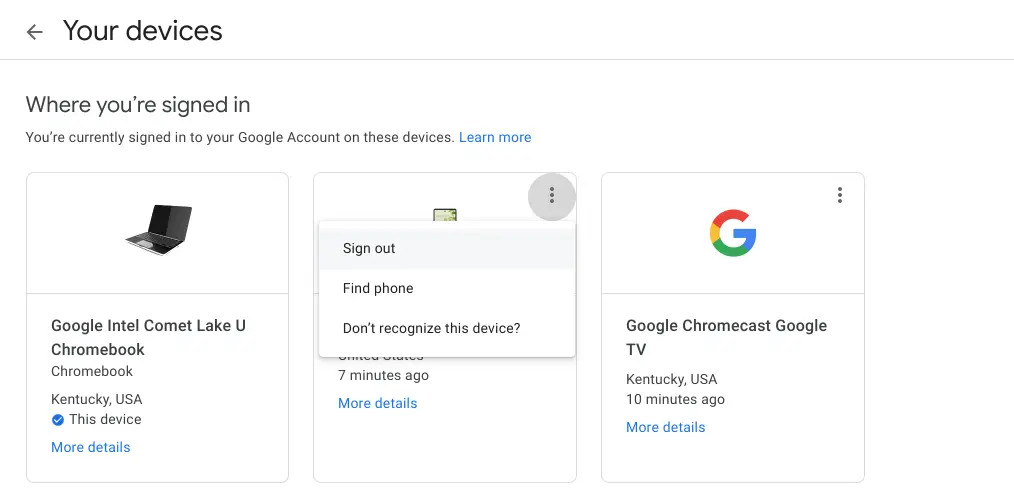
As an addition to this process, I’d also recommend going to your Google account (myaccount.google.com) navigate to Security > Your devices > Manage devices and use the 3-dot menu above any device you no longer use to sign out of those devices. This isn’t necessary to get your Connected Devices working, but it sure cleans things up a bit if you tend to sign in and use a bunch of phones or Chromebooks.
That’s it! These steps should have you up and running with your phone connected to your Chromebook in all the right ways. There are tons of benefits of having this up and running, and more are on the way. When something that tends to work without any issues all of the sudden becomes a mess, it can be very frustrating. Hopefully, if you were in that spot with this particular issue, this quick guide helped you out.
Newsletter Signup

Leave a Reply
You must be logged in to post a comment.