How to Turn Your Sonos Into Computer Speakers

We don’t really recommend doing this. However, it is possible to use Sonos speakers as computer speakers.

sonos speakers on a desk next to a computerTucker Bowe

Every product is carefully selected by our editors. If you buy from a link, we may earn a commission. Learn more

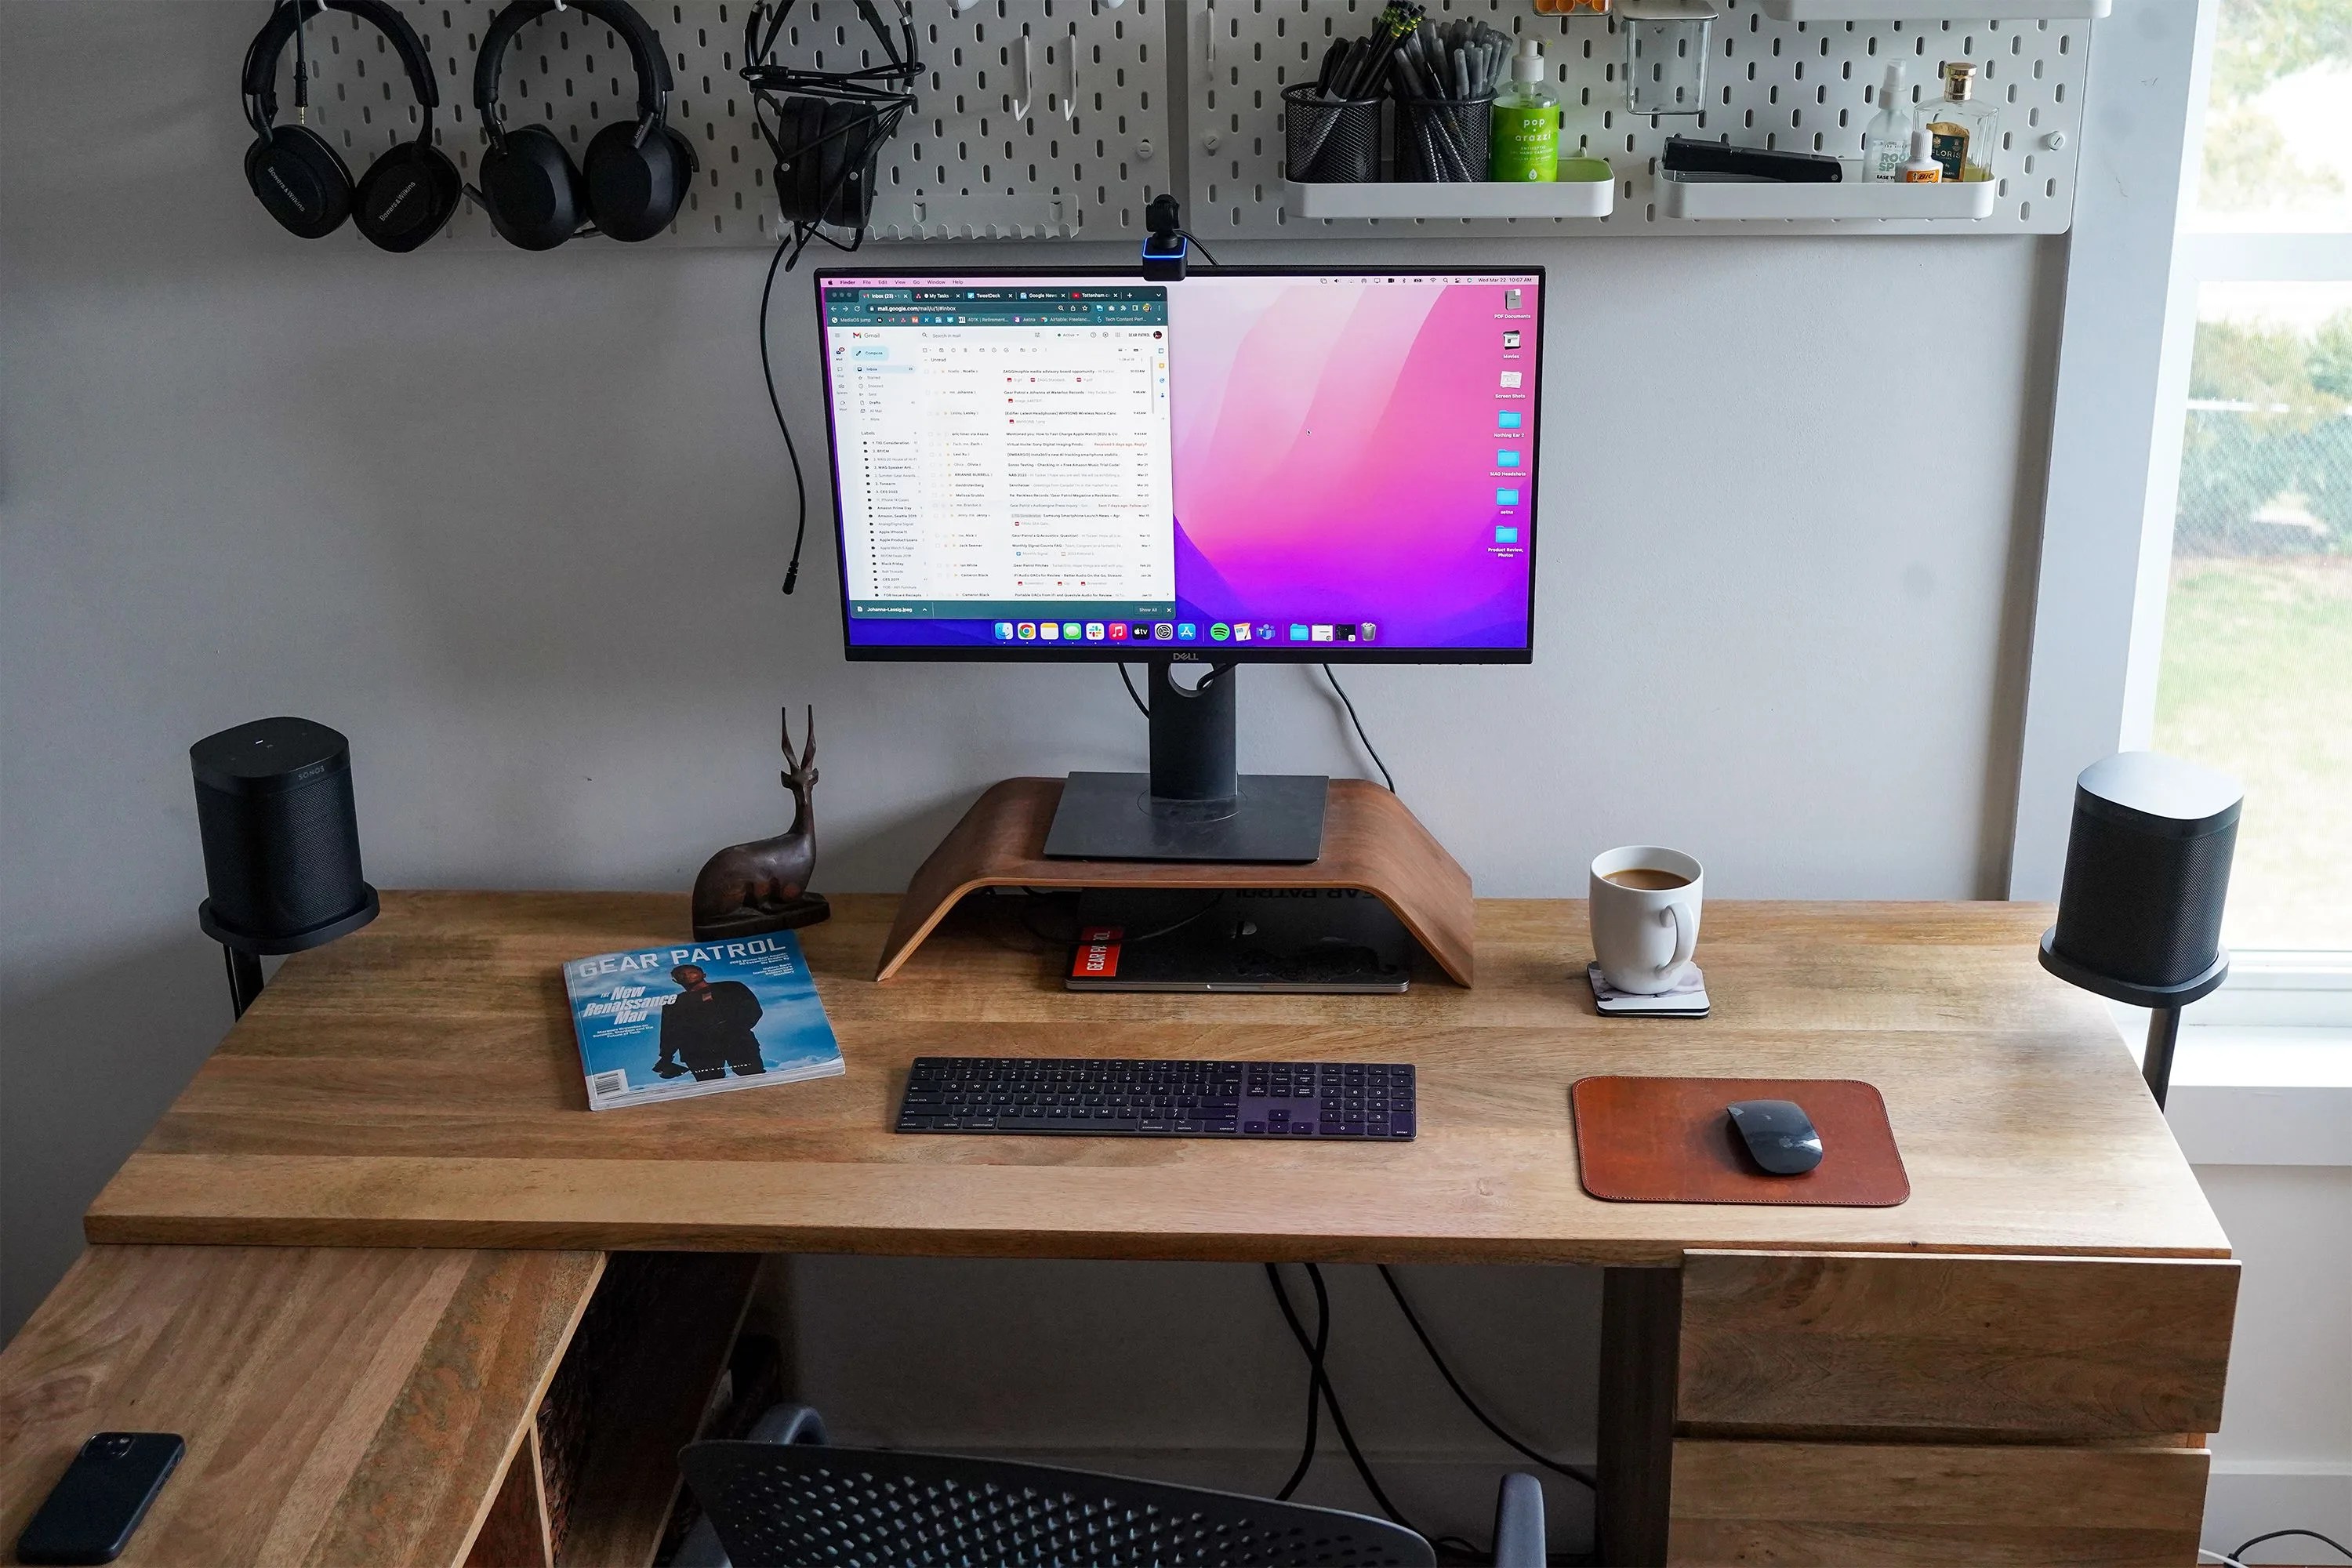
Sonos doesn’t make computer speakers. And despite how closely some of its speakers look the part (specifically the Play:1, One, One SL and new Era 100), that’s not how they were intended to be used. That said, if you’re dead set on using Sonos speakers as your computer’s default speakers, it is possible — and it’s especially easy if you have a Mac.

It wasn’t always very easy to turn your Sonos speakers into your Mac speakers, but that changed in 2021 when Apple rolled out its Big Sur 11.3 macOS update. This release allows you to better use any speaker that supports AirPlay 2 as your Mac’s default speakers. It’s not a perfect solution — and we’ll get into that shortly — but it’s easier and better than it was in past years.

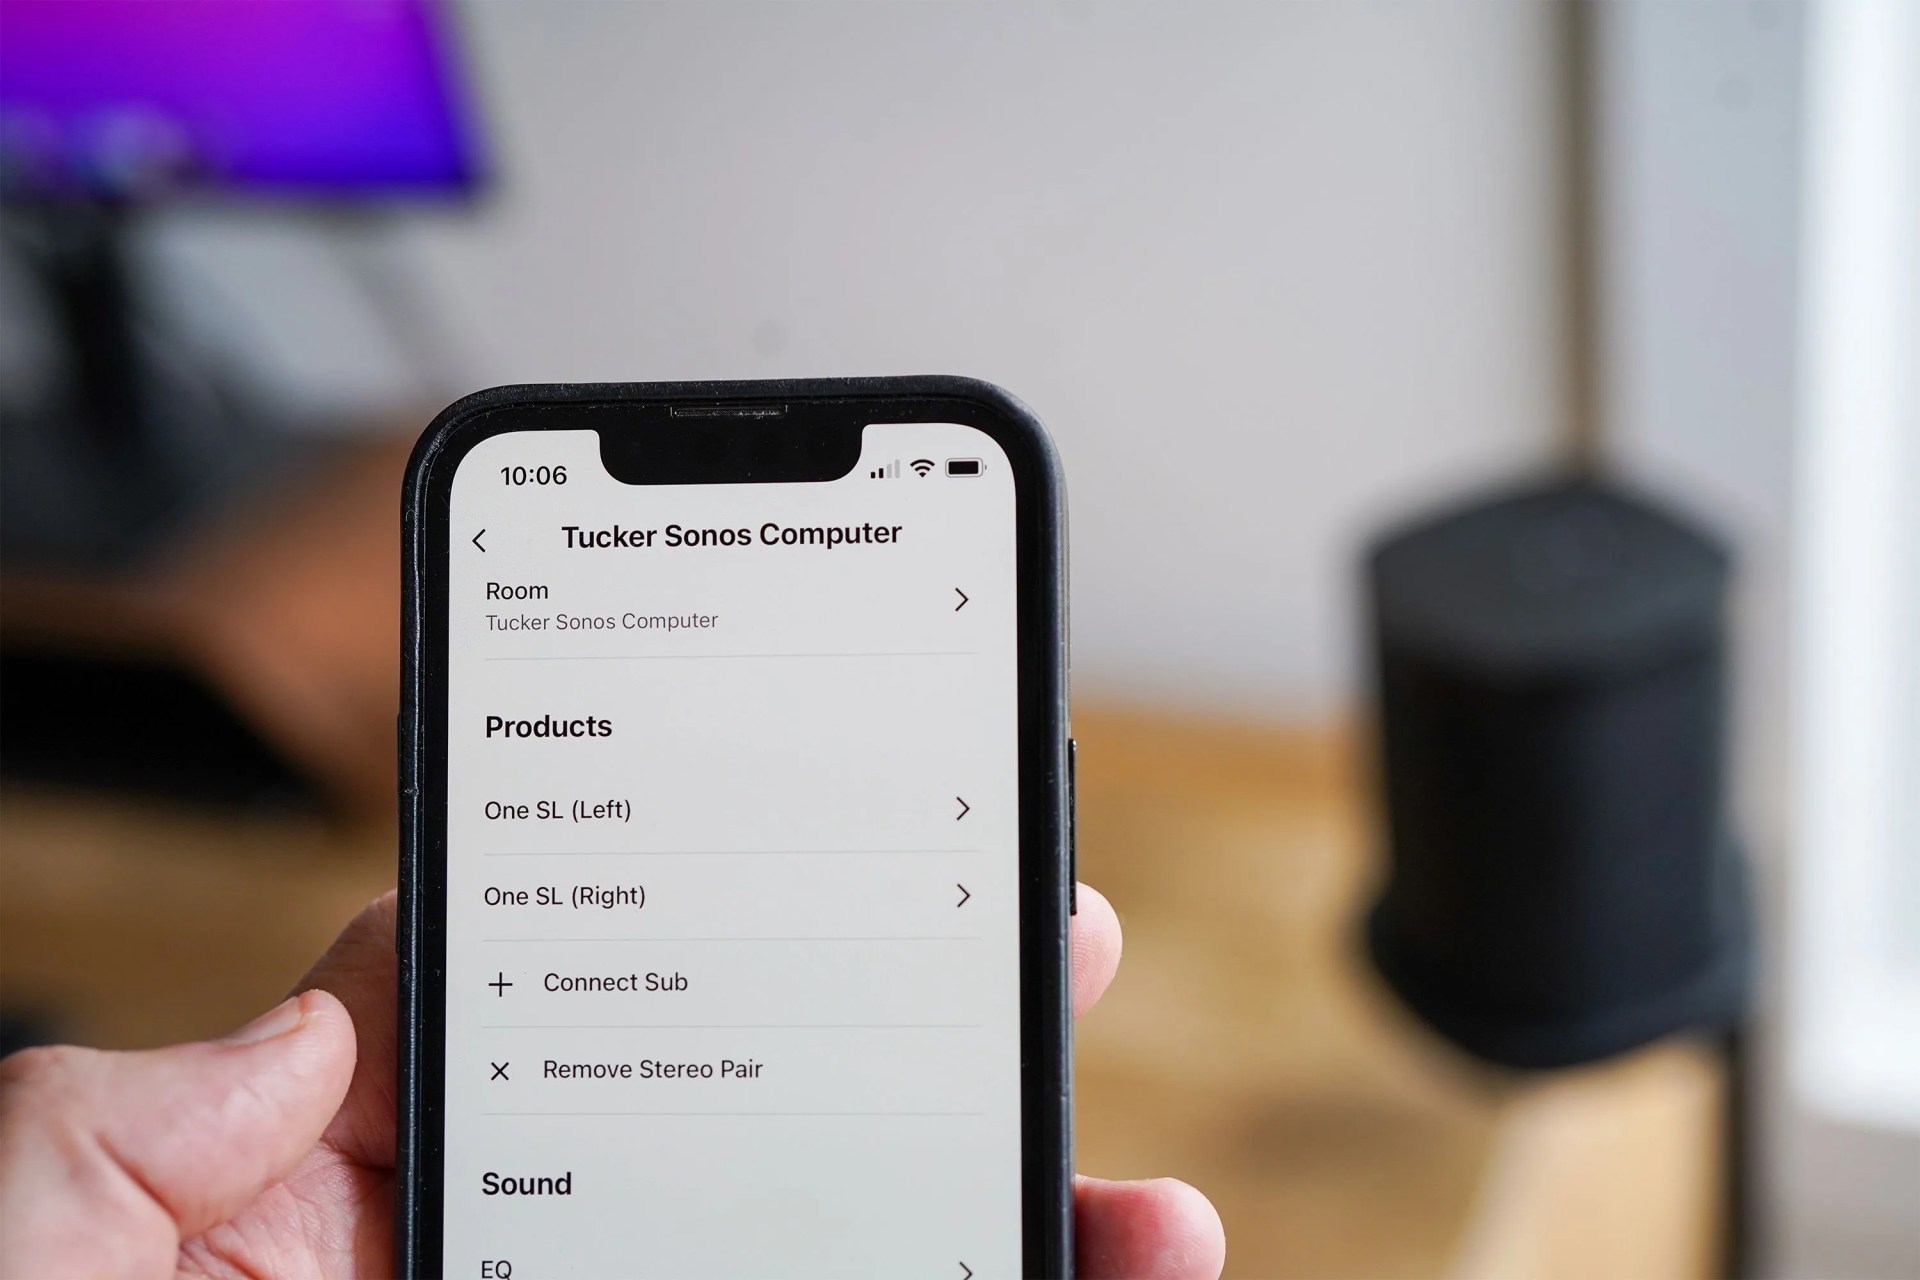
In short: The process of using one or two Sonos speakers (the latter for a stereo pair) as your Mac’s default speakers is very similar to how you would use one or two HomePods as your Mac’s default speakers. You need to stereo pair the two speakers — must be the same model of speaker, so two Ones or two Play:1s — within the Sonos app, and then you can stream audio to them from your Mac via AirPlay.

best home speakers gear patrol sonos oneSonos

Sonos One

Specs

Drivers One mid-woofer, one tweeter
Amplification Two Class-D digital amplifiers
Connectivity Wi-Fi, Ethernet
one slSonos

Sonos One SL

Specs

Drivers One mid-woofer, one tweeter
Amplification Two Class-D digital amplifiers
Connectivity Wi-Fi, AirPlay 2, Ethernet
sonos era speakerSonos

Sonos Era 100

Specs

Drivers Two angled tweeters, one midwoofer
Amplification Three Class-D digital amplifiers
Connectivity Wi-Fi, Ethernet, Bluetooth, line-in (USB-C)

How to Stereo Pair Your Sonos Speakers

a hand holding an iphone with a desk in the background
Stereo pairing two Sonos speakers is pretty easy and can be done within the Sonos app.
Photo by Tucker Bowe

You can only stereo pair two of the same model of Sonos speakers. This means you need two Play:1s, two Ones, two Era 100s or two Fives, for example. You cannot create a stereo pair with different model Sonos speakers, like a One and an Era 100. SL and non-SL varieties of a speaker count as the same speaker, for pairing purposes. You can create a stereo pair with a One and a One SL, or a Roam and a Roam SL.

Before creating a stereo pair, both Sonos speakers need to powered on, set up and connected to your home’s Wi-Fi. From there you can stereo pair them within the Sonos app. Here’s how:

  1. Open the Sonos app.
  2. Tap the Settings tab (located in the bottom-right corner).
  3. Select one of the Sonos speakers you want to create a stereo pair.
  4. Select “Set Up Stereo Pair” and follow the in-app instructions.

For more info on creating a stereo pair, check out Sonos’s support page.

How to Use Sonos Speakers As Mac Speakers via AirPlay 2

sonos speakers on a desk next to a computer
I have two One SLs configured as a stereo pair. I stream my Mac’s audio to them via AirPlay 2.
Photo by Tucker Bowe
sonos speakers on a desk next to a computer
I have my stereo paired One SLs named “Tucker Sonos Computer.”  
Photo by Tucker Bowe

After your two Sonos speakers are stereo paired, it’s pretty easy to set them up so that they are your default Mac speakers. There are two ways of doing this:

Option #1:

  1. Select the sound icon located in your Mac’s menu bar.
  2. Scroll down and select your stereo-paired Sonos speakers.

If your sound icon isn’t located on your Mac’s menu bar, you’re going to want it to be — because the AirPlay connection is going to frequently be severed if your Mac falls asleep or if you don’t play audio for a period of time. To make your sound icon appears on your Mac’s menu bar, go to System Preferences > Sound > and select the bottom option that says “Show Sound in menu bar” > and select “always” in the drop-down menu.

Option #2:

  1. Open System Preferences on your Mac.
  2. Select “Sound” on the side panel.
  3. Under “Output & Input”, make sure that you have Output selected.
  4. Select your stereo-paired Sonos speakers.

The Problem with AirPlay 2

The main reason why using AirPlay to turn your Sonos speakers into Mac speakers isn’t a great option is the connection will constantly get disrupted.

Every time your Mac falls asleep or gets turned off, the AirPlay connection will get severed. Also, if you’re using one of Sonos’s smart speakers (like the One), the connection will break every time you ask something via “Hey Alexa” or “Hey Sonos.”

Reestablishing the AirPlay connection is quick and easy — you just follow the above steps to make them your Mac’s default speakers again. However, you’ll likely find the process of having to reconnect them over and over again pretty annoying after awhile.

How to Use Sonos Speakers As Computer Speakers via Line-In

sonos-computer-speakers
If you have a Five or Play:5, you can simply use a standard 3.5mm to 3.5mm cable and connect your speaker and your computer (via its headphone port).  
Photo by Tucker Bowe
sonos-computer-speakers
Once connected, you just have to select your headphone port as your sound output in your computer’s audio settings. This works for Mac or PC. 
Photo by Tucker Bowe

If you have a PC — or a Mac and you don’t want to use AirPlay — another option is using a line-in (or aux) connection. You need to have a Sonos speaker (or preferably two of them for a stereo pair) that supports a line-in connection; there are only three Sonos speakers that support a line-in connection: Era 100, Era 300 and the Five (as well as the discontinued Play:5).

To do this, you’ll also need a dongle and likely an adapter.

• If you have a Five or Play:5, both of which have a line-in aux port on their back, you’ll just need a 3.5mm to 3.5mm aux cable like this one, which cost seven bucks.

• If you have an Era 100 or Era 300, which have a USB-C line-in port on their back, you’ll need a 3.5mm to 3.5mm aux cable as well as Sonos’s special Line-In Adapter, which costs $19.

sonos era speaker
The Era 100 is one of the few Sonos speakers that supports a line-in connection, with additional accessories. 
Sonos
sonos line in adapter
Sonos sells a special adapter for $19 that you need to use (along with an aux dongle) to hardwire your computer to either the Era 100 or Era 300. 
Sonos

From here, you just need to hardwire one of your Sonos speakers to your computer via its aux port. If you have two of the same speakers — like two Era 100s — you’ll want to first create a stereo pair (see steps above) and then hardwire one of those speakers into your computer; they will stay stereo paired when you designate one as your computer’s default speaker.

  1. Connect the Sonos speaker to your computer via a 3.5mm to 3.5mm dongle. (The Era 100 and Era 300 also require you to have Sonos’s adapter.)
  2. Select the Sonos speaker as your computer’s default speaker (open the Settings app on your computer > select System Preferences > Sound > Output > select the Sonos speaker).

You’re not done yet! There are two more settings you’re going to want to adjust for the best line-in experience while using your Sonos speakers as computer speakers.

How to Turn On Autoplay

sonos-computer-speakers
Once connected, you’re going to want to change some of your Sonos speaker’s line-in settings. 
Photo by Tucker Bowe
sonos-computer-speakers
The Play:5, Five and Era 300 are all probably overkill for using with your computer. But if you want to use them as computer speakers, you absolutely can. 
Photo by Tucker Bowe

Once you’ve successfully set your Sonos speakers as your default computer speakers, you’ll want to turn Autoplay “on” in the Settings menu of the Sonos app. This will allow your Sonos system to play automatically when it detects a sound coming from the line-in connection. If you don’t turn this setting on and you stream music to your Sonos speakers rather than just using them as computer speakers, you’ll likely have to go through the whole process of resetting them up again as your computer’s default speakers.

  1. Open the Sonos app on your smartphone.
  2. Select Settings (in lower-right corner).
  3. Select the speaker with the line-in connection.
  4. Scroll down to Line-In, select “Autoplay” and make sure it’s turned on.

How to Adjust Audio Delay

tech
Just as if your Sonos speaker were hardwired to a turntable, you’re going to want to adjust its audio delay so that there’s as little delay between the audio and video as possible.
Tucker Bowe

Last step: When using a line-in connection, Sonos naturally has an audio delay — there will be a one- or two-second playback delay with the sound. This means your video and sound likely won’t be lined up. And you obviously don’t want that.

The reason for this audio delay is that the Sonos speaker is doing some digital signal processing (or DSP) to optimize its sound and prevent distortion. According to Sonos, the audio delay “reduces the chance of audio issues occurring when your Sonos products are playing line-in audio in a group.” The problem is that this audio delay defeats a lot of the purpose of using your Sonos speakers as computer speakers. The good news is that you can adjust it.

  1. Open the Sonos app > select Settings > and select System.
  2. Select your speaker with the Line-In connection.
  3. Scroll down and select Audio Delay > select Low (75ms).

In this menu, there are four different audio delays that you can choose from: Max (2,000 ms), High (150 ms), Medium (113 ms) and Low (75 ms). By default, the Line-In connection of your Sonos speaker is set to Max, which is 2,000 milliseconds or two seconds; this allows for the most time for the Sonos product to optimize its sound. The Low setting has an audio delay of 75 milliseconds. It’s still a delay, but it’s far less noticeable.

, ,