How to Dehydrate Bananas
This post may contain affiliate links.
Whether it’s for crunchy dehydrated banana chips or chewy dried banana leathers, there are so many great reasons to dehydrate your own bananas!
While banana bread is the typical go-to when you find that you’ve got a few too many bananas on your hands, another great option is to dehydrate them! Not only are dehydrated bananas soft, chewy, sweet, and loaded with concentrated banana flavor, but if properly stored, can be shelf-stable for upwards of a year!
There are so many great ways to use dehydrated bananas. Use them as a topping for cereal, yogurt, or oatmeal. Add them to your favorite trail mix. Use banana chips as “dippers” for peanut butter. Serve them on top of burrito bowls like plantains. Or just enjoy them on their own!
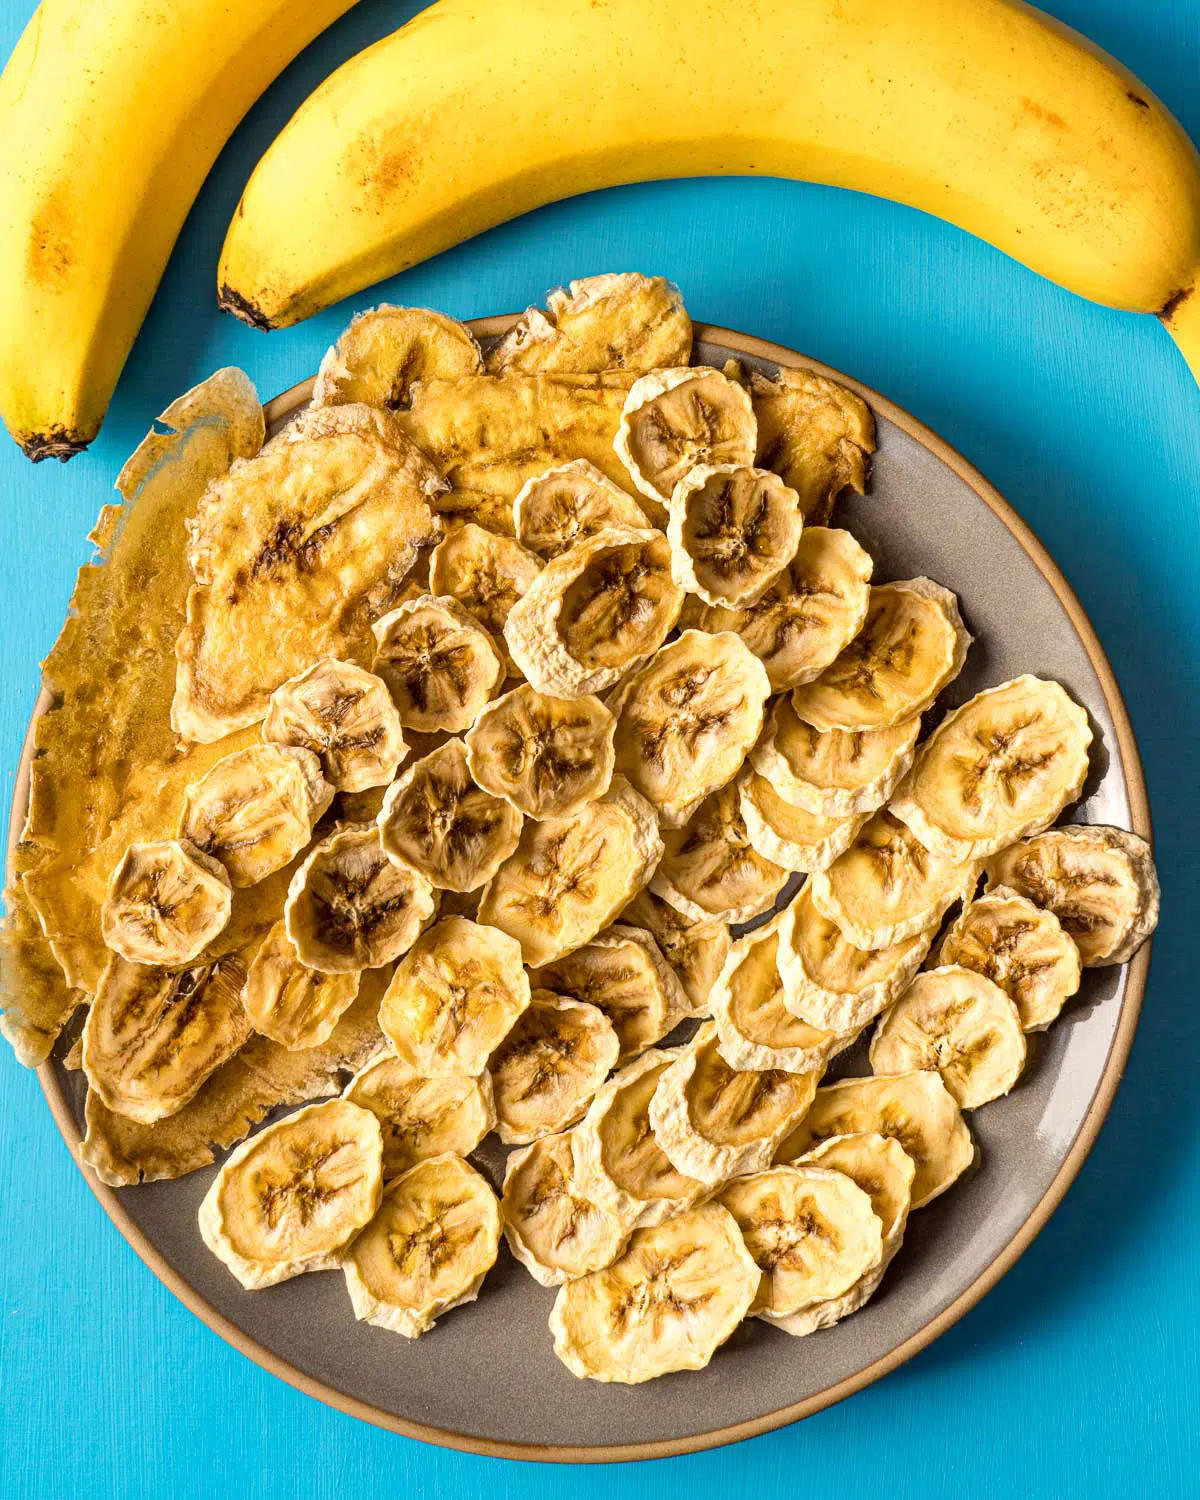
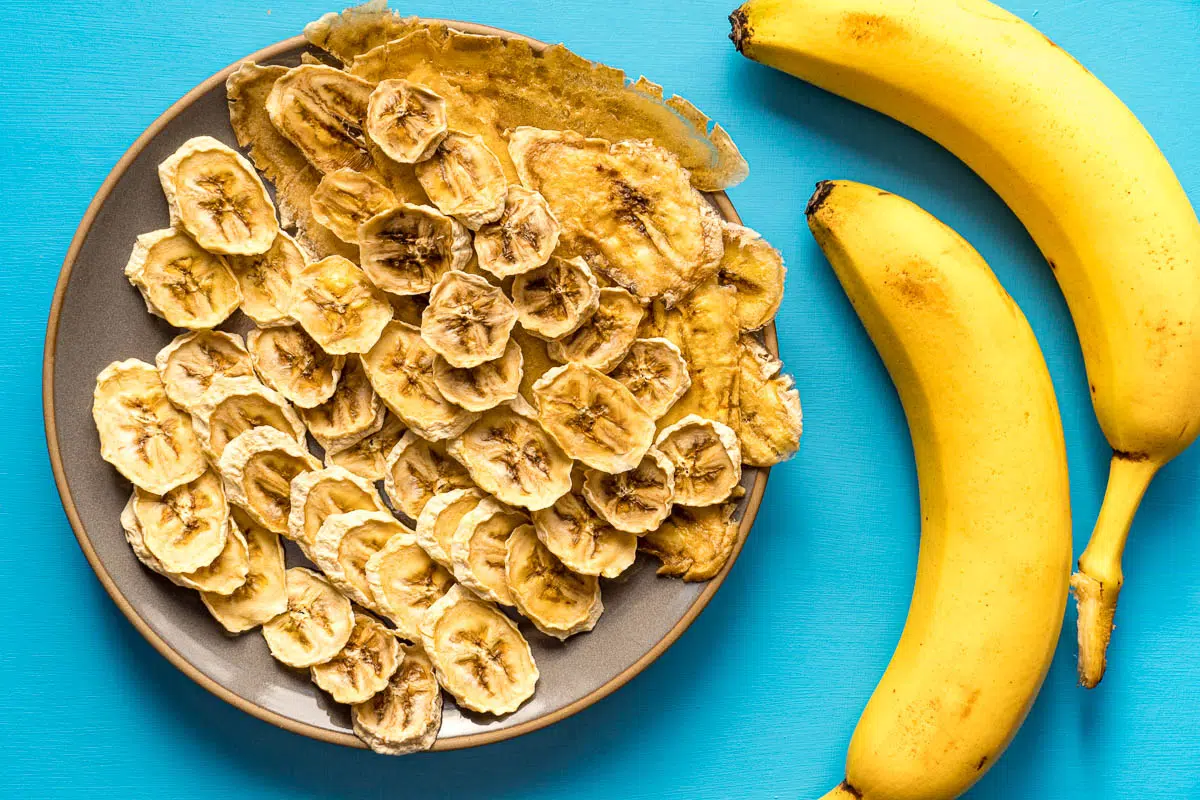
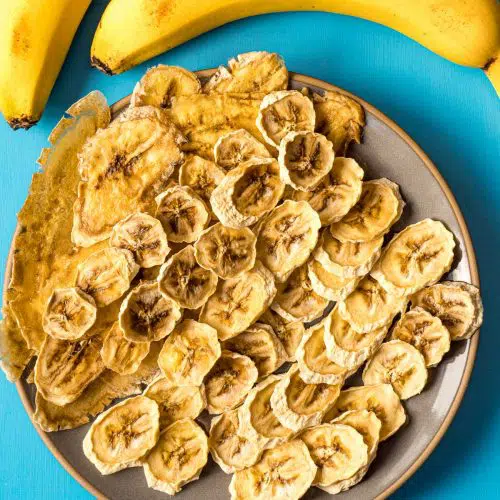
Our two favorite versions of dehydrated bananas are the classic chip and the smashed banana leather. The former uses just-barely ripe bananas while the latter uses heavily ripened bananas. So no matter what stage your bananas are at, there’s a method that will work for you.
So who’s ready to dehydrate some bananas? We’re here to tell you everything you need to know down below.
Prepping bananas for dehydrating
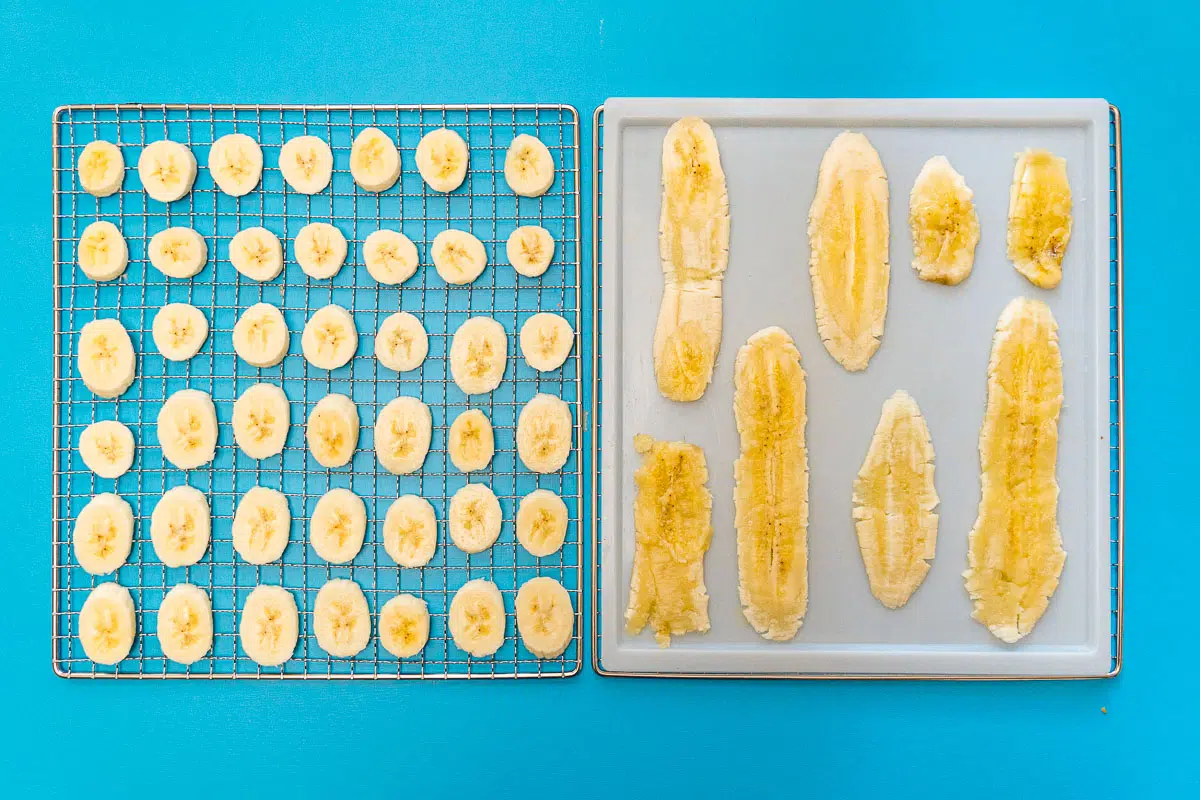
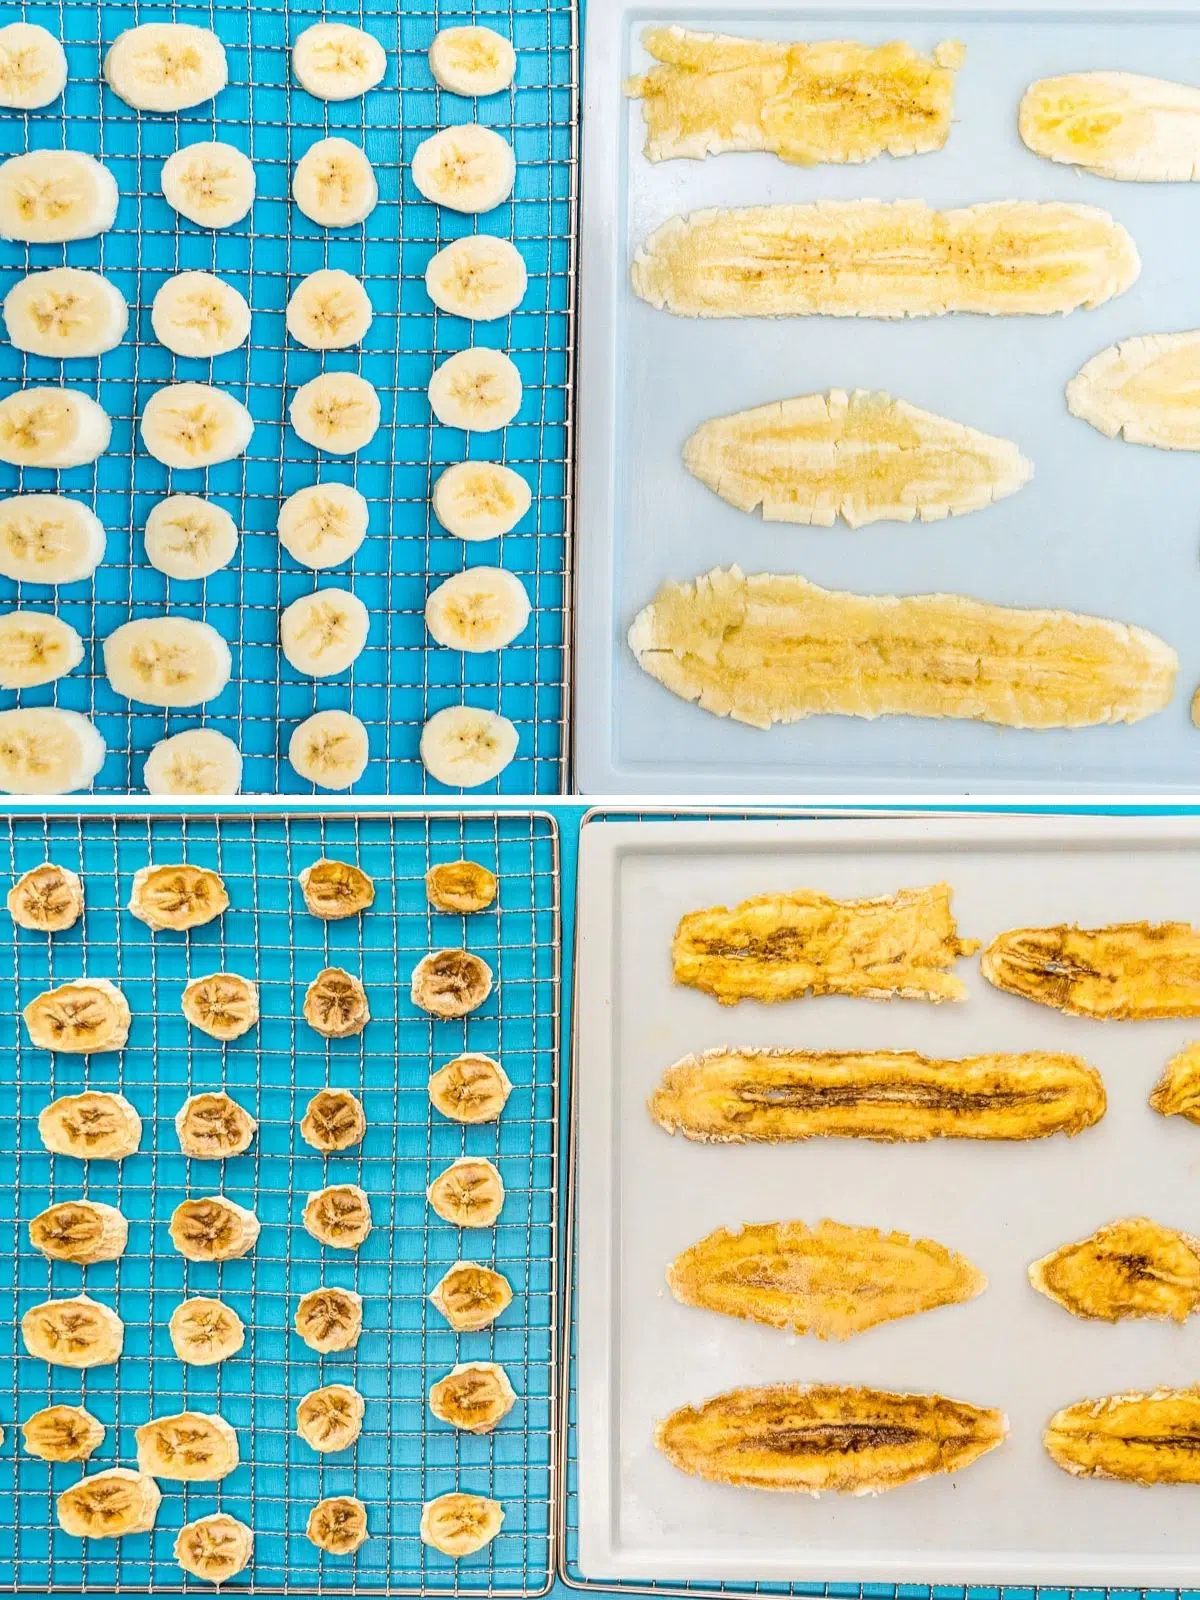
- Slice the bananas: Using a sharp knife or mandoline, slice the bananas into ¼”-⅜” thick rounds. Try to keep the pieces to a uniform size to help with even drying.
- For banana “jerky” you can slice the bananas lengthwise into long, ¼” thick slices.
Equipment Spotlight: Dehydrators
If you’re in the market for a dehydrator, we recommend buying one that has an adjustable temperature, which will allow you to dial in the drying temp to give you the best results for individual ingredients. The dehydrator we recommend (and use) most often is the COSORI Premium. You can also check out our best dehydrators post for a comparison of all the dehydrators we’ve used and would recommend.
How to dehydrate bananas
Drying bananas is pretty simple! After prepping the bananas and once your counters, equipment, and hands are clean, set up your dehydrator and follow these steps:
- Arrange the bananas on your dehydrator trays. If you’re using a tray that has large holes, line it with parchment paper or, even better, a mesh liner cut to the size of your tray. Leave space between the pieces to allow air to circulate.
- Dehydrate at 135ºF (52ºC) for 6-12 hours until the banana is dry and leathery.
- Depending on your machine, you may need to rotate the trays every so often to promote even drying.
How to tell when bananas are done
Bananas should be leathery when they are completely dried. To test, remove a slice and let it cool. It may have some bend but if you tear one in half and squeeze it, there should be no moisture that seeps out. If they have any signs of remaining moisture, put them back into the dehydrator or oven to dry longer.
How to store
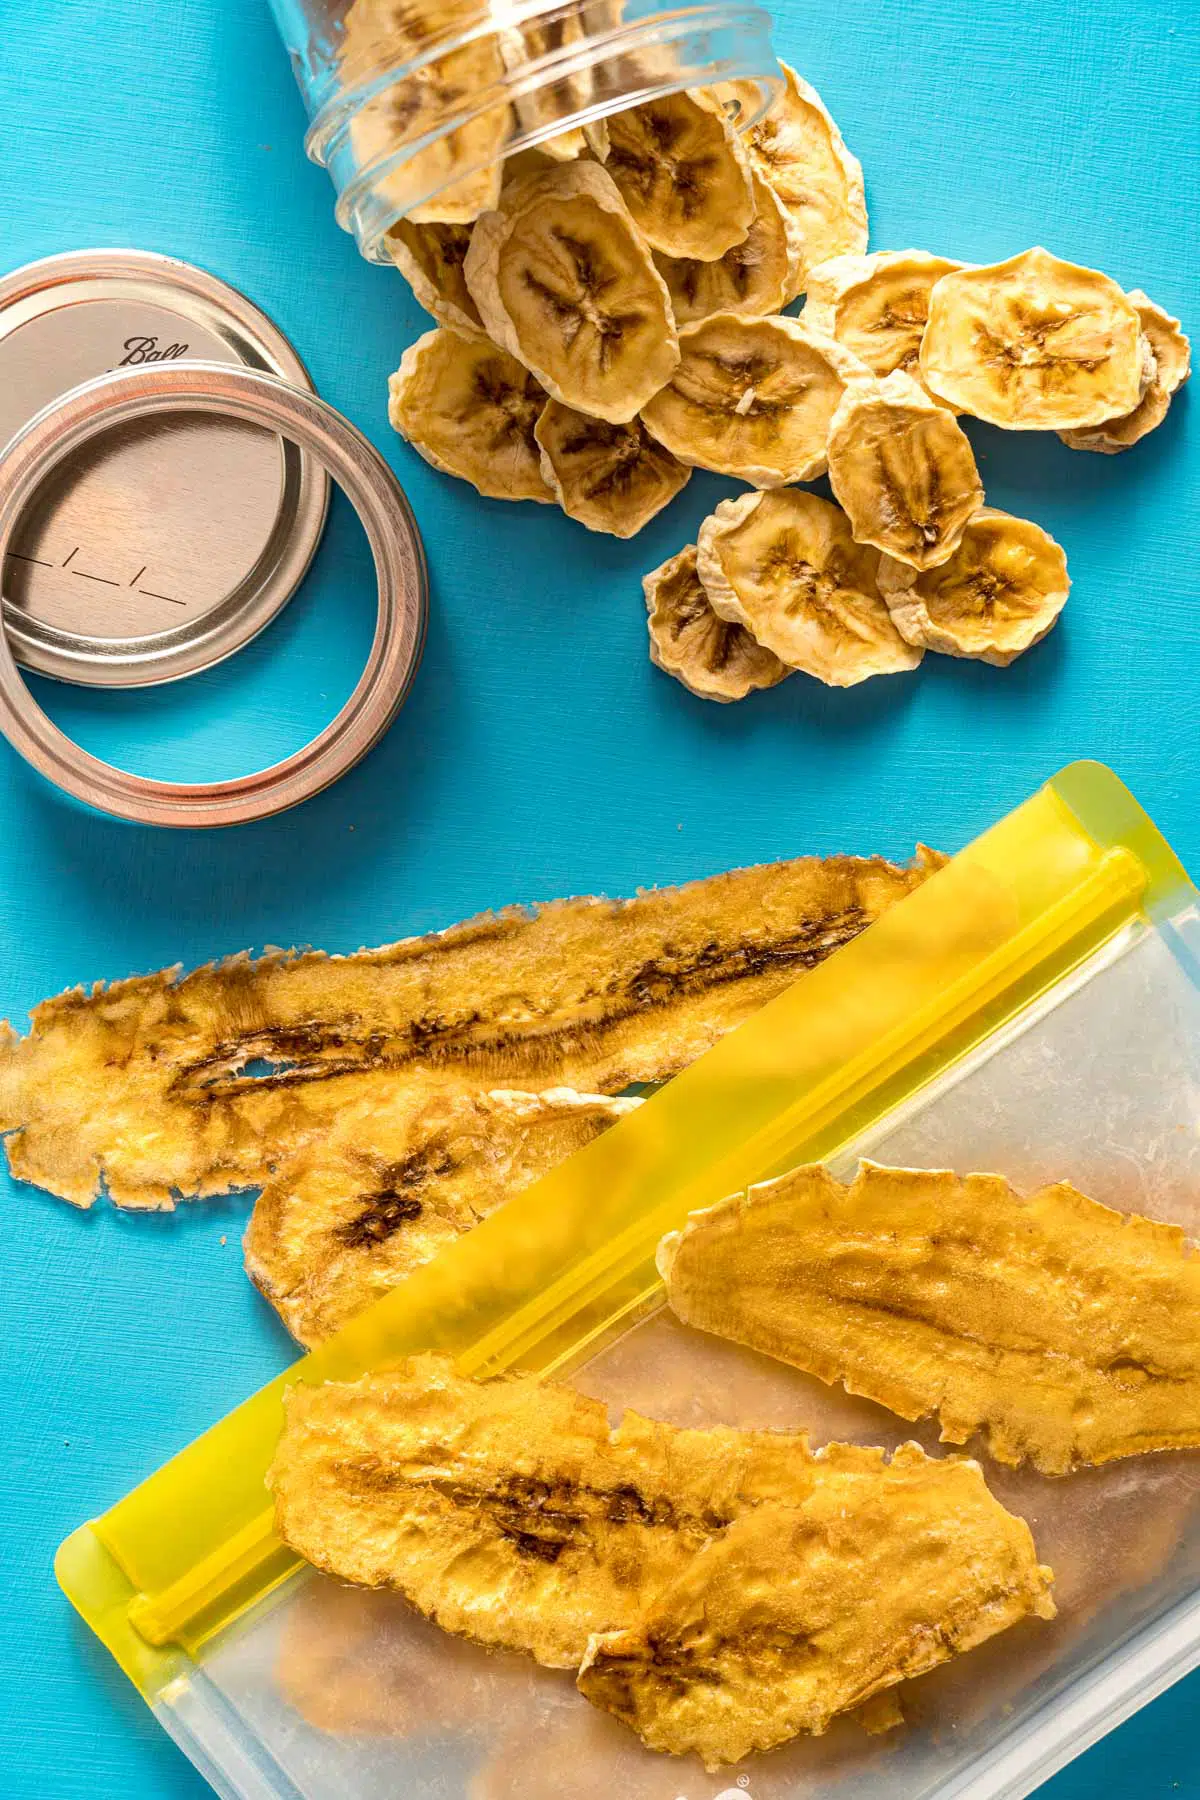
If you’re dehydrating bananas for snacking and plan on eating them within a week or two, you can store them in a sealed container or zip-top bag on the counter or in your pantry. Just let them cool and place them in a sealed container. We like to use these reusable ReZip bags.
However, when properly dried and stored, dehydrated bananas can last up to six months. Here are our tips for long term storage:
- Let the bananas cool completely before transferring them.
- Condition: Loosely pack the bananas in a transparent airtight container. Check it daily for a week to check for signs of moisture or condensation, and shake to help prevent the slices from sticking together. If signs of moisture appear, stick them back into the dehydrator (as long as there’s no mold—in that case, toss the batch). After a week, if there’s no signs of moisture or mold, you can package them for long-term storage.
- Store in a clean, airtight container. For longer shelf life, vacuum seal.
- Use a moisture absorbing desiccant packet if you anticipate opening the container often, or if you live in an area with high humidity.
- Label the container with the date and any other important details
- Place the container in a cool, dark, and dry place—inside of a pantry cabinet works well.
We personally like to store our dehydrated food in mason jars that have been vacuum-sealed using this handheld FoodSaver vacuum sealer along with these jar sealing attachments. This gives us the benefit of vacuum sealing without the waste (and expense) of plastic vacuum sealing bags. Since the jars are clear we make sure we store them in a dark spot in our pantry.
How to use
Here are a few ways to use your bananas:
- Include them in a DIY trail mix, or enjoy them on their own as a hiking snack
- Use them to scoop peanut butter or yogurt for a more substantial snack
- Add them (whole or chopped up) to oatmeal or breakfast porridge or to top yogurt
- Add them to baked granola
Equipment
- Airtight storage container
- Vacuum sealer (optional)
Ingredients
- 3 lbs bananas, see note 1
Instructions
- Start with clean hands, equipment, and countertops.
- Peel and slice the bananas—For banana chips: Using a sharp knife or mandoline, cut the bananas into ¼” rounds.For banana leathers: Slice the bananas lengthwise into ¼" strips.
- Arrange banana slices in a single layer on dehydrator trays, ensuring there is space between pieces to allow airflow.For banana leathers, lightly grease your dehydrator's solid fruit leather trays with a small amount of coconut oil. Place the strips of banana on the trays and press down on them with a spatula or bottom of a glass to flatten.
- Dehydrate at 135F/57C for 6-12 hours, until dry (see note 1). If making banana leathers, you'll want to flip them after a few hours to promote even drying.
Storage Tips
- Let the dried bananas cool completely before storing.
- Short term storage: If bananas will be consumed within a week or two, store in a ziptop bag or sealed container on the counter or in a pantry.
- Long-term storage: Condition by loosely packing the dried bananas in a transparent, airtight container. Leave it on the counter for a week and check it daily for signs of moisture. If condensation appears, return the bananas to the dehydrator (unless there are signs of mold—then, throw out the whole batch). Shake occasionally to keep the pieces from sticking together (expect leathers to stick together, though!).After conditioning, store in an airtight container in a cool, dark place for up to six months. Vacuum sealing will help extend the shelf life and quality of the bananas.