
It may not come to mind too often, but the Pokémon games have always had a ton of mysteries and secrets tucked within them. Some turned out to be merely rumors, like the infamous Mew under the truck in Pokémon Red and Blue, but others were simply items that were difficult to find a use for. Well, until the internet came along, that is. Now, we all know what every item does in every game, but that doesn’t mean they’re always easy to find.
Evolution Stones shouldn’t be looked down upon. Some trainers who watched the anime back in the day may see them as a cheat of sorts, but in Pokémon Brilliant Diamond and Shining Pearl, they’re essential items if you want to evolve specific Pokémon. Each stone is only usable once, so tracking them down is just the first step since you’ll need to think carefully about which Pokémon you want to spend it on. While that decision is up to you, we can at least guide you to the location of every Evolution Stone in Pokémon Brilliant Diamond and Shining Pearl.
See more
- All Legendary Pokémon locations in Brilliant Diamond and Shining Pearl
- Pokémon Brilliant Diamond and Shining Pearl: Grand Underground guide
- Pokémon Brilliant Diamond and Shining Pearl Super Contest Shows guide
How Evolution Stones work
Evolution Stones are one-use items that will instantly evolve a single Pokémon. There are nine types in total, at least one of each on the overworld with the exceptions being the Sun Stone and Moon Stone, but you can get multiple of each type if you need them by hunting for them in the Grand Underground. Once used, you can’t cancel an evolution or reverse it, so the commitment is permanent.
These stones won’t work on any Pokémon, though, even if they’re of the same type. We’ll list out all the applicable Pokémon each stone can be used on below.
Fire Stone location

The Fire Stone is hidden inside the Fuego Ironworks. You can get there from Route 205, where you need to use surf and head west until you reach the building. Once inside, head to the right side wall once you’ve solved the booster pad maze and reached Fuego himself, he will give you a Fire Stone.
A second can also be picked up here on the floor with the tile puzzle on the floor. Solve it and make it all the way to the right side of the room. Near a blue container in the corner is a Fire Stone.
A Fire Stone can be used to evolve:
- Vulpix to Ninetails
- Growlithe to Arcanine
- Eevee to Flareon
Water Stone location

You will get the first Water Stone as part of the main story when you’re on Route 213. While here, go south until you hit the beach and surf farther south until you come to a tiny island surrounded by rocks with a sailor on it. He’ll battle you, allowing you to go further north to find the item in the water near two other trainers in the water.
You can grab a second Water Stone, but not until you’ve unlocked the National Pokédex. Once you do and can access the Fight Area in the Battle Tower, one will be on Route 230. Keep your eyes on the right side for a set of stairs leading to a rock you can use Rock Smash on and continue down to the item.
A Water Stone can be used to evolve:
- Poliwhirl to Poliwrath
- Shellder to Cloyster
- Staryu to Starmie
- Eevee to Vaporeon
- Lombre to Ludicolo
Thunder Stone location

The lone Thunder Stone outside the Grand Underground is behind the Lighthouse in Sunyshore City. You can reach the Lighthouse by going down the stairs near the solar panels by Pokémon Rock. The item is tucked next to the rock on the left side.
A Thunder Stone can be used to evolve:
- Pikachu to Raichu
- Eevee to Jolteon
Leaf Stone location

Our journey to grab a Leaf Stone will take us into a secret area of Floaroma Meadows. To find it, go south from Fuego Ironworks and look for the entrance to the meadow across the river using surf. Take the stairs south and you’ll hit a field of flowers with the item resting among them.
A Leaf Stone can be used to evolve:
- Gloom to Vileplume
- Weepinbell to Victreebel
- Exeggcute to Exeggcutor
- Nuzleaf to Shiftry
Moon Stone location

The Moon Stone, and Sun Stone to follow, are two of the trickiest to get since they don’t appear anywhere in the overworld. The only place you can get them is through the mining mini-game in the Grand Underground or get lucky and catch a Pokémon that happens to already be holding one.
A Moon Stone can be used to evolve:
- Nidorina to Nidoqueen
- Nidorino to Nidoking
- Clefairy to Clefable
- Jigglypuff to Wigglytuff
- Skitty to Delcatty
Sun Stone location
Like the Moon Stone, get your hands dirty by digging in the Grand Underground if you need one of these rare evolution stones.
A Sun Stone can be used to evolve:
- Gloom to Bellossom
- Sunkern to Sunflora
Shiny Stone location
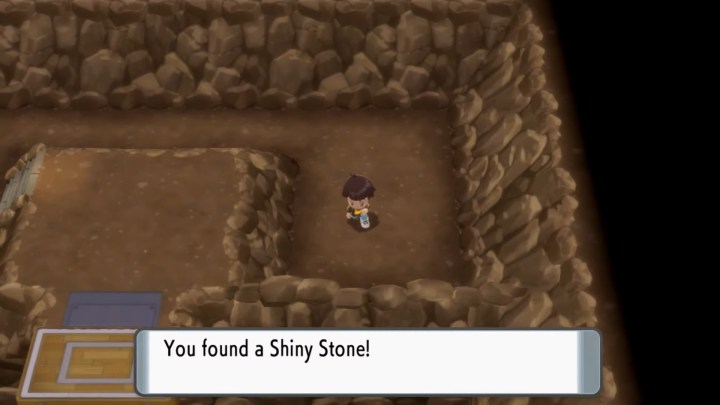
The first of the wild Shiny Stone to grab is on the Iron Islands that you first visit with Riley. As part of the story you two will navigate through a mine, but just before the exit, you will see the item on the right side of your screen.
The other Shiny Stone can be snagged while on Route 228. As you cross the bridge on this path, keep an eye out on the left-hand side for two rangers that will engage you in a Double Battle. Just before the pair, you can grab the Shiny Stone.
A Shiny Stone can be used to evolve:
- Togetic into Togekiss
- Roselia to Roserade
Dusk Stone location

Your first shot at a Dusk Stone is during the story section when you defeat Team Galactic Commander Jupiter at Lake Acuity and pick up the Storage Key item. With it, head over to Veilstone City and use it to get inside the Galactic Warehouse. There’s a side room in the upper right section with the Dusk Stone on a table near a computer.
The second won’t be until you’ve beaten the final boss and become the Pokémon League Champion. At this point, you will be able to enter the Hall of Fame and Victory Road. Head to the far end of the first floor of Victory Road and look in the back left corner. Use Strength to move the rocks out of the way to pick up the stone.
A Dusk Stone can be used to evolve:
- Murkrow to Honchkrow (Brilliant Diamond)
- Misdreavus to Mismagius (Shining Pearl)
Dawn Stone location

There are two chances to grab a Dawn Stone during the game. The first is at Mt. Coronet, which you get to via Route 207. Once inside, go to the south end of the cave and take some stairs down to the water. Surf across to the other side and grab the item here for the stone.
The second Dawn Stone won’t be obtainable until you have the National Pokédex and can access Route 225. Go north along this route until you hit a rock wall you can use Rock Climb on to get up onto a ledge. The Dawn Stone is behind a trainer you need to defeat to reach.
A Dawn Stone can be used to evolve:
- Male Kirlia to Gallade
- Female Snorunt to Froslass
Editors' Recommendations
- All Legendary Pokémon locations in Scarlet and Violet: The Indigo Disk
- All Captain Toad locations in Super Mario Bros. Wonder
- Where to find all Great Fairies in Zelda: Tears of the Kingdom
- All maps and battle arenas in Pokémon Unite: Overviews, wild Pokémon, and more
- How to play All-Rounders in Pokémon Unite: Charizard, Lucario, Garchomp, Machamp, and more


