

These simple bits of maintenance will clean up your Android companion and give you a maximally efficient foundation for the new year.


Happy New Year! I don’t know about you, but I find the start of a fresh voyage around this shiny ol’ sun of ours to be a fine time for tidying up, optimizing, and getting good and organized for the months ahead. And while I’d love to pretend I’m the type of person who has one of those disgustingly pristine, clutter-free desks you see on the internet, let me be brutally honest: The physical space around me tends to resemble a half-abandoned hog parlor.
But my Android phone? My Android phone is as orderly as can be, gosh darn it. And if you ask me, that makes far more of a difference than the state of the physical space around me.
Our mobile devices are where we do so much of our actual work and contemplation these days, after all — and yet it’s all too easy to overlook the importance of maintaining an optimal arrangement for both productivity and security within ’em. So now, as we gaze ahead at the promise-filled 2022 calendar, join me in taking 10 minutes to get your own trusty Android phone fine-tuned and fully ready for the coming year.
We’ll start with the simplest step of all.
Android maintenance step No. 1: The New Year’s app cleanse
Installing interesting and potentially useful new apps is easy — but y’know what’s considerably more difficult to do? Assessing which apps you actually use with any regularity and then uninstalling the stuff that’s sitting on your phone and collecting virtual dust bunnies (adorable as those may be).
[Psst: Love shortcuts? My Android Shortcut Supercourse will teach you tons of time-saving tricks for your phone. Sign up now for free!]
Lest you think this is busywork for the sake of busywork, let me remind you: An occasional app cleanse is actually valuable on a few different levels. First and foremost, it clears up clutter — both in terms of the actual space an app takes up on your limited local storage and in terms of the visual space it requires on your home screen or app drawer, where its presence makes it less speedy and efficient for you to find the things you genuinely use and seek out regularly.
Beyond that, though, having unused apps on your phone can slow your system down or wear your battery down, as lots of apps run in the background at least some of the time and needlessly use up your phone’s precious resources. That’s fine if they’re serving some legitimate purpose for you, but when they aren’t, it’s an easily avoidable waste.
And finally, having apps you don’t need on your device can sometimes expose you to prickly privacy and security issues, as the apps were probably granted some manner of access to your data back when you first installed ’em. Why keep such a door open if it’s no longer providing any meaningful benefit?
Thankfully, the fix for all of this doesn’t take much time at all — so long as you think to do it. Just open up the app drawer on your phone and think carefully about every single item you see within it. A good general rule is that if you haven’t opened or otherwise used something in the past two months, it’s probably worth uninstalling. Those “just in case” apps we all keep around almost never get called into action, and really, it takes about seven seconds to install something again if you ever do end up needing it.
So for anything you aren’t actively using, press and hold your finger onto its icon — and then, depending on your phone type and Android version, either drag the icon upward with your finger until you see an “Uninstall” command at the top of your screen or look for the “Uninstall” option (or icon) in the menu that pops up.
Told ya it wasn’t so bad, right? And our next step isn’t much harder.
Android maintenance step No. 2: The storage sweep-out
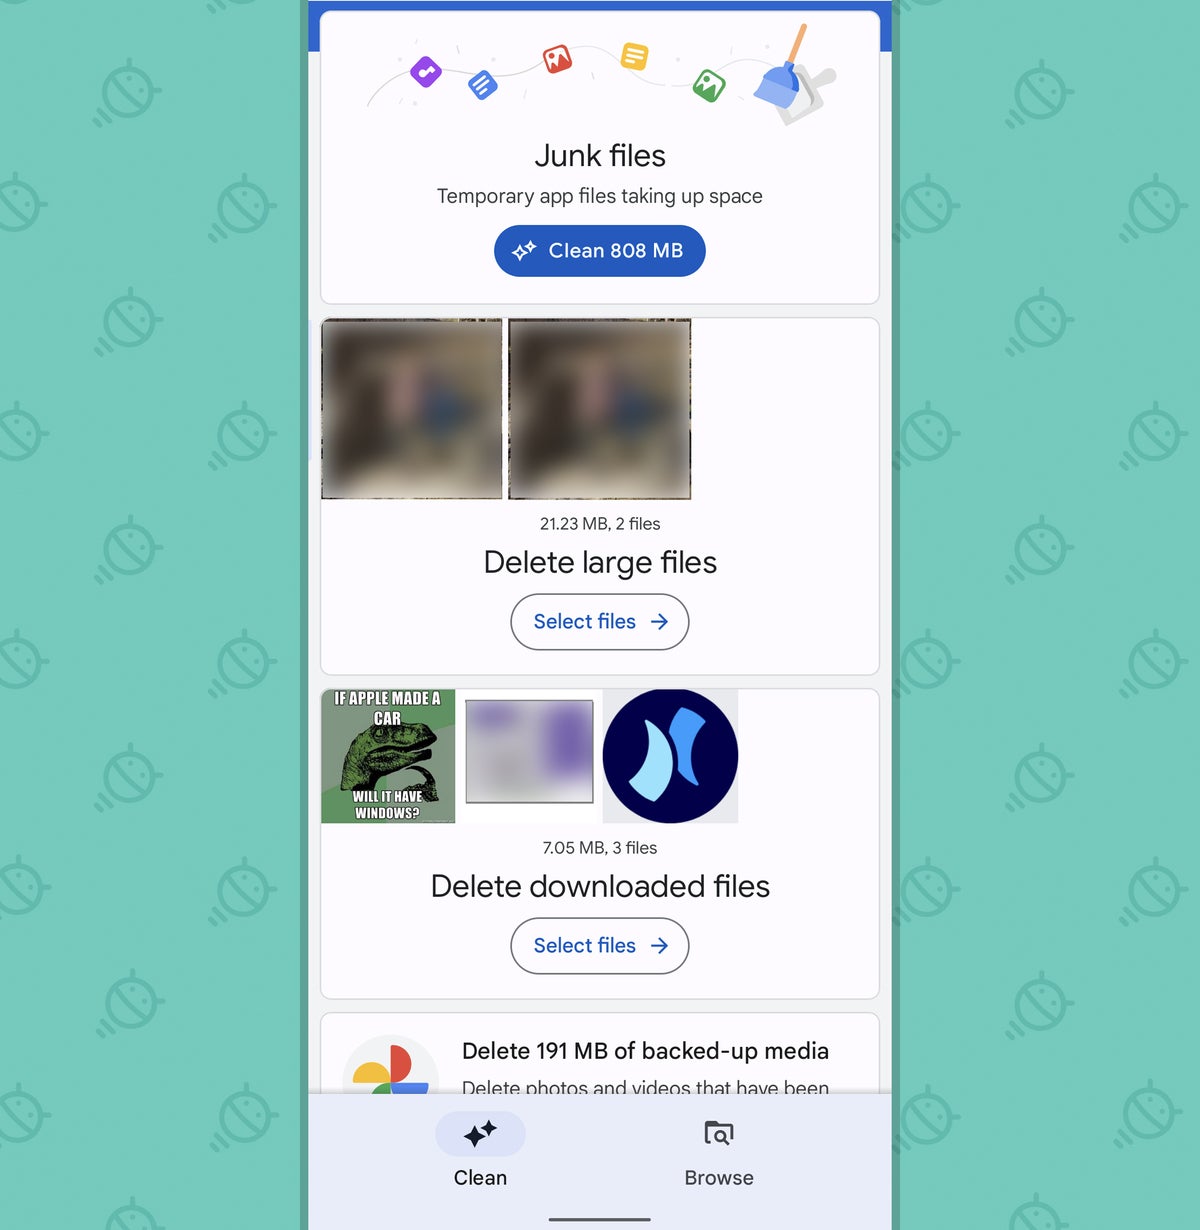
Now that you’ve got your app list pared down and prettied up, take a quick sec to free up some further space in your phone’s local storage. An official Google app called Files by Google will make the process as simple as can be: Just install the app, if you haven’t already, then tap the Clean tab at its bottom.
That’ll pull up a list of contextual suggestions for clearing out cobwebs, getting rid of gunk, and opening up extra space on your trusty ol’ Android companion — with one-tap commands for everything from wiping out temporary junk files to eliminating duplicates, deleting old downloaded files, and removing redundant copies of images and videos you’ve already backed up to Google Photos (assuming you’re using that service).

Feeling lighter yet? I sure hope so — ’cause now, it’s time to turn our attention to some deeper, more privacy-oriented parts of our 10-minute maintenance sprint.
Android maintenance step No. 3: The permission tightening
Android’s permission system has come a long way over the years, and with Android 10, 11, and 12, Google’s given us more and more bits of control over how exactly apps are able to access sensitive areas of our data.
With Android 10, we gained the ability to give apps access to our physical location only when said apps are actively being used instead of letting ’em see it all the time, as had previously been the case. With Android 11, that same concept got pushed even further, with the newly added option to allow an app access to your location, camera, or microphone only on a limited, one-time-use basis — for a single session, in other words, and with the permission expiring as soon as you move out of the app and on to something else. And with Android 12, our friendly pocket-computin’ pals get even more nuanced with exactly how much location data you want ’em to share with any given app.
But here’s the asterisk: In all of those cases, it’s up to you to make sure you have your permissions set up the way you want — and that’s pertinent particularly if you’re using a phone that was upgraded to Android 10, 11, or 12 at some point (as opposed to coming with any of those versions out of the box). Why? Well, I’ll tell ya: In any upgrade-involving instance, any apps you’d installed before the upgrade would’ve been given regular, unrestricted permissions within the older Android environment — and thus would only be affected by the new, more granular options if you were to manually go in and revisit their settings.
So do yourself a favor and do this:
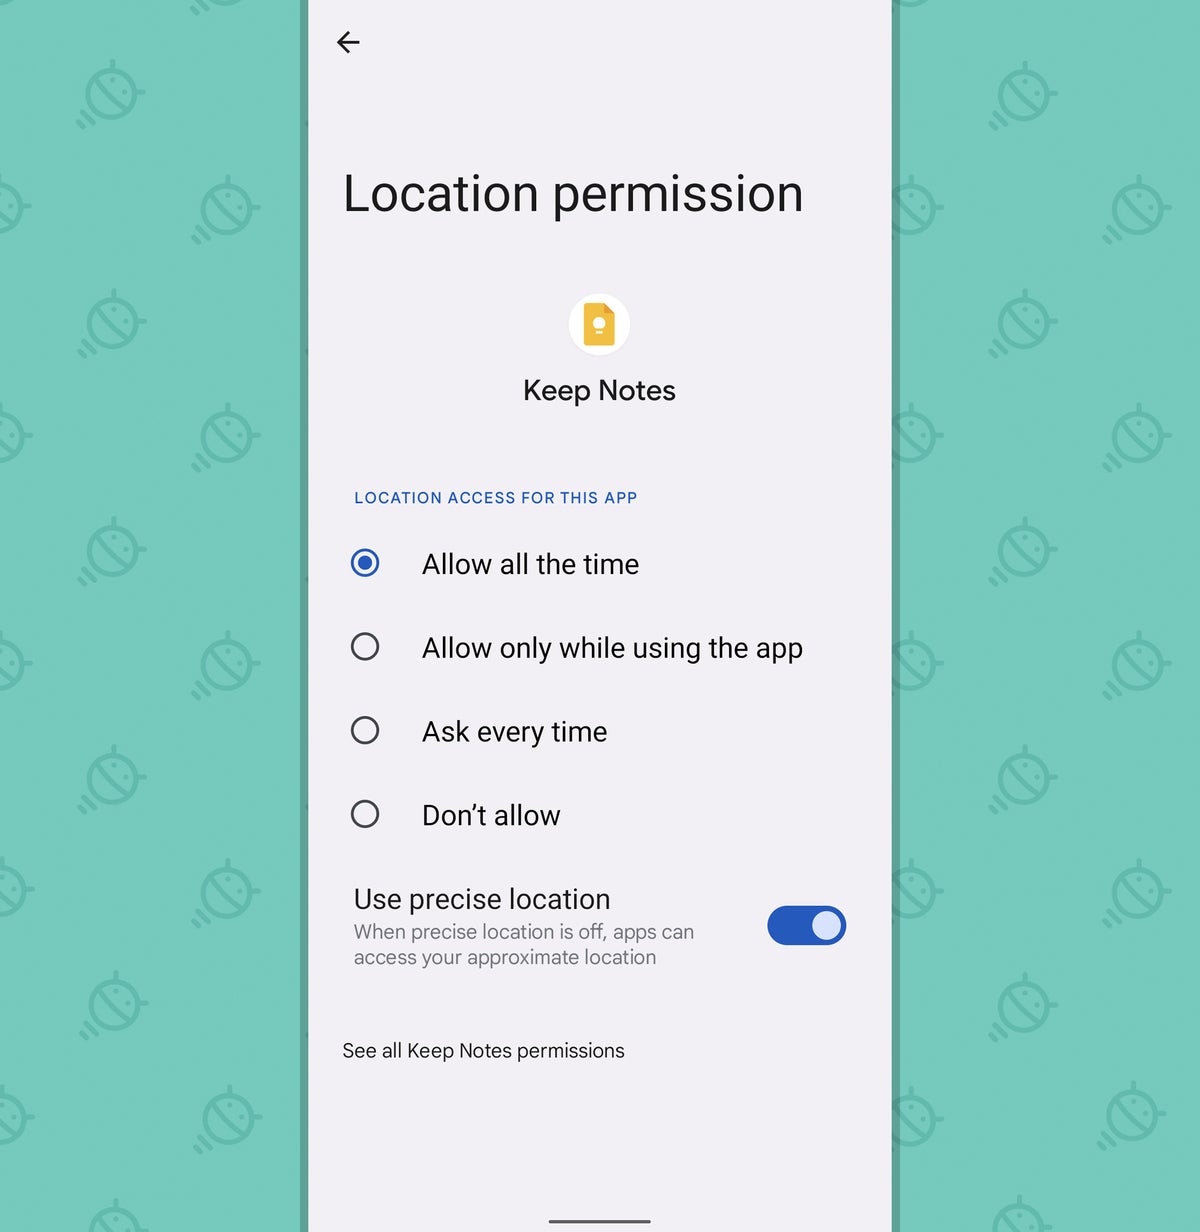
- Head into the Privacy section of your system settings and tap the line labeled “Permission manager.”
- Look through the various permissions listed there, paying particular attention to “Camera,” “Location,” and “Microphone” (especially if you have Android 10 or higher — which, at this point, you’d better!).
- As you tap each permission, see what apps have access to it. If you come across anything that doesn’t seem like it needs access to a certain area — or maybe doesn’t need full, ongoing access to it, in the Android 10 and up environments — tap its name and then adjust its permission settings as needed.

And speaking of things with over-the-top access to your information…
Android maintenance step No. 4: The external access checkup
In addition to all the apps on your phone, your Google-account-related info can be shared with external companies and services that don’t necessarily have a direct presence on your device — if you granted them some manner of access at some point in the past.
So while we’re thinking about permissions and other such saucy subjects, prance your way over to this Google Account page and scan through the list of third-party entities that are authorized to view at least some part of your account information. You’ll see lines for services that have full access to your entire Google account and everything within it along with lines for services that can see one specific area of your Google setup — like your calendar, your contacts, or your email.

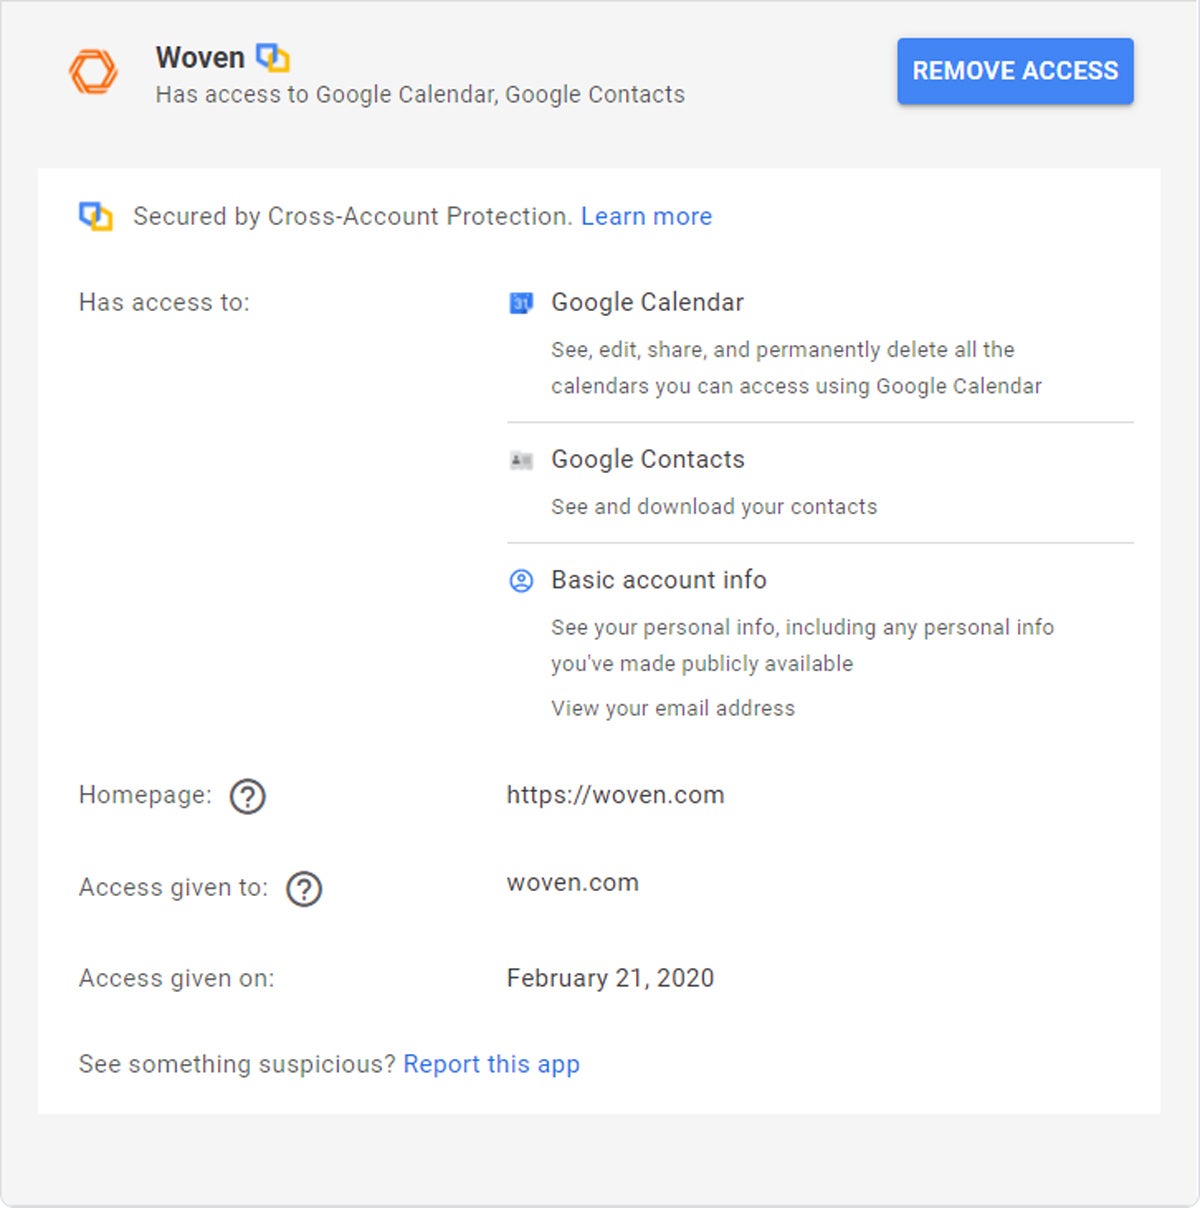
If you see anything there that you no longer use or (worse yet!) don’t recognize, click it, then click the Remove Access button to sever the connection and secure your data.
On a related note…
Android maintenance step No. 5: The device downsizing
In addition to apps and services maintaining access to your info after you’re no longer using ’em, actual devices can remain associated with your account indefinitely once authorized. And, oh yes, the start of a new year is a perfect time to do a little housekeeping and make sure any out-of-date devices are disconnected and off your list for approved Google account access.
This one’s especially easy: Just open up this Google Account page and take a close look at every device listed there. When you see something you’re no longer using, click the three-dot menu icon within its box and select the option to sign out of it. And if you encounter anything you don’t recognize at all, scream loudly, for effect — then click that same icon and select “Don’t recognize this device” to take appropriate action.
And while we’re thinking about devices…
Android maintenance step No. 6: The contacts cleanup
One of the most basic-seeming pieces of the modern smartphone puzzle is also one of the most likely to be neglected — and to devolve into an inefficient mess that’ll waste precious moments and make your life more difficult.
I’m talking about your device’s contacts, and depending on what type of Android phone you’re using, the amount of work needed to get it in order could range from “a few quick taps” to “a mildly involved migration from a locked-down, second-rate service into a superior alternative that’ll work on any device you sign into.”
Samsung folk, that latter part is for you. If you’re using a Galaxy phone, for Goog’s sake, now’s the time to move yourself out of the proprietary contacts service Samsung encourages you to use by default and into Google Contacts — which, all basic usability advantages aside, has the unbeatable benefit of instantly working on any Android phone you ever use now or in the future, not only on those made by Samsung. It also makes it as easy as can be to access your contacts from anywhere on the web on any computer, and it integrates your contact info into Gmail, Drive, and other Google services for even more efficiency.
If you fall into that Samsung camp, free yourself from your phone-maker’s self-serving shackles by following the steps here to move your info into Google Contacts now. Your future self will thank you.
For everyone else — and for our Samsung friends, once that move’s been made — open up the Google Contacts app on your phone and take the following steps to clean things up and eliminate time-wasting clutter:
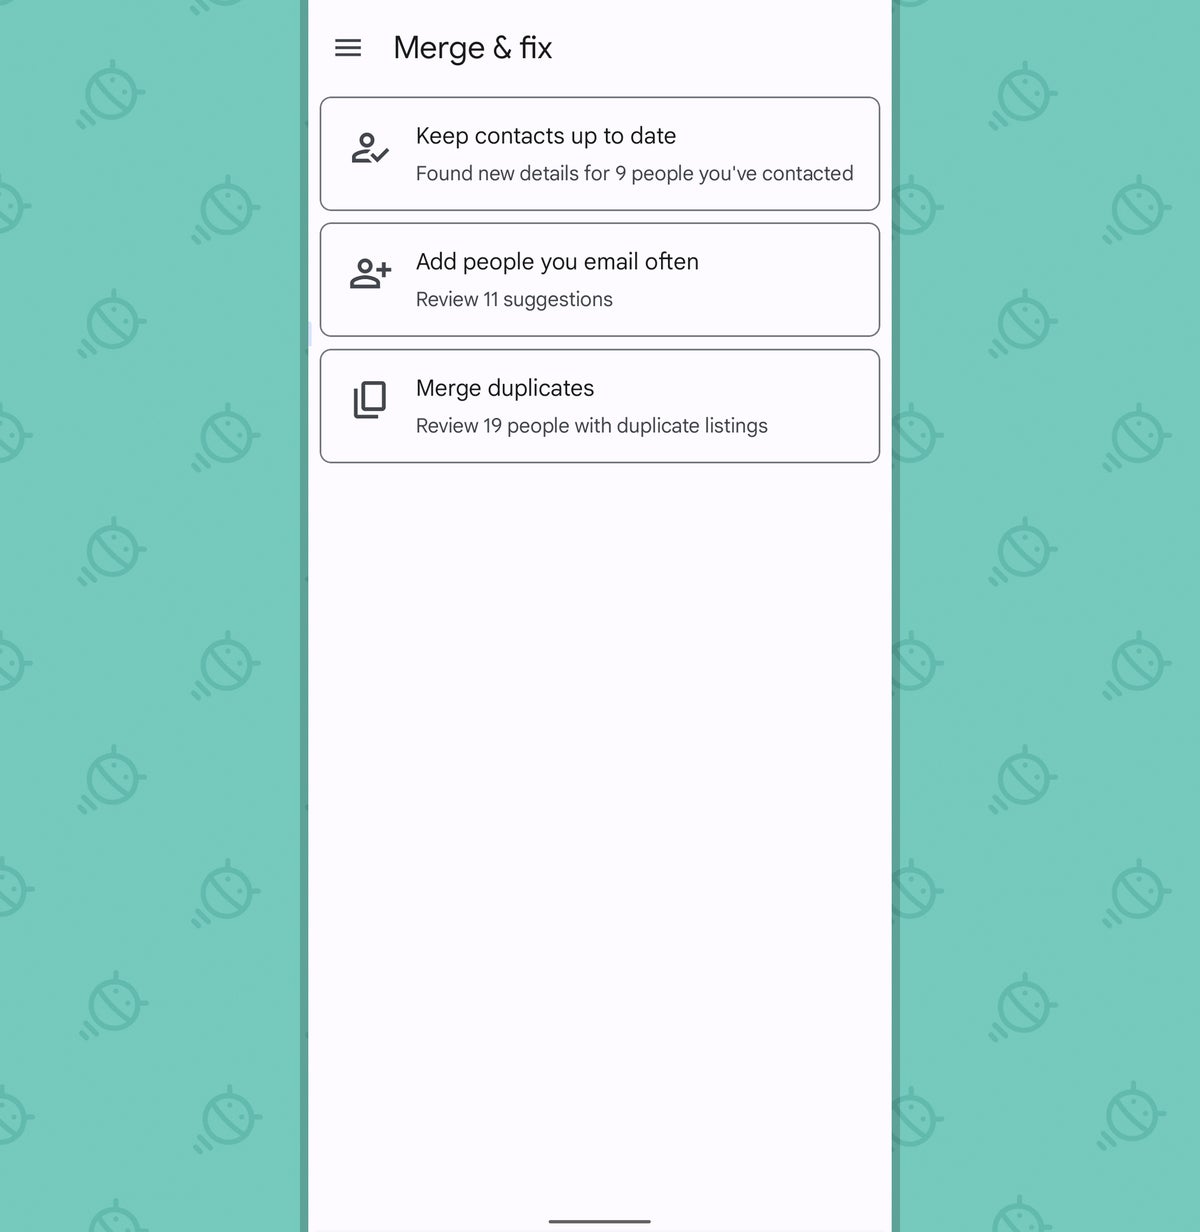
- First, tap the three-line menu icon in the app’s upper-right corner and select “Merge & fix.”
- Follow the prompts that come up to update any available info for out-of-date contacts, to add people you email regularly into your contacts, and to merge any duplicate entries into single consolidated entries. (If you don’t see any of those options, that means you don’t have any of those problems. Congratulations! Go get yourself a snack-sized sandwich as a reward.)
- Last but not least, scroll through your full list of contacts. If you see anyone there whom you never contact and no longer need present, press and hold their name to select it — then tap the name of anyone else you want to eliminate as you continue to scroll down. Once you’ve selected all of your unneeded contacts, tap the trash icon at the top of the screen and rest easy knowing your next search for someone’s info will be much easier as a result.
And with that, my fellow hominid, we’re ready to descend into our final Android maintenance step for the start of 2022:
Android maintenance step No. 7: The Play Store pruning
Holy hellfire, it’s actually here — the seventh and final step in this New Year’s neatening! I can’t believe this incredible journey of ours is almost at its end. If you make a photo yearbook of this adventure, put me down for two copies, all right?
But enough virtual tear drying — here it is: When you sign into your Google account on an Android device (or even a Chromebook or Android TV product), that hardware earns a long-lasting place in the Play Store as an account-connected destination. That means it shows up in the list of options that appears every time you open the Play Store from a computer and click the button to install an app onto a device.
Over time, what that typically leads to is your list growing longer and ever more convoluted — both from the sprawling presence of devices you’re no longer using and from the awkward, often code-like names some devices for some reason show up as in that environment. (The Lenovo Chromebook Duet is the “Google kukui”? Really, gang? That’s how you want to present this experience?!)
So as the last step of our little New Year’s cleanup, pull up this out-of-the-way Play Store settings page and skim through every device that’s listed on it for your account. For any devices you don’t still use, uncheck the box next to “Show in menus” within their line. That’ll effectively hide the device so that the next time you go to install something, it won’t show up as an option — and it’ll be that much easier to find a device you do still use from the list.
And for any devices where the name is annoyingly long or curiously cryptic, click the Edit button at the right of the line, then change the name to something shorter, simpler, and easier to recognize — or maybe just to “Myrtle,” if you’re feeling folksy — and click the Save button when you’re done. Whatever name you type will show up in the Play Store’s list of device options for app installations from then on out.


All that’s left is to pat yourself on the back and fetch yourself a fizzy beverage for a job well done — and to reassure yourself that, hey, you’ve got the most important manner of New Year’s organization accomplished. Everything else can wait.
Get six full days of advanced Android knowledge with my free Android Shortcut Supercourse. You’ll learn tons of time-saving tricks for your phone!


