Heading out the door? Read this article on the new Outside+ app available now on iOS devices for members! Download the app.
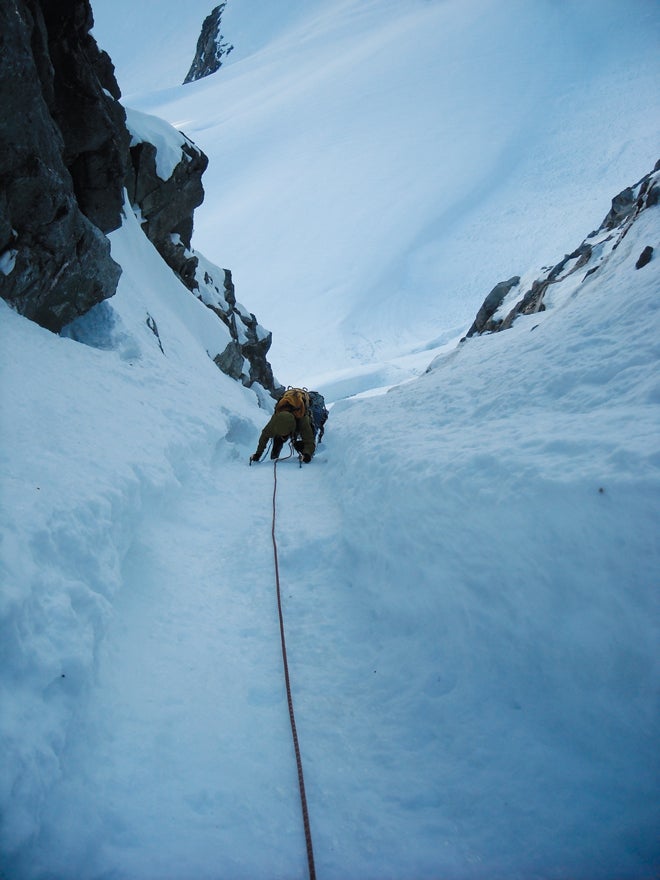
Expanding your repertoire to include snow climbing opens up a tremendous trove of new objectives, including those alluring lines called couloirs that drop like ribbons down mountainsides. While the masses choose the path of the choss field to gain the summit, you’ll ascend couloirs in record time by the addictive rhythm of kicking steps in the snow. It’s truly hypnotic. Best of all? Snow climbing doesn’t necessarily mean winter conditions. Prime time for many couloir climbs is spring and summer, when the snow is consolidated and blue skies, stellar views, and warm temps abound.
It doesn’t take much to learn the basics of an ice axe, crampon travel, self-arresting, and snow hazard analysis. Getting out with a guide for a day will help you gain a solid foundation, as will the old standby, Mountaineering: The Freedom of the Hills. As a beginner, you’ll want to start out conservatively because snow can change dramatically, even on the same route in the same day. An appreciation and understanding for snow’s variability will come with time. Here are six off-the-beaten-path couloirs that lead to some of the West’s most killer summits. Bonus: most are perfect for developing skills—not epics!—for those just starting out.
Hidden Couloir (Grade III, AI3 5.6)
Thor Peak (12,028′), Grand Teton National Park, Wyoming

The Black Ice Couloir on the Grand Teton gets all the hype as one of the area’s best alpine climbs, but why ascend a melting gauntlet when there are so many other options to choose from? As the name implies, this couloir is, well, hidden. Most people get their first glimpse of it from the summit of Mt. Moran. It’s an unforgettable perfect strip of snow, folded into the eastern flank of Thor Peak.
First ascensionist Paul Horton, who climbed the route in 1975 with Renny Jackson, remembers the first time he spotted the line: “I first saw it from the top of Mt. Moran where it jumps out at you. I was surprised it hadn’t been climbed.” The route is a beautiful, searing diagonal line, mixing snow, ice, and rock. Fantastically consistent, the couloir maintains a 45- to 50-degree angle for approximately 1,200 feet. An initial 300 feet of rock climbing gets you all warmed up.
- Guidebook: A Climber’s Guide to the Teton Range, by Leigh N. Ortenburger and Reynold G. Jackson ($40)
- Season: Late spring through midsummer
- Get there: From Jackson, take US-189 to the Moose Entrance of Grand Teton National Park. Take Teton Park Road to the Leigh Lake parking area. You could undertake a bruising bushwhack, but the more efficient (and fun) choice is to rent a canoe at Dornan’s in Moose ($48 per day/$40 per day multi-day) and paddle across String and Leigh lakes. Tie up your boat at the outlet of Leigh Lake Canyon and hike up-canyon approximately 1.75 miles to a steep, scree-filled gully leading to a snowfield at the base of the east face.
- Gear: Light rack and screws
- Stay there: Pick up a free bivy permit at the ranger stations. From January 5 to May 15, you can reserve online ($25) and pick up in person.
- Descent: Come down via the South Slopes (class 4).
Grinnell Couloir (Grade III)
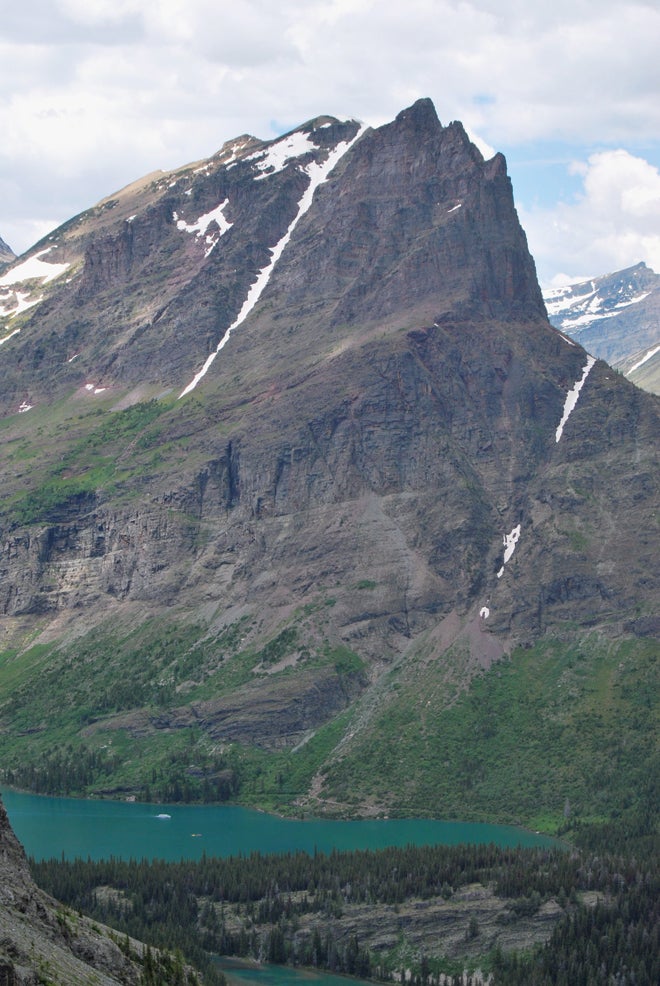
Grinnell Point (8,855′), Glacier National Park, Montana

Considering that the crumbling consistency of Glacier National Park’s peaks is not that conducive to rock climbing, snow climbing is an ideal way to get the eagle’s eye view of mountains that stretch out forever, jeweled by lakes milky with glacier silt. “Grinnell Couloir provides an opportunity to do a seldom-climbed, alpine ascent in the heart of the ‘Crown Jewel of the Continent,’” says mountaineer Ryan Schuster, who grew up spending his summers in the park.
This couloir parallels the popular South Ramp Route (class 3) and offers a fun, offtrail romp up the piercing dagger of Grinnell Point, one of the park’s most prominent features. Plus, for history buffs there’s the added intrigue of starting your route next to the abandoned Josephine Mine, named for the opium-toking, bootlegging dance-hall girl Josephine Doody who once lived in the area.
At a maximum of 40 degrees, it’s not too difficult of a climb—just make sure to hit it while there’s still ample snow in early summer. Grizzly bears aside, rock fall is one of Glacier’s biggest hazards, so don your helmet, strap on your crampons, and cruise up this fun line. From the top of Grinnell Point, climb another 1,250 feet up an easy ridgeline to the summit of Mt. Grinnell.
- Guidebook: A Climber’s Guide to Glacier National Park, by J. Gordon Edwards ($15)
- Season: Mid-May through June
- Get there: From Babb, take US-89 toward Many Glacier and drive 12 miles to the end of the road at the Swiftcurrent Motor Inn. Two trails access the Swiftcurrent Nature Trail—one at the Grinnell Glacier Picnic Area, the other south of the Many Glacier Hotel. Follow either trail for about a mile until reaching the North Shore Lake Josephine Trail. (If you’re feeling lazy, just take the boat ride across Swiftcurrent Lake for $24.25 per person.) After passing a small pond on the left below Grinnell Point, keep a lookout for a large, sheer cliff with a waterfall beside the trail. This signals your exit via a choose-your-own-adventure hike through cliff bands and grassy ledges to the base of the couloir and 2,600 feet of 40-degree snow climbing to the top.
- Stay there: Camp in the Many Glacier Campground, sleep in style at the Many Glacier Hotel, or bed down at the Swiftcurrent Motor Inn. Take note: The campground ($20/night) is very popular and does not take reservations.
- Descent: From the summit, descend via the Swiftcurrent Glacier to the Highline Trail.
Y Couloir (Grade III, AI2 or Grade III, AI3 M3)
Mt. Ypsilon (13,514′), Rocky Mountain National Park, Colorado
Hidden deep in the heart of Rocky Mountain National Park, Mt. Ypsilon has a sheer 2,000-foot southeast face that wraps around a steep cirque. Framed by the well-known Blitzen Ridge (5.4) and Donner Ridge (class 2/3), the face is split by the white thread of the Y Couloir, running up to Mt. Ypsilon’s summit.
The left branch is a Grade III line with a moderate angle (50-degree snow) and a difficult cornice at the end. “It’s a really striking line in a remote location,” RMNP climbing ranger Jess Asmussen says. “You see it from so many places in the park; it’s one of those things you look at forever, which makes it so special to climb.”
If you’re looking for more of a challenge, the steeper right option (Grade III, AI3 M3) travels through a tricky chimney, which, depending on conditions, may be choked with ice. Before getting sucked too deep into the chimney, move left for approximately two rock pitches before moving back into the couloir on a grassy ledge. The snow steepens to 55 degrees before hitting the headwall, where you can exit left to bypass 70-degree snow; depending on snowpack and season, you may hit a fifth-class scramble or lower-angled snow.
- Guidebook: Rocky Mountain National Park: The Climber’s Guide: High Peaks, by Bernard Gillette ($30)
- Season: A large, dangerous cornice often remains at the top of the route until the beginning of July (depending on the snow year). Be aware of hazards, like collapsing snow bridges, wet slides, cornice collapses, and exposed manky slabs that occur as temps rise. Get an early start to stack the odds in your favor; come September, the route is usually melted out. But time it right, and you’ll tick this challenging route.
- Get there: From Estes Park, drive to RMNP’s Fall River Entrance Station. Take Fall River Road to the Lawn Lake Trailhead. Hike 1.3 miles on the Lawn Lake Trail, then cross the Roaring River on a spur trail that heads to Ypsilon Lake, approximately 3.5 miles away. At Ypsilon Lake, take the climbers’ trail—stay on the northern branch that parallels the waterfall, working your way up the obvious gully—ascending 800 feet up to Spectacle Lakes. From the upper lake, the couloir is obvious.
- Gear: If opting for the right branch, bring a light rack for rock and snow protection.
- Stay there: Bivy permits ($20 during peak season) are available in person (or via snail mail) at the backcountry permit office near Rocky Mountain National Park headquarters.
- Descent: Come down via Southslope (class 2) or Donner Ridge (class 3).
Y Couloir (Grade III)
Mt. Conness (12,649′), Inyo National Forest, California

Perched on the boundary of Yosemite National Park and Inyo National Forest, Mt. Conness is composed of the classic, clean granite famous to the region. But its east face is also home to a series of beautiful couloirs. This Y Couloir has easy access and a moderate angle that doesn’t require anything more technical than an ascending traverse. “It has a lower angle with minimal rock fall hazard, as the peak is that solid, gorgeous Sierra granite. No stress,” Conness veteran Adonia Curry says.
Once you reach the Conness Glacier, look to the left for a finger of rock poking its way onto the snow, bordering the Y Couloir. The couloir quickly branches into two chutes, the left side being the more popular of the two. Kick your way up 1,200 feet of 45-degree snow to the summit plateau, and then continue on mellower ground to the top of Mt. Conness. If you select the right branch, be forewarned that it often develops a cornice, and up top you’ll need to exit left to avoid a cliff band, unless you want to up the ante by scrambling on rocks.
- Guidebook: The High Sierra: Peaks, Passes, Trails, by R.J. Secor ($33)
- Season: Keep tabs on Tioga Pass, which doesn’t get plowed until spring, and the road to Saddlebag Lake, which is plowed even later. Check with both Inyo National Forest and the California Department of Transportation.
- Get there: Travel up Tioga Pass Road/Hwy 120 to Campground Junction. Turn north on Saddlebag Lake Road to the trailhead at Saddlebag Lake. Hike northwest around Saddlebag Lake, then south along Greenstone Lake. Hug the southern slopes of North Peak, ascending to Upper Conness Lake. Hike south to the toe of the Conness Glacier for a total of six miles. The Y Couloir will be visible on your left.
- Stay there: Most climbers take advantage of the multiple campgrounds en route to the trailhead and make this a day mission, rather than camp in the backcountry. If you’re craving a little more luxury, there’s the Tioga Pass Resort.
- Descent: Walk off via the East Ridge Route (class 3).
Southeast Couloir (Grade III)
Mt. Tukuhnikivatz (12,483′), Manti-La Sal National Forest, Utah

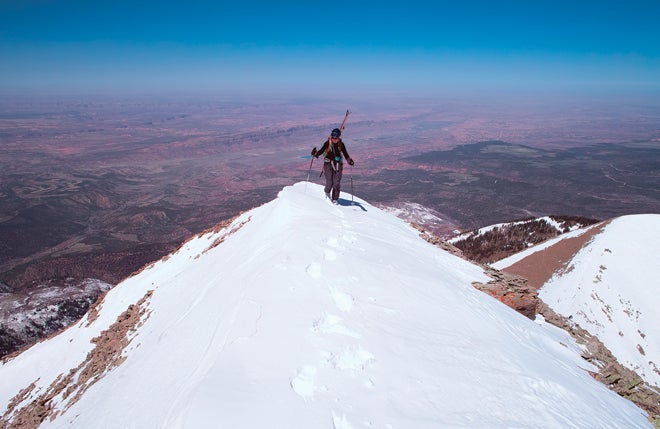
Snow climbing in Moab? That’s right! What better way to break up your desert sojourn than an excursion into the La Sal Mountains to cool off and practice your snow skills? Mt. Tukuhnikivatz, aka Mt. Tuk, commands attention with its pyramid profile rising high above the surrounding red desert. The second-highest peak in the La Sal range, Mt. Tuk’s Southwest Couloir is a popular ski descent, but wait till the snow firms up—as early as March if it’s a shallow snowpack with a lot of wind, but May on average—and you’ll have a 3,000-foot climb to boast about. This is a perfect route to develop mountaineering skills while giving your hands a break from crack climbing at Indian Creek. Start your ascent in pinyon/juniper forest before transitioning into aspens, and then conifers.
“From the summit, you can see the San Juan Mountains in Colorado and all of canyon country: Canyonlands National Park, Arches National Park—all the towers and arches. It’s amazing,” says local climber Brian Hayes. About one-third of the way up, you’ll encounter a small cliff band—work right or left depending on the snow year.
- Guidebook: Backcountry Skiing Utah, Second Edition, by Tyson Bradley ($17)
- Season: Spring
- Get there: From Moab, take US-191 south. Turn east on Route 46. From here, there are multiple ways to get to the departure point just below La Sal Pass on La Sal Pass Road—check with the Forest Service (435-637-2817) for current info on road closures and snow levels. The approach will depend upon how high you can drive, but from La Sal Pass, located between Mt. Peale and Tukuhnikivatz, the summit of Mt. Tuk is 2.2 miles away. Consult your map (NatGeo Trails: Manti La-Sal NF #703) and hoof it off-trail to the base of the couloir.
- Stay there: On National Forest land, no camping permit is required. Stay closer to town in the River Road/ UT-128 or Potash Road campgrounds.
- Descent: Take the path of least resistance down the peak’s eastern flank to the pass and travel off-trail back to your vehicle.
Northwest Ice Couloir (WI3+)
Eldorado Peak (8,876′), North Cascades National Park, Washington

This high-quality mixed climb offers an alternate way to the top of the classic East Ridge (Grade II) on Eldorado. It’s deep in the backcountry, and the approach is convoluted, so many climbers turn this trip into an overnight outing.
This more technical route combines the best of both worlds: an eight-pitch run up a mixed snow and ice couloir punctuated by ice bulges and rock steps. The icing on the cake is the tail end of the infamous knife-edge ridge, which can vary from a narrow sidewalk to an overhanging cornice depending on conditions. Relish the views from the top of this iconic Cascade peak, dubbed the “Queen of the Cascade River” by local pioneer Fred Beckey.
- Guidebook: Selected Climbs in the Cascades: Alpine Routes, Sport Climbs, & Crag Climbs, Volume 2, by Jim Nelson and Peter Potterfield ($27)
- Season : Early spring through early fall depending upon desired ice-to-snow ratio, as the snow increases following a storm cycle. If you’re craving ice, try fall.
- Get there: From Marblemount, take Cascade River Road to the Hidden Lake Peak Trailhead. The approach is complicated by long traverses and descents. Best to throw down and buy the guidebook.
- Gear: Ice screws, light rack, and pickets. Bring glacier travel rigs for the descent via the East Ridge.
- Stay there: Bivy sites abound with many climbers opting for sites at the base of the peak’s East Ridge. Pick up a free backcountry permit at one of the North Cascades National Park ranger stations.
- Descent: Downclimb the East Ridge back to Eldorado Glacier.
Snow climbing
Gear you’ll need
The challenge and appeal of alpine snow routes is how much conditions can vary on any given day. In the summer, an ice axe and helmet may be all you need. Tackle that same route a few hours before sunrise, and you’ll likely be geared up with crampons for the bulletproof snow. Come back in the fall, and the route may be more of an ice climb requiring screws, mountaineering boots, and rock pro. And think about the approach: Depending on snow conditions and season, boots might suffice, but you may need snowshoes or skis to avoid postholing.
Unlike rock climbing, unroped snow climbing is the norm and what climbers strive for to move efficiently (within reason). But don’t let that lull you into foolishly leaving the rope and snow pro at home, including pickets and flukes, if you need them. Every year, multiple deaths occur across the country from falls, both roped while not using protection and unroped. Snow climbing doesn’t come with a recommended gear list the same way rock routes dictate what you’ll need down to the last cam. Always bring your self-awareness and do your homework by talking to locals, going online, and stopping at ranger stations to get the most upto- date weather and snowpack conditions.