
It's pretty common for laptop users to use an external mouse over their device's touchpad. Apart from familiarity, many people claim that the mouse is more accurate and easier to handle. However, most laptops now have precision trackpads that can support advanced touchpad gestures.
Windows has its fair share of powerful touchpad gestures, yet it is one of the most underused tools. Some users know of the gestures but do not customize them to their liking, while many more are completely unaware of their existence.
In this guide, we will show you the different touchpad gestures available in Windows 11 and how you can customize them to your needs.
Types of Touchpad Gestures in Windows 11
Windows 11 supports three types of touchpad gestures. These are:
- Tap gestures: This is the most common gesture used to detect one or more fingers pressing the touchpad briefly. Tap gestures are straightforward; they allow you to select specific items on your computer.
- Zoom & scroll gestures: These gestures are self-explanatory. The scrolling gesture allows you to conveniently go through a page or document without pressing the Windows scroll bar. On the other hand, the Zoom gesture lets you zoom in and out of a particular item. You can do it by pinching or expanding two fingers on your touchpad.
- Three-finger gestures: These are the customizable touchpad gestures in Windows 11, allowing you to create specific movements, such as swipes or taps, to perform an action on your computer.
How to Enable or Disable Touchpad Gestures in Windows 11
If you want to get stuck in with enabling and customizing touchpad gestures in Windows 11, here's how to get started.
How to Enable or Disable Tap Gestures on Windows 11
Tap gestures are typically enabled by default on a Windows computer, especially when a supported precision touchpad is installed. However, if in some situation that these gestures aren’t working correctly or you want to disable them, follow the instructions below:
- Press and hold Win + I keys to open the Settings of your Windows 11 computer. Alternatively, you can launch it from the Start menu.
- Then, click the Bluetooth & devices tab found on the left panel of the Settings window.
- Next, click the Touchpad option from the list.
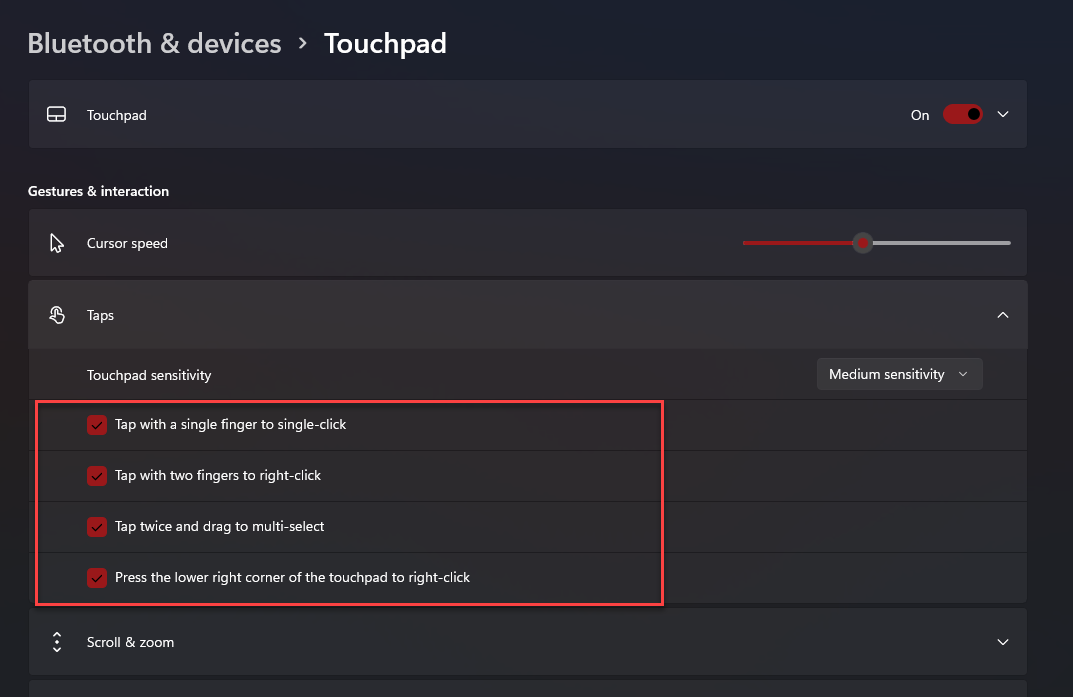
- From the Touchpad page, click Taps to reveal all gestures. Here you can find different tap gestures.
-
Next, click on the individual checkboxes to enable or disable the motion.

-
You also have the option to adjust the sensitivity of your touchpad in this setting. To do so, click the dropdown menu under the Touchpad sensitivity tab and select your preferred sensitivity.


Note: In some cases, the ‘Most Sensitive’ option misread accidental palm touches as taps. If this is happening to you, switching to the ‘High Sensitive’ option is better.
How to Enable or Disable Scroll and Zoom Gestures in Windows 11
By default, these gestures are enabled but aren’t programmable. However, Windows 11 allows you to disable these gestures and set the scrolling direction according to your preference. Here’s how:
- Launch Settings by clicking its icon on the Start menu or press and hold Windows + I keys.
- Click the Bluetooth & devices tab on the sidebar of the Settings window.
- Then, click the Touchpad option.
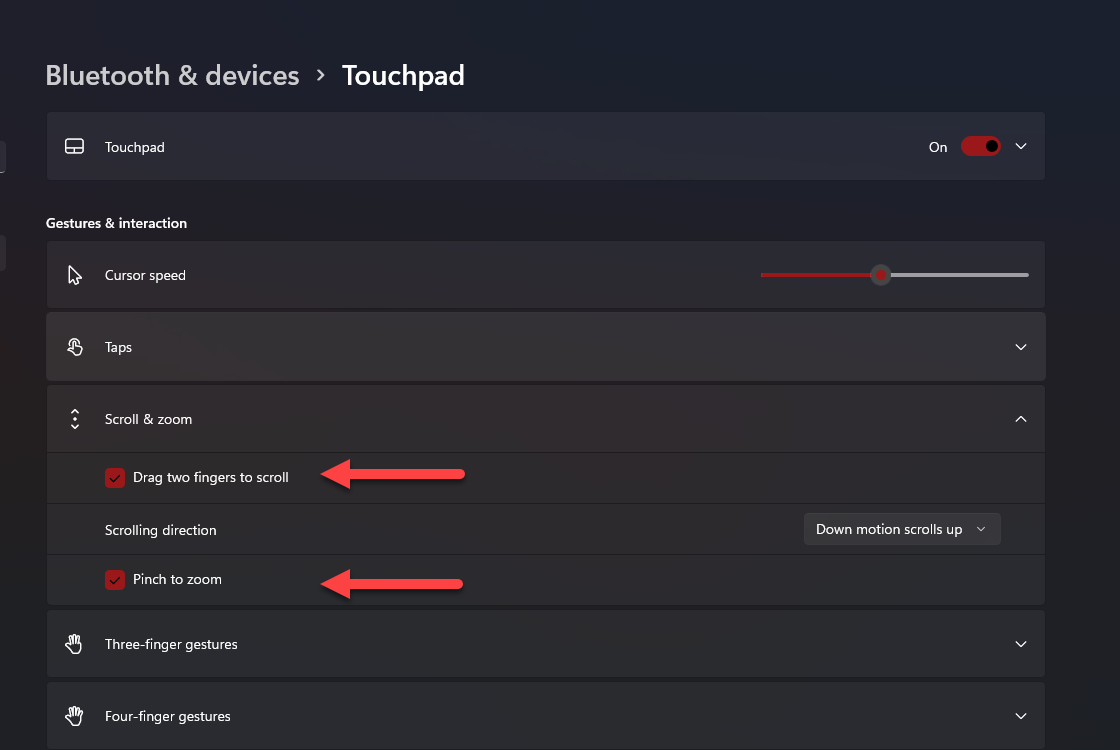
- In the Touchpad settings, click Scroll & zoom to reveal options.
-
Here you can turn off/on the Pinch to zoom and Drag two fingers to scroll options by clicking the checkbox beside the options.
-
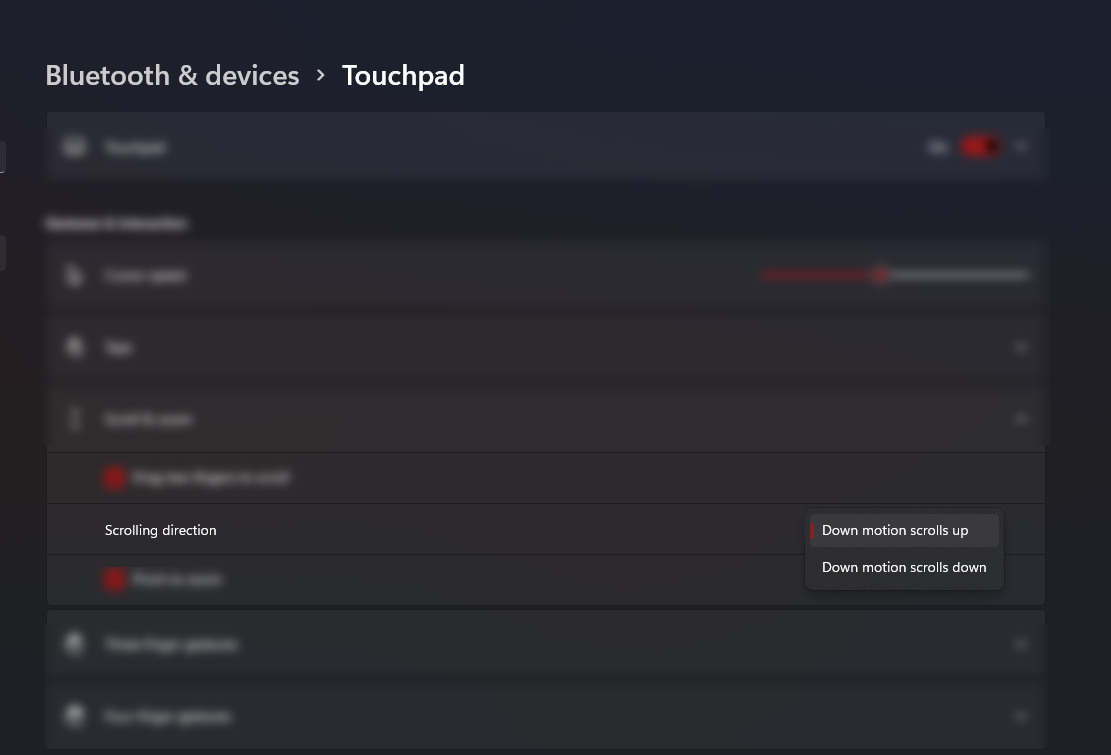
You can also click the drop-down menu on the Scrolling direction tile to choose your preferred scrolling direction.


Note: If you choose to disable the ‘Drag two fingers to scroll’ option, you need to use the scroll bars present on the specific windows you want to scroll or your keyboard.
How to Enable or Disable Three-Finger Gestures in Windows 11
Compared to the two gestures, three-finger gestures are customizable, allowing you to create swipes and taps to perform specific actions on your computer. Follow the steps below to enable this type of gesture:
- Press Win + I to open the Settings of your Windows 11 computer. Alternatively, you can launch it from the Start menu.
- Then, click the Bluetooth & devices tab found on the left panel of the Settings window.
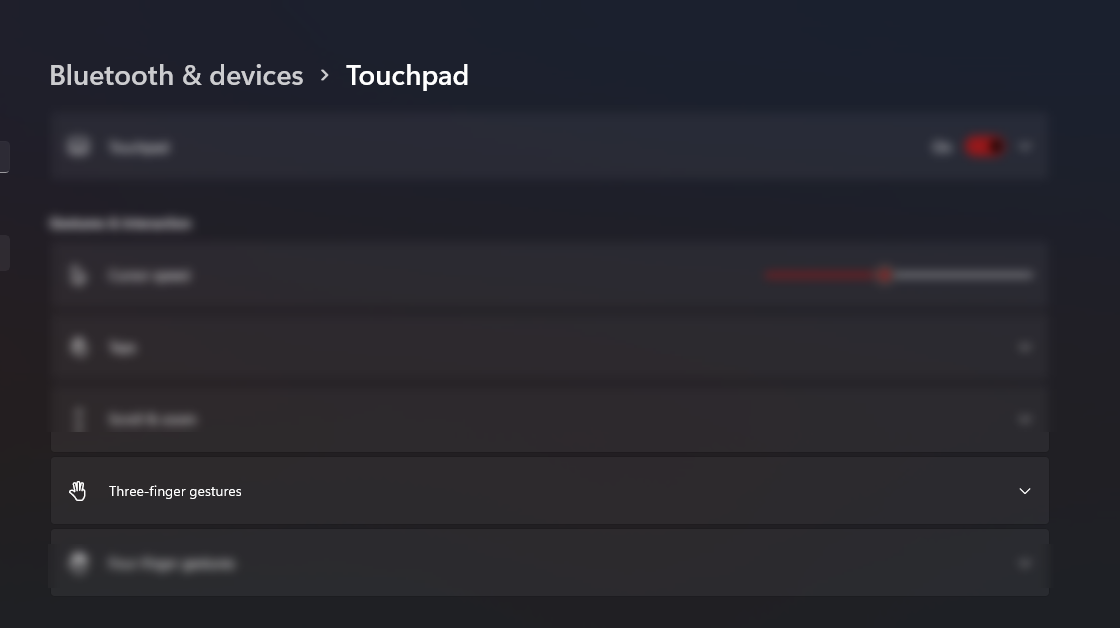
- Next, click the Touchpad option from the list.
-
Scroll down and click Three-finger gestures from the options. This type of gesture has two categories: Swipe and Tap.
-
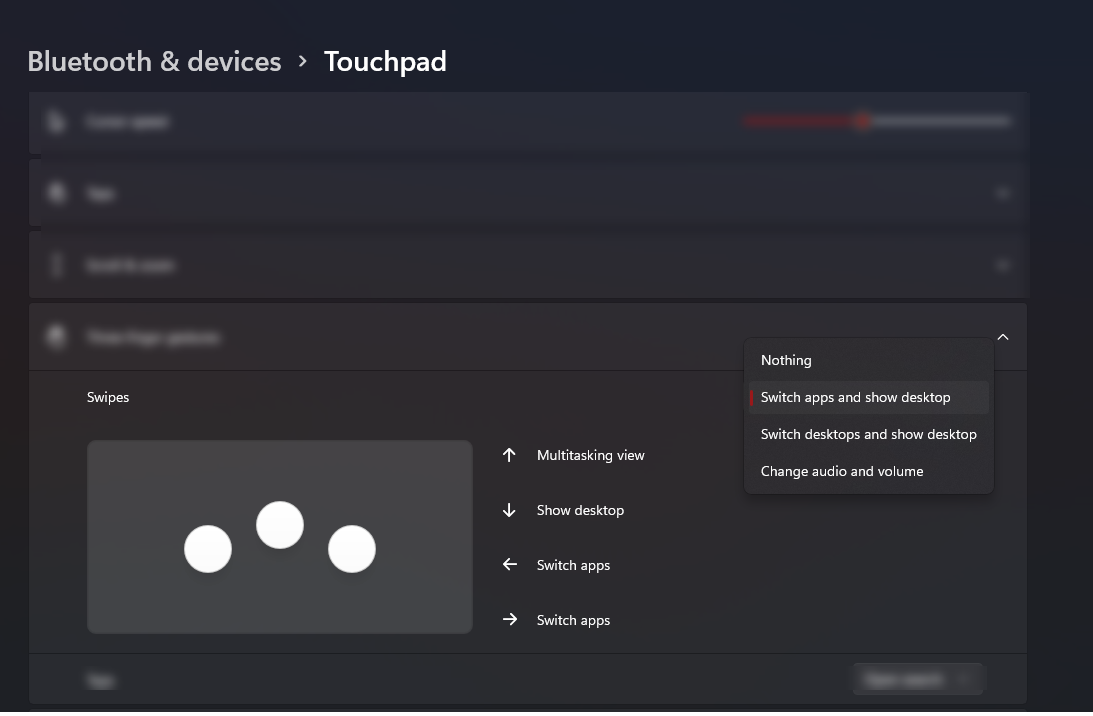
For the Swipe category, Windows has some existing templates that you can use:
- Switch apps and show desktop (Default): This templated gesture allows you to switch among apps using the three-finger sideways swipe gesture. You can also open the Multitasking view by swiping your three-fingers up and show your desktop by swiping down.
- Switch desktops and show desktop: Instead of switching apps, this preset allows you to switch desktops using the three-finger sideways swipe gesture. The two three-finger gestures perform the same function as the previous template.
- Change audio and volume: This gesture template is ideal for those who constantly listen to music, podcasts, or edit videos on their Windows device. With this gesture, you can turn the volume up or down using the three-finger up and down swipe gesture. In addition, the sideways three-finger swipe allows you to jump to the previous and next song on your queue.
- To choose from the existing Swipe gestures, click the drop-down menu in the Swipe section and select your preferred option. If you choose Nothing, it will disable this gesture on your Windows 11 PC.
-
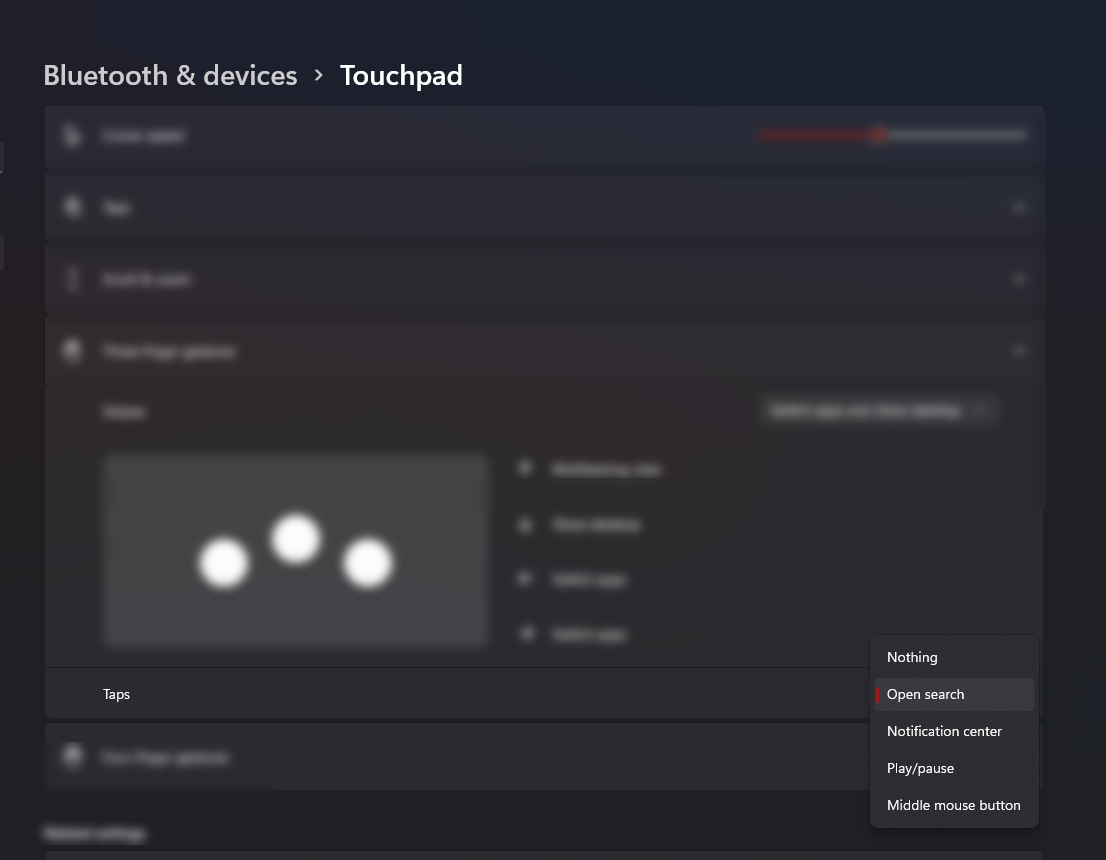
Windows also has preset options for the three-finger tap gesture. To choose from this option, click the drop-down menu on the Taps section and select your preferred action. You can also enable this gesture by choosing Nothing from the drop-down option.


How to Customize Three-Finger Gestures in Windows 11
If the three-finger templated gestures aren’t much use for you, you can customize them depending on what you require. Windows 11 allows you to map your own keyboard shortcuts or mouse actions for all three-finger gestures. Here’s how:
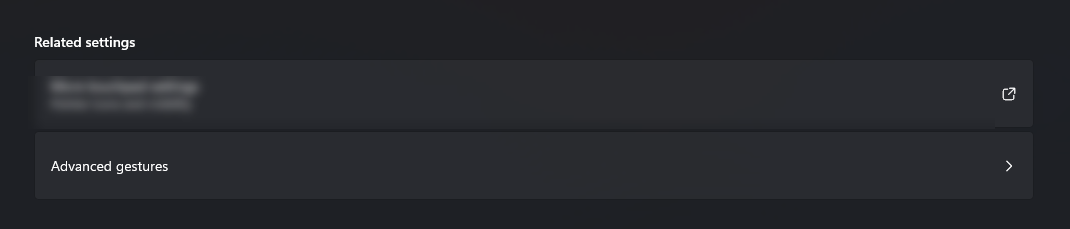
- Form the Touchpad setting, scroll down and click the Advanced gestures option.
-
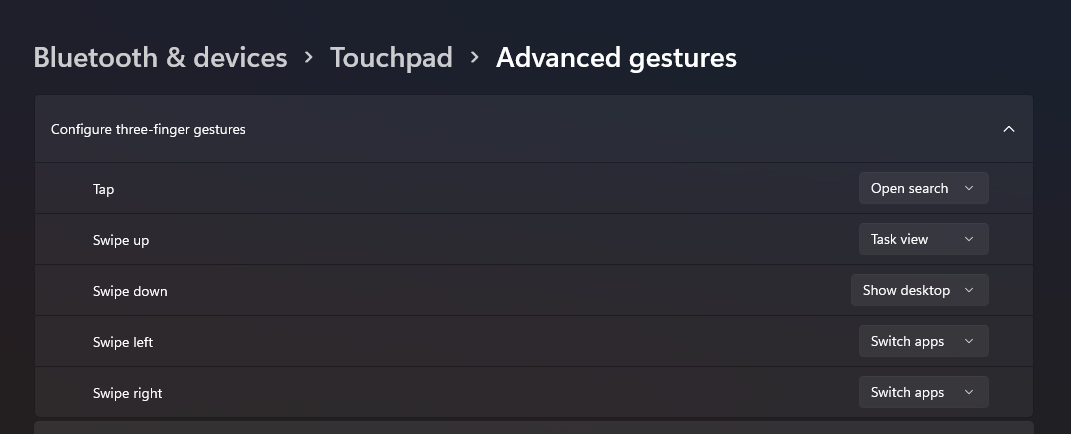
From the Advanced gestures window, you have the option to customize the three-finger gestures.
-
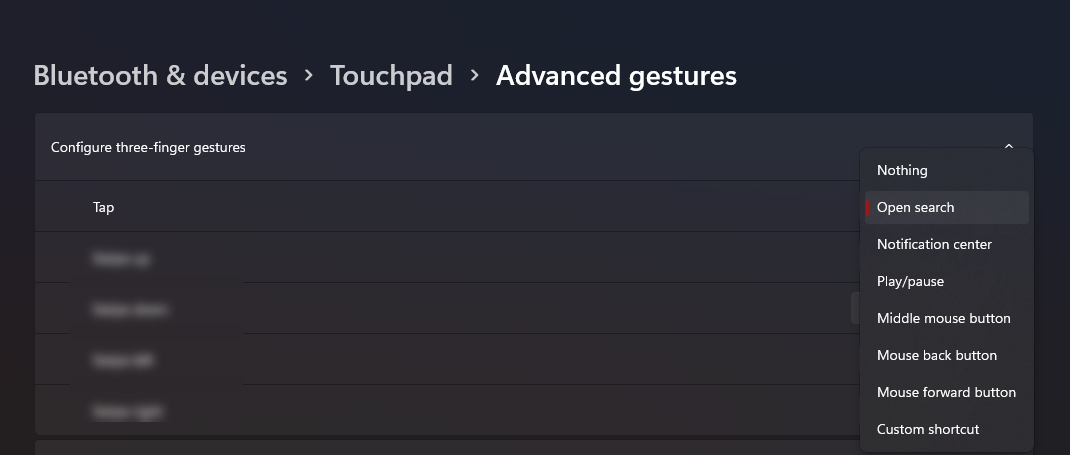
Under the Configure three-gestures menu, click the gesture you want to customize. For example, you want to change the action for Tap. You have the option to choose from Windows’s pre-selected actions or bind a keyboard shortcut through the Custom shortcut option.
-
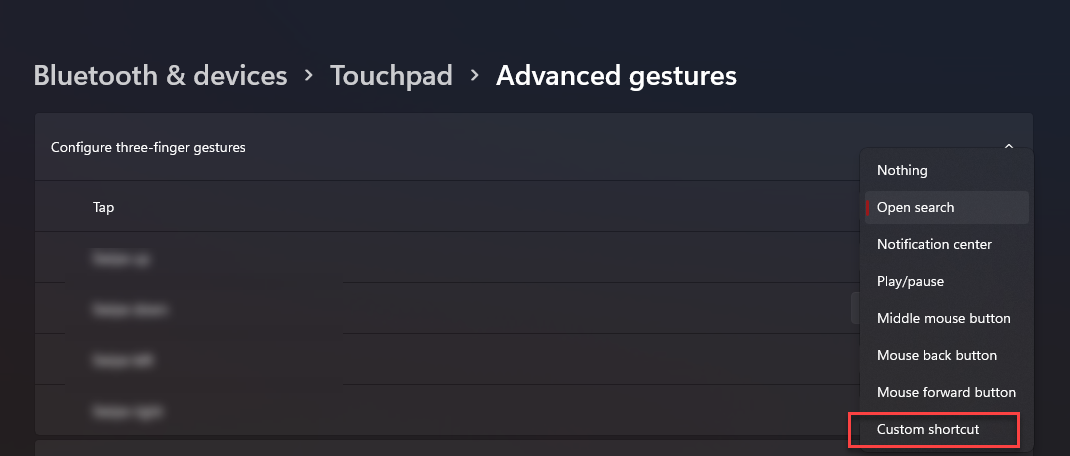
If you wish to create your own shortcut, click Custom shortcut from the menu.
-
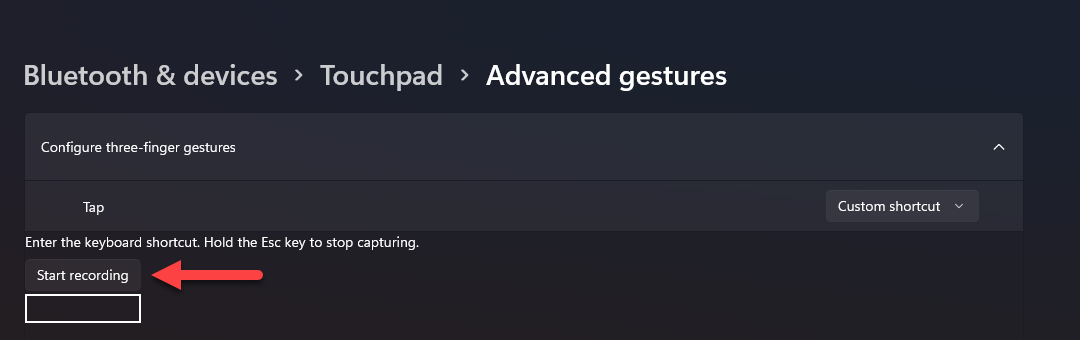
Next, click the Start recording button and press the keyboard shortcut you want to associate with the gesture.
-
Once you see the keyboard shortcut displayed in the box, click the Stop recording button. Alternatively, pressing and holding the Esc keys will confirm the action.
- Repeat steps 3 to 6 for all the gestures you wish to bind a keyboard shortcut.


Increase Your Productivity With Windows 11 Touchpad Gestures
A regular mouse may be easier to control, but you can create gestures that can be customized depending on your needs through your touchpad. Through touchpad gestures, you can get more out of your Windows system, especially when paired with other powerful features of Windows 11.