If you’re someone who enjoys hitting the gym or engaging in regular strength training, you’re probably familiar with the concept of dedicating a day specifically for your arm muscles.
Traditionally, arm day has often revolved around bicep curls, and while they are undoubtedly effective, it’s time to break free from the confines of this single exercise.
Why is it important to incorporate variety into your arm workout routine? Well, by challenging your muscles in different ways, you can stimulate new growth and prevent plateaus. While bicep curls are excellent for targeting the biceps, there is a whole array of non-curl exercises that can provide a fresh and exciting stimulus to your arm muscles.
In this article, we will introduce you to five non-curl exercises that will help you take your arm day to the next level. These exercises will not only work your biceps but also target other key muscles in your arms, such as the triceps and forearms. By diversifying your arm workout, you’ll not only achieve more balanced muscle development but also enhance your overall strength and functionality.
So get ready to break away from the traditional arm day routine and embark on a journey of arm reinvention. This article will provide you with step-by-step instructions, helpful tips, and a dose of inspiration to ensure an exciting and effective arm workout. Let’s unleash the true potential of your arms and revamp your workout routine like never before!
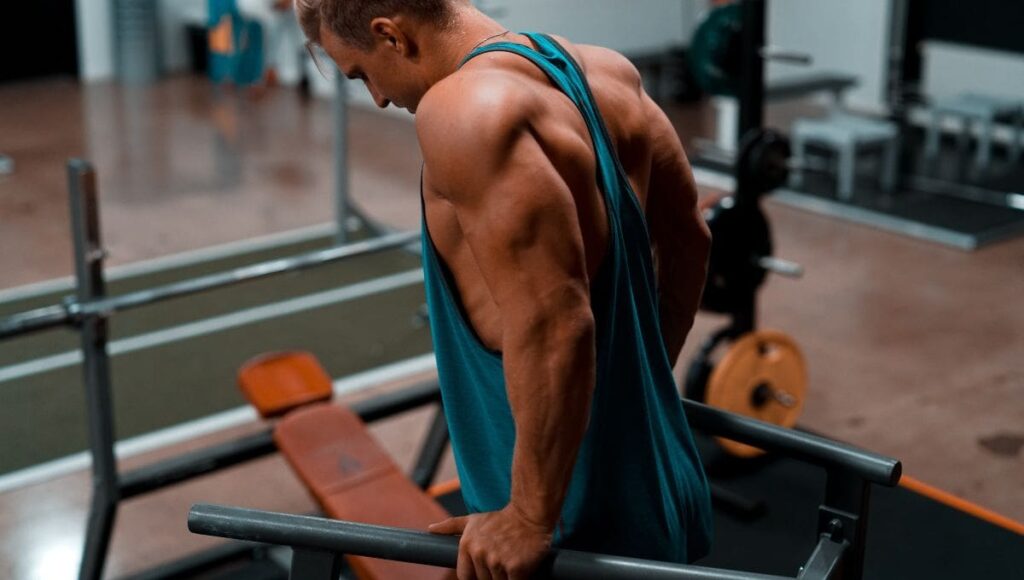
Exercise 1: Tricep Dips
Tricep dips are an excellent exercise that primarily targets the triceps, the muscles located on the back of your upper arms.
They are highly effective in building strength and definition in this area, giving your arms a toned and sculpted appearance. But tricep dips offer more than just aesthetic benefits; they also contribute to improved functional strength and stability in your upper body.
Technique
To perform tricep dips correctly, follow these step-by-step instructions:
- Find a stable surface: Look for parallel bars or a sturdy bench that can support your body weight. Make sure the surface is secure and won’t move during the exercise.
- Position yourself: Stand in front of the bars or bench and place your hands shoulder-width apart on the surface behind you. Keep your fingers pointing forward.
- Lower your body: Lower your body by bending your elbows and allowing them to flare out to the sides. Your chest should lean forward slightly while your back remains close to the surface. Keep your legs extended or bend them at a 90-degree angle, depending on your comfort level.
- Lower until your arms form a 90-degree angle: Continue lowering your body until your upper arms are parallel to the ground, forming a 90-degree angle at the elbow joint.
- Push back up: Engage your triceps and push through your palms to extend your arms and return to the starting position. Keep your core engaged throughout the movement.
Here are some tips to make the most of your tricep dips and challenge yourself at different fitness levels:
Start with assisted tricep dips: If you’re new to this exercise or find it challenging, you can use a bench or chair to assist you. Place your feet on the ground, slightly in front of you, and use your legs to support some of your body weight as you perform the dips. As you gain strength, gradually reduce the assistance from your legs.
Six pack exercises better than sit ups
Focus on form and control: It’s crucial to prioritize proper form over the number of reps. Keep your elbows pointed backward, avoid excessive swinging or momentum, and maintain a controlled pace throughout the movement. This ensures that your triceps are the primary muscles being worked.
Add resistance: Once you have mastered bodyweight tricep dips, you can increase the challenge by using a weight plate on your lap or wearing a weighted vest. The added resistance will intensify the exercise and promote further muscle growth.
Remember, it’s essential to listen to your body and work within your own capabilities. As you become more comfortable with tricep dips, gradually increase the number of repetitions and sets to continue progressing. So, get ready to feel the burn in your triceps and elevate your arm day to new heights with tricep dips!
Exercise 2: Push-Up Variations
Push-ups are a classic exercise that targets multiple muscles in the arms, chest, and shoulders. While the standard push-up is an effective compound movement, incorporating variations can specifically target the arms and provide unique benefits.
Let’s explore some push-up variations that will help you take your arm workout to the next level.
Wide Grip Push-Ups:
Targeted Muscles: Chest, shoulders, and outer portion of the arms.
Benefits: Wide grip push-ups target the chest and shoulders, while also engaging the outer portion of the arms. This variation can help broaden the chest and build overall upper body strength.
Form and Technique: Begin in a standard push-up position but position your hands wider than shoulder-width apart. Lower your body while maintaining a straight line from your head to your heels, and then push back up, engaging your chest and arms.
Decline Push-Ups:
Targeted Muscles: Upper chest, shoulders, and triceps.
Benefits: Decline push-ups shift the emphasis to the upper chest and shoulders, providing a challenging exercise for those seeking to develop the upper body’s aesthetic proportions.
Form and Technique: Position your feet on an elevated surface, such as a bench or step, while keeping your hands on the ground shoulder-width apart. Lower your body while maintaining a straight line, and then push back up, engaging your upper chest and arms.
Plyometric Push-Ups:
Targeted Muscles: Chest, triceps, and shoulders.
Benefits: Plyometric push-ups are a dynamic and explosive variation that enhances power, speed, and upper body explosiveness. They can help improve athletic performance and increase muscle strength.
Form and Technique: Start in a standard push-up position. Lower your body, and as you push back up, forcefully push off the ground, allowing your hands to leave the floor momentarily. Land with control and immediately move into the next repetition.
Remember these key tips for proper form and technique for all push-up variations:
- Keep your core engaged and maintain a straight line from head to heels.
- Lower your body with control and avoid letting your lower back sag.
- Breathe steadily, exhaling as you push up and inhaling as you lower down.
Start with a variation that suits your current strength level and gradually progress as you build strength and confidence.
By incorporating these push-up variations into your arm workout, you can target specific arm muscles, enhance upper body strength, and add variety to your routine. So, get ready to challenge yourself, push your limits, and transform your arms with these effective push-up variations!
Exercise 3: Overhead Press
The overhead press, also known as the shoulder press, is a compound exercise that primarily targets the shoulders but also engages the triceps, upper back, and core muscles. It involves pressing a weight overhead from shoulder level, making it an effective exercise for developing strength and muscular definition in the arms.
Let’s delve into the benefits, proper form, and tips for progressing with the overhead press.
Benefits of the Overhead Press for the Arms:
Shoulder Development: The overhead press is renowned for its ability to build strong and defined shoulders. It targets the deltoid muscles, including the anterior (front), lateral (side), and posterior (rear) deltoids. This leads to improved shoulder stability, functional strength, and an aesthetically pleasing upper body.
Tricep Engagement: As you press the weight overhead, the triceps work synergistically with the shoulders to extend and stabilize the arms. This results in increased tricep strength and tone.
Core Stability: Performing the overhead press requires core engagement to maintain balance and stability throughout the movement. This indirectly contributes to a stronger and more stable core.
Proper Form and Technique for Overhead Press:
Start by standing with your feet shoulder-width apart, keeping your core engaged and your spine in a neutral position.
Hold the weight (dumbbells, barbell, or kettlebells) at shoulder height with an overhand grip, palms facing forward.
Press the weight overhead by extending your arms, ensuring they are aligned with your ears. Keep your elbows slightly in front of your body during the movement.
As you press, exhale and engage your core muscles for stability. Avoid arching your back or leaning excessively backward.
At the top of the movement, pause briefly and squeeze your shoulder and tricep muscles.
Lower the weight back down to shoulder level in a controlled manner, inhaling as you do so.
Tips for Progression and Increasing the Challenge:
Gradual Weight Increase: Start with a weight that challenges you but allows for proper form. As you become more comfortable and proficient, gradually increase the weight to continue challenging your muscles and promoting growth.
Incorporate Variations: Experiment with different variations of the overhead press, such as using dumbbells, barbells, or kettlebells. Each variation provides a slightly different stimulus to the muscles and can add variety to your routine.
Tempo and Repetition Range: Vary the tempo and repetition range to keep your muscles guessing. You can incorporate slow and controlled movements for hypertrophy or explosive movements for power and strength.
Incorporate Supersets or Drop Sets: To increase intensity and challenge, consider incorporating supersets (performing the overhead press immediately followed by another exercise) or drop sets (performing a set with a heavy weight and then immediately reducing the weight and performing another set to failure).
Remember, proper form is crucial to maximize the benefits of the overhead press and prevent injury. If you’re new to this exercise, consider working with a qualified fitness professional to ensure you perform it correctly.
By including the overhead press in your arm workout routine, you’ll experience improved shoulder and tricep strength, enhanced muscular development, and overall upper body power. So, grab your weights and get ready to press your way to stronger, more defined arms!
Exercise 4: Diamond Push-Ups
Diamond push-ups are a fantastic variation of the traditional push-up that specifically target the triceps, making them an excellent addition to your arm workout routine. By adjusting your hand placement, you shift the emphasis from the chest to the triceps, helping you build strength and definition in the back of your arms.
Let’s dive into how to perform diamond push-ups correctly, including hand placement, form, and modifications for different fitness levels.
Description and Focus on the Triceps:
Diamond push-ups, also known as triangle push-ups, get their name from the diamond shape formed by placing your hands close together during the exercise. By bringing your hands in close proximity, you create a narrower base of support, which places greater emphasis on the triceps. This variation challenges the triceps to work harder, leading to improved strength and muscle development in the back of your arms.
Proper Hand Placement and Form:
Begin in a high plank position, with your hands directly under your shoulders and your body forming a straight line from head to heels.
Bring your hands close together, positioning them directly beneath your sternum, forming a diamond shape with your thumbs and index fingers. Your remaining fingers should be extended.
Engage your core, squeeze your glutes, and keep your elbows pointing back and close to your sides throughout the movement.
Lower your body by bending your elbows, keeping them close to your sides as you descend. Aim to bring your chest as close to your hands as possible.
Push through your palms and extend your arms to return to the starting position, fully extending your elbows.
Modifications and Tips:
For Beginners:
If regular diamond push-ups are too challenging, you can modify the exercise by performing them on your knees instead of your toes. This reduces the amount of body weight you’re lifting and allows you to focus on proper form and technique.
Start with a higher surface, such as a bench or step, to decrease the amount of bodyweight you’re supporting and gradually progress to performing diamond push-ups on the floor.
For Advanced Individuals:
To increase the difficulty of diamond push-ups, elevate your feet on an elevated surface, such as a bench or step. This increases the amount of bodyweight being shifted onto your upper body, intensifying the tricep engagement.
You can also incorporate tempo variations, such as slowing down the lowering phase of the movement or performing explosive push-ups, to challenge your triceps even further.
General Tips:
Maintain a neutral spine and engage your core throughout the exercise to ensure proper alignment and stability.
Breathe steadily, exhaling as you push up and inhaling as you lower down.
Gradually increase the number of repetitions and sets as you build strength and endurance.
Remember, it’s important to listen to your body and choose a variation that suits your current fitness level. As you become more proficient, gradually progress to more challenging modifications to continue challenging your triceps and achieving optimal results.
Incorporating diamond push-ups into your arm workout routine will help you develop strong, defined triceps. So, let’s get started and add this effective exercise to your arsenal of arm-strengthening movements!
Exercise 5: Hammer Curls
When it comes to arm exercises, most people immediately think of traditional bicep curls. However, there’s another highly effective and often overlooked exercise that targets not only the biceps but also the forearms—the hammer curl.
Hammer curls provide a unique twist to your arm workout routine and offer several benefits. Let’s explore the advantages of hammer curls and learn how to perform them correctly.
Benefits of Hammer Curls for the Biceps and Forearms:
Balanced Arm Development: While traditional bicep curls primarily target the biceps brachii muscle, hammer curls engage both the biceps and the brachialis muscle, which lies beneath the biceps. This leads to more balanced and symmetrical arm development.
Forearm Strength and Stability: The hammer grip used in this exercise places significant stress on the forearm muscles, including the brachioradialis and wrist flexors. As a result, hammer curls help strengthen the forearms, improve grip strength, and enhance overall arm stability.
Functional Movement: Hammer curls mimic a natural arm movement and have real-world applications. The motion closely resembles tasks such as carrying groceries, hammering nails, or performing various manual activities, making hammer curls beneficial for functional fitness.
Step-by-Step Instructions for Performing Hammer Curls Correctly:
- Stand with your feet shoulder-width apart, keeping your back straight and core engaged.
- Hold a dumbbell in each hand with a neutral grip (palms facing each other), allowing your arms to hang naturally at your sides.
- Keep your elbows close to your torso throughout the movement.
- Begin by curling the weights upward while maintaining the neutral grip, focusing on contracting the biceps and forearms.
- Continue lifting until your forearms are nearly perpendicular to the ground, and your biceps are fully contracted. Hold this position for a brief moment, focusing on the muscle contraction.
- Slowly lower the weights back down to the starting position, maintaining control and feeling a slight stretch in the biceps and forearms.
- Repeat the movement for the desired number of repetitions, aiming for a smooth and controlled tempo.
Tips for Performing Hammer Curls:
Start with a weight that allows you to perform the exercise with proper form and technique. Gradually increase the weight as your strength and confidence improve.
Avoid excessive swinging or using momentum to lift the weights. Focus on controlled and deliberate movements throughout the exercise.
Maintain a neutral grip throughout the entire range of motion. This helps emphasize the engagement of the brachialis and forearms.
If you want to intensify the exercise, you can perform hammer curls unilaterally (one arm at a time) to challenge each arm independently.
Incorporate hammer curls into your arm workout routine to add variety, target multiple arm muscles, and enhance forearm strength. Remember to prioritize proper form and gradually increase the weights to continue challenging yourself. Get ready to enjoy the benefits of stronger and more defined arms with this fantastic non-traditional exercise!
Conclusion
Congratulations! You have now discovered five non-curl exercises that can truly amp up your arm workout routine. By incorporating these exercises into your regimen, you can achieve a well-rounded arm development and unleash the full potential of your upper body strength.
We have emphasized the importance of incorporating variety into your arm day routine. While bicep curls are undoubtedly effective, focusing solely on them limits your arm development and may lead to plateaus. By diversifying your exercises, you engage different muscles, stimulate growth, and enhance overall strength and functionality.
Throughout this article, we introduced you to tricep dips, push-up variations, the overhead press, and hammer curls. Each exercise targets different arm muscles, providing a balanced approach to arm development. From the triceps to the biceps and forearms, these exercises ensure you work all the major muscle groups in your arms, resulting in a well-sculpted and strong upper body.
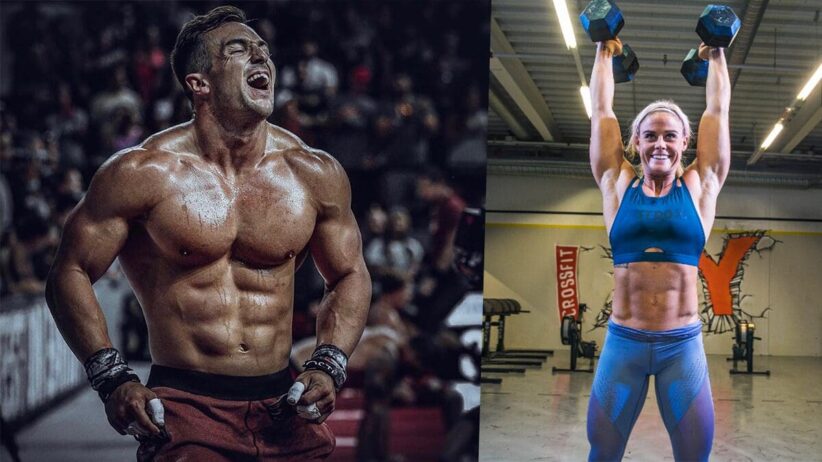
 Source: Photo courtesy of CrossFit Inc.
We encourage you to try out these exercises and incorporate them into your arm day routine. Experiment with variations, challenge yourself with heavier weights, and strive for proper form and technique. Remember, progress is a journey, and continuous effort will yield the best results.
But don’t stop here! The world of fitness is vast and ever-evolving, with new exercises and techniques constantly emerging. Take the time to explore and discover additional non-curl exercises that can further enhance your arm development. Challenge yourself with different movements, experiment with different equipment, and push your boundaries.
By embracing variety and continuously seeking new exercises, you can prevent stagnation, keep your workouts exciting, and achieve optimal arm development. So, step out of your comfort zone, be open to new possibilities, and let your arm day be a dynamic and exhilarating experience.
Now, it’s time to put your newfound knowledge into action. Get ready to redefine your arm day and unleash the true potential of your arms. Strong, defined, and powerful arms are within your reach. Embrace the challenge, push your limits, and enjoy the rewards of a well-rounded arm workout routine!
Image Sources
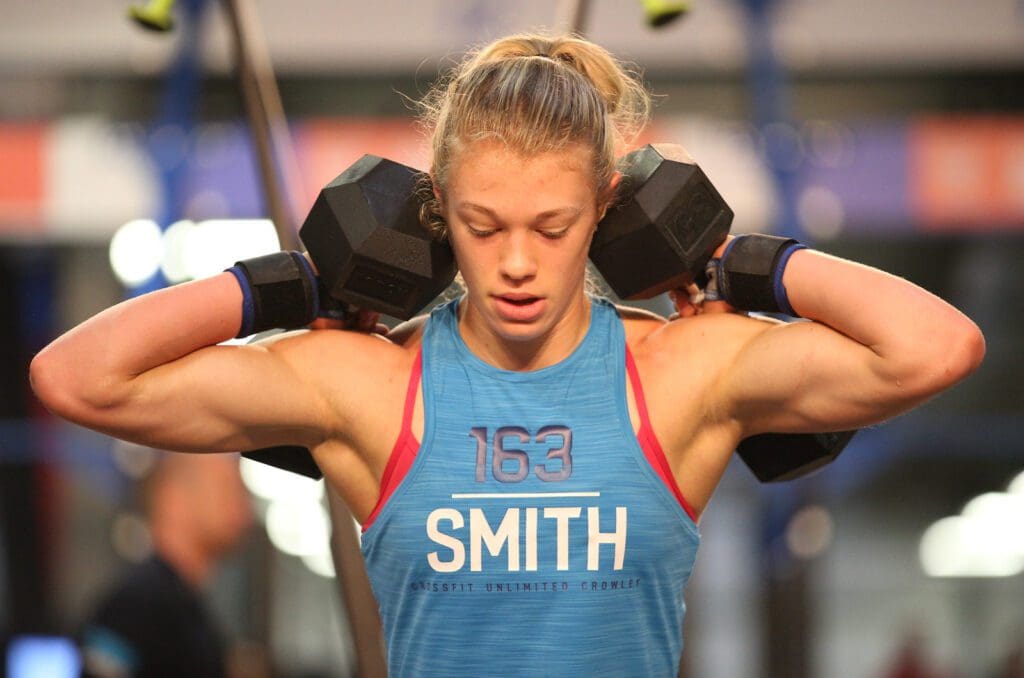
- hardest 6 minute tricep workout: Photo courtesy of CrossFit Inc.
- Muscle-Mass-Adrian-Sara: Photos Courtesy of CrossFit Inc