Hotter summers make for harder growing soil conditions, and the poor veggie garden beds can suffer the most. One way around this is to set yourself up with wicking beds.
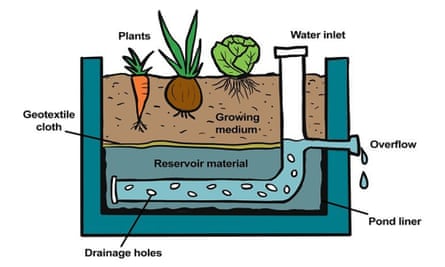
The basic theory behind wicking beds is that the water is stored in an airtight reservoir underneath the soil, and it “wicks” up through the soil to the roots above as the plants transpire moisture through their leaves.
Depending on its size, the reservoir can keep the soil moist for up to 10 days. It virtually eliminates evaporation from the soil and removes the chance of leaf scald, which can occur when you water your plants from above.
Everything you need to make one can be picked up from a hardware store.
How to make a wicking bed
Equipment you’ll need (the lengths will depend on the size of your garden bed):
A raised garden bed that features a firm frame
Brickies sand (very fine sand), enough to cover the base of your garden bed to a depth of 50mm
Food-grade plastic sheeting, enough to line the entire garden bed, all the way to the top
Two lengths of 50mm slotted agricultural pipe, one long enough to reach one-third of the length of your garden bed; the other long enough to reach the entire length of the bed
50mm poly pipe, enough to reach from the top to the bottom of your garden bed
25mm poly pipe, enough to reach half the height of your garden bed
A poly elbow, to join the shorter piece of 50mm slotted agricultural pipe to the 25mm poly pipe
Sealant, to seal the agricultural pipe in place
14mm construction aggregate (blue metal gravel), enough to fill the bottom half of your garden bed
Geotextile fabric, enough to cover the entire base of the garden bed
High-quality topsoil, enough to fill the top half of your garden bed
Mulch (pea straw or lucerne straw), enough to cover the top of your garden bed to a depth of 50mm
Step 1: Set up your raised bed

Your raised bed can be made from anything; however, ideally it needs to be a minimum of 50cm high, with a solid frame and base (such as a corrugated iron container, timber box or old bathtub). Ensure that it is placed on a level site and a stable, even surface – laying a bed of sand first is a good idea.
Step 2: Add the liner
Make sure the base of the garden bed is clear of anything sharp. Consider covering the base with a layer of brickies sand, just in case. You could also use some old carpet.
Then spread the food-grade plastic evenly across the base and up the sides, ensuring that it reaches almost to the top of the garden bed. If your plastic is thin, you could double it over before using it.
Step 3: Insert the overflow pipe
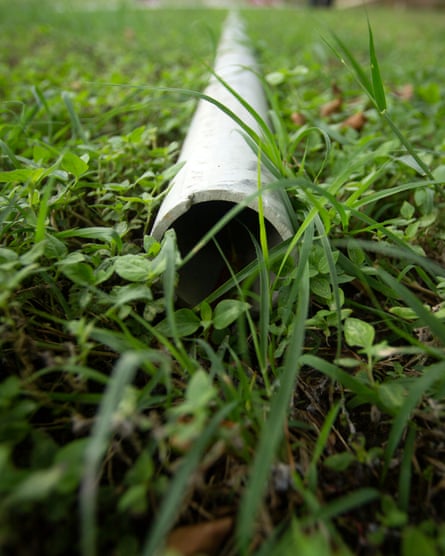
On one of the short sides of the garden bed, cut a hole just a little larger than the agricultural pipe you are using. Also cut through the liner. Install the shorter piece of agricultural pipe so that it pokes out of the hole, and then seal it on both sides to ensure watertightness.
Attach the poly elbow and the 25mm poly pipe, so that the top of the pipe will sit at the same height as the top of the stones in your bed. This poly pipe can be used to indicate when you have enough water in the garden bed, and it can be swivelled to release the water from time to time to avoid stagnancy.
Step 4: Form the water reservoir
Add the gravel. Lay the longer piece of agricultural pipe across the centre of the gravel from one side of the garden bed to the other. At the end of this agricultural pipe that is closest to the overflow pipe, place the 50mm poly pipe so that the top of the pipe is higher than the top of the garden bed (you will need something to hold it in place until the soil is added). This is the inlet pipe, which you will use to add water to the garden bed (with a hose or narrow-spouted watering can).
The gravel between the inlet and overflow agricultural pipes prevents water from rushing through and out of the garden bed before the reservoir is filled, and it allows you to fill the reservoir quickly without back-flooding the garden bed, which is really important.

Step 5: Check for leaks
Add water to the garden bed through the inlet pipe, and leave it overnight to see if there are any leaks.
Step 6: Insert the geotextile fabric
Lay the fabric on top of the reservoir. If you don’t have access to geotextile fabric, then you can use a piece of shade cloth that has been doubled over. Whatever you use, ensure that the material allows water to move up but stops soil from going down.

Step 7: Add the soil
Pour in the topsoil. To keep your soil rich and healthy, ensure that you add approximately 10cm of fresh compost to the garden bed each year before planting.
Step 8: Start planting
Treat this like a normal raised garden bed, with the tallest vegetables in the centre and the shortest or creeping species on the edges.
Note that the driest soil will be located at the surface, which helps to stop weeds from growing. You will need to hand-water seedlings from above for a couple of weeks until their roots get going. When you have finished planting, add a layer of mulch.
This is an edited extract from Futuresteading by Jade Miles, published by Murdoch Books (A$39.99)
Comments (…)
Sign in or create your Guardian account to join the discussion