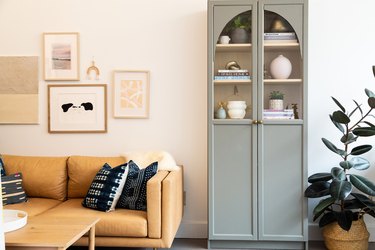
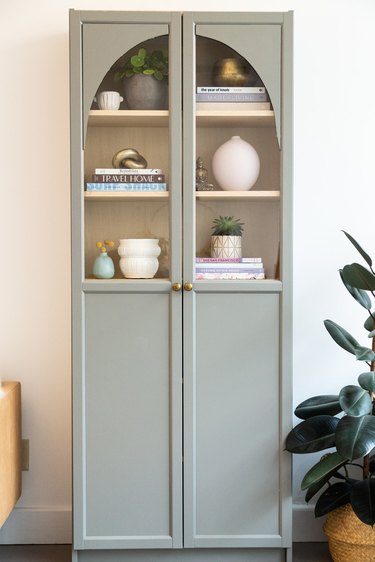
Arched cabinets in dining rooms and kitchens are popping up all over Instagram. Like this black glass display cabinet from Crate and Barrel. There is something about the curve on the top of the cabinet that screams sophistication.
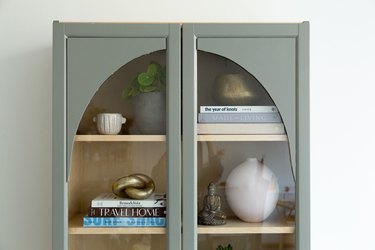
We used a Billy bookcase from IKEA paired with Oxberg cabinet doors. Now, you can keep the natural wood color of the IKEA cabinets and bookcase, but we wanted to go with something more on trend and stylish. We used Benjamin Moore in Desert Twilight — it's the perfect mossy green with khaki brown undertones.
Video of the Day
Video of the Day
Adding the curved wood pieces over the glass doors is actually a bit more simple than it may seem! Read on for all the details...
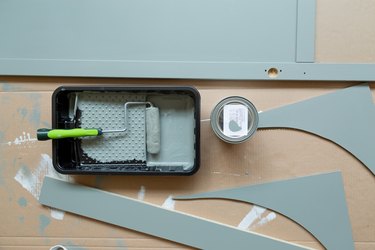
Things You'll Need
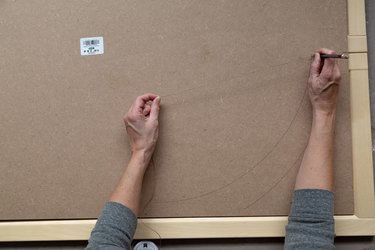
Step 1: Create arch shape on MDF board.
Use the string and pencil method. Place the board on top of the cabinet doors. Tie a string to a pencil. Hold the end of the string in the center of the board (in the middle of the cabinet doors). Then place the pencil (tied to string) near the top of the cabinet and slowly draw a curved line down the outer edge of board. This will create the arched shape.
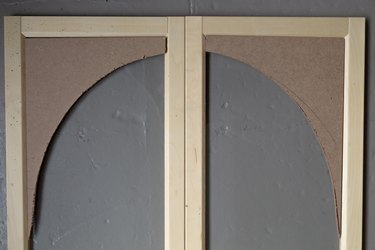
Step 2: Cut two arch shapes from MDF board.
Use a jigsaw to cut the arch shape. After you cut the first one, trace and cut another one. Our arch shape is two inches at the smallest point, 12 inches across, and 17.5 inches long. Sand the edges of the arches.
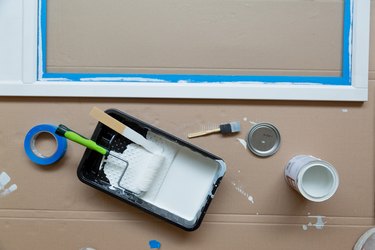
Step 3: Prime the IKEA cabinet and MDF board.
You will need to use a shellac based primer for the laminate IKEA furniture. The Zinsser B-I-N primer works really well. Roll the primer onto the cabinet doors and bookcase pieces prior to building the furniture. Also, be sure to roll primer on the MDF pieces.
Step 4: Allow the primer to dry.
The shellac based primer will dry fairly fast!
Step 5: Add color.
Use a new roller brush to apply the green paint. We used a Benjamin Moore Advance cabinet paint in Desert Twilight color. Two coats should be perfect. Allow to dry overnight, and then put together the bookcase and cabinet doors per the IKEA instructions.
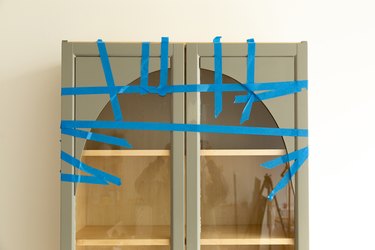
Step 6: Adhere arches to the top of cabinet glass doors.
We used gorilla glue to attach the arches. Press the arch onto the glass and secure with blue painters tape. Allow to dry overnight. (We recommend to use a clear glue.)
Step 7: Remove any paint from glass.
Use a paint scraper to remove any paint from the glass.
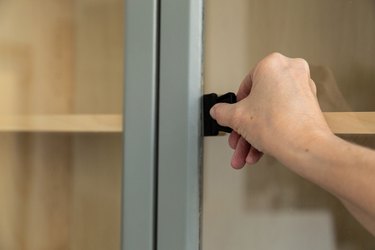
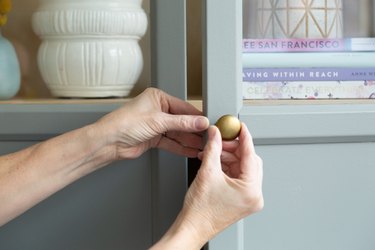
Step 8: Add cabinet hardware.
You can use the cabinet pulls that came with the IKEA cabinet, or add brass pulls to give it a sophisticated look. (Or, check out this DIY on how to paint cabinet hardware.)