
We may earn revenue from the products available on this page and participate in affiliate programs. Learn More ›
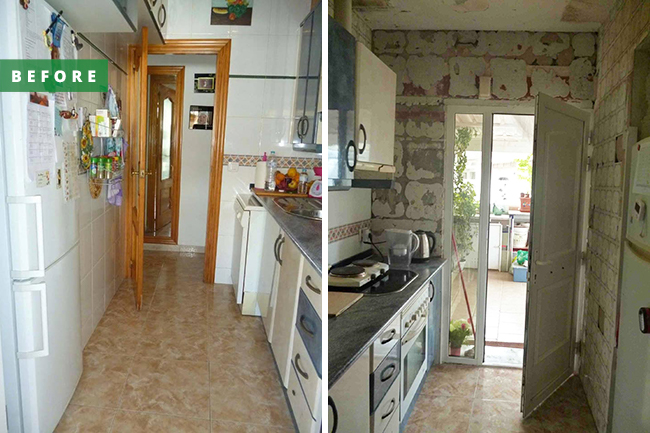
When we moved into our current home we sacrificed space for the opportunity to live by the sea. Having smaller rooms doesn’t matter a great deal when you spend much of your time outdoors. It is a decision we have never regretted, with the possible exception of the kitchen, which was cramped and badly organized.
My wife and I had built two kitchens before, but on those occasions we had more space to work with, and a blank canvas because we had built the entire structure of those rooms from the ground up. This time we had to work within the confines of the existing walls, and at the start we weren’t even sure what the walls were made of.
RELATED: Buying an Old House? Be Prepared to Live With These 12 Quirks
Out with the Old
We wanted to keep the floor tiles, which are pleasantly neutral and run through most of the ground floor. Everything else had to go.
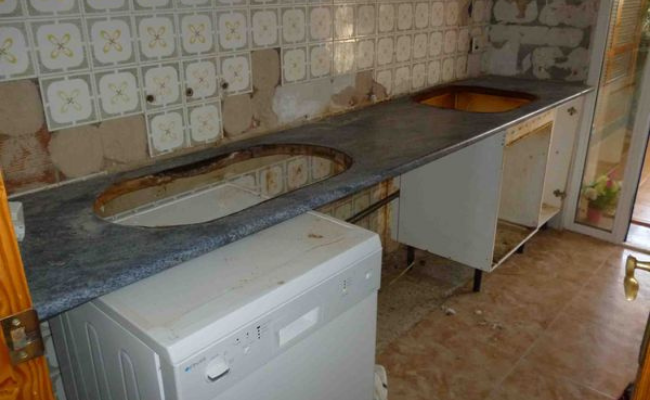
The first job was to remove the existing cabinets, which we didn’t envisage being a problem. The previous owner had used way more screws than necessary, making it a tedious task though not a difficult one.
We had always planned to upgrade the electrics because there were fewer lights and outlets than we wanted. Revealing the existing wiring made this a necessity. It’s not an area where I have any skill, so we called in a local contractor to make it safe. The plumbing pipes were also in poor condition, but I could replace those myself.
Bare Walls
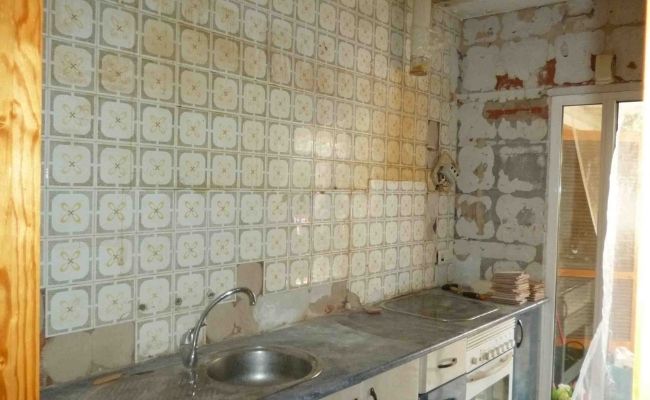
The existing wall tiles were originally white but had yellowed with age, and several were cracked. Normally we would have attacked them with an SDS hammer drill and a chisel bit. Doing it manually was a safer way to start as we were unsure of the underlying structure.
Sure enough, the first layer of tiles revealed a further tile layer underneath, probably dating to the 1960s when the house was built. These were attached to the wall with pads of mortar a half inch thick.
My wife and I have done a good deal of remodeling, and ordinarily we would install drywall. However, a lot of work would be required to clear the existing substrate so I called a friend who is a building contractor. He advised removing the remainder of the first layer, then applying a waterproof plaster coating. It would retain the strength, be quicker, and more resistant to any humidity.
Lighter and Brighter

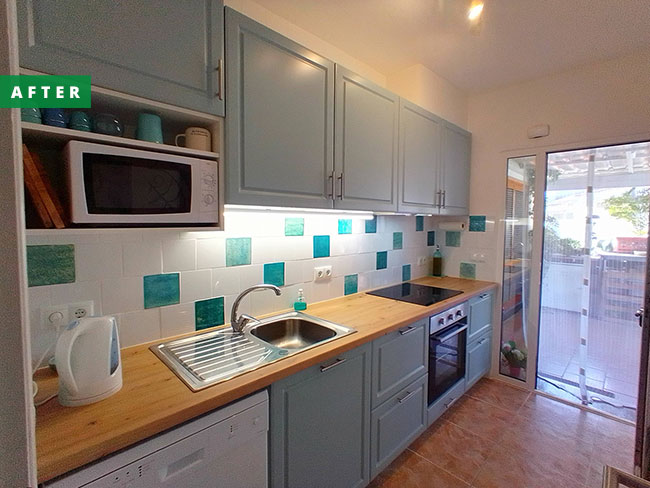
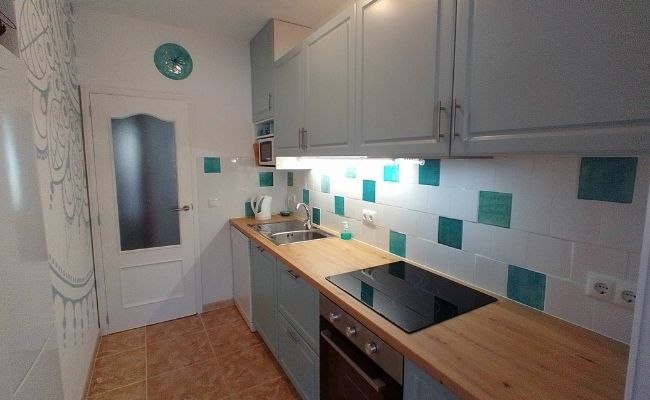
My wife is a ceramic artist, and loves painting and decorating. She has a far better eye for design and color than I. She chose light blue cabinets with brushed steel handles that are bright and modern, but have a small molding so they are not featureless. The wall units are taller than the previous ones, meaning we have the same storage without anything on the opposite wall. It has opened the room up tremendously.
Walls were painted white (more on that in a moment), as was the existing interior door which was previously pine that had been varnished a dull brown.
We bought a low-profile range hood to install in the cabinet over the cooktop. It has twin spotlights that provide illumination in that area. We ran LED lighting under the remainder of the wall cabinets to brighten the main food-preparation area. Finally, we fitted a four-way spotlight rail to the ceiling for general light.
RELATED: See the Most Searched for Kitchen Cabinet Color After White
Space Efficient
The kitchen is only 9 feet by 6 feet, with a small alcove that takes a refrigerator. We spent a long time thinking about efficient use of the area, and how to position the cooktop, oven, sink, and dishwasher in order to maximize space.
Moving the microwave from the countertop up onto the wall freed up a useful area to the left of the sink. The new sink is 30 percent larger than the old one, which didn’t have a drainer. Yet because the drainer now reaches over the dishwasher, we have gained room in the center of the worktop as well.
Base units are now deep drawers rather than cabinets (with the exception of the one under the sink). The drawers provide just as much storage, but it’s surprising how much more pleasant they are to use. Lifting things up and out is much easier than reaching into the back of low cupboards.
RELATED: 7 Things to Know Before Installing Butcher Block Countertops
Unique Ceramics and Art
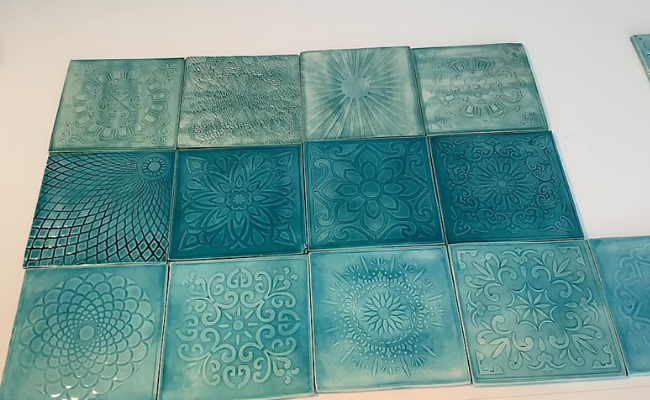
The final touches that elevate it to something particularly special to us are a large mandala wall mural that my wife Xandra painted, and her handmade tiles for the backsplash. There are 21 of these, and each one has a unique embossed pattern. They add both color and texture, while remaining easy to keep clean.
Final Thoughts
The only natural light in the kitchen comes from the glazed front door. Changing the cabinets and painting the walls allows that light to reflect around the room. Even in ordinary daylight the difference is quite dramatic. There’s an open and uncluttered feel that makes it seem much bigger than it is. We are delighted with the result.