November 20, 2021
(last updated February 9, 2022) There’s nothing I love better than a slice of classic vegan pumpkin pie during the holiday season. This version uses cashews for an ultra-creamy consistency and features a traditional, flaky vegan pie crust.
I have very positive feelings about pie. I like apple, cherry, pecan, blueberry, peach, chocolate mousse, key lime, and most of the classic pie flavors. But if I had to choose only one pie to eat, it would without a doubt be pumpkin pie.
I love all things pumpkin, and I don’t confine my pumpkin eating to the early fall months alone. It’s no surprise that I love pumpkin pie, too: the spices, the aroma, and the luxurious, creamy texture.
I have tried many, many versions of vegan pumpkin pie over the years. Some have involved tofu, others coconut cream. But the base ingredient that has always worked best is cashews.
Cashews may be the most hard-working ingredient in my kitchen. They’re the starting point for my all-purpose cashew cream, whipped cream, queso sauce, cheesecake, and a lot of other recipes that call for dairy-like richness without dairy. And it’s cashew cream that brings this vegan pumpkin pie to life.
This year, I’ve finally decided to consolidate my many pumpkin pie experiments into a single, definitive recipe. Here it is, my perfect vegan pumpkin pie.
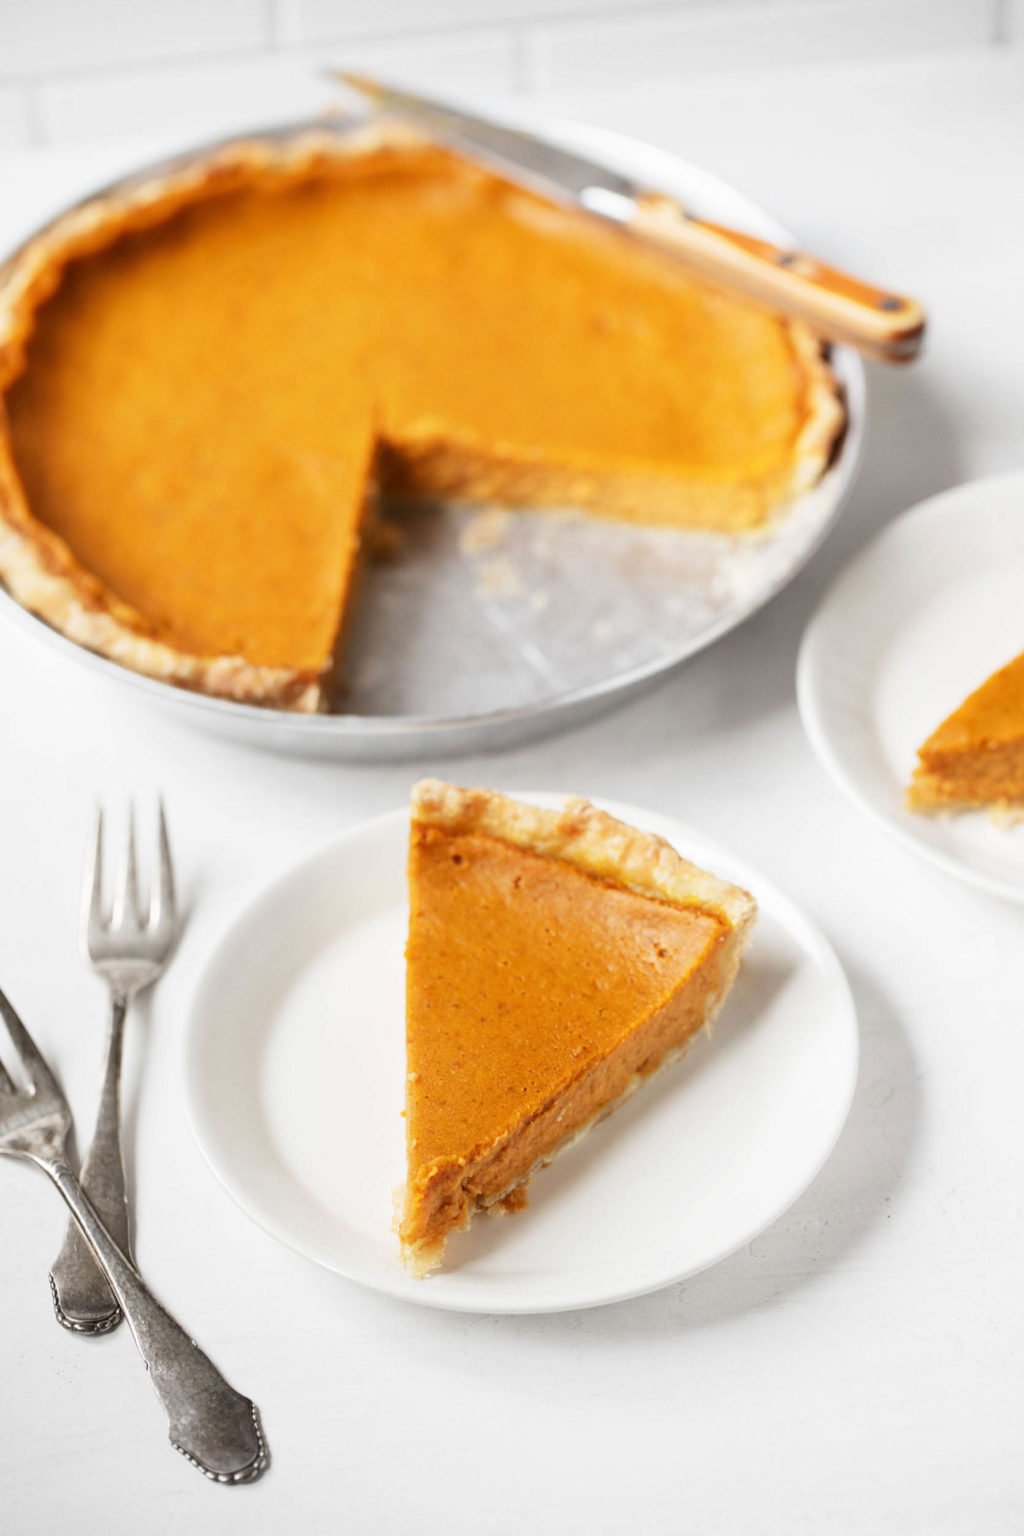
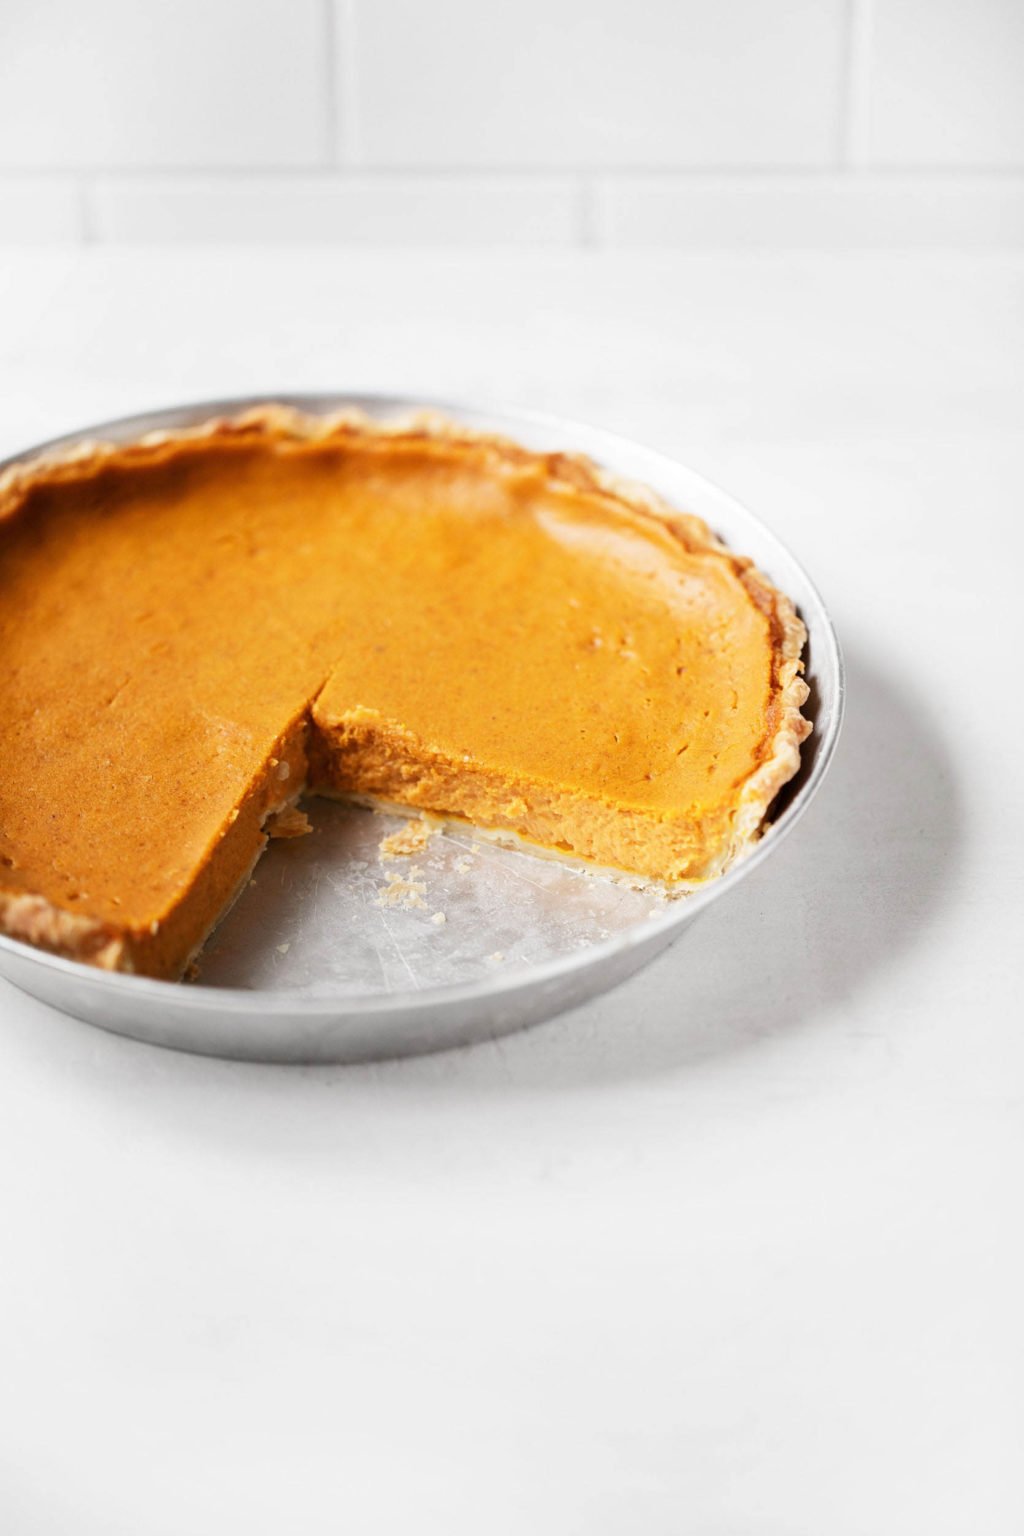
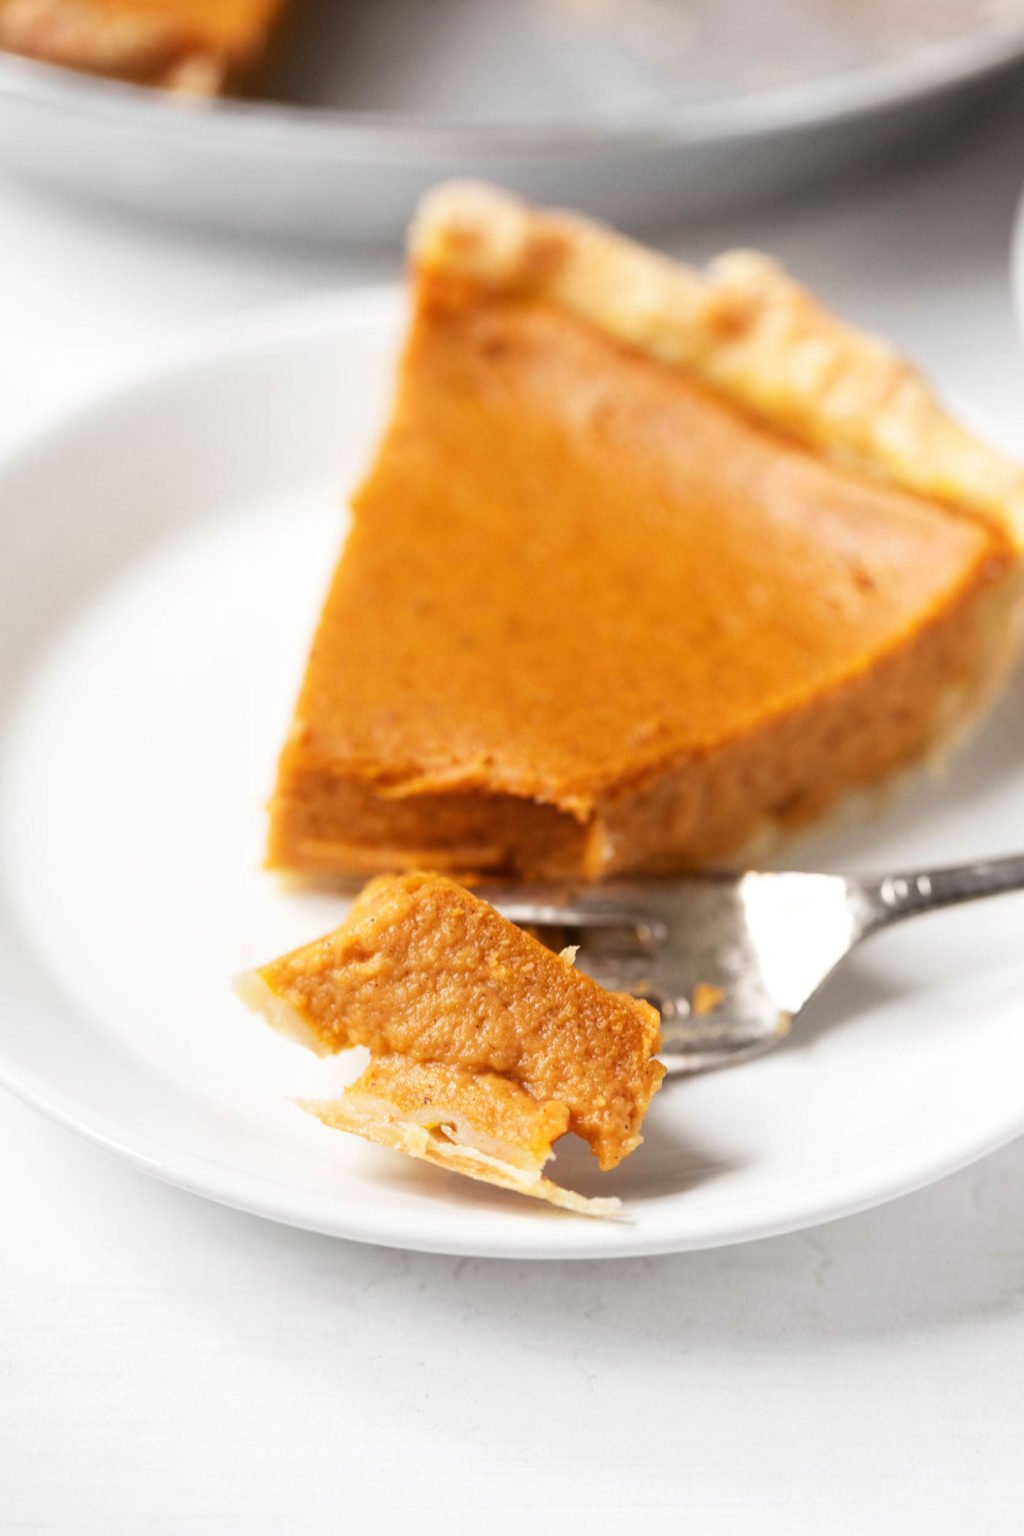
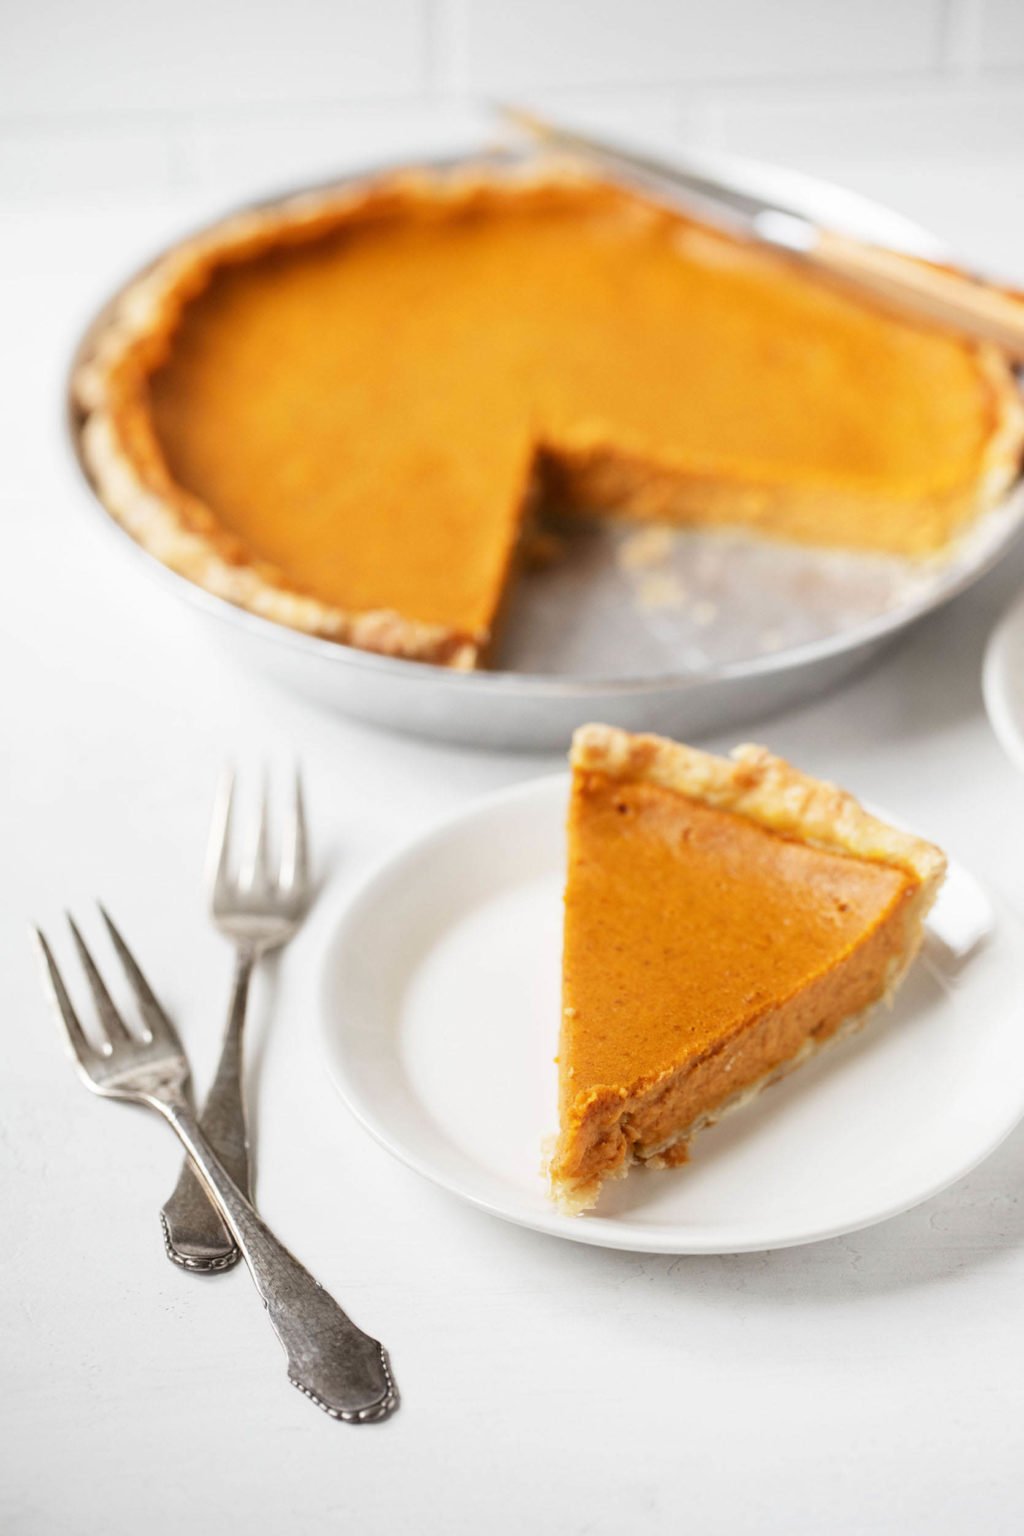
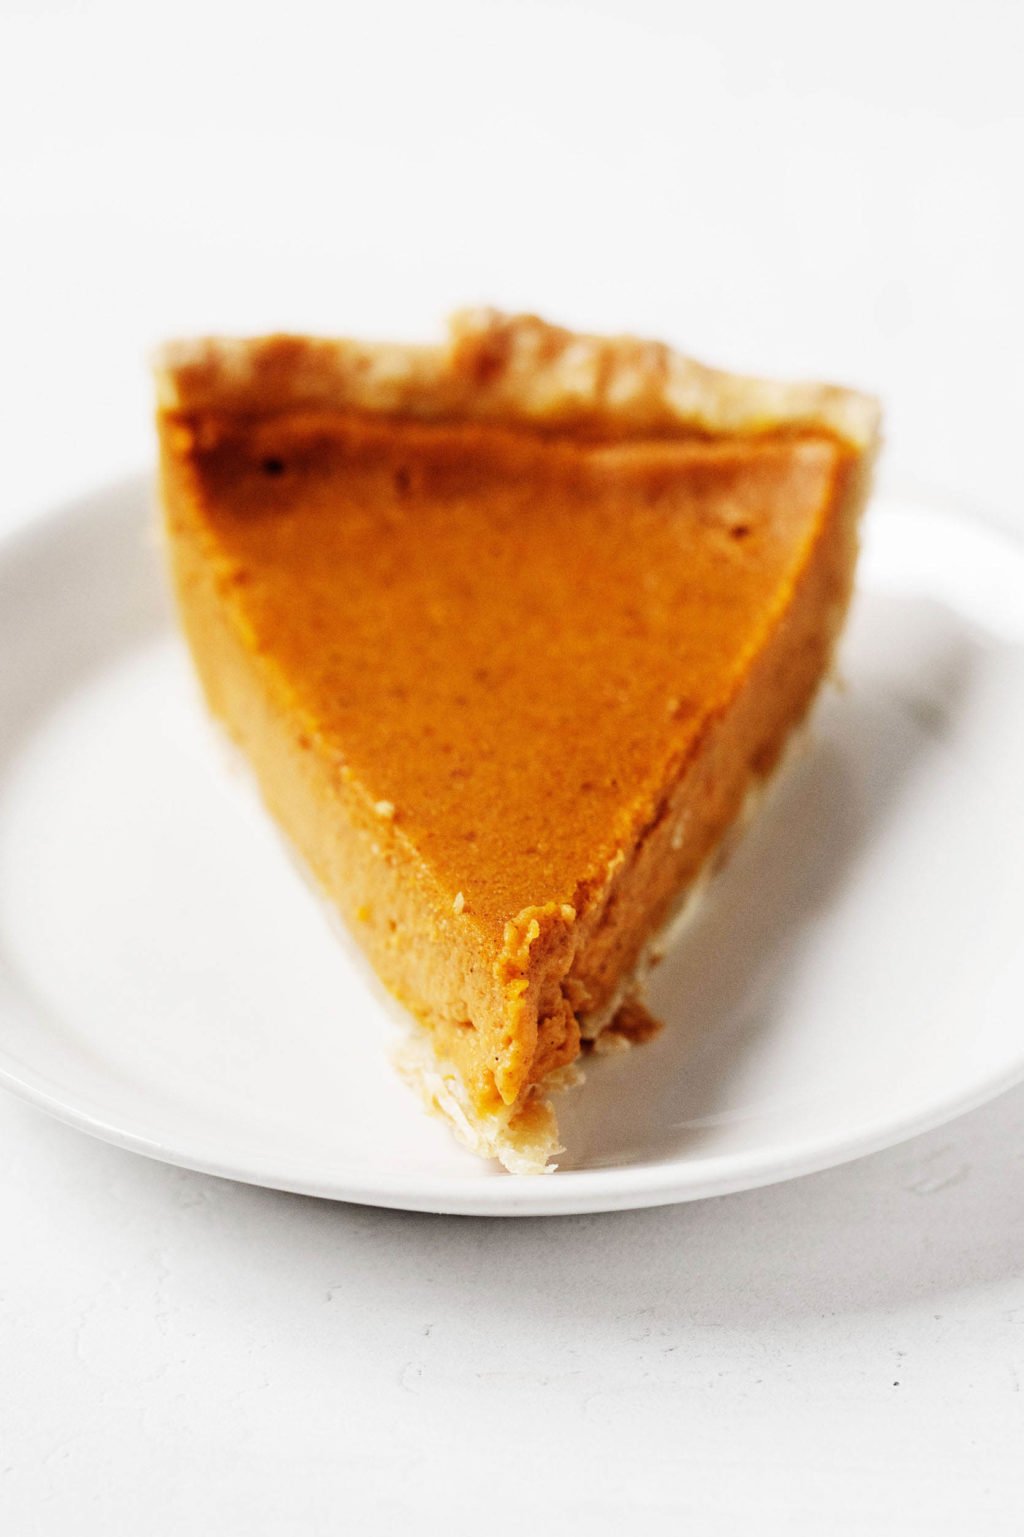
As far as pumpkin pies go, this is a classic recipe: no special twists or frills. It has a flaky vegan pie crust, a creamy, rich center, and that beautiful orange hue. Plus, the flavor and aroma of pumpkin pie spice. If you love pumpkin pie already, then there’s nothing not to love here. If you haven’t yet found a plant-based recipe for keeps, perhaps this is the one.
How to make vegan pumpkin pie
The immediate challenge of this recipe is that traditional pumpkin pie is made with both eggs and evaporated milk (or heavy cream). Neither of these filling ingredients is vegan, of course.
To make vegan pumpkin pie, one has to replace both creaminess, usually provided by cream or evaporated milk, and binding, which is what the eggs do.
I’ve found that cashews are best for creating a creamy, rich texture in vegan pumpkin pie. Silken tofu is an option, but it’s not quite as rich as cashews are. Coconut cream works, but it’s not my favorite flavor, and I prefer the unsaturated fats in cashews to the saturated fats in coconut.
As for binding—the ingredient that helps the pumpkin pie to have a set texture—I use a thickening agent. This can be arrowroot powder, cornstarch, or tapioca starch. I give all options in the recipe.
Perfect vegan pie crust
Of course pumpkin pie isn’t just about the pumpkin filling. It’s also all about the crust!
I’ve made vegan pumpkin pie with graham cracker crust and with a flaky, all-butter pie crust. Both have their charms. At the end of the day, though, the flaky crust version wins my heart. It adds buttery goodness to the recipe and a little saltiness to offset the sweetness of the pumpkin filling.
I make my vegan pie crust pretty traditionally. The only thing I do differently is of course to use vegan butter. You can take your pick of vegan butter, but varieties that come in a stick form tend to be easier for baking.
For the edges of the crust, you can be as decorative or as simple as you like. I find that crimping with a fork looks festive enough and requires the least work of any pie edge technique. But there are many options to choose from.
A simple, gently fluted edge, which is what you see in these images, looks nice, too.
Do I need to make pumpkin purée from scratch?
You most definitely don’t. In fact, I don’t think I’ve ever roasted a pumpkin in order to make pumpkin pie filling from scratch. I purchase canned pumpkin purée, which works really well.
I’ve read a few times that homemade pumpkin purée has better flavor than canned, which is definitely possible. And from what I can tell, it’s not too hard to make it from scratch. But I’ve always had such nice results with canned pumpkin purée that I’ll probably stick to using it.
Plus, making pie is already a bit of a project! It’s worth saving time on reliable shortcuts.
Vegan pumpkin pie ingredients
Here’s a rundown of the primary ingredients you’ll need to make the vegan pumpkin pie.
All-purpose flour
I use unbleached, all-purpose flour for my buttery pie crust.
You can probably get away with substituting a small portion of that flour with whole wheat flour, but I haven’t had too much luck with 100% whole grain crusts myself. They usually end up a bit dry. Plus, I think the butter flavor shines through more when I use all-purpose flour.
If you need to make the crust gluten-free, that’s no problem! A good gluten-free, all-purpose flour blend ought to work well. I really like the King Arthur Measure for Measure blend.
Vegan butter
There are many vegan butter options nowadays, and most of them should work in the crust. However, it’s much easier to cube butter for pie crust if you use butter that comes in a stick form. I usually use either Earth Balance or Miyoko’s butter for mine.
Pumpkin purée
As I mentioned, you can feel free to make life a little easier and purchase this in canned form. Just be sure to purchase pumpkin purée, rather than pumpkin pie filling, which is pre-sweetened.
If you do prefer to make your purée from scratch, you’ll need about 1 3/4 cups total.
All-purpose cashew cream
In past vegan pumpkin pie experiments, I blended raw, soaked cashews directly into my pie filling. It worked well.
However, this time I got to thinking about using my all-purpose cashew cream instead of raw nuts. I figured this had two advantages: first, smoother texture for the pie filling. Second, it would allow me to provide a tree nut free option with coconut milk as a direct substitute.
It worked so well! In fact, now that I’ve made the pie this way, I doubt I’ll try anything else. You’ll need one cup of the cashew cream, and you can find all of the instructions you need for making it here.
Arrowroot or tapioca starch
You can use either arrowroot powder (also sold as arrowroot flour) or cornstarch to thicken your pumpkin pie filling as it bakes.
I think that arrowroot creates a slightly creamier finished pie filling, but the difference between the thickeners isn’t huge. And the ratio between them is the same: one tablespoon arrowroot for every tablespoon of cornstarch.
If you don’t have either thickener at home, but you do have tapioca flour, then you can use four tablespoons of tapioca flour instead. It’s less strong than the other two thickeners, so you’ll need more of it.
Sugars
I use a mixture of both brown and cane sugar in the vegan pumpkin pie filling. A 50/50 mix is just the right balance of moisture, and it also gives the finished pie a really pretty, bright and vibrant orange color.
Pumpkin pie spice
I’ll admit it: with all the pumpkin-themed baking that I do in the fall, I rely heavily on pumpkin pie spice.
I don’t doubt that it would be very easy for me to make a homemade pumpkin pie spice blend at home, or to give a little more thought to a good mixture of individual spices. But I do like shortcuts, and pumpkin pie spice is an easy shortcut.
So, that’s what I use in the pie. If you wish to make your own pumpkin pie spice, then you’re doing what I don’t bring myself to do! And it doesn’t look to be that difficult, either.
And if you’d like to substitute the pumpkin pie spice for this particular recipe, but you don’t feel like making a whole batch of spice blend, then I recommend 1 teaspoon ground cinnamon, 1/2 teaspoon ground ginger, 1/8 teaspoon ground nutmeg or allspice, and 1/8 teaspoon ground cloves (listed in the recipe, too).
Vanilla extract
The vanilla in the pumpkin pie filling is subtle, but it does enhance the flavor of the pie. If you don’t have vanilla extract, you can use an equal amount of vanilla bean paste or powder.
Steps & tips
If you take this recipe step-by-step and take your time, then it’s an easygoing pie. However, there are a few points in the process when things can get a little tricky, so worth going through it all.
Make your pie crust
This part is pretty straightforward. If you’ve made pie crust from scratch before, then you’ll know what to do. If you haven’t, then I hope the instructions are clear, but this post is a good all-around primer.
I used my food processor as a shortcut to make pie crust for a really long time. Nowadays I prefer working with a simple pastry cutter and my hands. I think I get a better feel for the dough and its consistency that way.
Chill your pie crust
Two hours is definitely enough time for this pie crust. However, chilling pie crust presents a nice opportunity to take a break when you’re preparing the vegan pumpkin pie.
If you like, you can make the pie crust dough up to two days in advance of baking the pie. Store it wrapped in plastic wrap or wrapped tightly in wax paper in your fridge.
The unbaked pie crust dough can also be wrapped and frozen for up to a month.
Roll and fit the crust
When it comes to rolling and fitting pie crust, visuals are superior to words! Here’s a good tutorial that will help you with the rolling process.
Blind bake
I was resistant to blind baking my pie crust for a long time, and I almost always skipped the step. However, once I started, I found that it made a huge difference in my pies.
Blind baking is just baking your pie crust—which is weighted down, usually with dry beans—for 10-15 minutes before the crust is filled and the entire pie is baked.
The result of blind baking is that the bottom of the crust can bake and firm up a bit before a wet filling is added to it. Ultimately, blind baking helps to prevent the dreaded “soggy bottom” that can so easily happen in homemade pie-making.
A few things to know about blind baking:
- There are special blind baking weights that you can use to weigh your crust down. I usually use dry beans or dry wheat berries from my pantry.
- Prick the bottom of your crust with a fork before you blind bake. This allows some steam to escape as the butter melts, and it will result in a more flaky crust.
- 10-12 minutes of blind baking is all you’ll need for the vegan pumpkin pie recipe. After that, the crust will need to cool for 10 minutes before you add the pumpkin pie filling.
Prepare the filling
I do this as my crust blind bakes. It’s the easiest part of the recipe! Use a food processor or a blender to blend the ingredients until they’re smooth.
Fill + bake
Once your crust is blind baked and cooled and your filling is blended, you’re ready to fill and bake the pie.
You’ll need to give the pie about 45 minutes in the oven. One thing to look out for is that sometimes crust edges can brown before the pie has had enough time in the oven. You can protect the pie edges with a DIY foil shield or with one of these.
An important FYI: at the end of baking, the center of the filling should have some wobble, but the outer edges of the filling will be set. This is how it should be. The filling will continue to set and firm as you chill your pie.
Chill the pie
Altogether, this recipe involves seven (!) hours of chilling time: two for the crust, five for the pie.
I know this is a lot. But of course that chilling time is inactive time, and you can plan around it.
The five hours of chilling time for the pie itself will allow the pumpkin pie filling to set up properly, so that it’s firm, yet still creamy. You can let it chill in the fridge or in a cool part of your home for at least five hours.
Alternatively, you can prepare the pie a day ahead of time and allow it to cool in the fridge overnight.
Storage and reheating
The vegan pumpkin pie should be stored in the fridge for any period longer than two hours. However, I think it tastes best when it’s either room temperature or gently warmed. You can plan to take it out of the fridge 1-2 hours before slicing and serving.
If you’d like to enjoy the pie warm, then you can reheat it at 350F for 15 minutes.
The entire pie can be stored in the fridge for up to four days.
Can I freeze vegan pumpkin pie?
Most definitely! Freezing the pie is the easiest way to make it ahead of whatever occasion you plan to serve it for. You can freeze the pie for up to four weeks.
More vegan pumpkin treats to savor
Pumpkin pie may be the most beloved pumpkin dessert, but there are so many other pumpkin baked goods to enjoy in the fall and winter months. Here’s a short list of my favorites, for holidays or any occasion:
- Pumpkin chocolate marble loaf
- Classic vegan pumpkin bread
- Pumpkin chocolate chip blondies
- Pumpkin cashew pudding
- Vegan, gluten-free pumpkin skillet cornbread
And here, without further ado, is the classic vegan pumpkin pie.

Classic Vegan Pumpkin Pie
Author –Yields: 12 servings
Ingredients
For the crust
- 1 1/2 cups unbleached, all-purpose flour (180 g)
- 1 tablespoon cane sugar (12 g)
- 1/2 teaspoon kosher salt
- 8 tablespoons cold vegan butter, cut into cubes (112 grams / 1 stick)
- 1 teaspoon white vinegar
- 6-8 tablespoons ice water
For the pie
- 15 ounces canned pumpkin purée (430 g / 1 3/4 cups)
- 1 cup cashew cream (substitute full fat, canned coconut milk, shaken well)
- 2 tablespoons arrowroot or tapioca starch (18 g; substitute cornstarch)
- 1/2 cup brown sugar (96 g)
- 1/2 cup cane sugar (96 g)
- 2 teaspoons pumpkin pie spice (substitute 1 teaspoon ground cinnamon, 1/2 teaspoon ground ginger, 1/8 teaspoon ground nutmeg or allspice, and 1/8 teaspoon ground cloves)
- 1 teaspoon vanilla extract
For serving
- tofu whipped cream (optional)
Instructions
- To make the crust, mix the flour, sugar, and salt in a large mixing bowl. Add the butter and use a pastry cutter or two knives to cut the butter into the flour, until the pieces of butter are about the size of peas. Alternately, you can put the flours, salt, and sugar into a food processor, add the butter, and pulse until the ingredients are combined and the butter is the size of peas.
- Mix the ice water and vinegar. Add the water into the flour mixture in a thin stream, using a spatula to mix as you go. As soon as the dough holds together without being wet, and it easily sticks together when you squeeze a small amount in your hand, it's ready. If your dough is too crumbly and isn't holding together, add additional ice water by the tablespoon until it does. Transfer the dough to a floured work surface and shape it into a disk. Wrap it in plastic wrap and refrigerate for at least 2 hours. At this point, you can keep the dough in the fridge for up to 2 days or freeze it for later use, if you like.
- When the dough has finished chilling, preheat your oven to 375F. Flour a work surface and rolling pin.
- On the floured work surface, roll the dough into a circle about 1/4 inch thick and about 12 inches in diameter. Gently transfer this circle of dough to a pie dish. Trim and crimp the edges, then use a fork to prick the bottom of the crust. Cover the crust with a sheet of parchment paper and fill it with dry beans (any are fine) or pie weights for blind baking. Blind bake the crust for 10-12 minutes, or until the edges of the crust are just barely golden. Remove the par-baked crust from the oven, discard the beans, and remove the parchment sheet.
- While the crust blind bakes, blend all of the filling ingredients together in a food processor or blender. Blend for a full 2-3 minutes, or until the filling is silky smooth.
- Remove the crust from the oven. Allow it to cool for 10 minutes. Then, pour the filling into the crust. Return it to the oven and bake for 45 minutes, or until the crust is browning at the edges and the filling is jiggly, but set at the outer edges. I recommend using a commercial or homemade foil pie crust shield to protect the edges from browning too much during baking, but it's not absolutely necessary (browned pie crust still tastes good!).
- Remove the pie from the oven. Allow it to rest in a cool place for at least 5 full hours before slicing. Alternately, you can chill it in the fridge overnight (or up to 3 nights) before serving. Cut into slices, top with tofu whipped cream if desired, and enjoy!
I haven’t made the pie since last fall, and I can’t wait to make it again this coming week. Pie is always a bit of a project—it isn’t straightforward or a one-bowl affair, the way a lot of my favorite vegan cakes are.
But I always find that the effort is worthwhile, and I’m never sorry to have leftover pumpkin pie in my fridge and freezer. I hope you’ll enjoy the recipe, too.
xo
This post may contain affiliate links. If you use these links to buy something I may earn a commission. Visit my privacy policy to learn more.
Categories: Recipes,
Pies & Tarts
Method: Oven
Ingredients: Cashew Nuts
Dietary Preferences: Soy Free, Vegan
Recipe Features: Holidays
Method: Oven
Ingredients: Cashew Nuts
Dietary Preferences: Soy Free, Vegan
Recipe Features: Holidays


Leave a Comment
Superb recipe! Very easy to make. Love the creaminess the cashews give it. This is now my go-to pumpkin pie recipe. Thank you to Gena!
So glad you like it, Lacey!
In the recipe intro you say “If you haven’t yet found a plant-based recipe for keeps, perhaps this is the one” For me, this IS the one!! I made the filling yesterday and had to write to say thank you… it is delicious, definitely a keeper.
So glad you like it, Jill!
Hi Gena! I have a kabocha squash laying around in my counter and have been looking for the perfect pumpkin pie recipe to try and this one sounds like it! I’ve noticed that other bloggers use maple syrup too, have you tested with that? Do you think I could sub a little sugar for maple (or molasses, as I was thinking of doing)?
Hi Iara! I haven’t tried it, so I can’t say for sure. It could have an impact on the consistency of the filling. But if you have success with it, I’d love to hear about it 🙂