5 Foolproof Tips for How to Cook Rice
Whether you’re a fan of basmati, jasmine, or just plain white rice, we’ve got tips that will give you perfect results every time
When you shop through retailer links on our site, we may earn affiliate commissions. 100% of the fees we collect are used to support our nonprofit mission. Learn more.
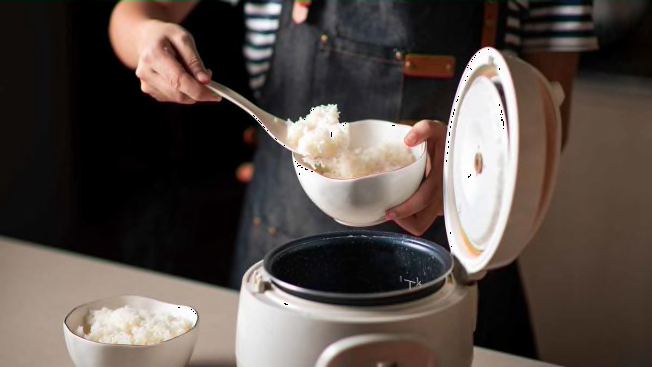
In theory, cooking rice is about as easy as it gets, requiring two ingredients and heat. But without some know-how or at least an awesome rice cooker, what should be a fluffy, soft pile of aromatic grains can easily turn into a mushy mess or charred, dry dregs.
We’ve got a lot of rice-obsessed employees at Consumer Reports, myself included, from various rice-eating cultures. Just about all of us use rice cookers daily and consider them indispensable, so I asked a dozen of my colleagues for their best rice cooking tips. But because none of us actually cook for a living, I also spoke with a couple of chefs who really know their rice.
Whether you’re wondering if it’s really necessary to rinse your rice, how precise your measurements need to be, or what types of rice are best cooked in a rice cooker, you’ve come to the right place. And just in case you ever find yourself without a rice cooker, I threw in stovetop instructions, too.
Now, let’s get cooking!
1. Choose the Right Rice Cooker
“I always avoided boiling rice in a pot at home because I didn’t know what to do, and it seemed complicated,” says Lisa Ruiz, the lead tester in our rice cooker tests. “Testing rice cookers for CR was an eye-opening experience for me because they work pretty efficiently, the process is really easy, and the timing is reliably repeatable.”
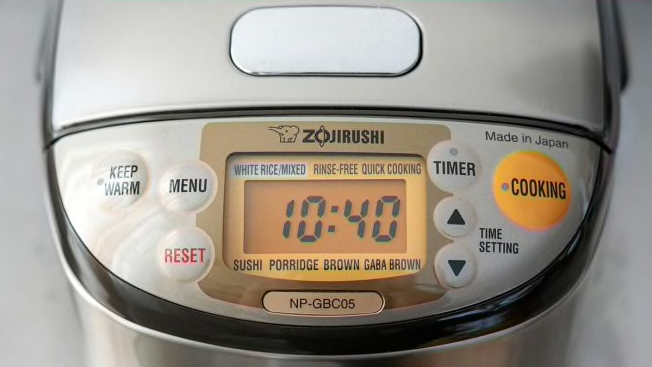
Photo: Perry Santanachote/Consumer Reports Photo: Perry Santanachote/Consumer Reports
Presets Are Your Friend
Depending on your rice cooker model, you may not have any options beyond pressing one button to start cooking. Or you may have more program choices than you know what to do with. Basically, you want to press the preset that corresponds to the type of rice you’re cooking, but your cooker might have other convenient settings, such as quick-cook and delay start.
“My kids get hangry and impatient,” says Yusuke Tomizawa, a digital marketing specialist at CR. “The quick-cook setting on my Zojirushi has Japanese rice ready in 15 minutes.”
But what are you giving up by saving time? Apparently, not much. “It’s a slight difference in texture, but not too perceptible,” says Amit Bhan, CR’s director of strategic intelligence. “I’m so grateful for the convenience that I don’t care.”
When the rice is done cooking in a rice cooker, let it rest undisturbed for 10 minutes to absorb some steam and firm up a bit. Use the paddle that comes with the rice cooker or a silicone, plastic, or wooden spoon to fluff the rice. (A metal fork could scratch the nonstick coating on the pot.)
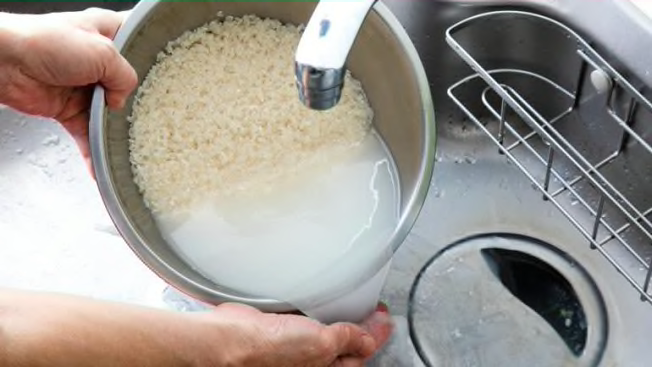
Photo: Yuuji/Getty Images Photo: Yuuji/Getty Images
2. Rinse and Soak Your Rice
Why We Rinse Our Rice
“I’m not going to argue with any grandma about washing rice,” says JJ Johnson, chef and owner of Fieldtrip, a rice-focused eatery in New York. “That is one thing that I think all rice cultures do. Wash it until the water runs clear.”
“Rinsing rice gets rid of the powder that coats the grains, separates the grains, and gives the steamed rice texture,” says Amelie Kang, owner of MáLà Project, a Sichuan-style restaurant in New York. “Rinsing three times is the general guideline.”
It also cleans rice of any remaining dirt, dust, or bran particles from the production process. “I’ve seen how they collect rice in the paddies and how it’s processed in the factories,” says Min Kim Bryant, a market analyst at CR. “The same reason I wash my produce is why I wash my rice.”
Rinsing also reduces the amount of arsenic in rice. “You can reduce your exposure to arsenic by 30 percent just by rinsing,” says Tunde Akinleye, the lead tester in CR’s investigation of arsenic levels in rice. “That’s huge!”
When to Soak Rice
Some staffers also suggest soaking your rice after rinsing if you’re cooking brown rice, wild rice, or Japanese short-grain rice (known in the U.S. as sushi rice).
“I’m from Korea and I love plain sushi rice, but my husband, who was born in America, prefers brown rice for its nutrition,” Kim Bryant says. “I find brown rice is hard and kind of dry, so I mix them together, rinse, and soak for at least an hour to give the brown rice better texture.” Then she uses the whole-grain setting on the rice cooker for about 55 minutes or 30 minutes on the quick setting.
“I soak my sushi rice for 30 minutes before cooking it,” Boyd says. The Rice Factory, which is the Japanese specialty rice seller she buys her rice from, says a soak gives rice more time to absorb water, resulting in more tender kernels once cooked.
Remember, the heartier the grain, the longer you should soak—up to 8 hours for wild rice.
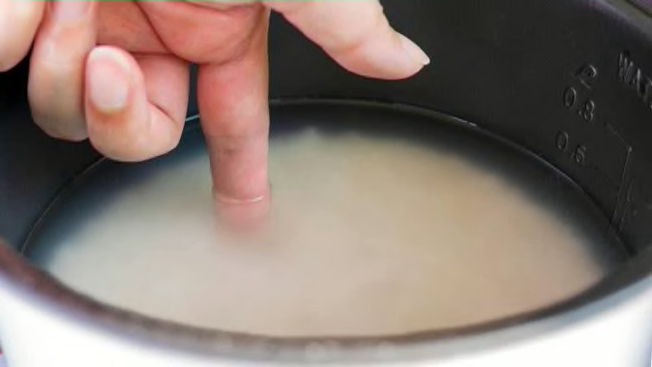
Photo: Perry Santanachote/Consumer Reports Photo: Perry Santanachote/Consumer Reports
3. Master the Rice-to-Water Ratio
Rice-cooker manuals say to use the measuring cup that comes with the appliance and fill the pot with water to the line that corresponds to the rice measurement. But cups go missing, markings on the sides of the pots wear off, and manuals disappear into the abyss that is the junk drawer. Here are a few tricks.
2:1
“I grew up eating rice and beans at least four times a week, so cooking rice was one of the first things I learned to do,” says Marta Tellado, CR’s president and CEO. “Two-to-one never fails.” As in two parts of water and one part rice.
Knuckle trick #1
Aimee Soriano-Vlachos, a data operations project leader at CR, relies on what she calls an ancient Asian secret to achieving that ratio. “I place my middle fingertip on the bottom of the pot and measure the rice to the first knuckle, then add water to the next knuckle,” she says.
Knuckle trick #2
Johnson does a variation on that. “I put my middle finger at the top of the rice and pour the water in until it reaches the first knuckle on my finger,” he says. “The knuckle trick works every time. It doesn’t matter how big or small your hand is.”
Palm trick
Kim Bryant places her palm over the rice and adds water until it reaches the back of her hand.
The great thing about rice cookers is that your rice and water measurements don’t need to be perfect. The appliances use sensors to adjust the cooking time and temperature depending on how much rice and water is in there. For good measure, add more water for basmati and brown rice (1 cup of rice to 2¼ cups of water) and less water for sushi rice (closer to a 1:1 ratio).
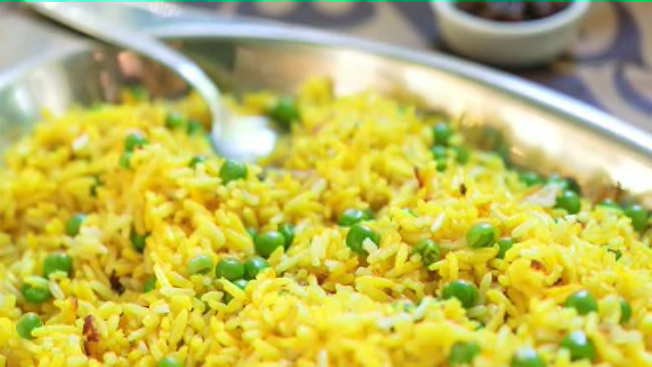
Photo: iStock Photo: iStock
4. Add Flavor
You can add spices to the pot along with the rice and water as well as other aromatics, such as sautéed onions or garlic. If nothing else, “always add a pinch of salt,” Tellado says.
But Johnson salts the rice after it’s done cooking. “You don’t want to put salt into the pot when you’re cooking it because it will tighten up the germ and it’ll take longer for the rice to cook, and it might not cook as evenly.”
If you’re not cooking aromatic rice, such as jasmine or basmati, swap out some or all of the water for chicken broth for a flavor boost. For creaminess and aroma, sub coconut milk for half of the water.
“A little butter or a few drops of oil in the cooking pot helps prevent foaming and spluttering of starch buildup,” says Nicole Powell, a testing technician at CR.
“Saffron gives basmati rice a gorgeous color and flavor,” Bhan says. “Or add turmeric, a bay leaf, and peas for some nice contrast.”
The award for the most original rice add-in, however, goes to Valerie Pedrozo, an associate director for data governance at CR. “My parents are from Samar Island in the Philippines,” she says, “where they top off red sticky rice with hot chocolate.”
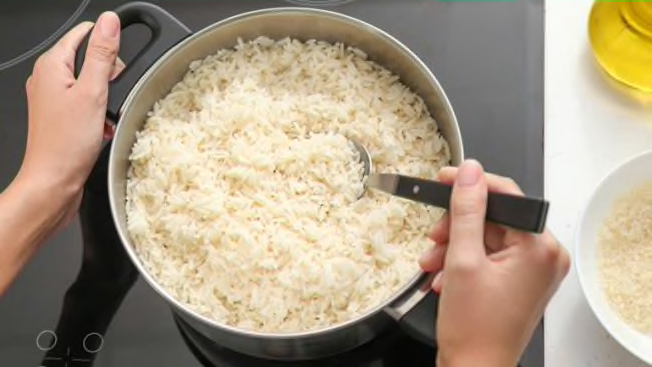
Photo: Adobe Stock Photo: Adobe Stock
5. Learn How to Cook Rice on the Stovetop (Just in Case)
In my early 20s I went on a trip with my sisters and cousins. We got ready to cook dinner and realized there wasn’t a rice cooker in the rental and we’d have to make rice on a stovetop. Of course, not a single one of the Thai American women in the room knew how. Our collective shame was so palpable we could have eaten that for dinner instead. We ate bad rice that night, and I vowed to learn how to make good rice on a stove.
The trick is to calibrate the rice cooking to your stove and cookware. The first few batches are experimental and probably won’t come out perfect or hassle-free, but once you know the exact heat level and timing, you can repeat it every time.
Pick the Right Pot
Choose a larger pot with room for the rice to double, and a tight-fitting lid to prevent steam from escaping. “Many people cook rice in these itty-bitty teeny little pots and wonder why the bottom is overcooked and the top is undercooked,” Johnson says. “It’s because the rice doesn’t have room to expand.”
Measure the Rice and Water
While you can be more loosey-goosey with the rice-to-water ratio using a rice cooker, I recommend measuring for stovetop rice for repeatable consistency. If there’s a different amount of water in the pot every time you cook rice, you’ll need to monitor and adjust your heat level and cook time manually, a task that a rice cooker does automatically.
I prefer a ratio of 1 cup of rice to 1½ cups of water for long-grain white rice, 1¼ cups of water for sushi rice, and 2¼ cups of water for short-grain brown rice. You can use these measurements as a starting point, but you may need to use more or less water depending on your rice and your burner’s heat level.
Rinse the rice and drain it thoroughly in a colander before adding it to a pot with the measured water.
Cook and Take Notes
Bring the pot of water and rice to a boil over high heat, then immediately reduce the heat to low, cover, and cook until the water is absorbed. Steam should steadily plume from the sides of the lid, but reduce heat if water bubbles out. Set a timer for about 20 minutes for white rice and 45 minutes for brown rice (longer if you want a crispy bottom layer). When the rice is done, leave the lid on and remove the pot from the heat. Let it stand for 10 minutes to finish cooking via steam before fluffing.
If the rice isn’t quite tender and no water remains, add a little more water next time. If the rice is wet or mushy, use less water next time. Take notes: You might not remember this. Adjust the water and timing until it comes out perfectly, and then use the exact same pot and burner every time for hands-off stovetop rice.
Johnson has a great tip for fixing undercooked rice: Fluff the rice, put it in a bowl, cover it, and microwave for 2 minutes. If you overcook rice, just add more water or chicken stock and turn it into rice porridge.


