How to Run Windows 11 on a USB Drive (and Take it With You)
Create a portable Windows 11 installation.
For many years, we’ve been able to make Linux Live disks that boot and run completely off of a USB Flash drive (or optical disc). These portable OS installs can be useful when you just want to try an operating system without messing with whatever platform you have on your best hard drive or SSD. And they can be good for when you want to take your OS and programs with you as you move back and forth between computers.
Thanks to Rufus, a popular free app that creates bootable USB drives, you can make a portable install of Windows 11 that runs off of a Flash drive you carry in your pocket. Testing Rufus’ “Windows to Go” feature, we were able to use the same Windows 11 disk on two different computers, with minimal hassle.
The latest version of Rufus not only allows you to create a Windows to Go version of Windows 11, but one that can avoid the TPM and CPU requirements of the new OS. So, if you have a computer that doesn’t have TPM 2.0 or a compatible CPU (Intel 8th Gen or higher, AMD Ryzen 2000 series or higher), you can boot off of this WIndows to Go disk with no problem. If you want to install Microsoft’s OS onto the main SSD or hard drive of a PC with older hardware, see our story on how to bypass Windows 11’s TPM requirements or how to do a clean install of Windows 11.
Below, we’ll show you both how to create a portable Windows 11 installation that runs off a USB flash drive and then how to use it when you switch back and forth between computers.
How to Create a Portable Windows 11 Installation
Having a portable Windows 11 installation installed to a USB drive is useful if we don’t want to nuke our Windows 10 install. The portability is a little limited as when we move to a different machine, we’ll be asked to reset your PIN. But all we need is a fast USB 3 drive and we can enjoy Windows 11 without touching our legacy installs.
1. Download the latest version of Rufus and install it on your machine. At the time of writing the latest version is 3.16 which includes the Extended Windows 11 Image support.
2. Insert a blank 64GB or larger USB stick then open Rufus. The faster the USB drive, the better as this will become your main drive.
Stay on the Cutting Edge
Join the experts who read Tom's Hardware for the inside track on enthusiast PC tech news — and have for over 25 years. We'll send breaking news and in-depth reviews of CPUs, GPUs, AI, maker hardware and more straight to your inbox.
3. Select the USB device that you want to install Windows 11 to.
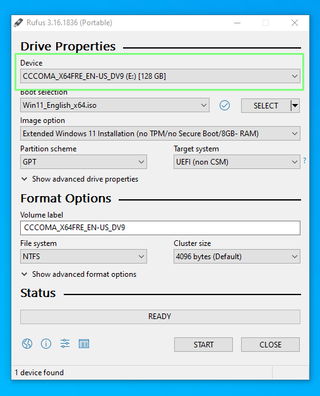
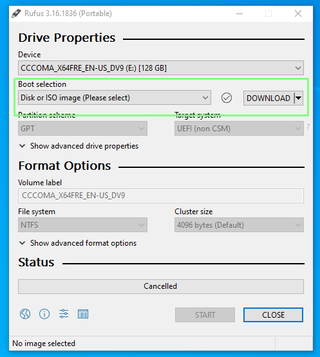
4. Ensure that Boot Selection shows “Disk or ISO image” and click on DOWNLOAD.
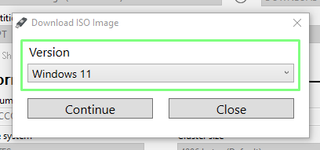
5. Select Windows 11 and click Continue.
6. Select the latest release and click Continue.
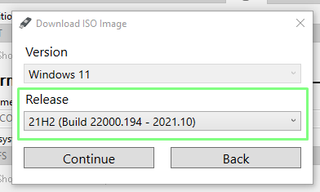
7. Select the edition and click Continue.
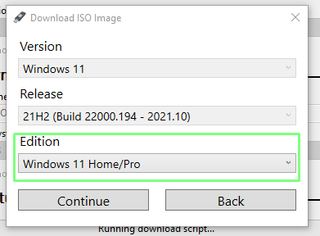
8. Select your preferred language and click Continue.
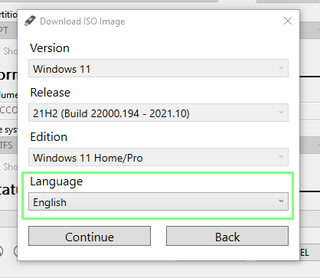
9. Select the architecture and click Download. A new window will open asking where to save the ISO image. Save it to your Downloads folder. You can also download the image using a browser if you wish.
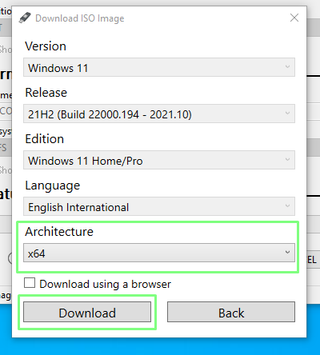
10. Wait for the download to complete.
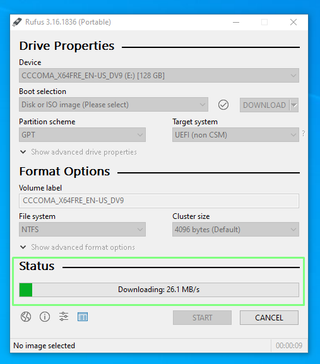
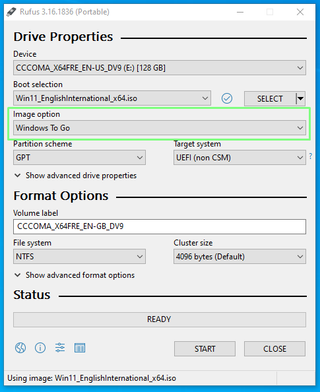
11. Click on the Image option drop down and select Windows To Go. This will install Windows 11 directly to the USB drive.
12. Double check that the correct drive has been selected and click on Start to begin the installation.
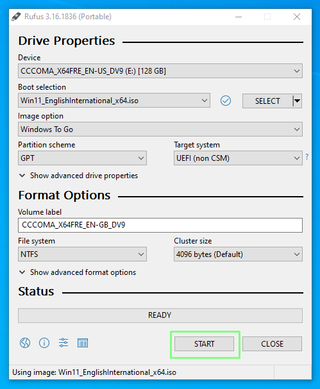
13. The write process can take some time, depending on the USB drive being used, when done remove the drive and insert it into the machine that you wish to boot from.
14. Power up the machine that you wish to use for Windows 11, press whichever key will trigger a USB boot.
15. Select your Windows 11 boot drive and boot.
16. Follow the standard Windows 11 post install script to set up your computer.
Your USB drive now contains a full Windows 11 installation, ready for use.
Using the Portable Windows 11 Drive Across Machines
Each time the portable Windows 11 drive is inserted into a device, you will be challenged to verify who you are.
1. Insert the Windows 11 USB into a new device and boot.
2. Click on Setup my PIN on the login screen to start the verification process.
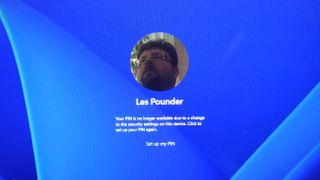
3. Enter the account details used when setting up Windows 11, in our case it was a Microsoft account.
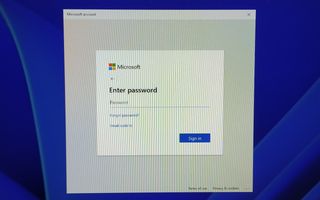
4. Click on Email < Email Address > to send a verification email to your account.
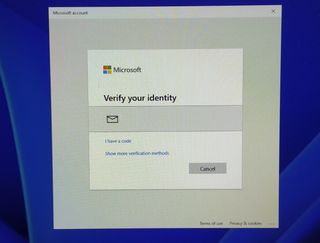
5. On another device open your verification email and type the code into the Windows 11 prompt.
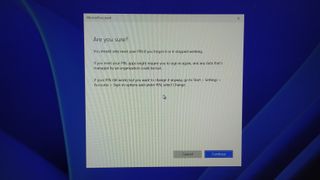
6. When asked to reset your pin, click Continue.
7. Create a new pin and click Ok to continue the login process.
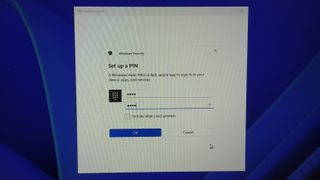
You will have to repeat this process every time you move from one PC to another. However, if you are booting the USB disk on the same PC over and over again, you won’t.
More Windows 11 Tutorials:
Les Pounder is an associate editor at Tom's Hardware. He is a creative technologist and for seven years has created projects to educate and inspire minds both young and old. He has worked with the Raspberry Pi Foundation to write and deliver their teacher training program "Picademy".
-
USAFRet Reply
That's what it appears to be.Krotow said:And how activation will work then? Microsoft Account?
Licensed to you, not necessarily the hardware.
Hence:
"Click on Setup my PIN on the login screen to start the verification process. "
And then - "Send a verification email..." blah blah
So, not as seamless as "Plug into any random system and just go".
You NEED that license tied to you first. -
Alvar "Miles" Udell That's strange because Microsoft software is supposed to be keyed to the motherboard...and why I had to buy Office again after I swapped motherboards...Reply -
USAFRet Reply
No, this is why you can transfer a Windows license between systems.Alvar Miles Udell said:That's strange because Microsoft software is supposed to be keyed to the motherboard...and why I had to buy Office again after I swapped motherboards...
Since v1607 in Win 10, this has been a thing:
For the OS activation, read and do this before you change any parts:https://support.microsoft.com/en-us/help/20530/windows-10-reactivating-after-hardware-change
The license is also to you, not just the motherboard.
Office?
Completely different, and depends on how you acquired the license for it. -
Yandex63 I tried this on a 128gb PNY drive, and have some questions... First, when I tried to boot to the drive/Win11, It gave me errors for the computer not being UEFI bios. Does that mean that any machine I try to run the Win11 portable version on must have the same specs required for installing it on a computer?? I had assumed (possibly wrongly) that because in Rufus/Image Option, it had the following "Extended Windows 11 Installation (no TPM, no Secure Boot/8GB Ram)?? I'm going to wipe the USB drive and try again to see if I missed something. Advice is welcome!Reply
Also, I've not upgraded any of my machines to Win11 yet, because all of them are MBR/Legacy. I've read a number of articles on how to convert to UEFI/GPT, but they all focus on converting the drives, and experience has taught me that those types of "how tos" always seem to leave out one or two critical steps... which in turn usually takes me down a rabbit hole of fixes that lasts for hours or days. That being said, can anyone direct me to a true "step by step" guide on how to convert an existing Win10 installation to UEFI/GPT WITHOUT LOOSING DATA?
Many Thanks! -
USAFRet Reply
Any system must be already WIn 11 capable. You can't run this on just anything.Yandex63 said:I tried this on a 128gb PNY drive, and have some questions... First, when I tried to boot to the drive/Win11, It gave me errors for the computer not being UEFI bios. Does that mean that any machine I try to run the Win11 portable version on must have the same specs required for installing it on a computer?? I had assumed (possibly wrongly) that because in Rufus/Image Option, it had the following "Extended Windows 11 Installation (no TPM, no Secure Boot/8GB Ram)?? I'm going to wipe the USB drive and try again to see if I missed something. Advice is welcome!
Also, I've not upgraded any of my machines to Win11 yet, because all of them are MBR/Legacy. I've read a number of articles on how to convert to UEFI/GPT, but they all focus on converting the drives, and experience has taught me that those types of "how tos" always seem to leave out one or two critical steps... which in turn usually takes me down a rabbit hole of fixes that lasts for hours or days. That being said, can anyone direct me to a true "step by step" guide on how to convert an existing Win10 installation to UEFI/GPT WITHOUT LOOSING DATA?
Many Thanks!
Convert to GPT?
Well...data loss should never be an issue, because you DO have full drive backups, right?
MBR2GPT
https://docs.microsoft.com/en-us/windows/deployment/mbr-to-gpt
Never go down a path like that without a known good backup, and know how to recover. -
Yandex63 Thank you! I guess I assumed when I read the "no TPM, no Secure boot/8GB Ram" it would run on/in that situation.... guess not, ;)Reply
I do have have full backups, but, if I can avoid the hassles of going through a recovery I'd certainly prefer that route.
USAFRet? Me too! 22 years, 8 months. Only regret was not staying till 24. ;)
Forgot one thing that is still a bit muddy..... So once the conversion is complete, the next steps are a reboot into bios, and change settings to Secure Boot and UEFI? Is that correct? Any little thing I'm missing? Those "little things" are what always seems to jump up and bite me. :) -
USAFRet The backups are for when an Oops happens.Reply
No matter how careful we are, things can and do go wrong.
A good backup will allow 100% recovery.
For your 'next steps'...I think that is correct.
But remember...running a WIndows OS from a USB is substandard performance. It will be markedly slower.
And thank YOU...;) -
chzuck1 All worked well until I tried to update windows. Said I did not meet minimum hardware requirements and needed to be part of Windows Insider program.Reply -
chzuck1 Reply
From what I am seeing so far a lot of us with oldler PC's, ones that came equipped with Windows 7, will be stuck with Windows 10 until it goes away, then if we still want to use the PC, we will go to a Linux system.chzuck1 said:All worked well until I tried to update windows. Said I did not meet minimum hardware requirements and needed to be part of Windows Insider program.

