
The quality of light is one of the most important aspects of photography. Because without light, there quite literally is no picture.
In this tutorial, we’ll take a look at one method to fix bad lighting in your portraits using Photoshop and offer several suggestions for finishing touches. Let’s get started.
How to Fix Bad Lighting in Your Portraits
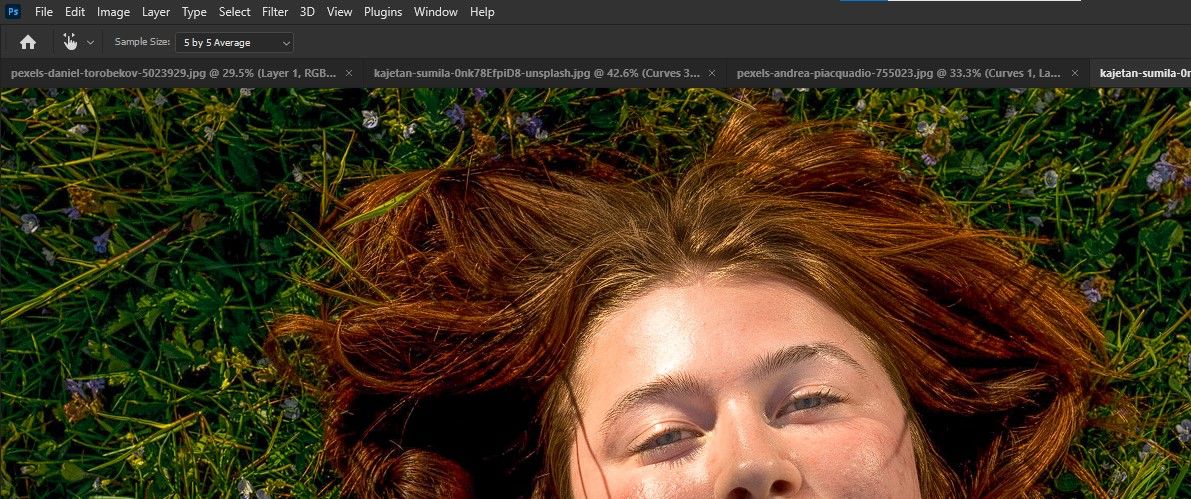
There are many conditions that can result in bad lighting in a photo. Bright daylight is often one of them.
Taking photos outside during the afternoon hours without professional lights and modifiers is usually a bad idea; that’s when the sun is at its highest point and the light is very harsh on a clear, bright day. This means the light will have high contrast, with very bright highlights and very dark shadows.
Let’s take a look at how to fix bad lighting. If you'd like to follow along, you can download the same image we used from Unsplash.
Step 1: Fix the Shadows
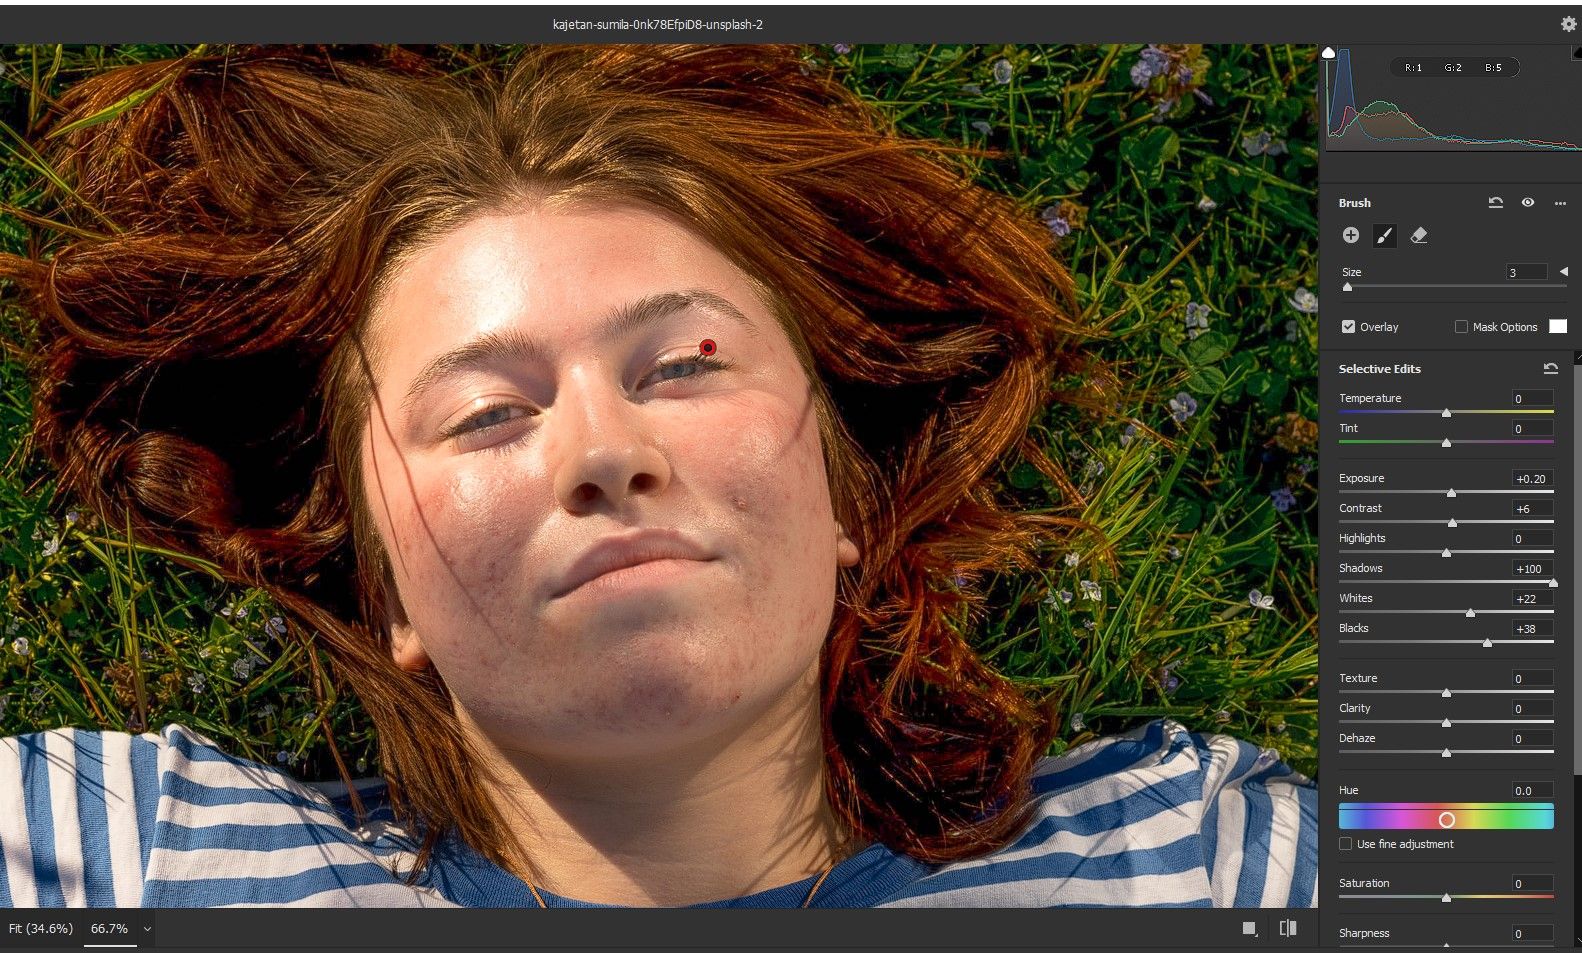
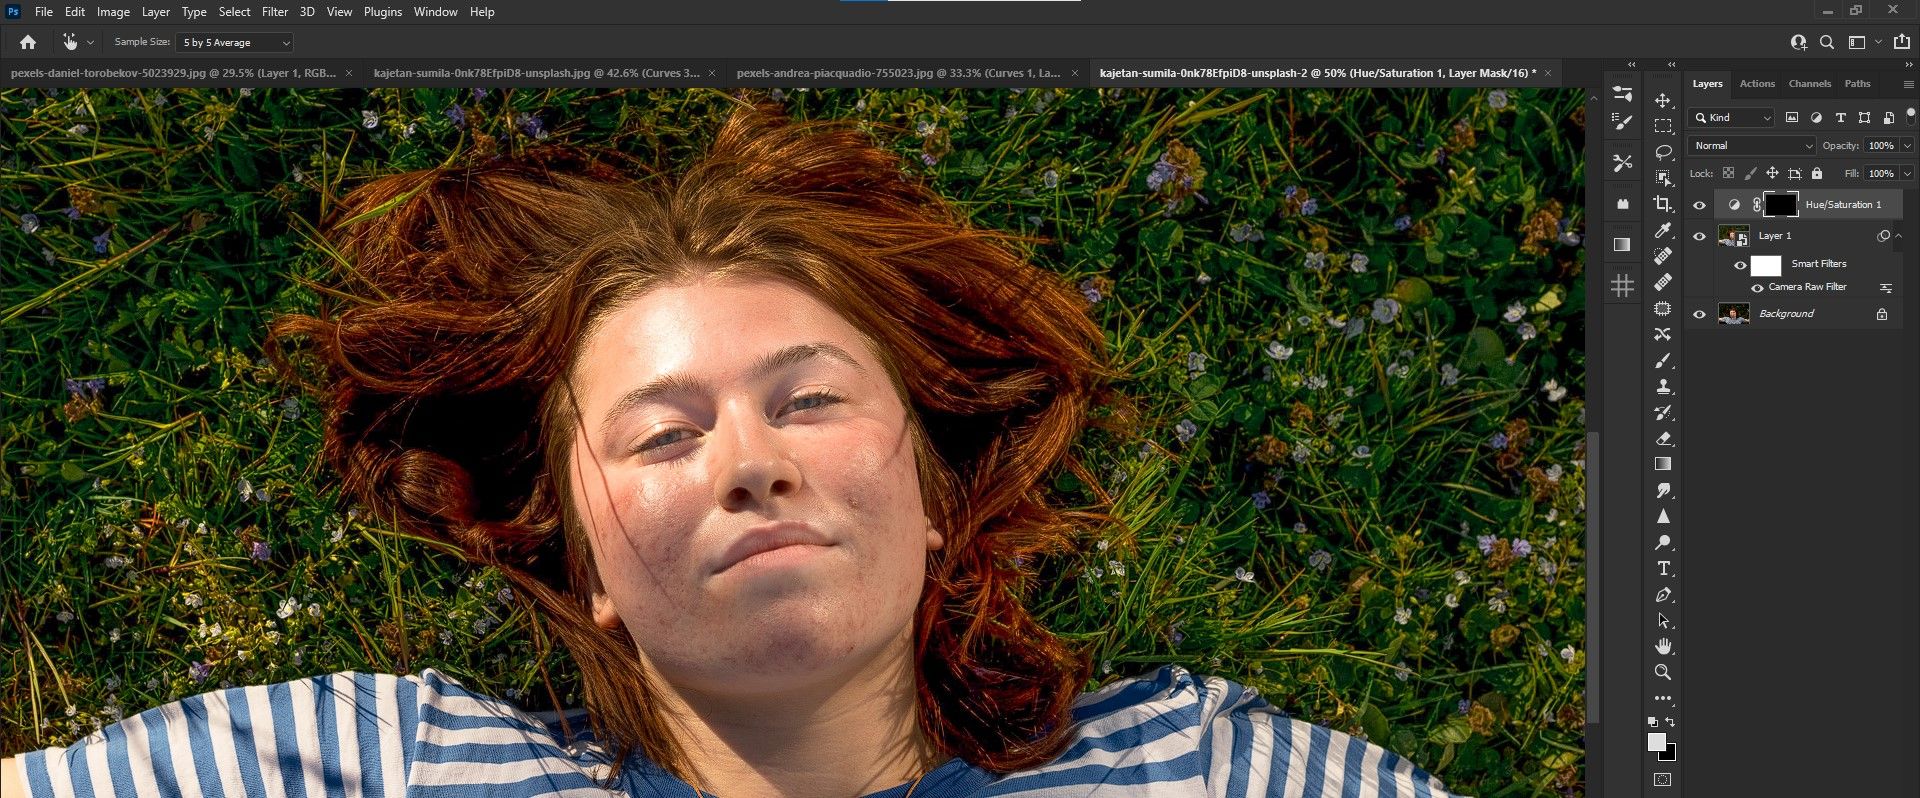
Upon close inspection of this image, we can see that there are very bright highlights on the person's face, while their eyes are very dark and lack detail. This is a common occurrence when the subject is directly facing the sun.
Let’s fix the shadows first—follow these steps:
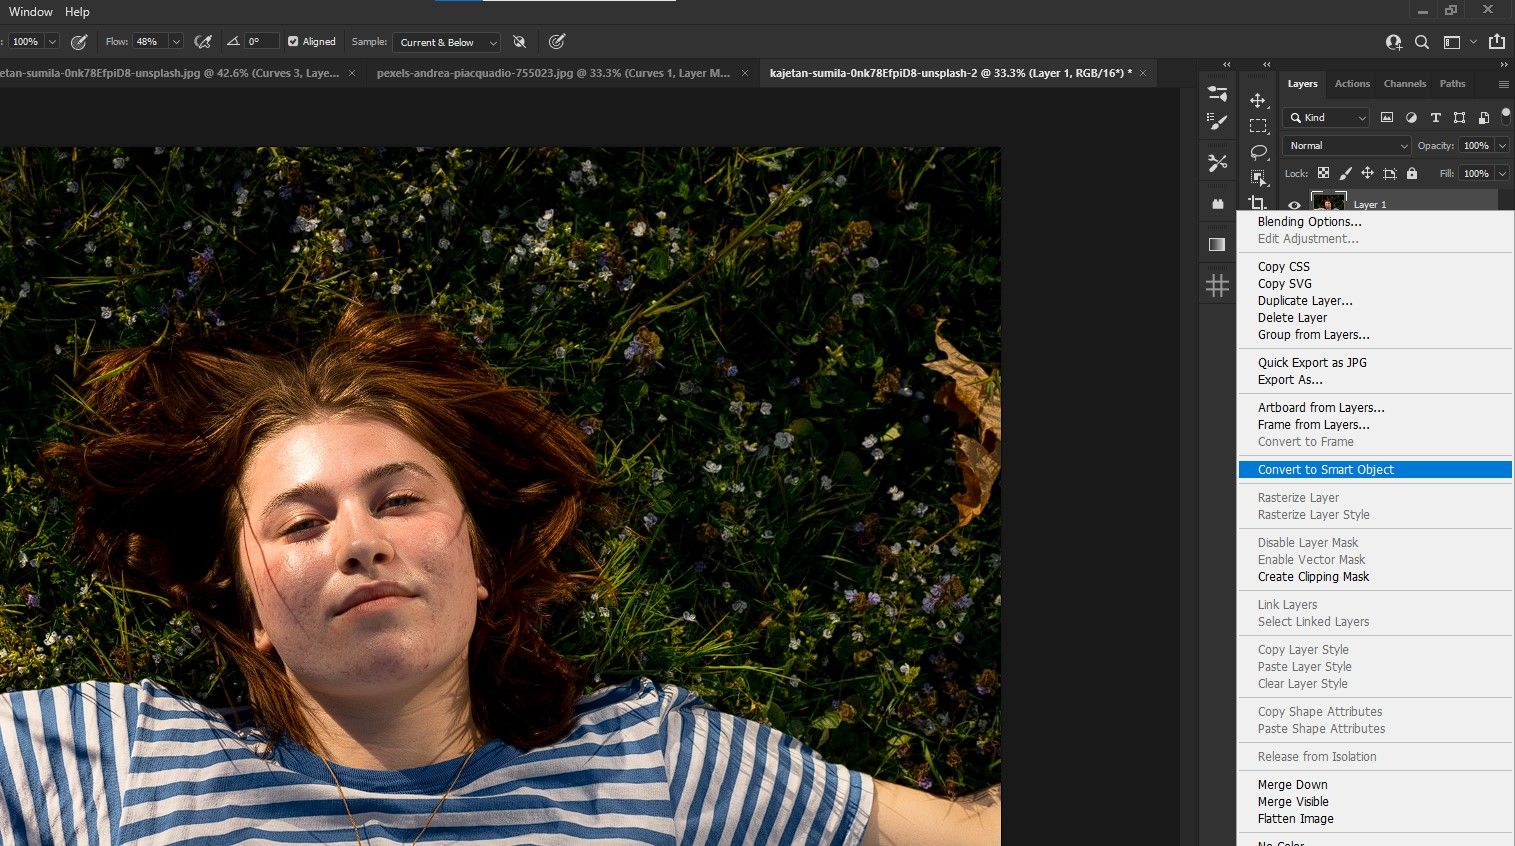
- In Photoshop, duplicate the background layer by pressing Ctrl + J.
-
With Layer 1 active, right-click and select Convert to Smart Object.
-
Go to Filter > Camera Raw Filter.

-
In the Basic menu, move the Shadows slider to +100.

- Press K for the Adjustments Brush. Make the following slider adjustments: Exposure +20, Contrast +6, Shadows +100, Whites +22, and Blacks +38.
-
Start brushing the effect over the person's eyes and below their eyebrows, then paint over their lips. If you need to erase the effect, press and hold the Alt key and brush over the image where needed.
- Click OK when you’re done.


There is more than one way to remove shadows from photos. That's why it's not necessarily important to memorize the steps. Instead, simply fix the next obvious flaw in your workflow.
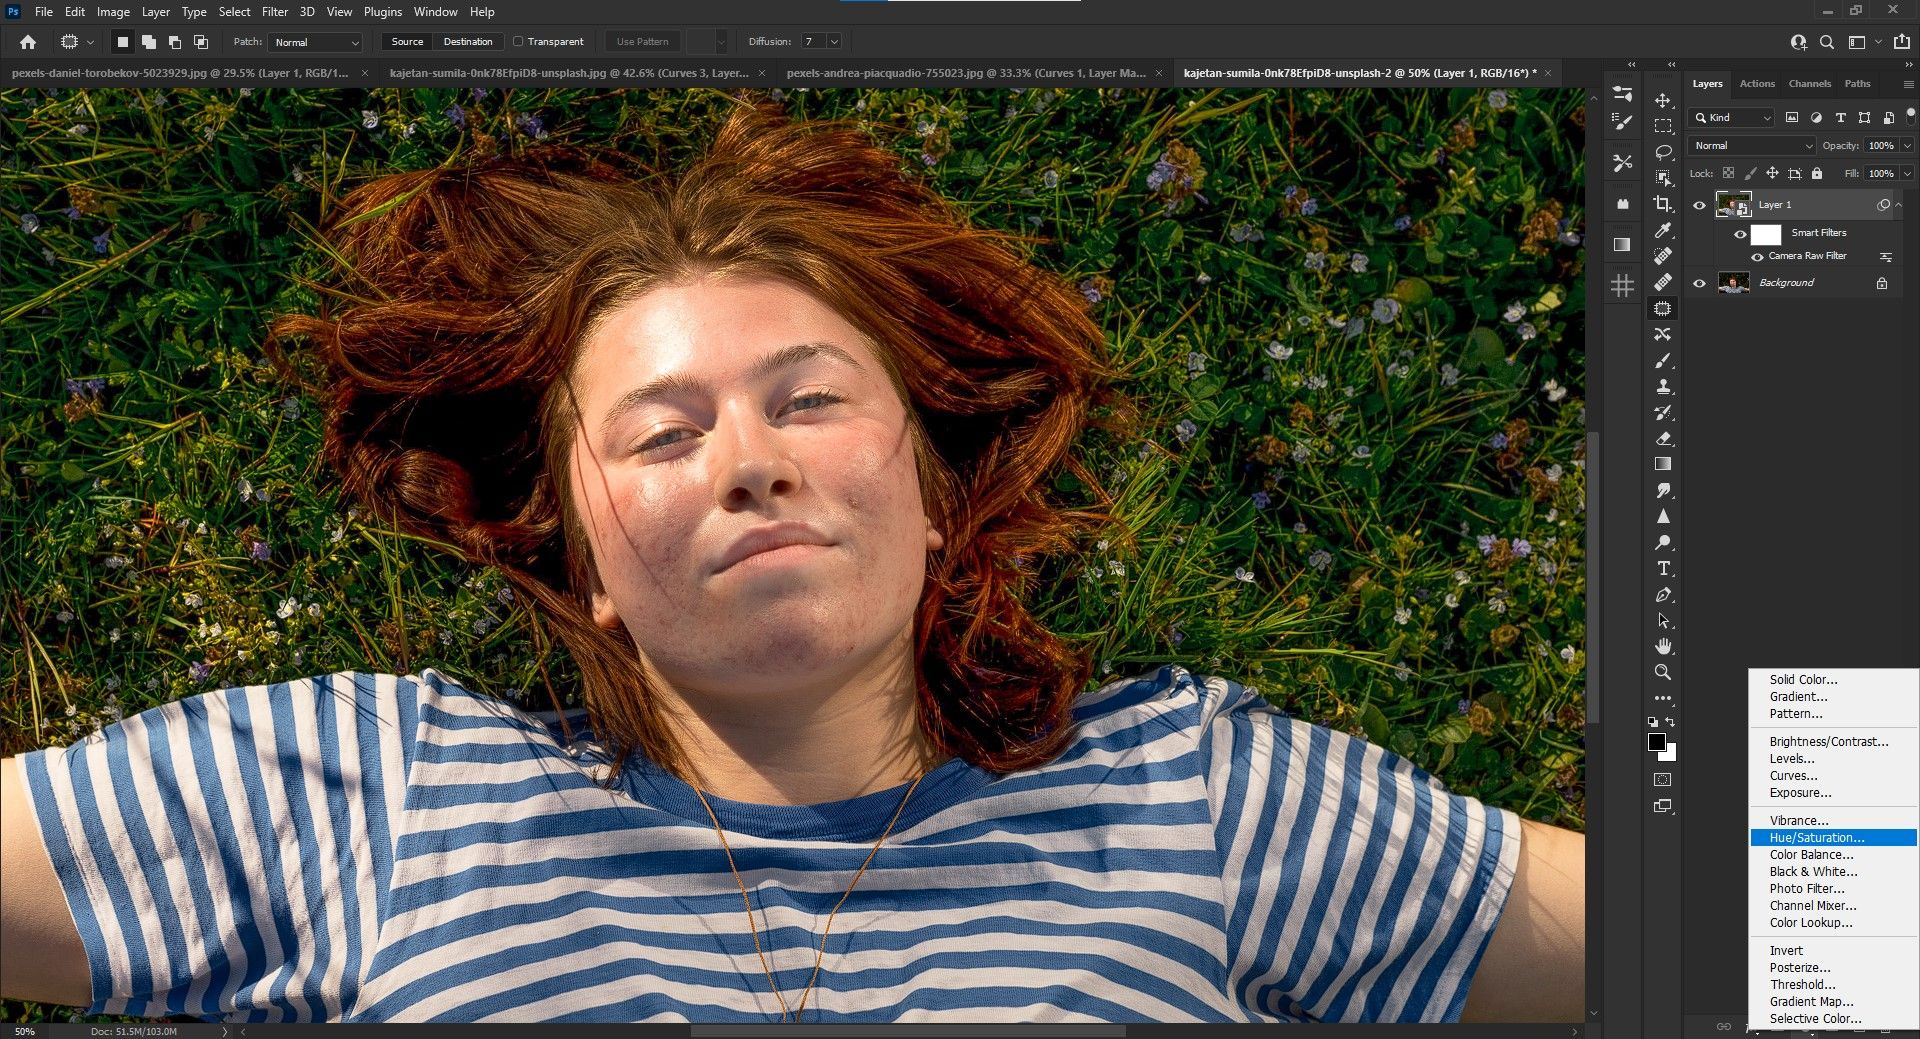
Step 2: Fix the Color
We’ll get to the highlights in a moment, but first, we’ll address the strong reds and yellows in the person's face. In this example, the harsh sunlight caused the colors to be over-saturated. We can reduce the saturation and brightness with one adjustment layer.
To do that, follow these steps:
-
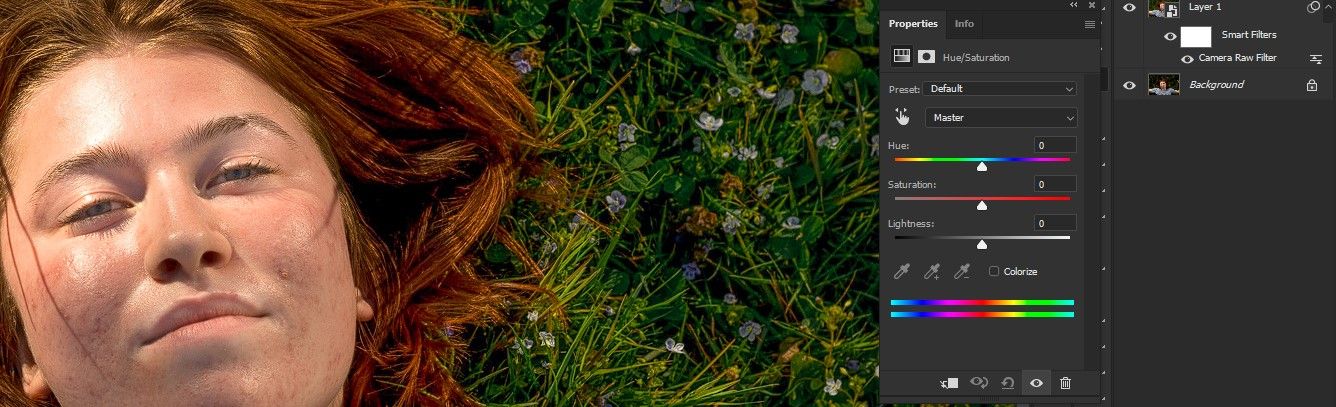
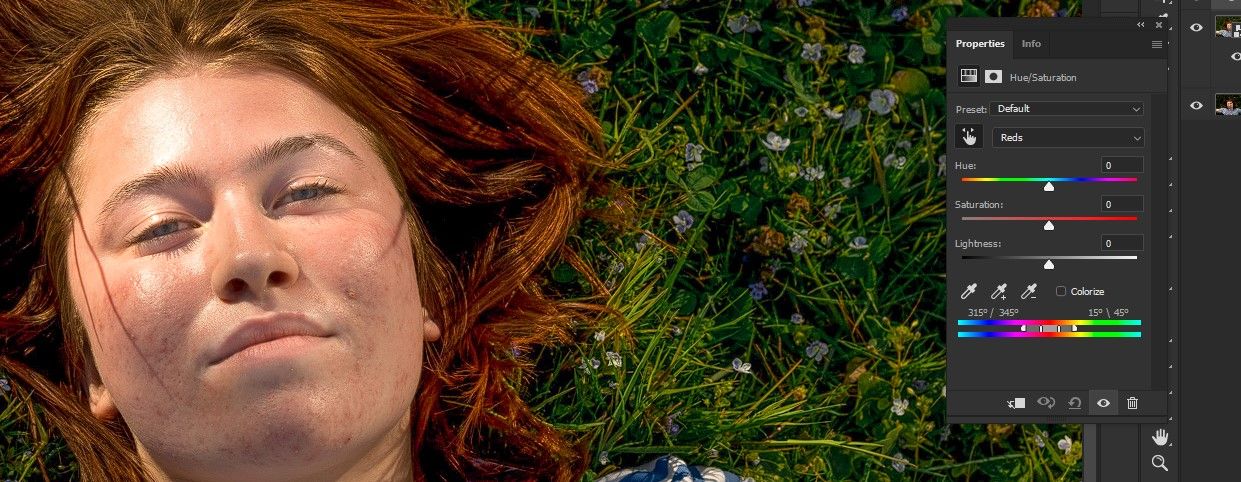
Go to the Adjustments layer icon at the bottom-right of Photoshop. Select Hue/Saturation.
-
Click on the hand selection tool in the Properties panel.
-
Ensure the Sample Size is 5x5 Average.
-
Drag the Eyedropper to the reddest part of the person's face and left-click (here, we picked a sample color from the left side of their cheek). Confirm that the master channel (color spectrum at the bottom of the panel) changes to a red color pallet after the selection.
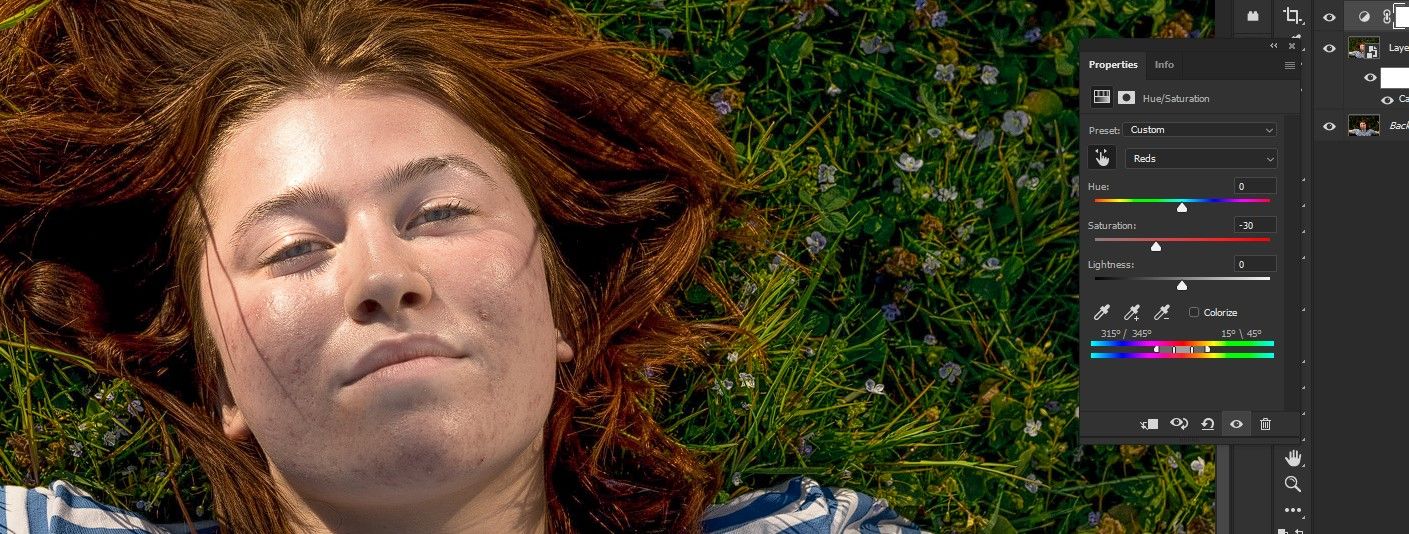
- There are two ways to reduce saturation. Hold down left-click and drag the cursor to the left. Or move the Saturation slider to the left. The value should be around -30.
-
Change the Lightness slider to -25.
-
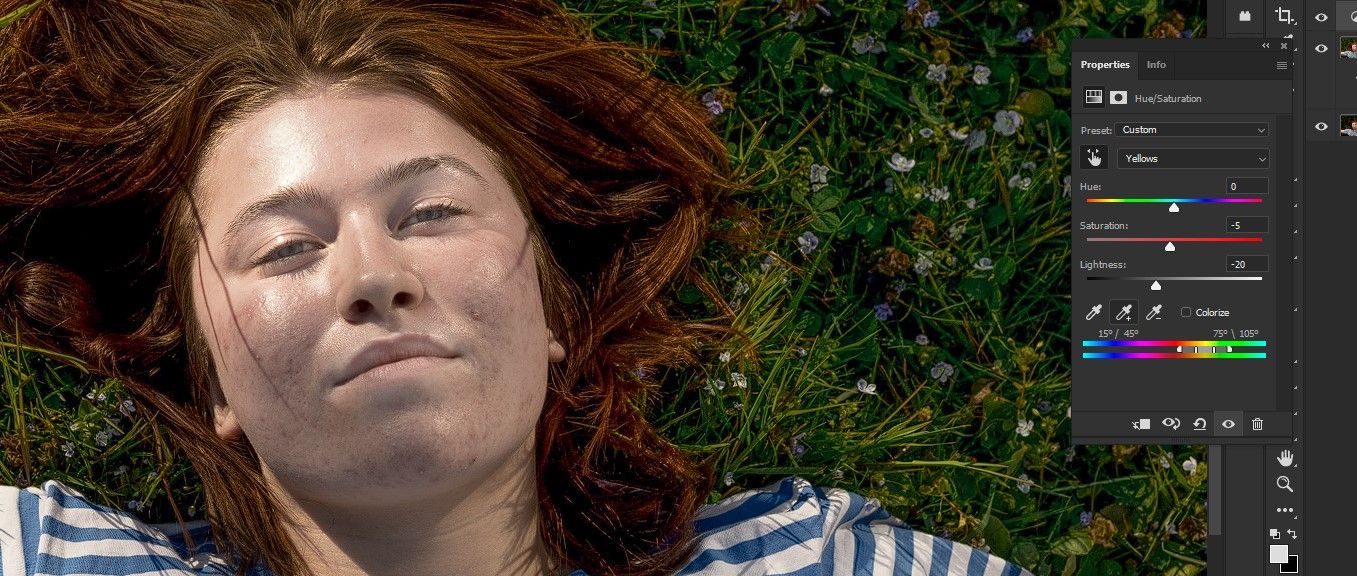
Select a yellow color pallet from the master channel. Reduce the Saturation to -5 and the Lightness to -20.
-
With the Hue/Saturation layer mask active, press Ctrl + I to invert the mask. It should turn black.
-
Press B for the Brush tool. Paint the effect over the person’s face and skin. It might look like too much at first but we’ll soon reduce the intensity of the effect. Check out our Photoshop Brush Tool for beginners guide for more keyboard shortcuts.
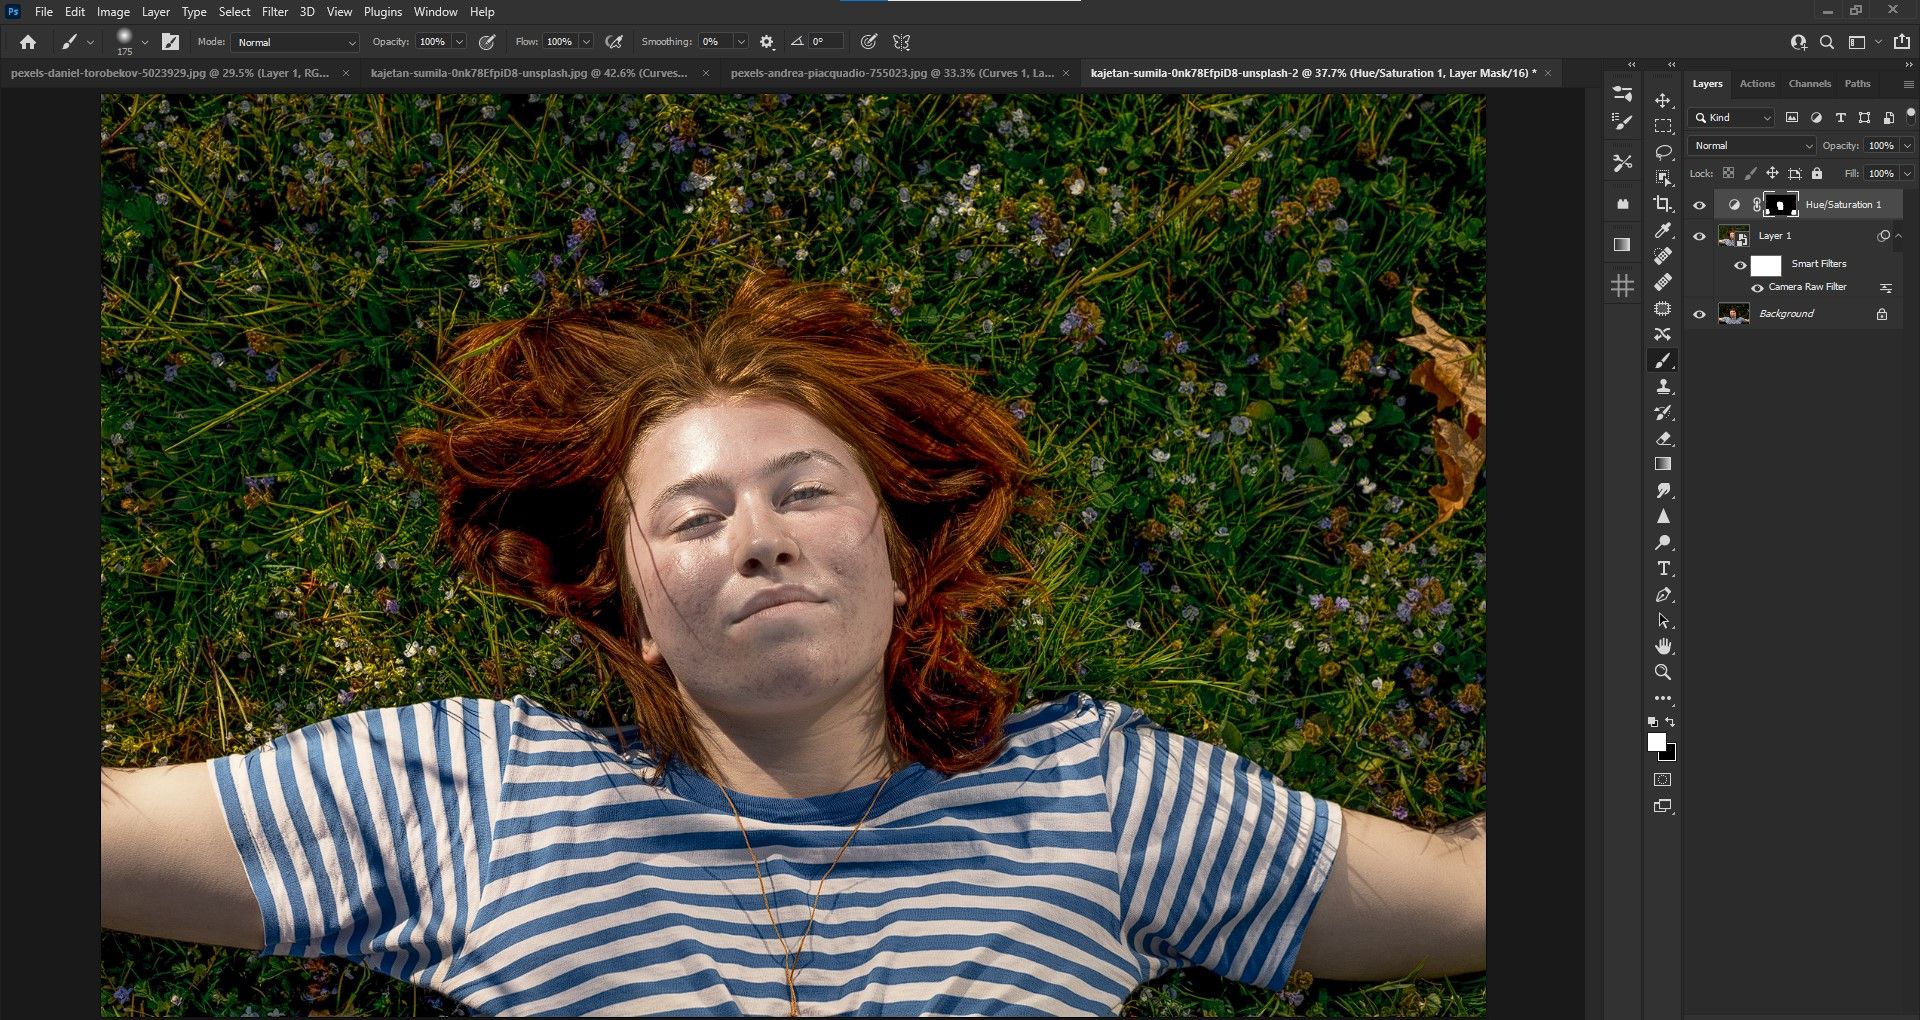
- With the Hue/Saturation layer active, reduce the Opacity to 75.


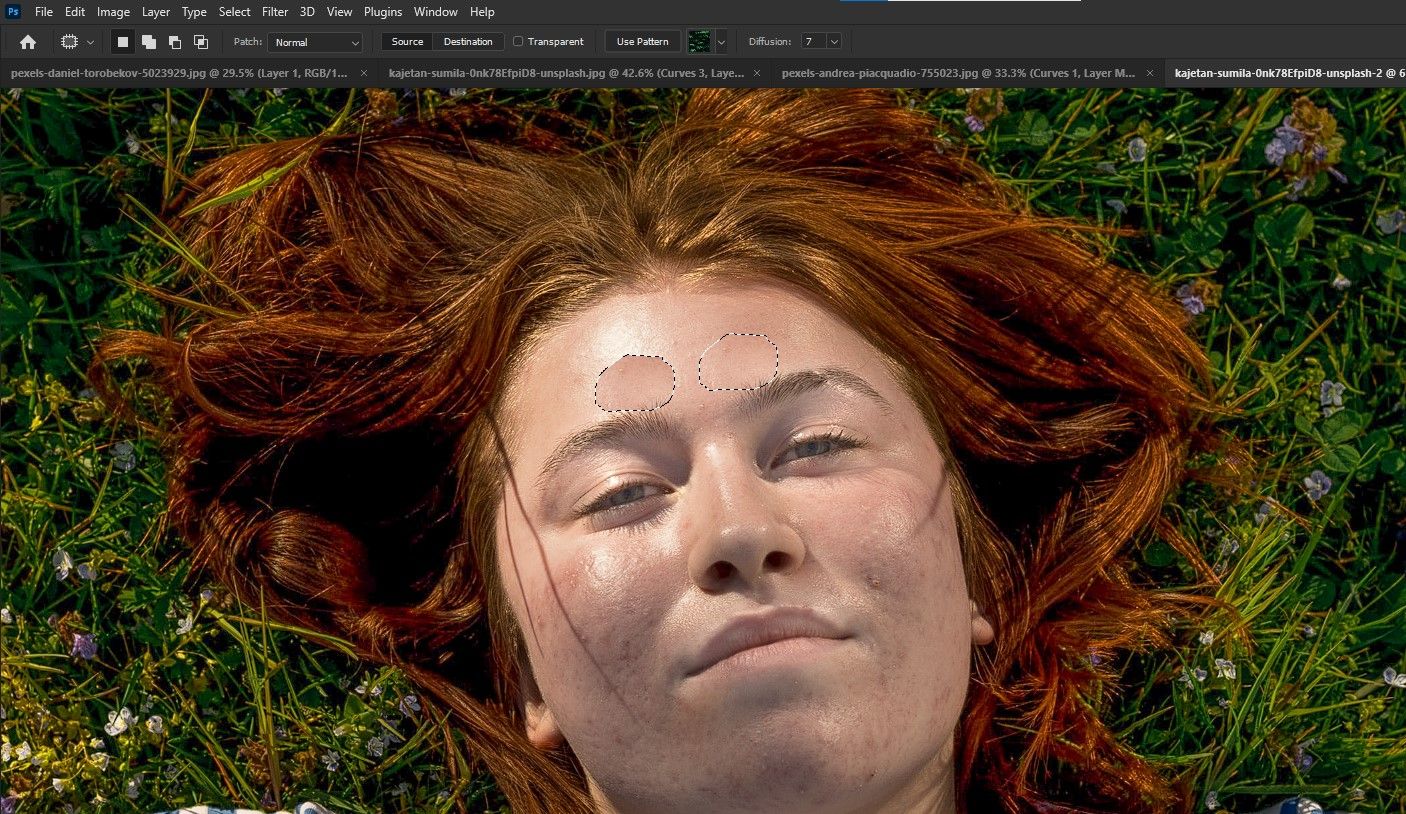
Step 3: Fix the Highlights Using the Patch Tool Kit
The highlights will be a lot more manageable now. We’re going to use the Patch tool to fix up some texture and discoloration which are pronounced by the highlights of the face.
To do that, follow these steps:
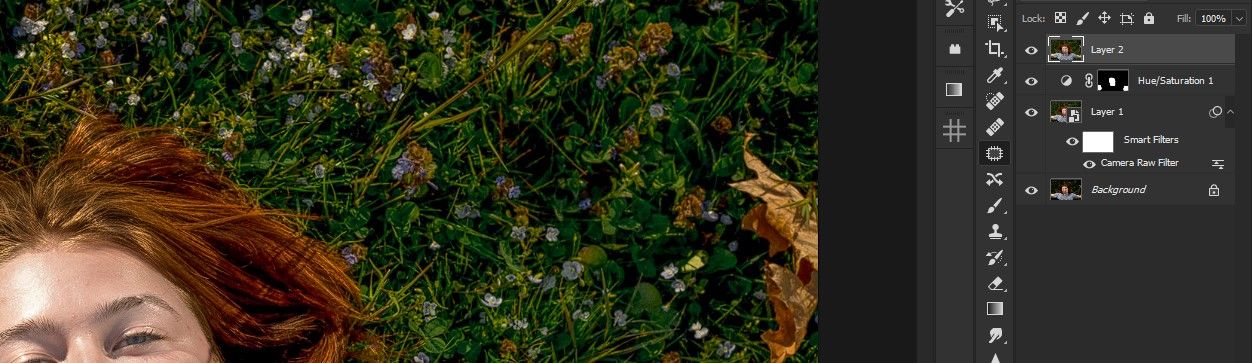
- Create a Stamp Visible layer by pressing Shift + Ctrl + Alt + E.
-
Click on the Patch tool icon or press J. Note that the keyboard shortcuts may be different for you if you’ve customized them.
-
Start selecting small bits of the highlighted areas and move them over to similar areas of the person’s face that are darker.
- To clean up the rough patches of skin, you can use the Healing Brush tool. It works similarly to the Clone Stamp tool in that it samples from the areas that you want to use as a source of reference for the replacement. In fact, you can alternate between the Healing Brush tool and the Clone Stamp tool.
-
Reduce Opacity for the best results. We reduced it to 80.


This will be the most time-consuming part of the tutorial, but the more time you put into this step, the better the results will be. You can take it a step further and remove the blemishes if you’re going for a high-end portrait.
Step 4: Add Finishing Touches
As a final touch, we can now enhance the eyes by brightening them and increasing the contrast in the iris because they look a little undefined.
To enhance the eyes:
-
Create a Curves adjustment layer and adjust the points along the curve as shown below.
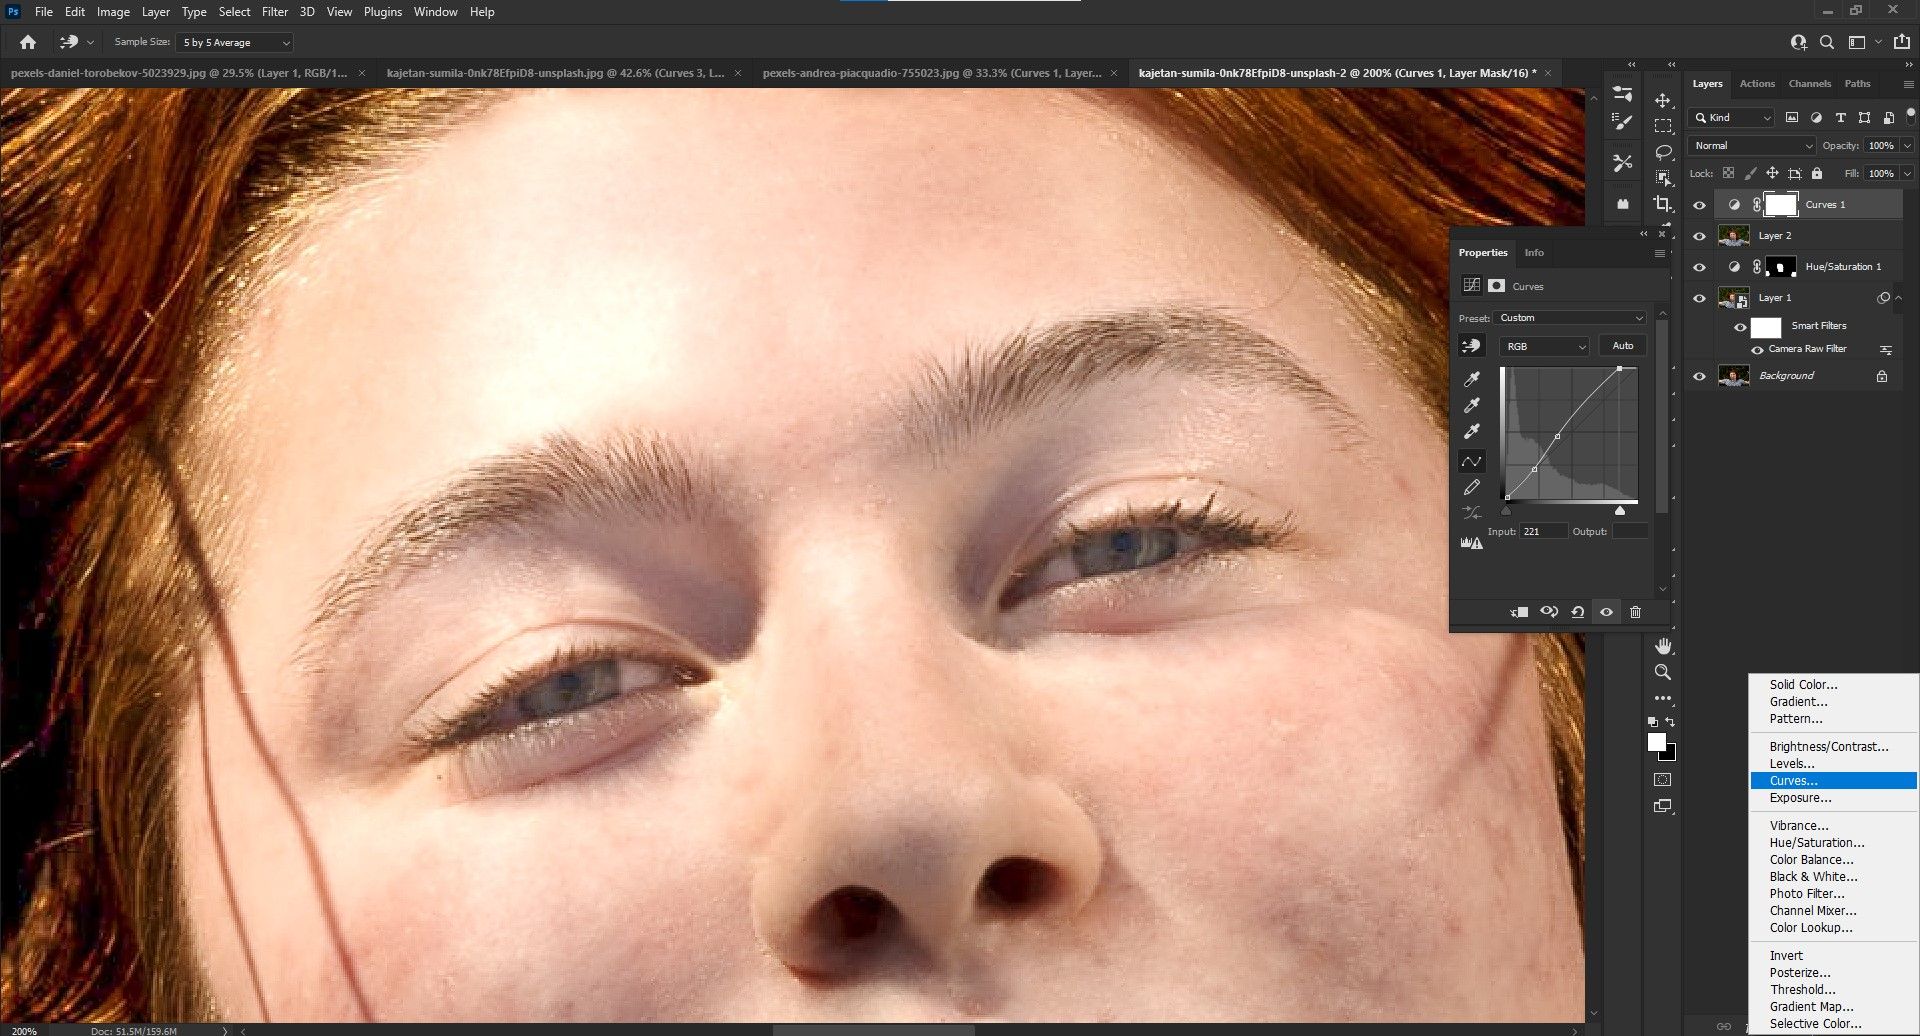
-
With the Curves layer active, press Ctrl + I to invert the mask.
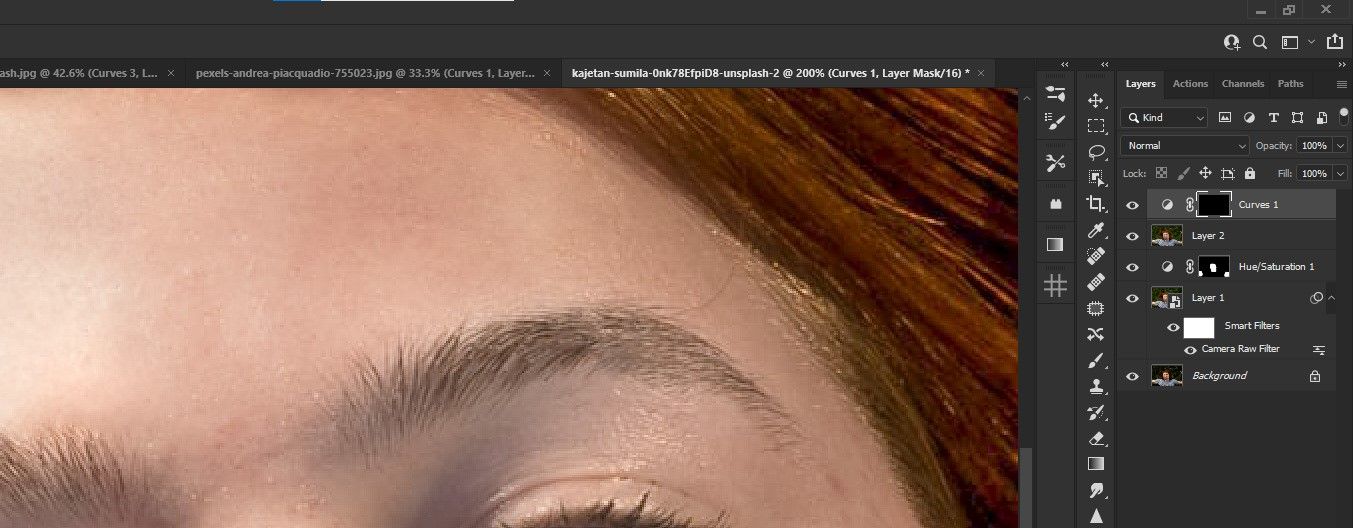
- Press B for the Brush tool and paint the effect into the eyes as needed. If the effect isn’t strong enough, you can duplicate the layer (Ctrl + J) and reduce the Opacity to your liking.


We created another Camera Raw Layer for further adjustments. We used the Adjustments Brush tool to enhance the eyes even more and added a vignette effect around the person's head.

A third-party plugin such as Anthropics Portrait Pro can aid in touching up the skin and facial features. Below is a comparison of the original image that we started with in Photoshop and the final image that we touched up in PortraitPro.
Original:

Final:

Don’t Let Bad Lighting Ruin Your Portraits
Ideally, it’s best to prepare for various bad lighting scenarios, especially outdoors when you're dealing with the sun. But if you're unprepared and don't have the proper gear on hand, making careful adjustments in Photoshop can potentially save otherwise unsharable images.
Should you ever find yourself in such a scenario, refer to this tutorial to fix the lighting of your photos on post.