Wondering how you can combine two, three, or more screenshots side by side using your iPhone? Here are quick and free ways to turn multiple iPhone screenshots into a single image, with all of them placed horizontally, one after another.
After learning about these methods, it will be easy to use the screenshots in your next blog post, Word document, or personal or professional projects. There's no need to insert single screenshots that are unpleasant to scroll on a computer. Now you can merge them into a single landscape image.
1. Use the Picsew App
The App Store has several apps that let you stitch together images, make a collage, place them side by side, and do all kinds of editing. However, most free photo editing apps add a watermark, reduce the export quality, change the dimensions, or crop the image parts. But Picsew stands out as, even in the free version, it doesn't have these restrictions.
Here's how to use Picsew to stitch screenshots together on an iPhone or iPad:
- Download Picsew from the App Store and open it. Make sure you allow the app to access your photos.
- Select the desired screenshots and tap Horizontal.
- That's it! The app has horizontally arranged the selected screenshots one after another.
- Finally, tap the share button and choose Export to Photos.


Besides simply stitching the screenshots, you can tap the yellow pencil icon to crop and adjust each image. Plus, you can also do this for all four edges of the combined image.
In the app settings, you can change the format of the exported image to PNG.
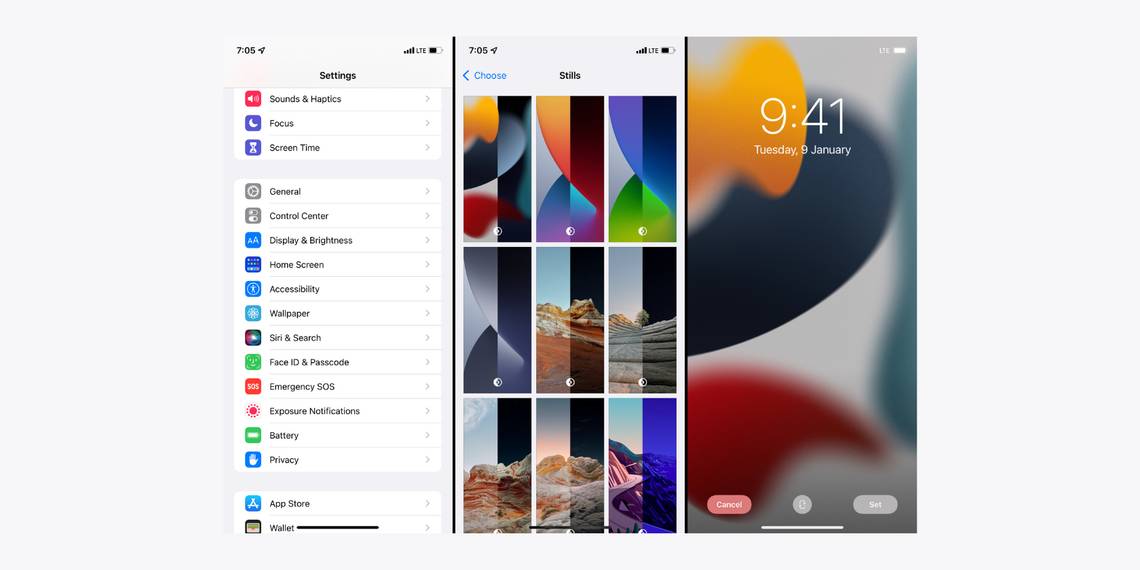
Finally, upgrading to premium offers many exciting tools, like inserting space and borders between the screenshots. You can also tidy up the top bar of the iPhone screenshots with a tap. Doing this will set the iPhone screenshot time to 9:41 and edit the other icons (like battery and Wi-Fi), making the screenshots look professional (as if they're from Apple Support). You also get access to iPhone and iPad mockups where you can place your screenshots.
2. Use the QuickPictureTools Website
This website doesn't have an optimized mobile version. Therefore, you will have to zoom in to use it. However, the primary benefit of using QuickPictureTools is that it saves your settings and lets you create multiple combined images with the same parameters. This handy feature becomes useful for repetitive bulk edits.
For example, if you have set the margin, spacing, and color, they will stay the same until you close the website. Plus, you can choose the final image format (JPEG or PNG) and the picture quality. These thoughtful additions make it super convenient for blog posts where image format and file size matter.
Here's how to place screenshots side by side using QuickPictureTools:
- Use an iPhone browser (preferably Safari) to visit the combine images section of QuickPictureTools.com.
-
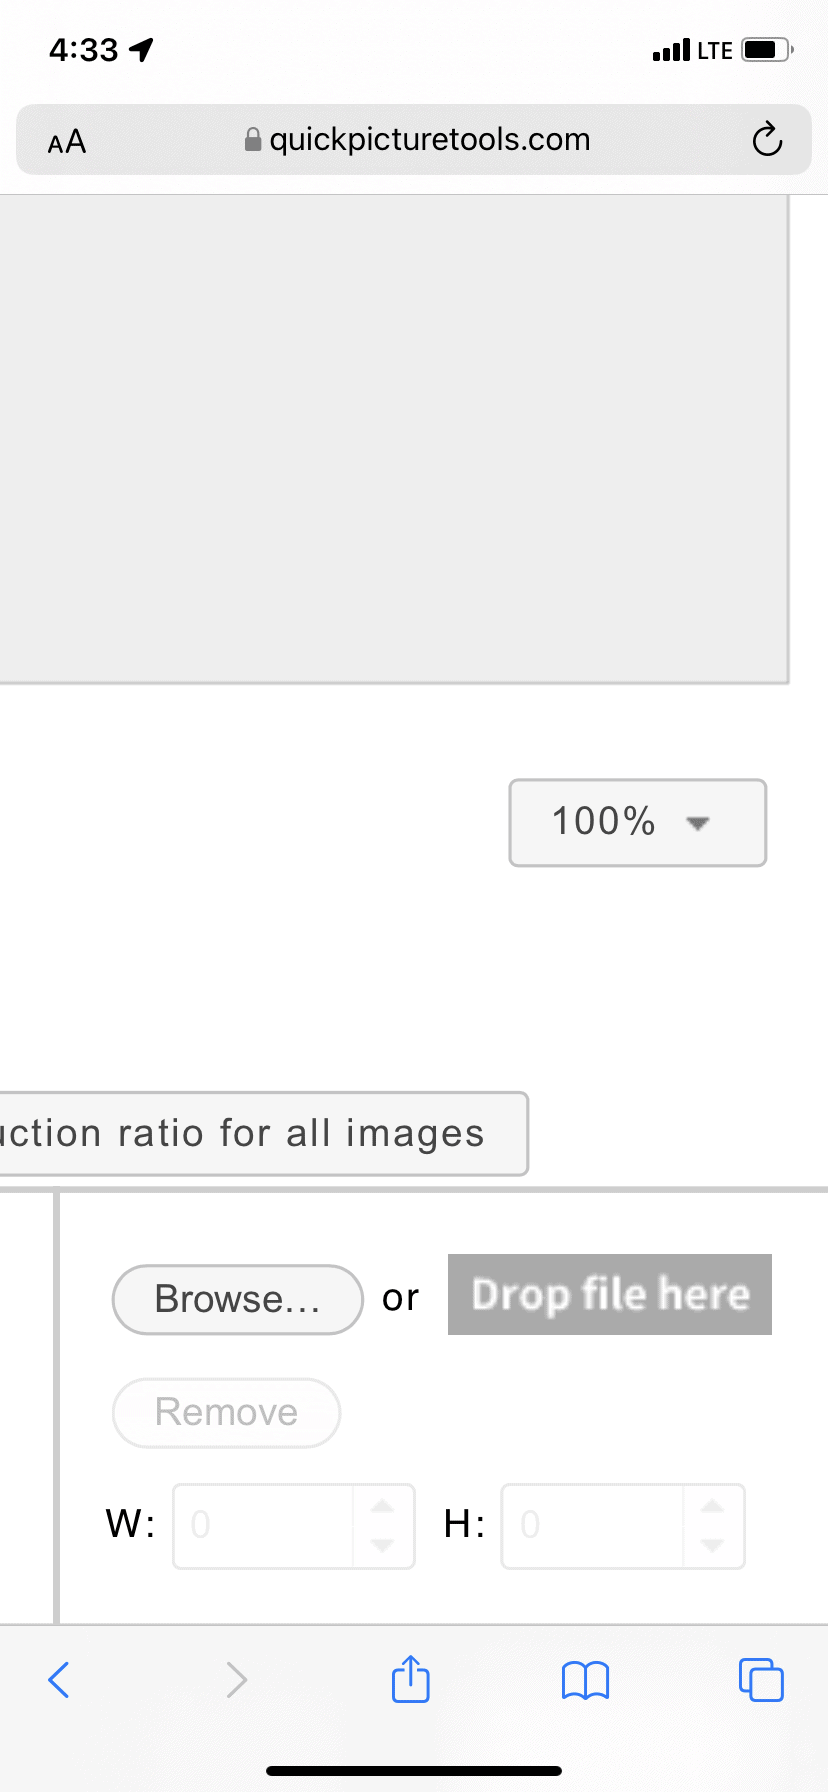
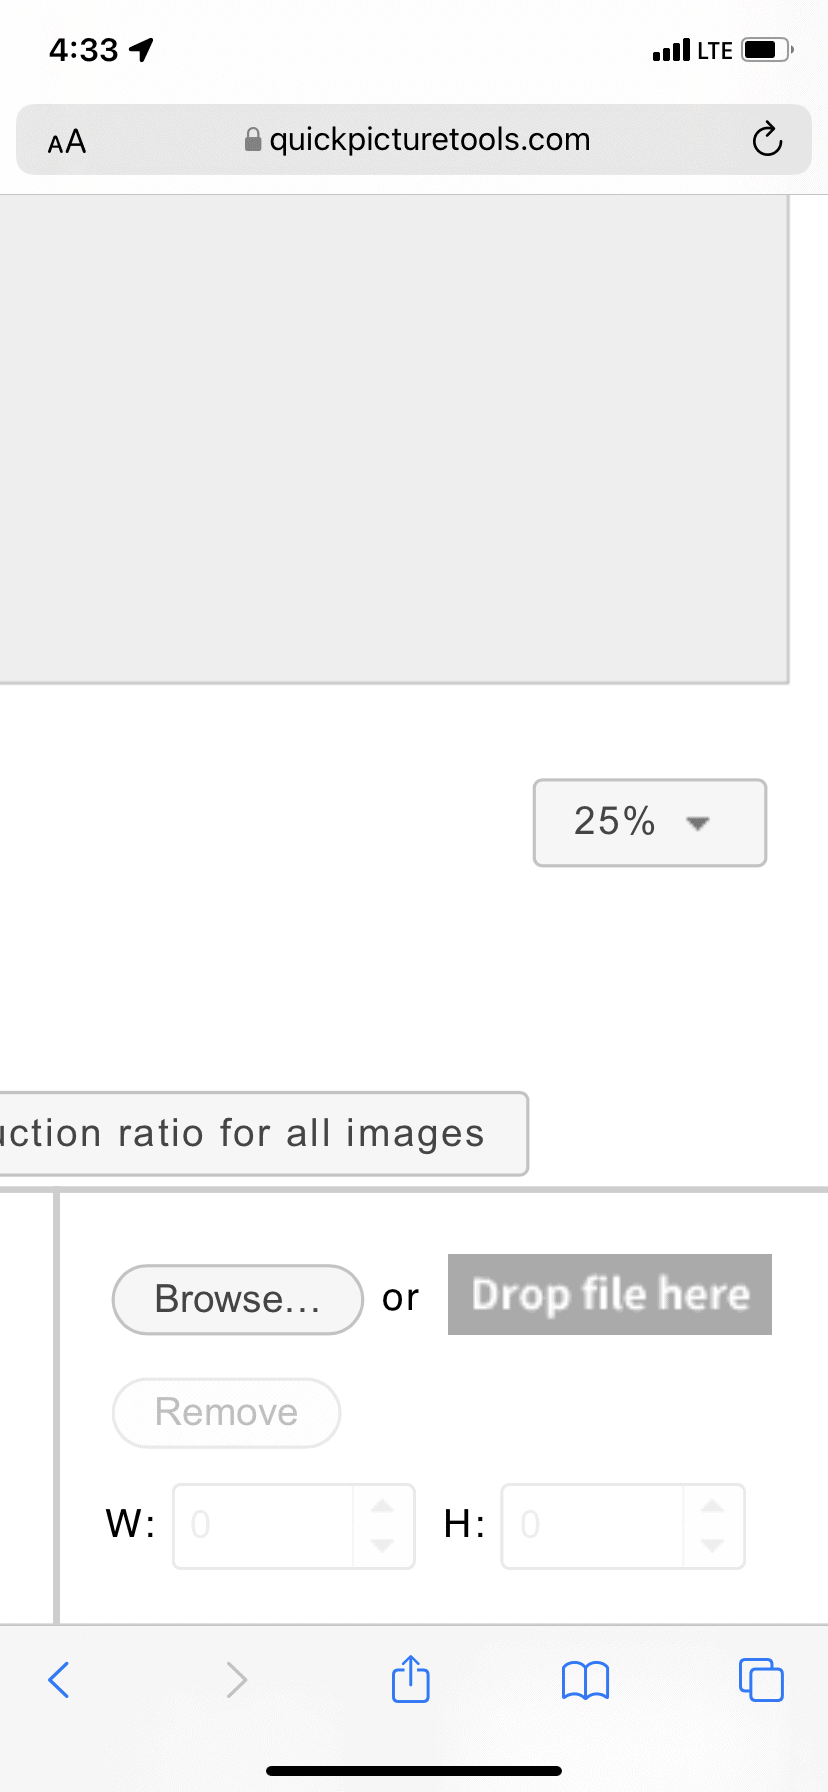
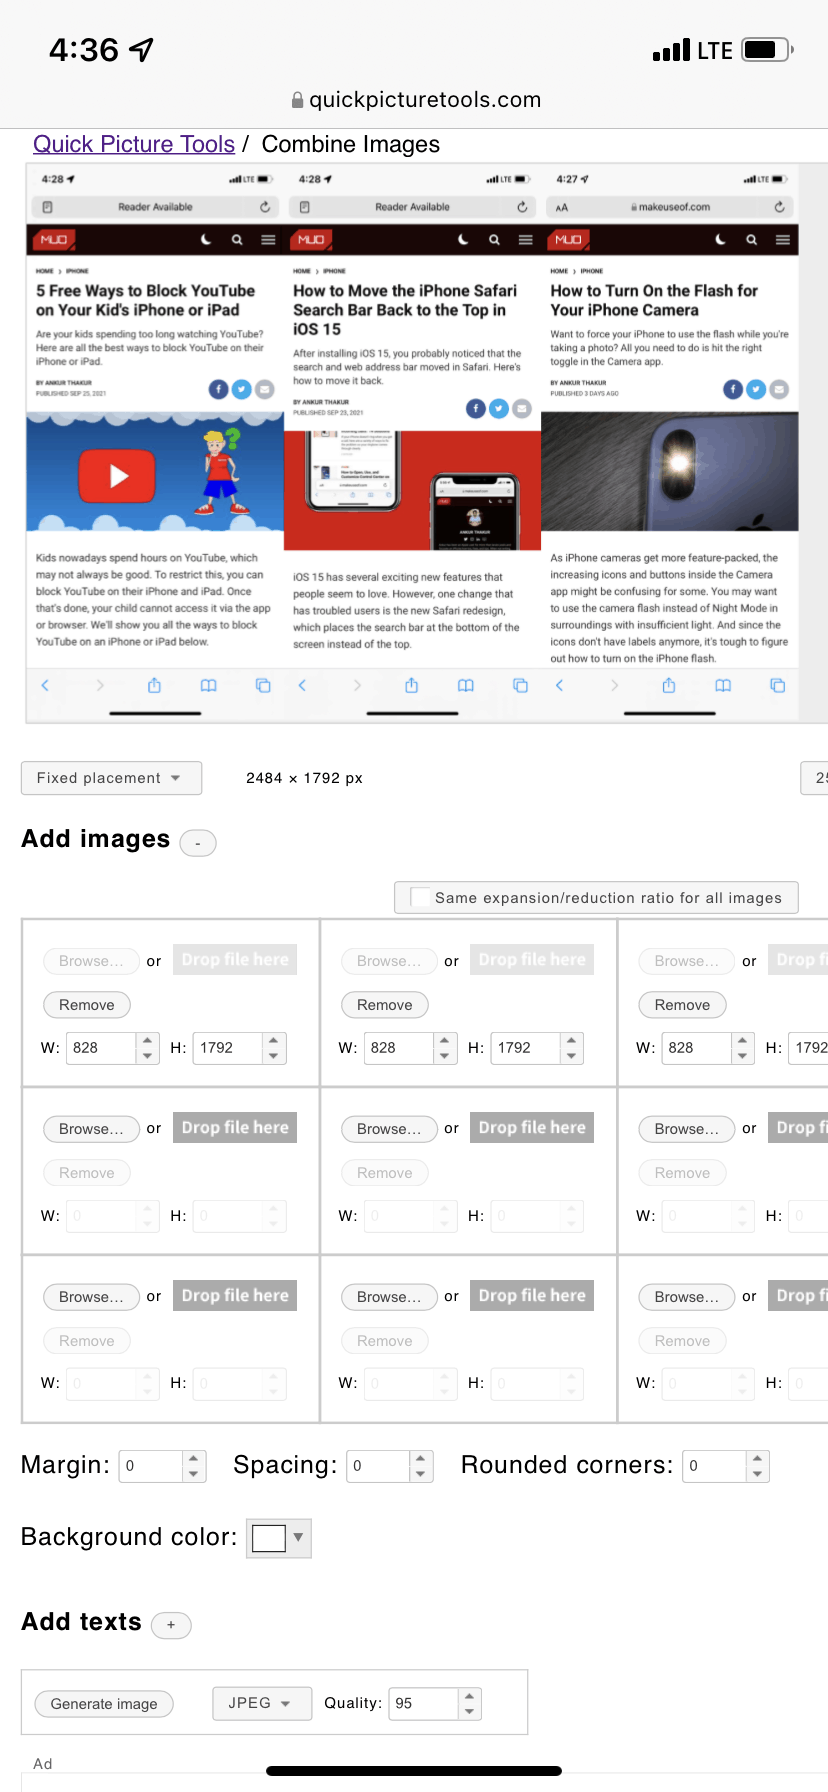
Once you're here, use two fingers to zoom the web page and tap 100%. Set it to 25% so that the screenshots appear smaller in the preview section and you can view them.
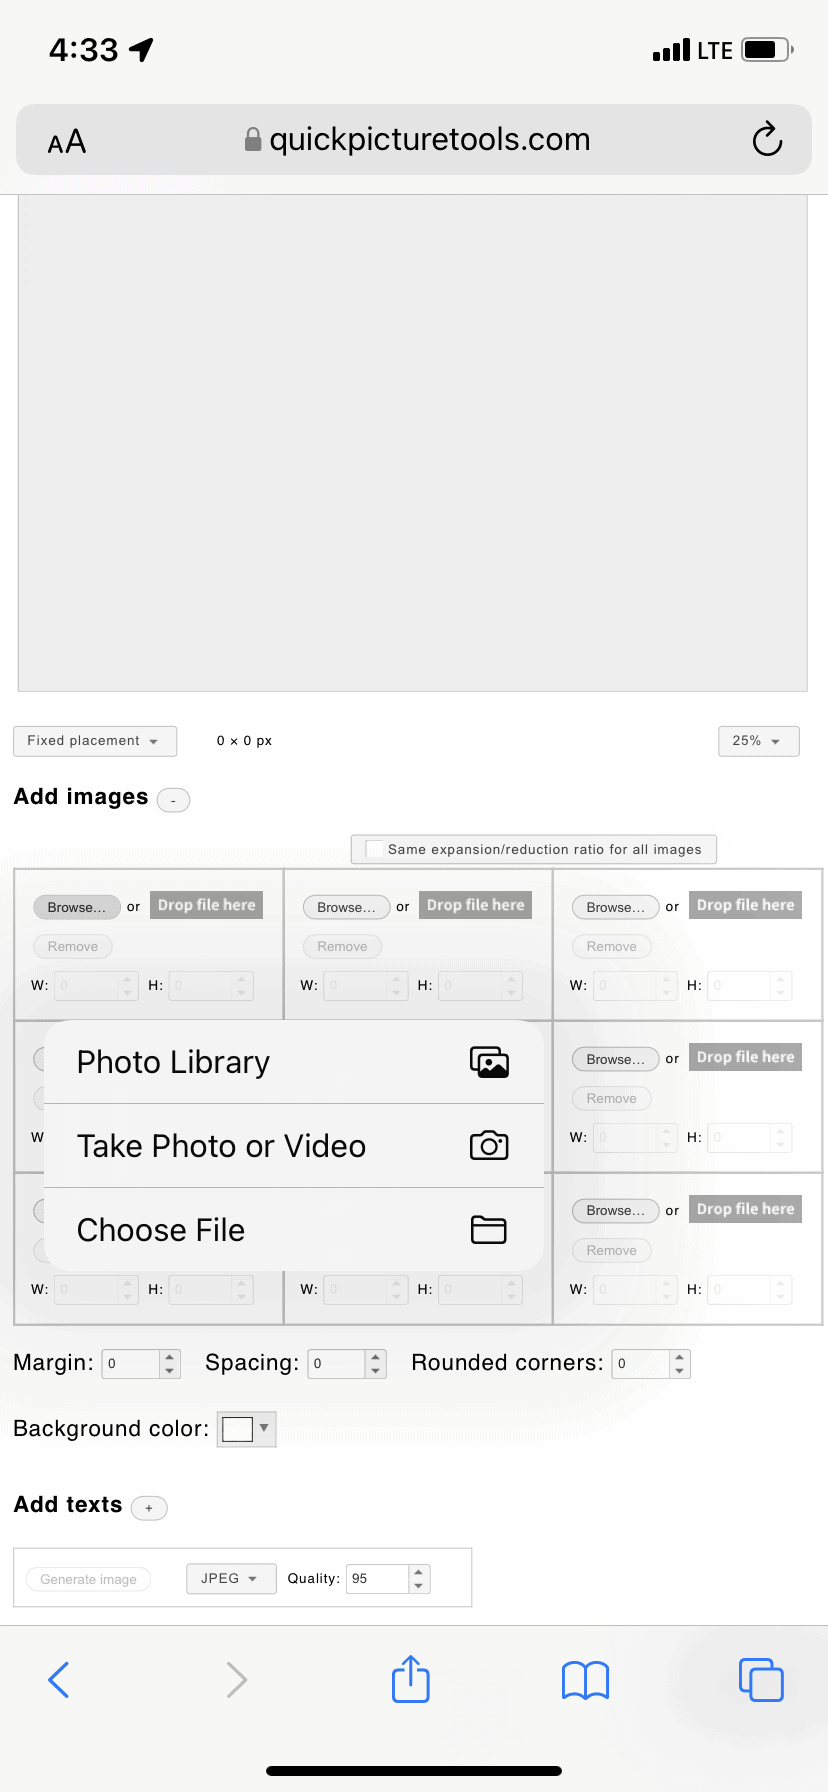
- Tap Browse and choose your first screenshot from the Photos or Files app.
-
You can add up to two more screenshots by tapping Browse from the adjacent boxes. If you add four screenshots or more, they won't combine side by side, but they'll stack vertically instead.
-
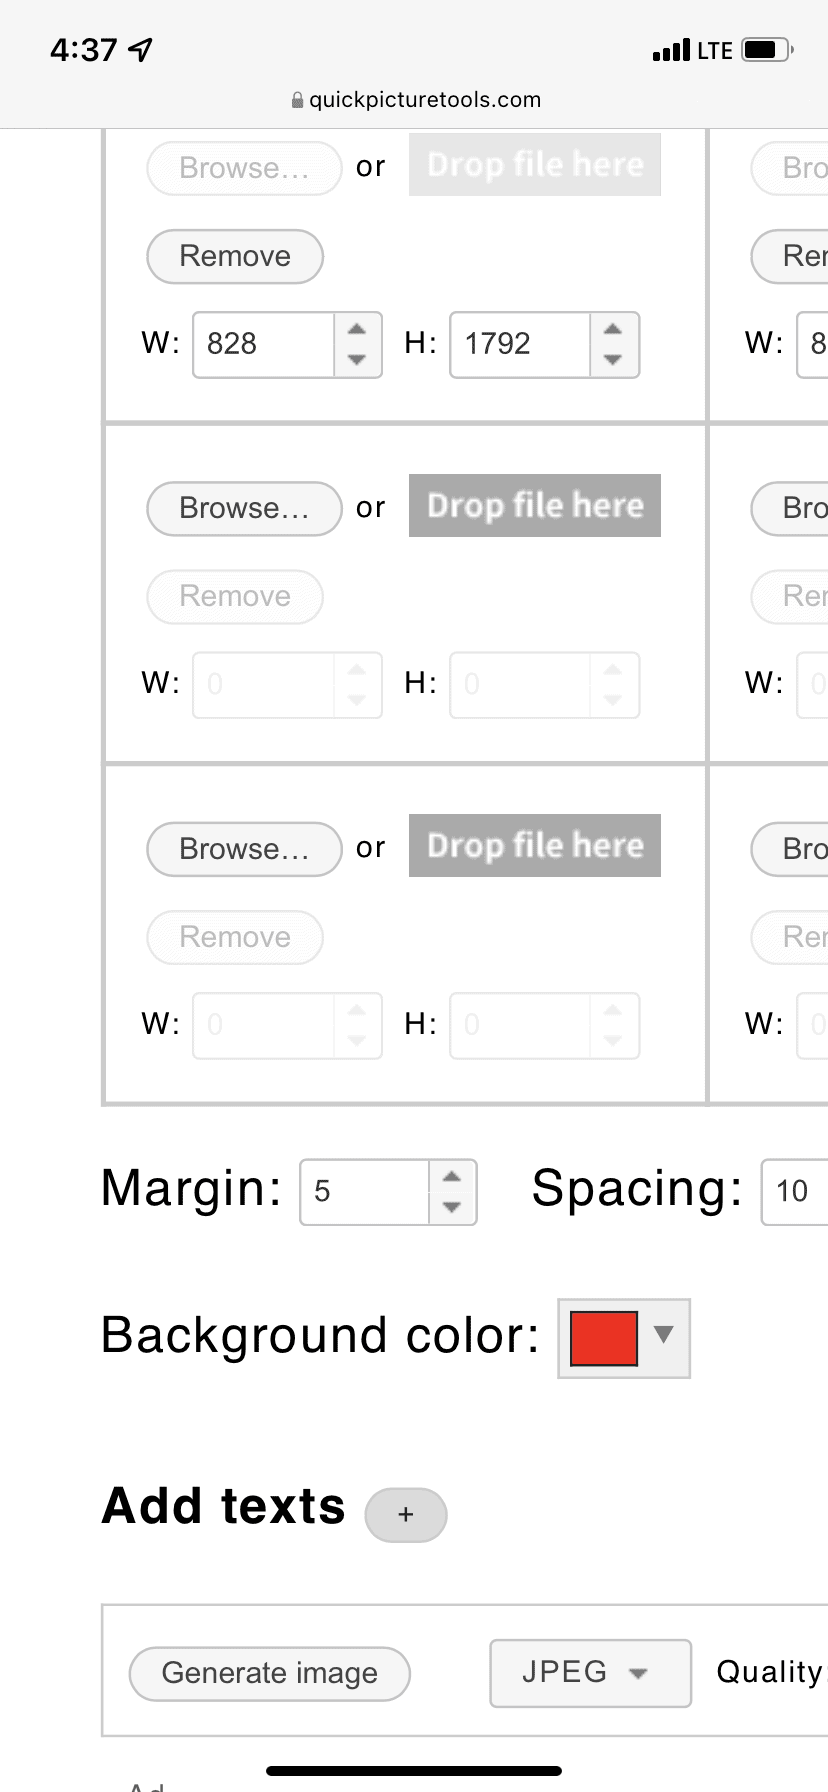
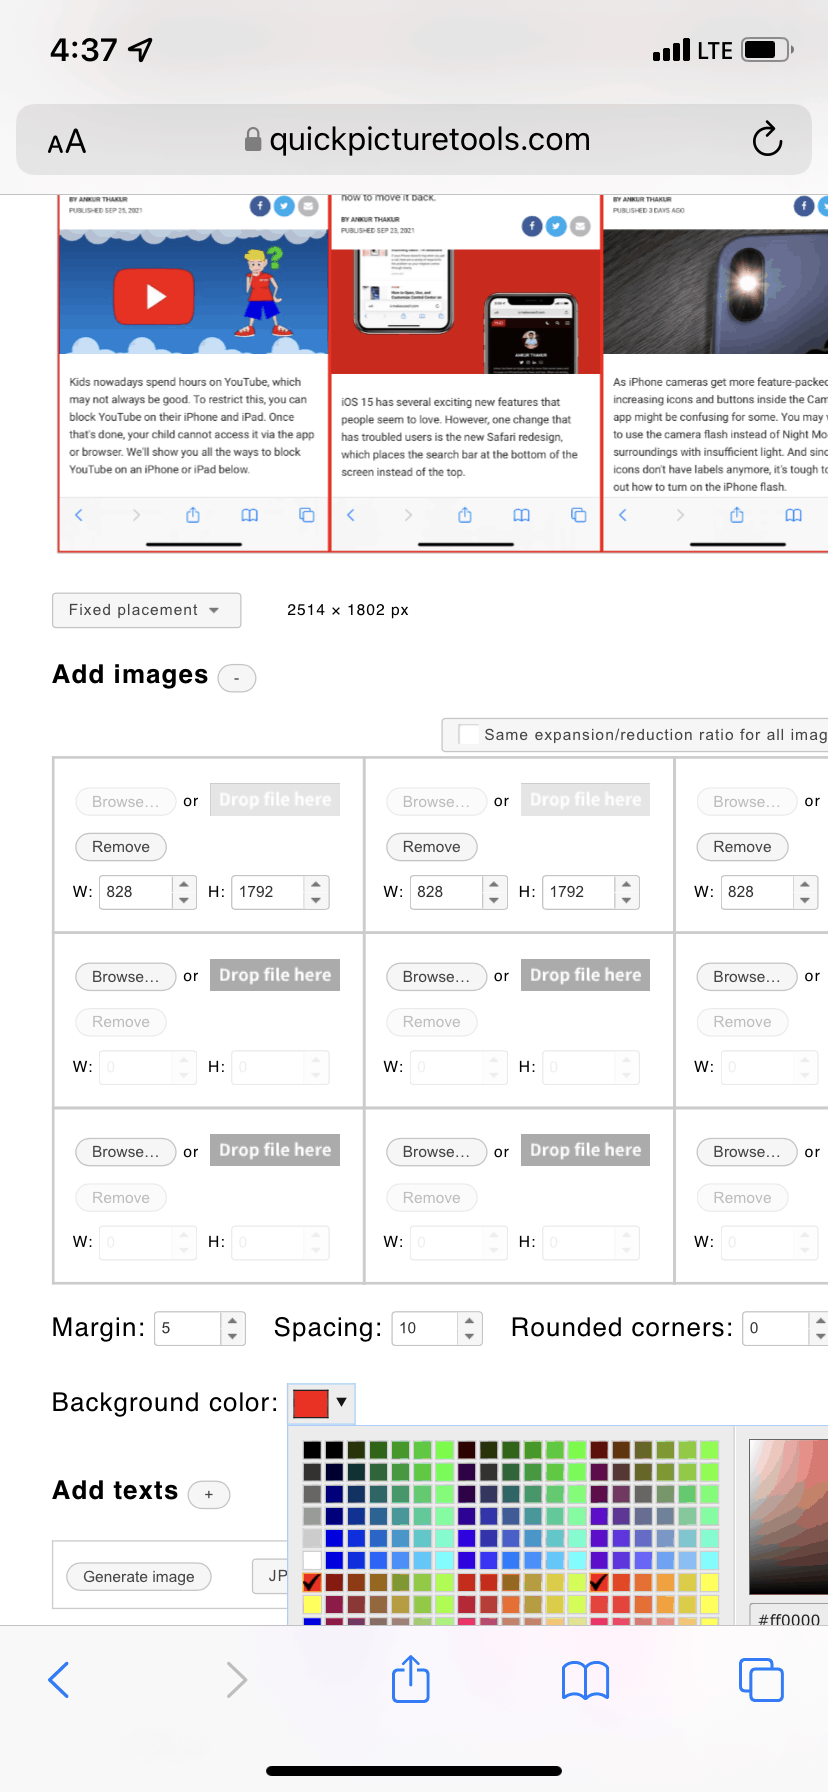
Once you have added two or three screenshots, you can set the Margin (border), Spacing (between the screenshots), and the Background Color that appears in the space between your images.
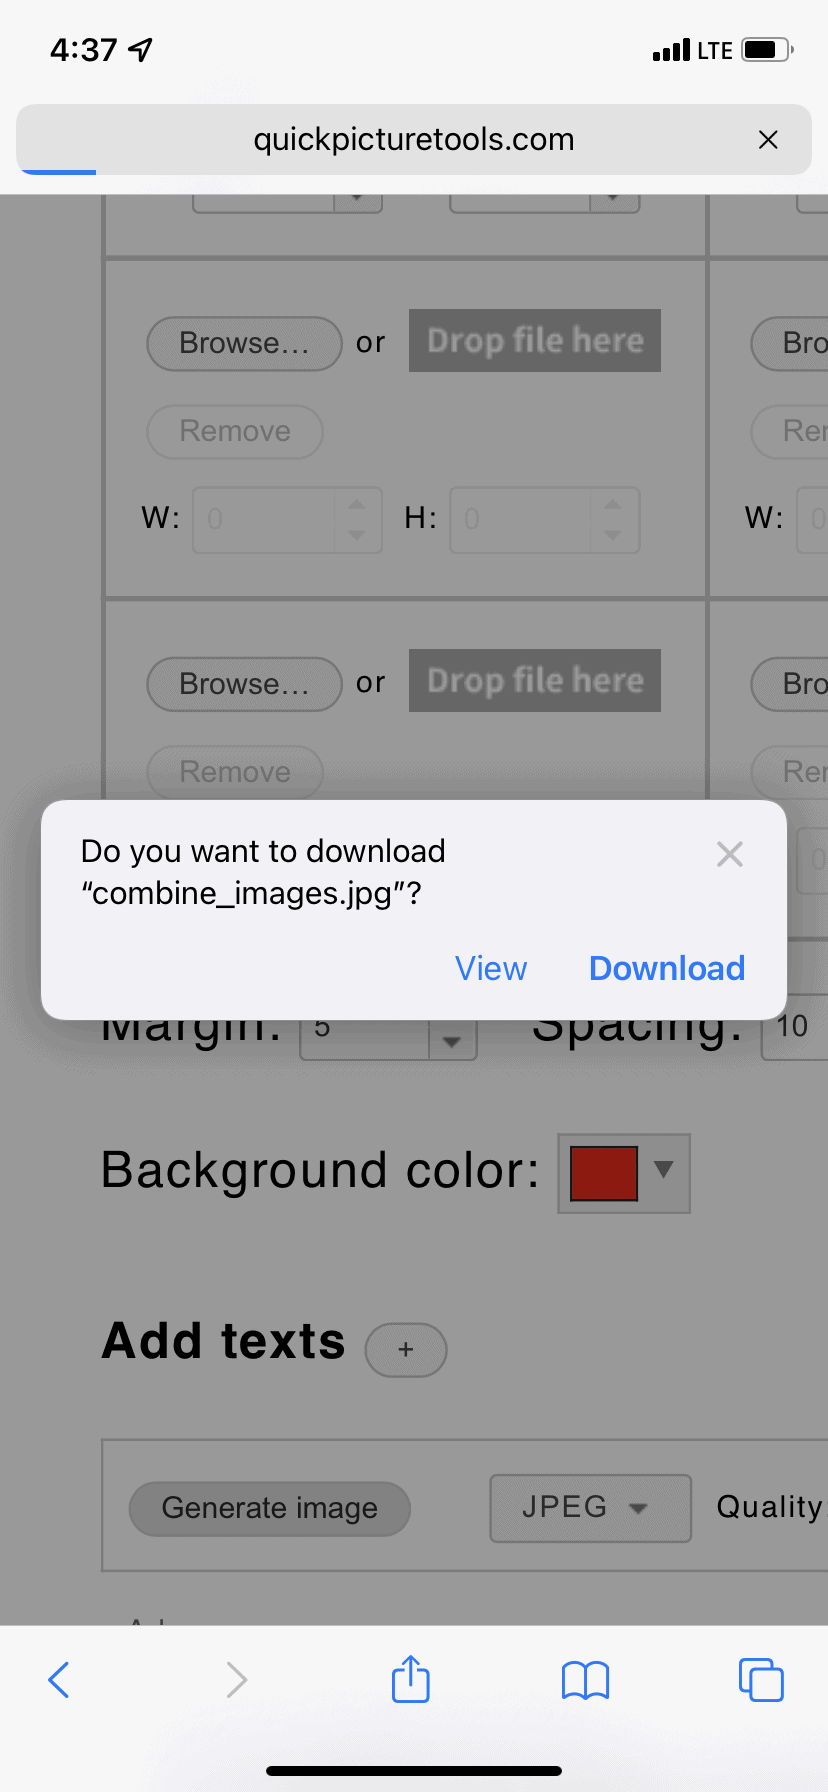
- Finally, tap Generate Image > Download. Please note that if you tap View, it will open the image in full screen in the same browser tab. Due to this, your set parameters like margin or spacing will reset. So, if you want to continue combining multiple screenshots one after the other, choose Download.
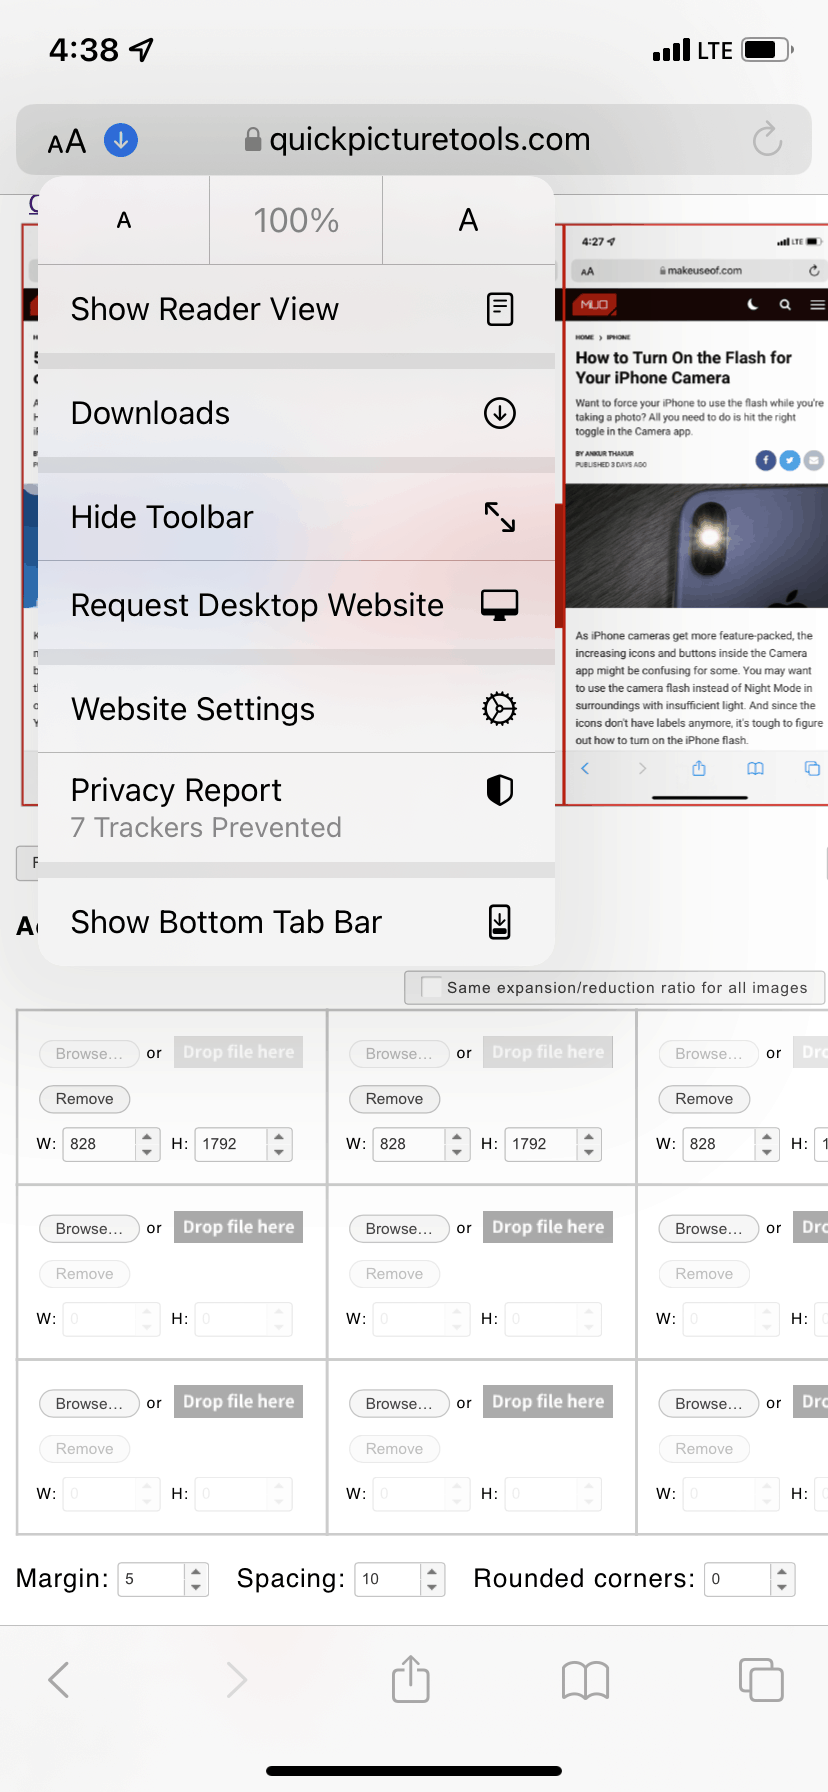
- In iOS 15, tap AA > Downloads. In iOS 14 and earlier, tap the Safari download arrow.
-
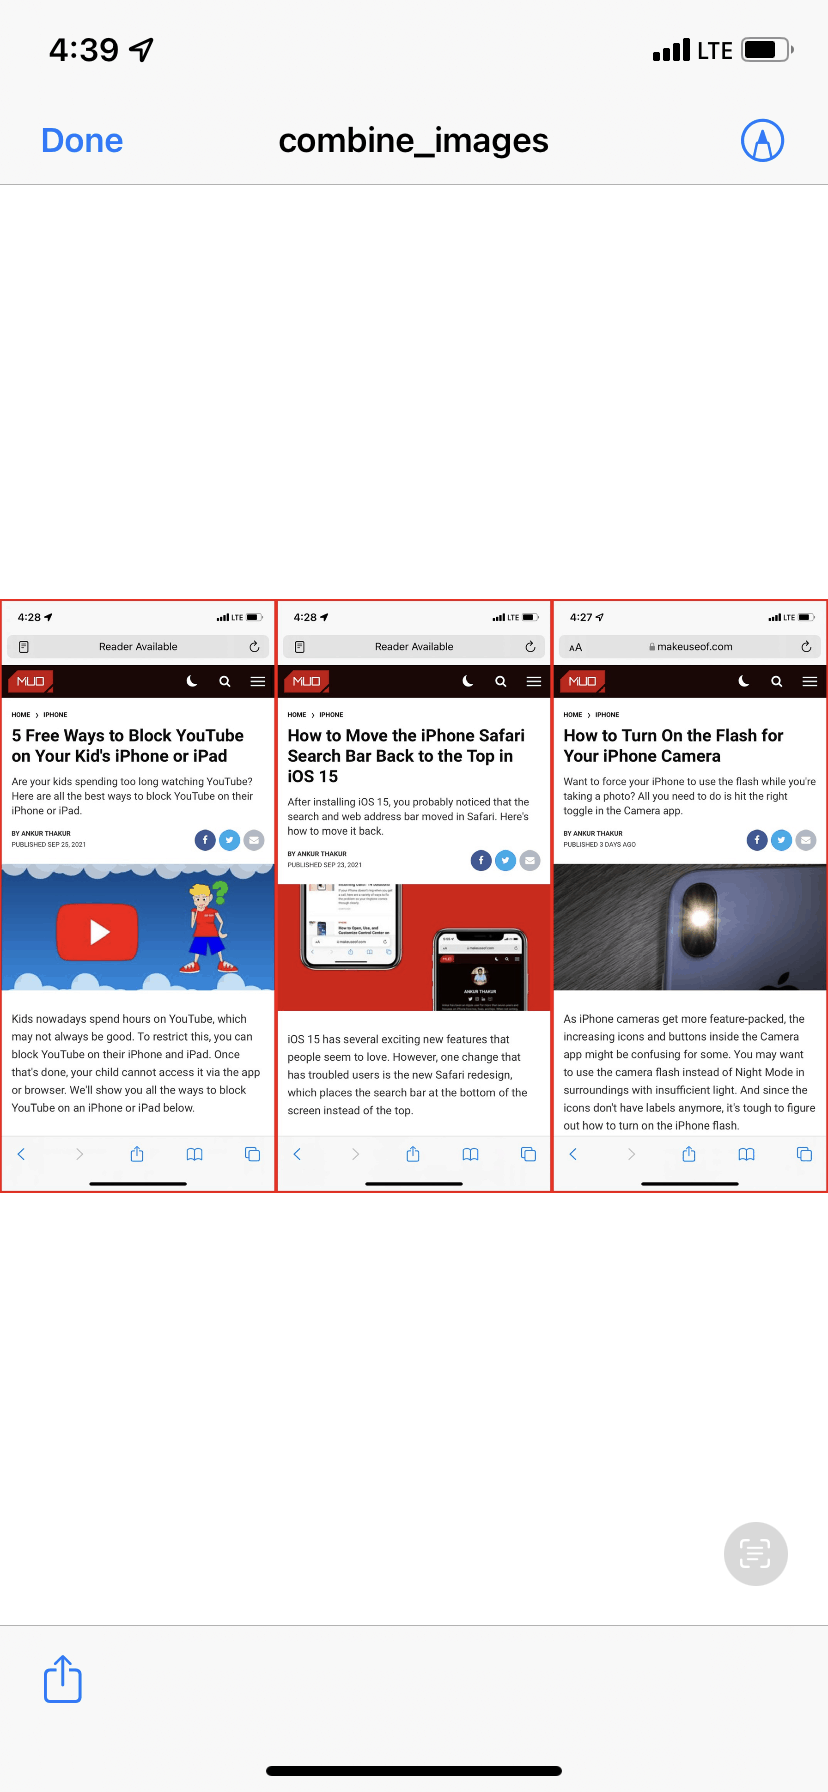
Now, tap the edited image name and hit the share icon from the bottom, then choose Save Image. You may also go with other options from the iOS Share Sheet like AirDrop, Mail, or third-party apps.


3. Create Your Own Shortcut
Using the Shortcuts app, you can create your custom iOS shortcut that will swiftly combine the images side by side. You can also choose to set the spacing between the pictures.
The Shortcuts app is owned by Apple and comes pre-installed on all iPhones running iOS 13 or later. If you're on iOS 12, or have deleted the Shortcuts app, you can download Shortcuts from the App Store for free.
Please note that the steps below to build this shortcut are according to iOS 15. If you're on iOS 14 or earlier, it will look slightly different. Here's how to do it:
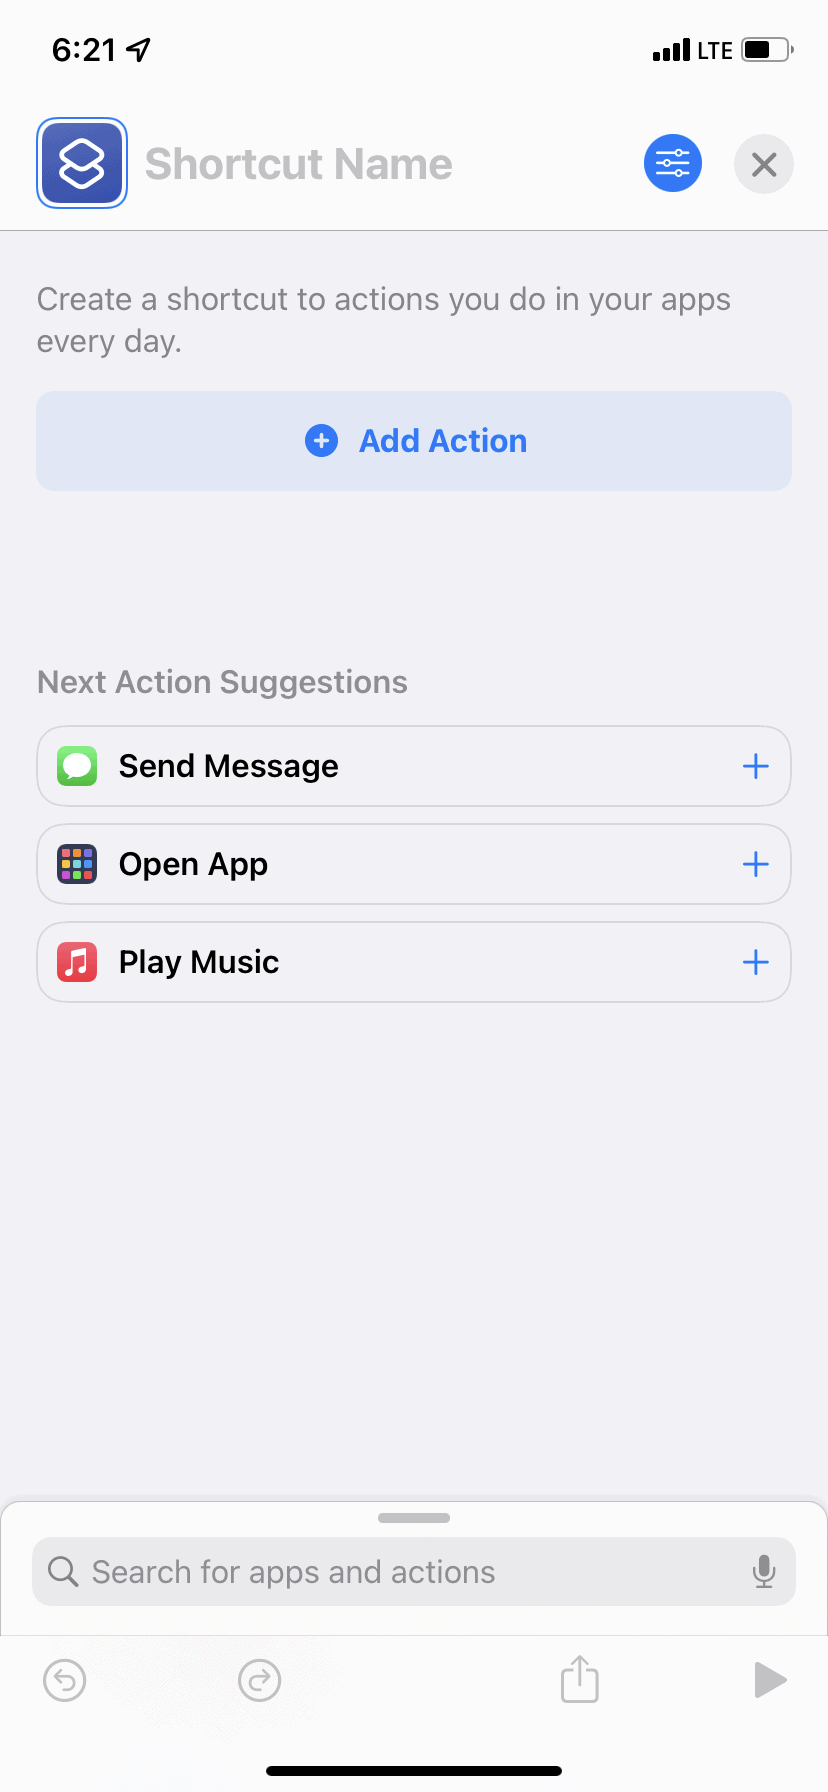
- Inside the Shortcuts app, make sure you are in the My Shortcuts tab. From here, tap the plus icon (+) from the top right.
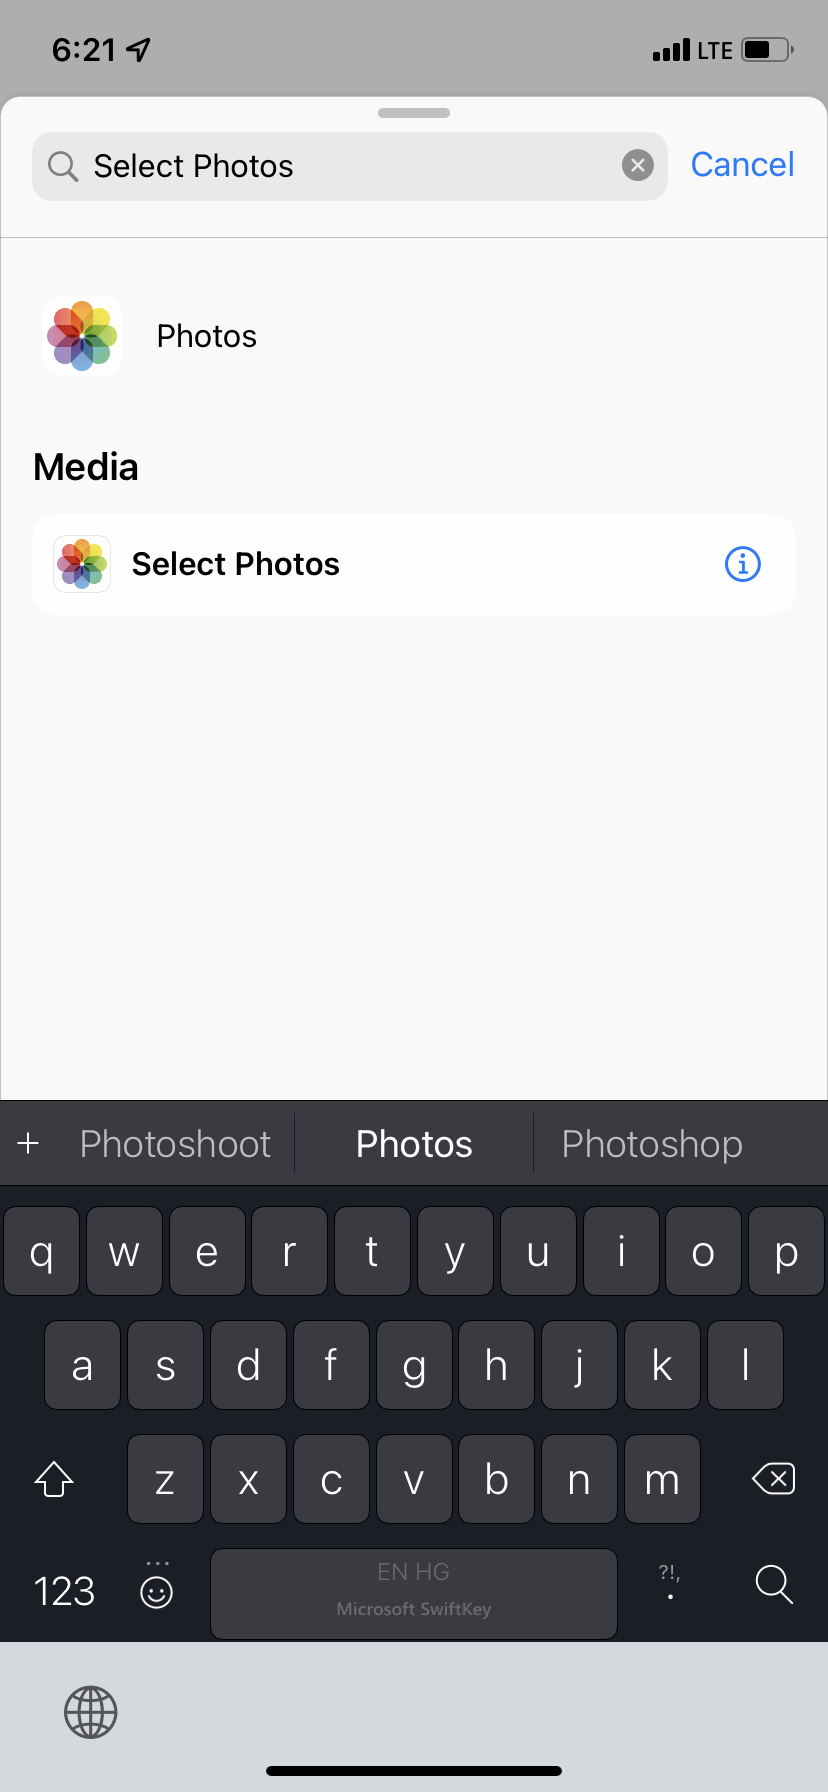
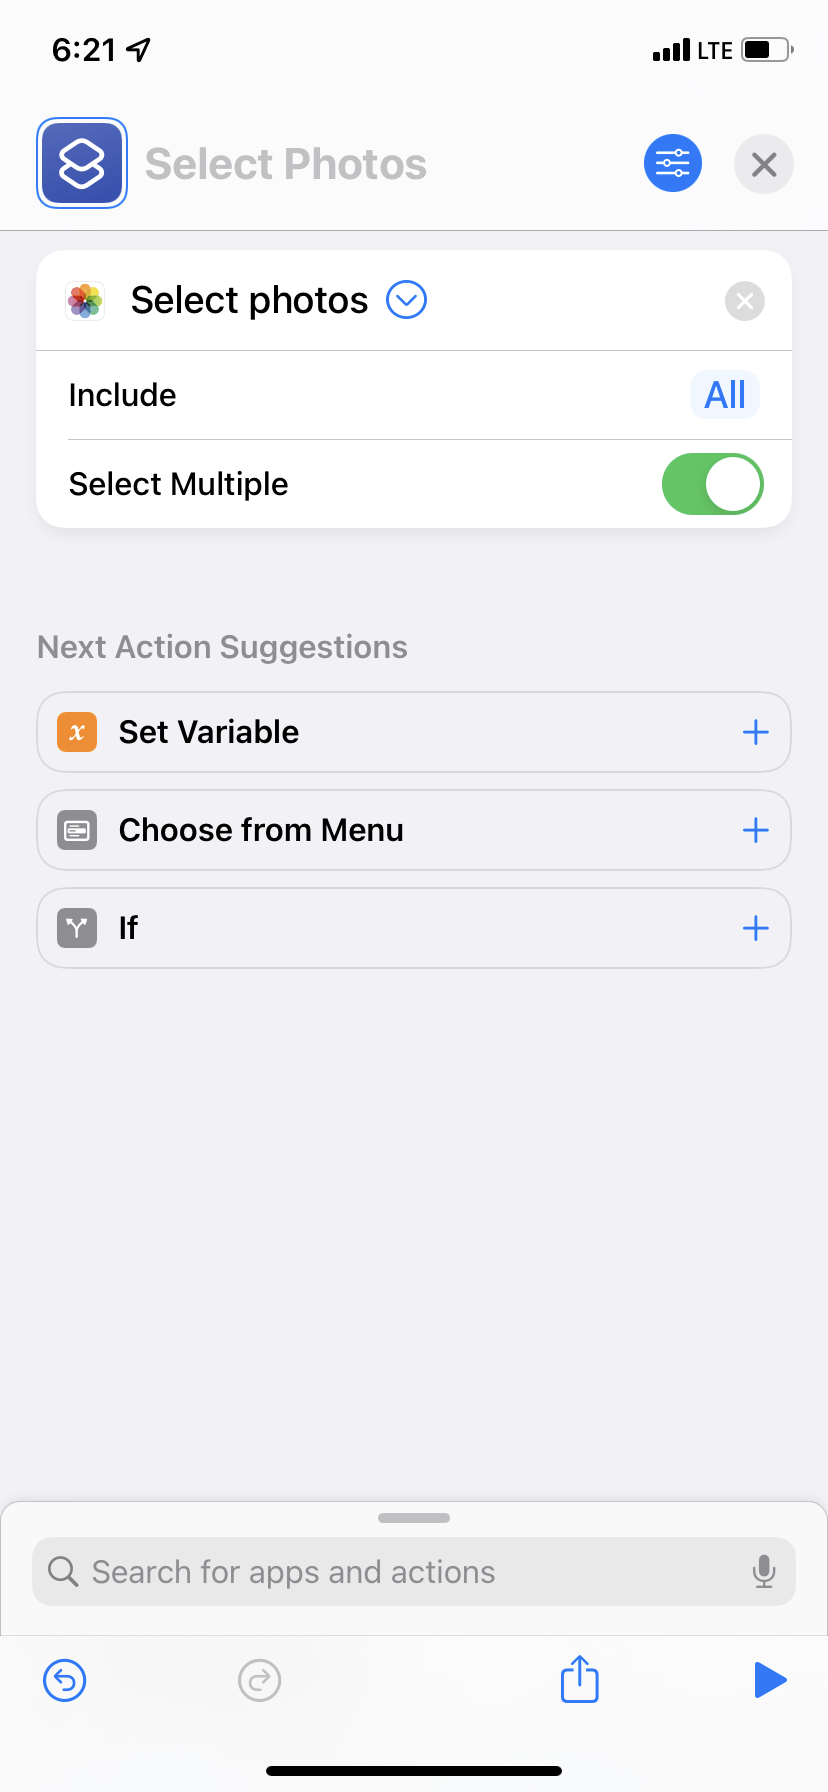
- Tap Add Action and use the search box to find Select Photos. Alternatively, you can also tap Add Action > Apps > Photos > Select Photos.
-
Tap the arrow and enable the toggle for Select Multiple.
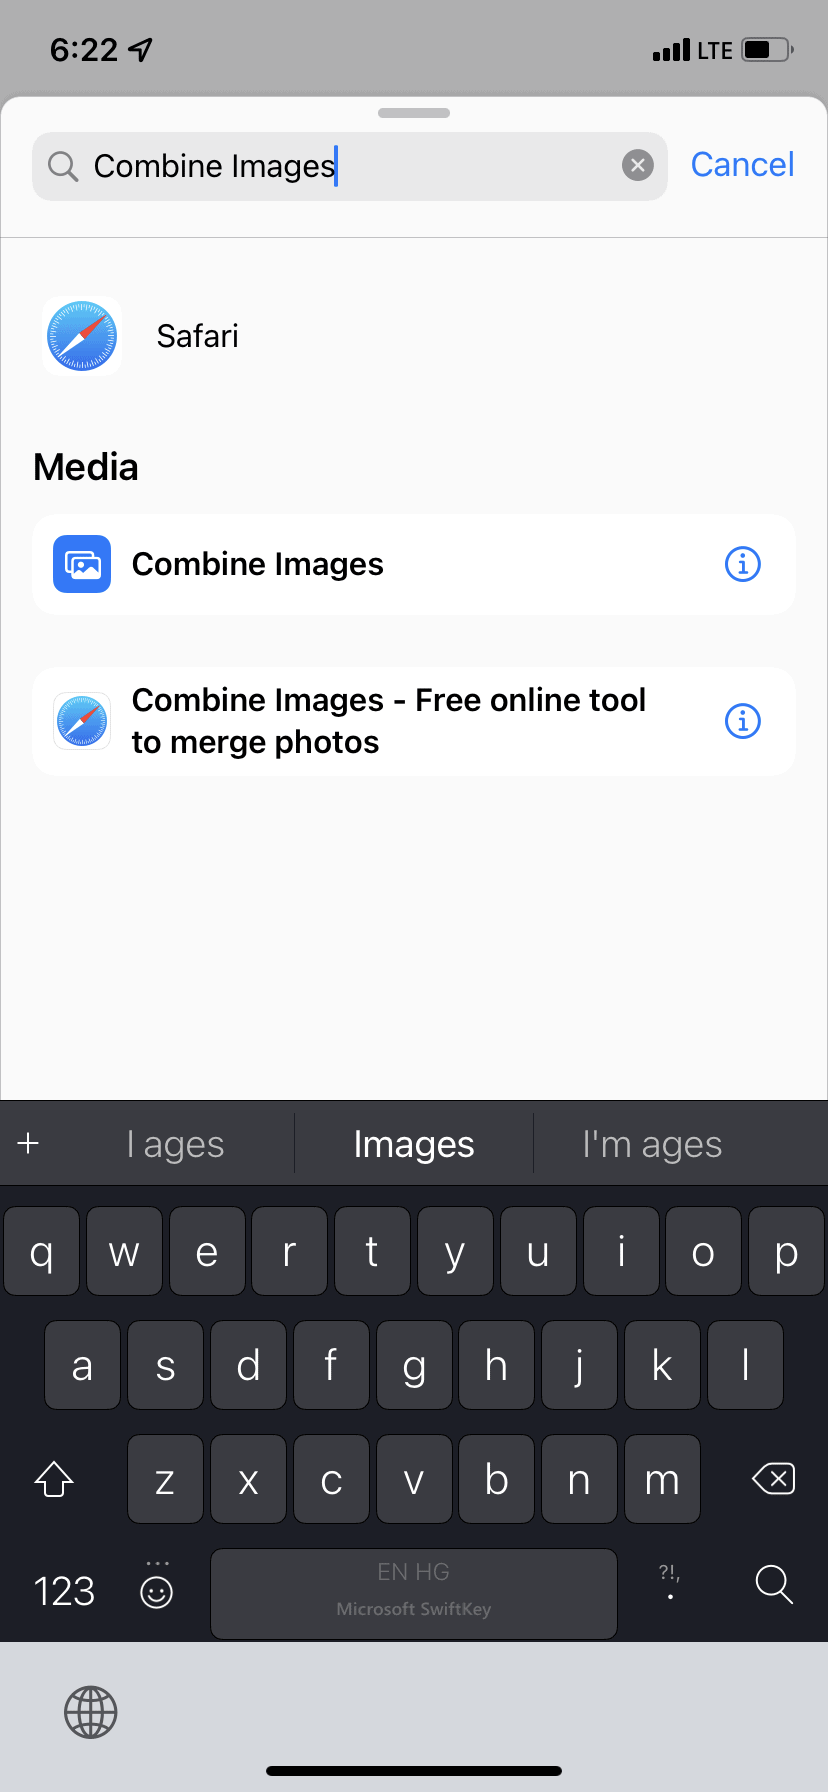
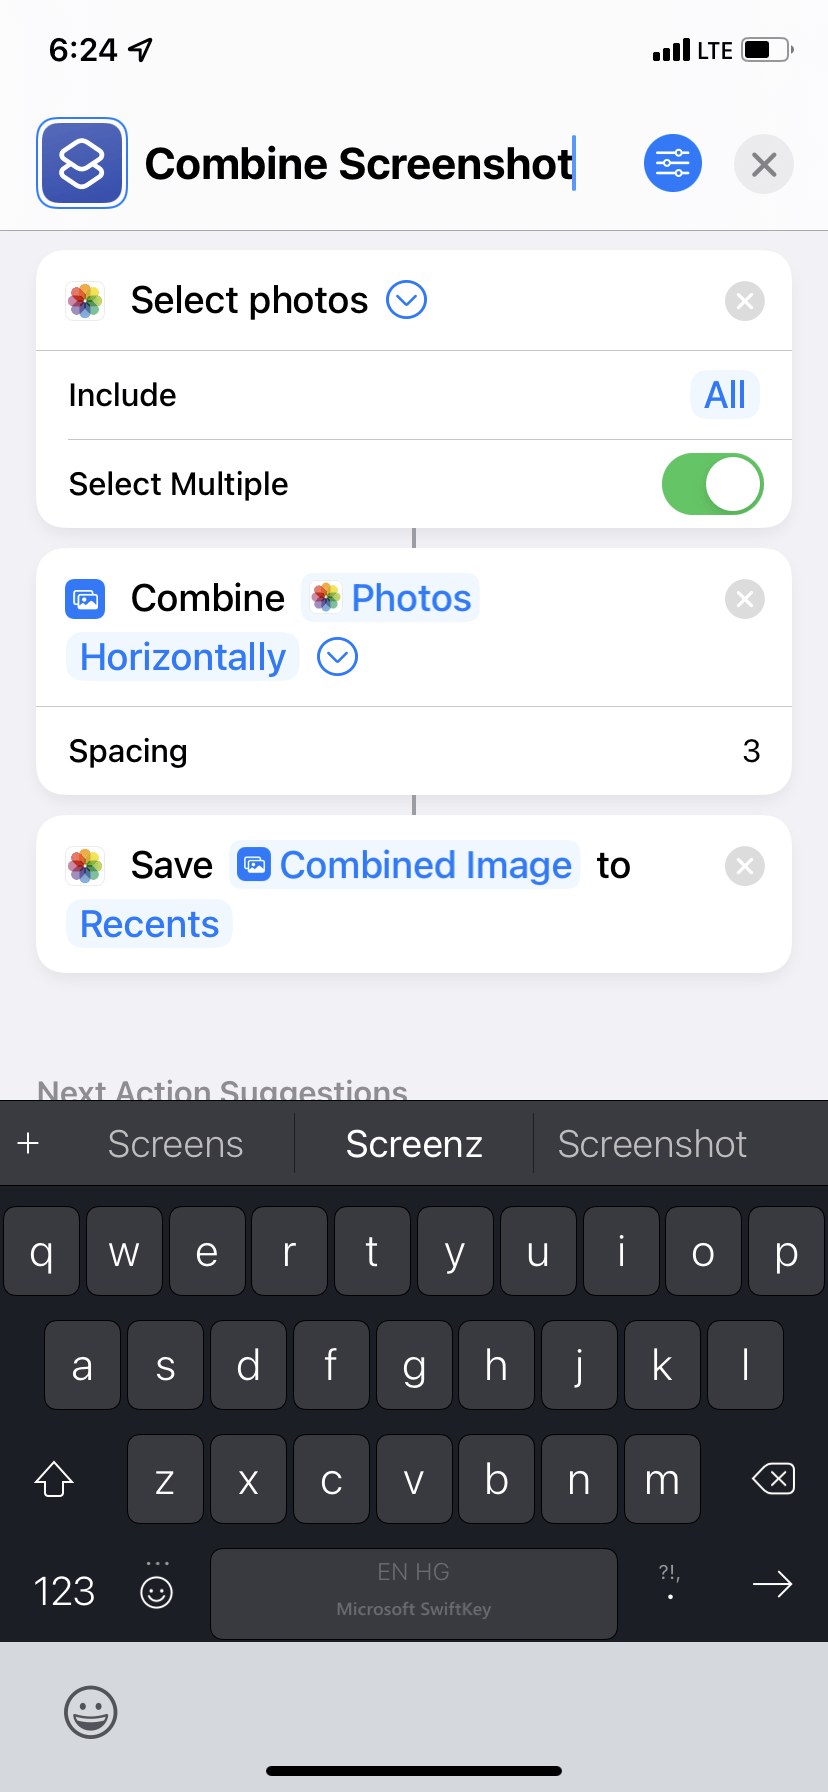
- Tap the search box at the bottom of the screen and type Combine Images. Select it from the search results.
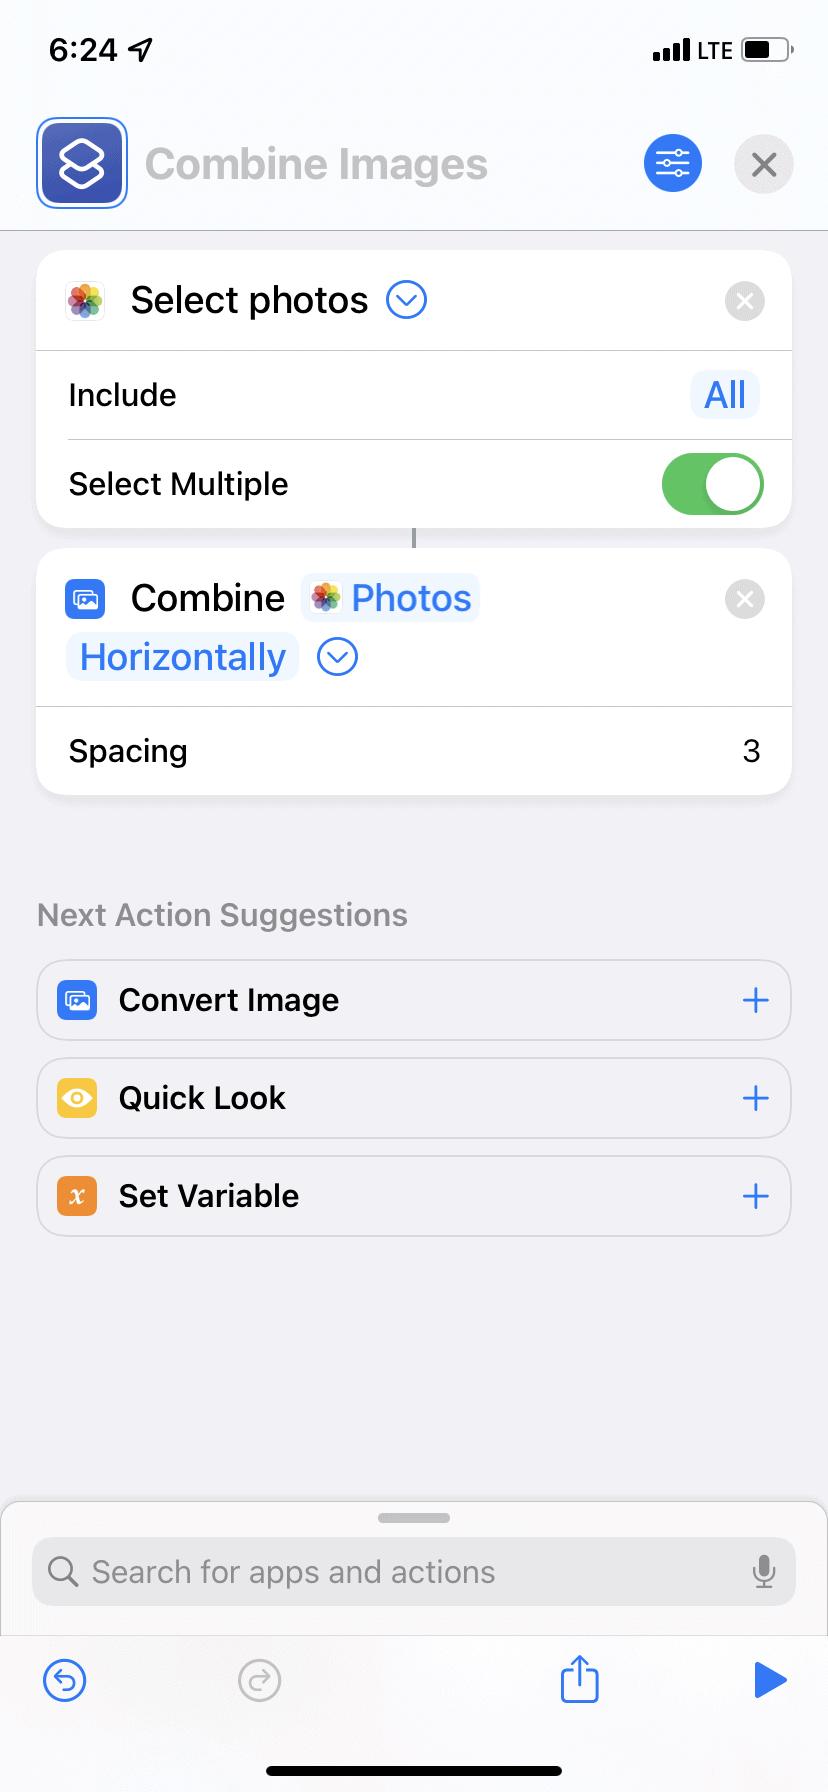
- Make sure, next to Photos, it says Horizontally. If not, tap the current word and choose Horizontally. Additionally, you can tap the arrow and set the spacing between the images.
-
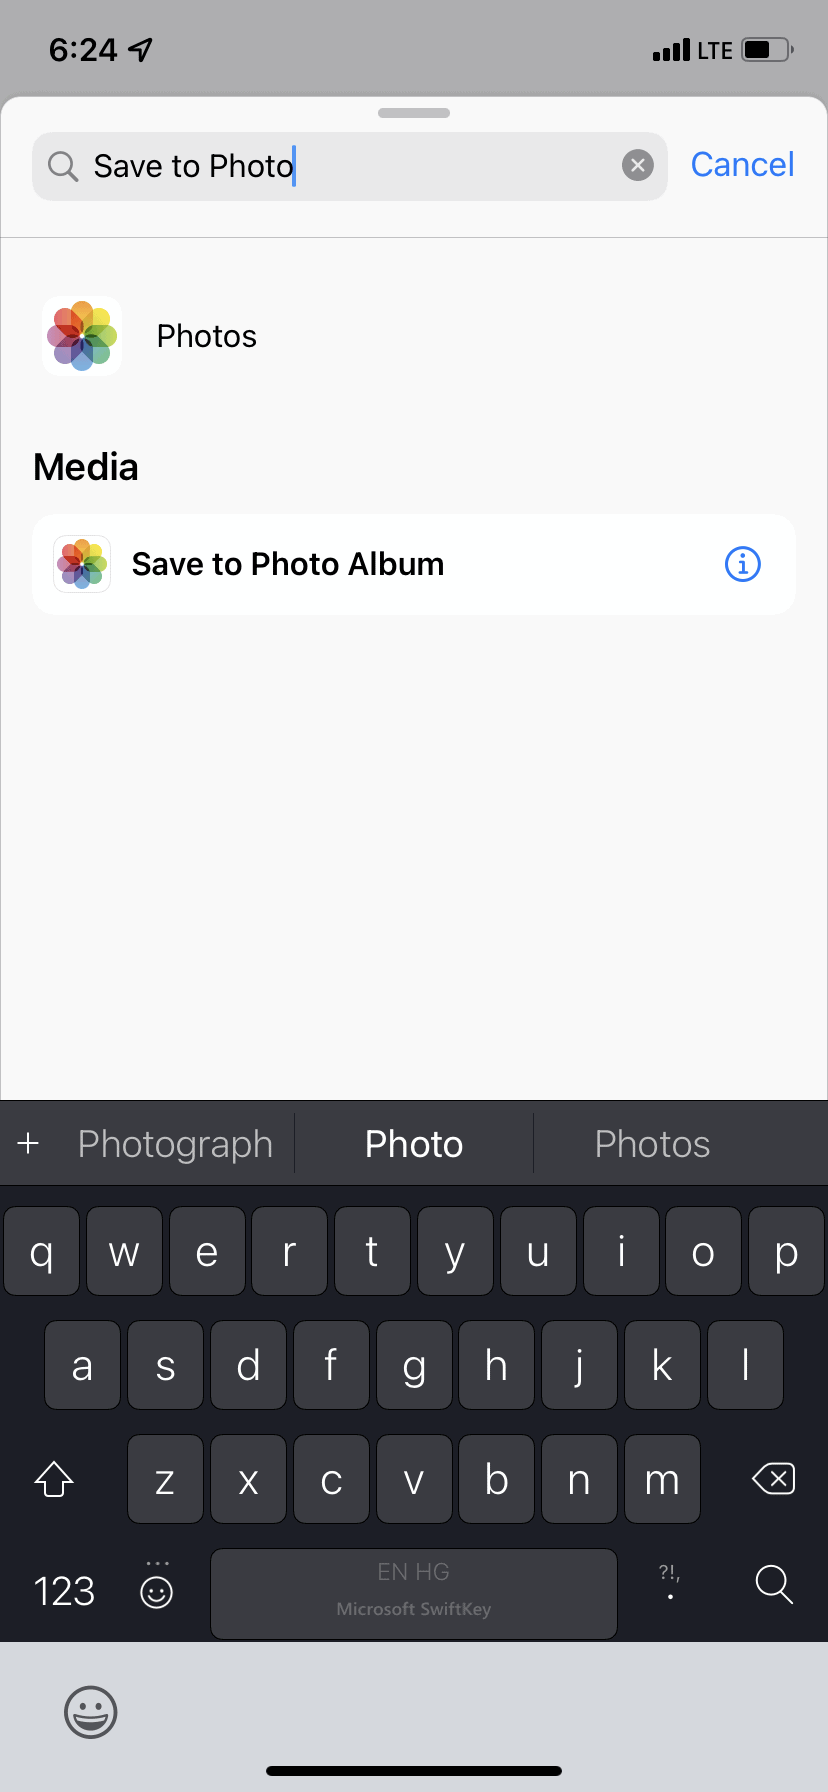
In the search box, type Save to Photo Album and tap this action to add it to your shortcut.
- From the top of the screen, give this shortcut any desired name.
-
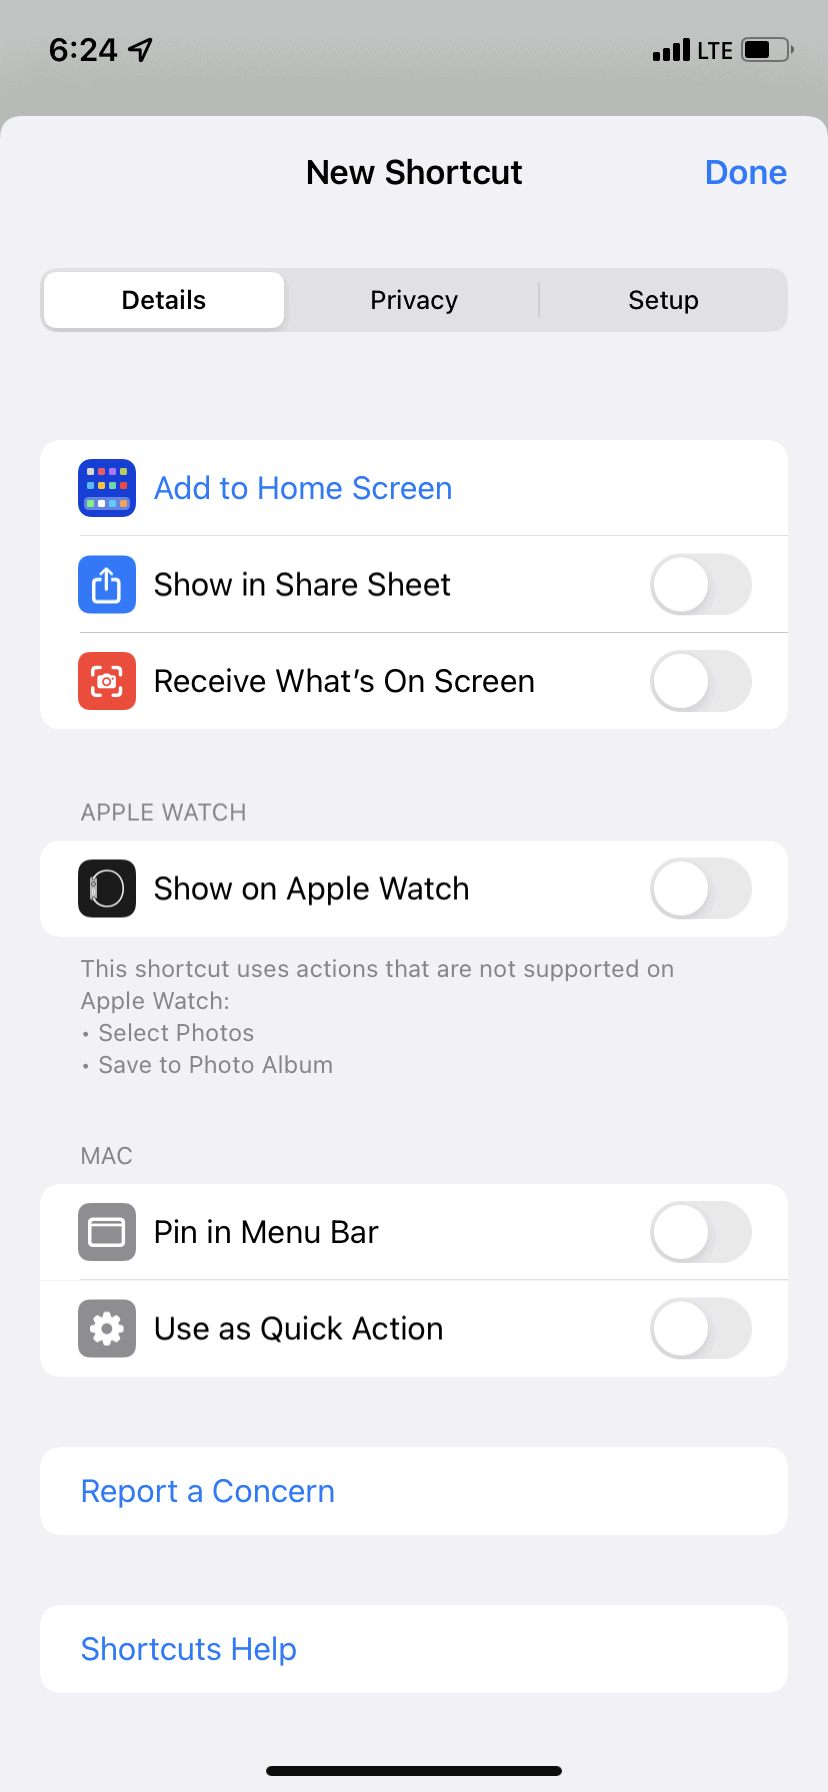
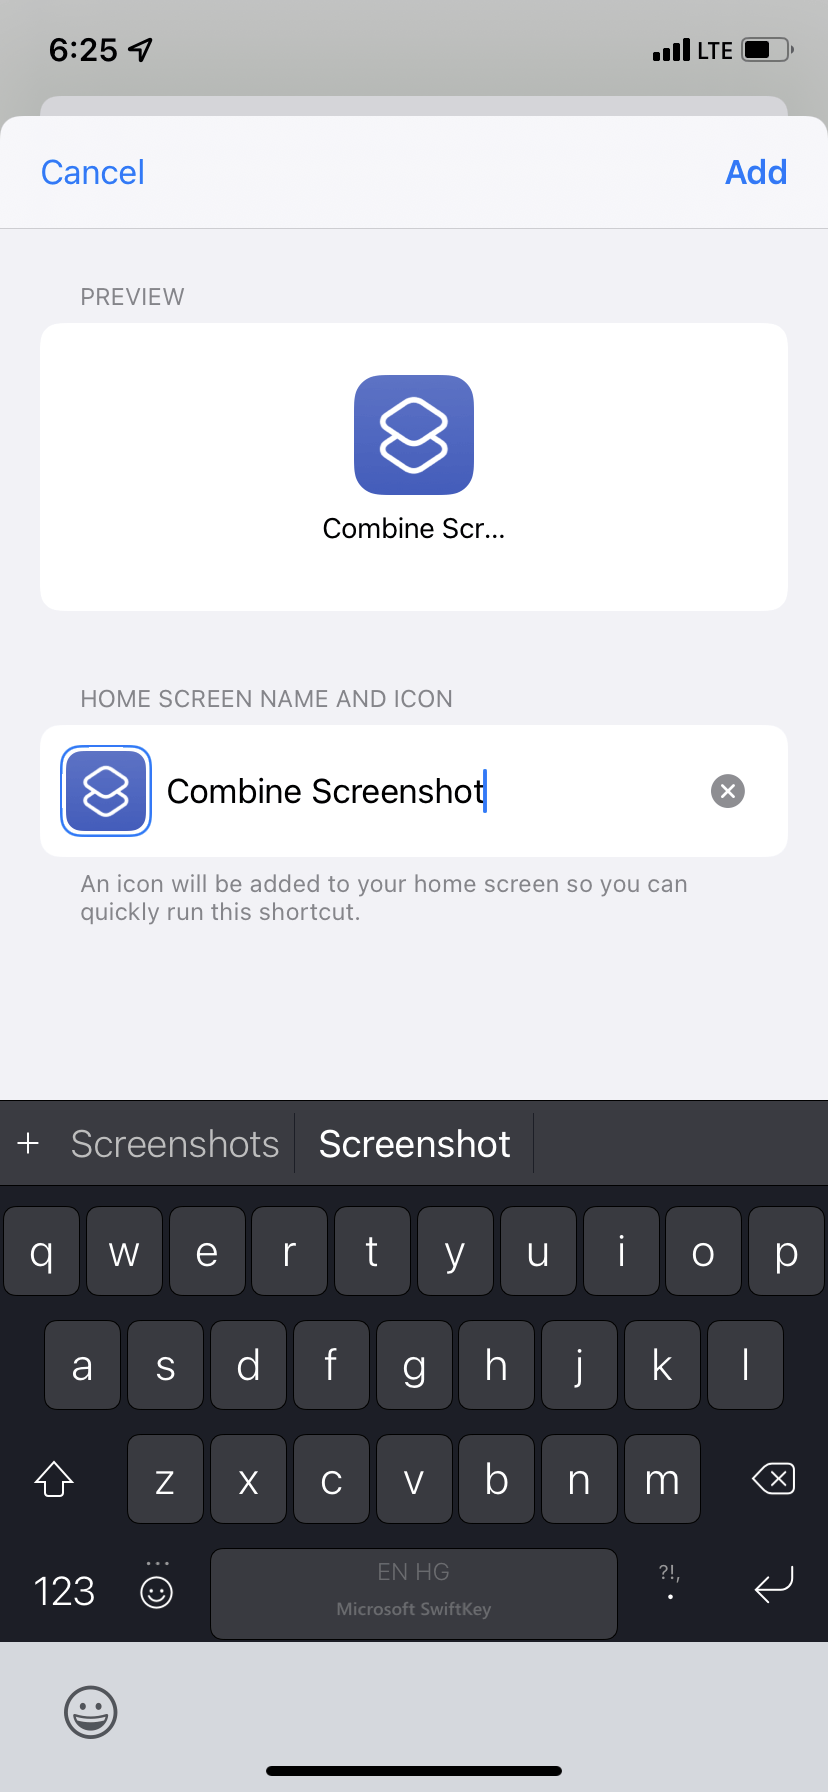
Tap the blue settings icon from the top right and choose Add to Home Screen. Type the shortcut name once more and tap Add to access it quickly. It will take you to the iPhone Home Screen.
- You can now open the Shortcuts app and tap Done, then hit the X to exit and save your shortcut.
- To use the shortcut, tap it from the My Shortcuts section or the iPhone Home Screen. Now, select the screenshots from the Photos app and tap Add. The iOS shortcut will combine your screenshots side by side and save the final image to the Photos app. You will see a notification when done.


Once you have spent a few minutes building the shortcut, this method is pretty quick. However, the main drawback is that you can't change settings like the spacing between the screenshots for each edit. It's fixed as per the shortcut settings. To change it, you need to edit the shortcut.
Therefore, if your motive is just to have screenshots side by side and do that quickly, the Shortcuts method is great. But if you want customization for each project, the previous solutions are better.
Combined Screenshots Ready To Use!
After seeing the above three methods, you should be confident in combining multiple screenshots side by side into a single image straight from your iPhone.
As you might have already figured out, these steps aren't limited to only screenshots. So go ahead and turn other pictures into collages as well.