Heading out the door? Read this article on the new Outside+ app available now on iOS devices for members! Download the app.
I will never forget the first time I saw my teacher gracefully extend her leg behind her shoulder in Parivrtta Surya Yantrasana (Compass Pose). I thought she was an alien.
I had never seen the pose except in yoga magazines. Once I experienced it in person, I finally understood why it was called Compass Pose. My teacher looked sorta like a compass mixed with a pretzel. Shortly after that, during my home practice, I started to take the time to explore how trying to come into the pose felt in my body. The more I practiced Compass Pose, the more I realized that even though the pose seemed completely intimidating, my doubting mind was the primary thing that was getting in the way.
See more: 5 Hamstring Openers to Find Freedom in Compass Pose
How to make Compass Pose easier
Think of what Compass Pose demands of you anatomically. Break it down and be certain to address each part of it in order to make it more accessible to your body. That is the secret of smart sequencing.
When you look at the actual mechanics behind Compass Pose, it requires a lot of hamstring flexibility, hip abduction with a bit of rotation, and shoulder mobility. Even though the final pose looks super intimidating, you will come to understand that when you create the same shapes in less-challenging poses earlier in the sequence, Compass Pose not only becomes more accessible, it becomes the next logical pose.
Another thing I learned while practicing and teaching Compass Pose—and this is important—is that your expression of the pose is going to look different than anyone else’s pose. If you can’t get your leg completely behind your shoulder or straighten your leg, that’s OK! My left side isn’t able to straighten in the pose. It kind of looks like a broken compass needle, to be honest. So if you’re only able to “straighten” your leg a couple of inches and it looks bent, I’m right there with you! You can still get all the benefits while honoring your limits.
Want more poses, tips, and anatomy insights to prep for Compass Pose? Join Outside+ today to access our full 45-minute sequence building to Compass Pose.
A sequence to prepare you for Compass Pose
The following sequence slowly stretches and builds strength in your body in all the areas challenged by Compass Pose.
Quiet yourself
Come into a seated pose and place your hands over your heart. Feel the beating of your heart. Listen for the pulsation, the expansion, the contraction. Notice the temperature of the room. Observe how you feel. The practice of yoga asks you to feel. To feel the good, the bad, the uncomfortableness, and the bliss in it all. Ask yourself to dedicate this practice to feel all of these things, and to remember that you are whole. If at any point in your practice you forget, come back to your heartbeat and your breath. Feel free to come into any of your favorite warming stretches before practicing the following.
Thread the Needle With Straight Leg
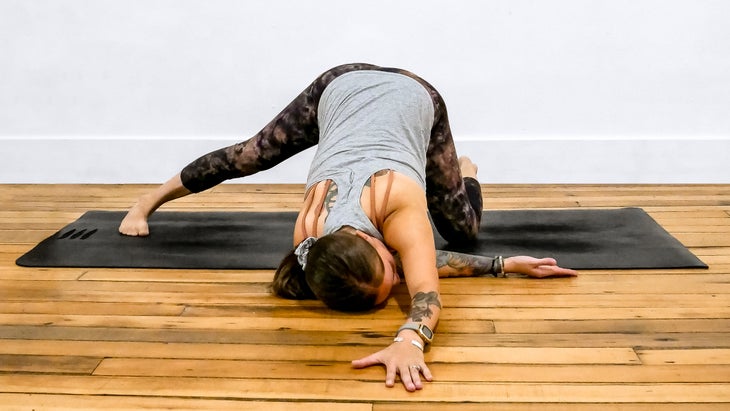
Start in Tabletop, then sweep or slide your right foot straight out to your right side so your heel is in line with your left knee. Press down into the ground through the pinky toe edge of your right foot. Walk your hands forward about 1 foot in front of your shoulders and slide them almost as wide as the mat like you’re coming into Uttana Shishosana (Extended Puppy Pose). Either stay here or bring your right arm into a twist by threading it behind your left wrist and bringing your right cheek to the mat. Stay here for several breaths. Unwind. Repeat on the other side. Come back to hands and knees.
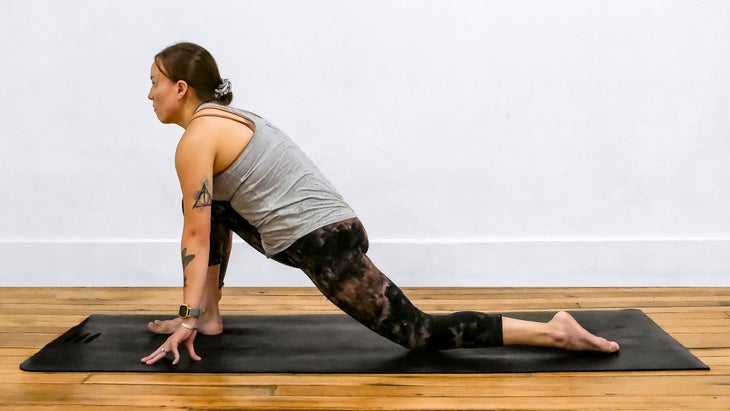
Half Splits With Twist
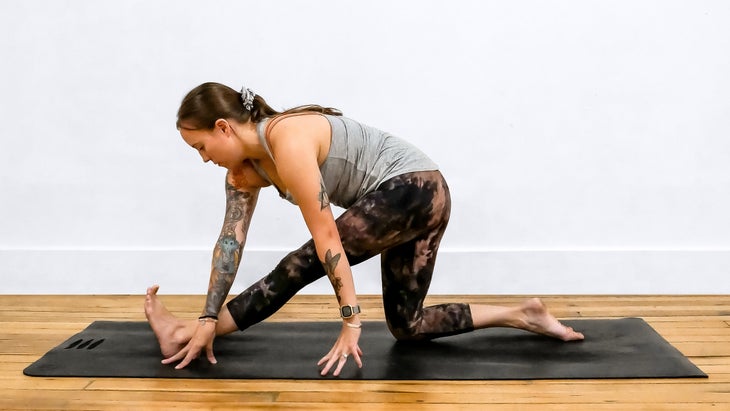
From hands and knees, step or wiggle your left foot in between your hands and then begin to inch your right knee behind you to your comfort level. If your hands don’t reach the ground, use a couple blocks as limb extenders. The essential thing here is to stack your hips over your right knee and not slip into the common tendency to sit too far back, which causes you to lose some of the stretch in your front hamstring.
From here, press the back of your left heel into the mat and, without moving your foot, try to push it away from you. Stay here or bring both of your hands to the outside of your left shin for a slight twist. If you take the twist, make sure both of your hips remain facing the front of your mat. You might need to draw your left hip slightly back. Repeat on the other side. Come back to hands and knees.
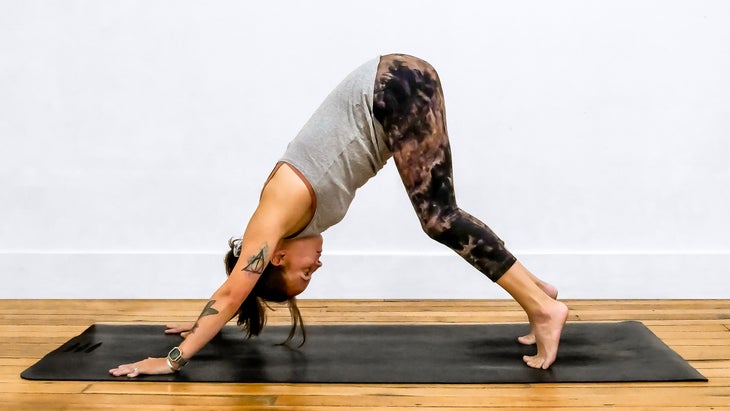
Downward-Facing Dog With Cat-Cow
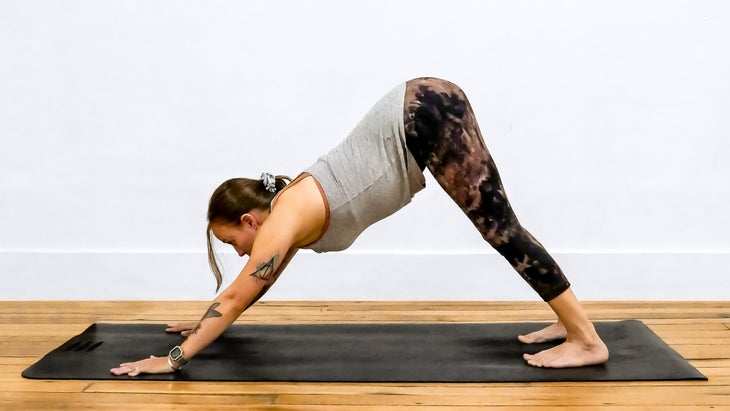
From hands and knees, press into your hands and lift your hips up and toward the back of your mat into Adho Mukha Svanasana (Downward-Facing Dog Pose). Press down through your heels to create length in your hamstrings, even if your heels don’t touch the mat. Exhale and start to come into Marjaryasana (Cat Pose) while still in Downward-Facing Dog by rounding your back and tucking your chin.
Inhale and come into Bitilasana (Cow Pose) in Downward-Facing Dog by arching your back. Repeat several times. Come back to Downward-Facing Dog with a flat back.
Chair Pose
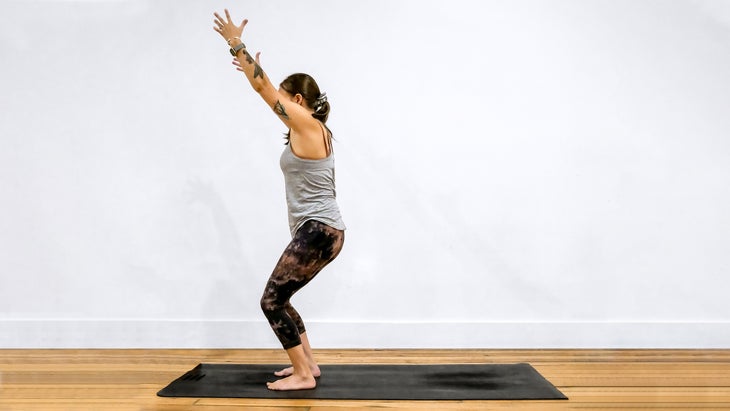
From Downward-Facing Dog, make your way to the front of the mat. For this variation of Utkatasana (Chair Pose), keep your feet about hip-distance apart. Reach your arms alongside your ears, bend your knees, and sink your booty back. Stay in the pose as you press down through your heels and lift through the top of your head.
Bring your arms straight out from your shoulders with your palms pressing away from you toward the side walls. Pinch your shoulder blades together. Begin to twist to the left, bringing your left palm to face the back of the mat and your right palm toward the front. Make sure that your pelvis remains facing the front of the mat, which means you may need to bring your left hip slightly forward.
Half Moon Pose

From Chair Pose with twist, shift your weight to your right foot and lift your left knee toward your chest. You may wobble. That’s OK. Just pause and wait until you feel steady before you transition any more.
Slowly begin to press your left heel toward the wall behind you. At the same time, counterbalance yourself by leaning your right shoulder toward the mat in front of you.
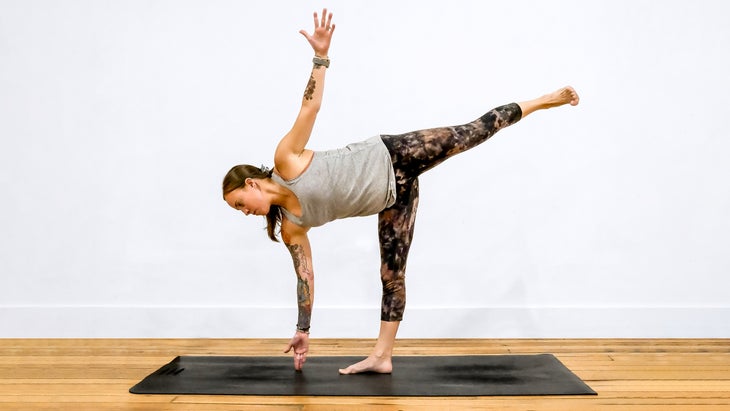
Eventually bring your right hand down to the mat or a block and boom—you’re in Ardha Chandrasana (Half Moon Pose)! You will be facing the left side of your mat. To really fire up your right hamstring, if you’re feeling super stable, feel as though you’re drawing your right sit bone toward your navel.
Extended Triangle Pose
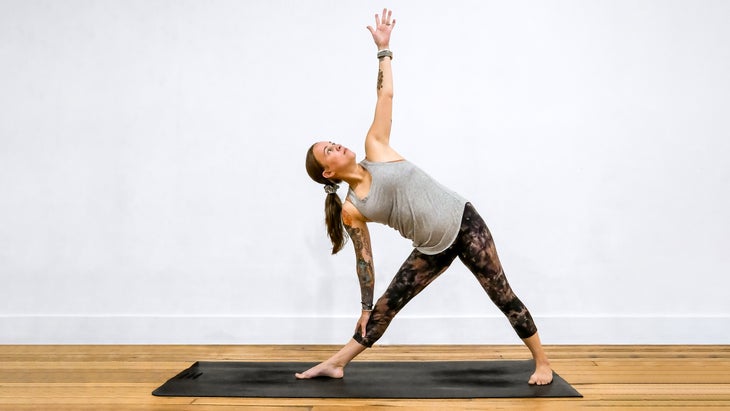
From Half Moon, start to bend into your right knee and lower your left leg toward the back of the mat. At the same time, lift your chest and left shoulder as you step back. Once your left foot finds the mat, begin to straighten your right leg and bring your right hand to your right shin. Your left foot will be angled slightly in for Utthita Trikonasana (Extended Triangle Pose).
Remember: Triangle is a HUGE challenge, so if you’re finding that you’re unable to reach your shin or take a deep breath, grab a block and place it alongside your right ankle to bring the ground up to your right hand.
Extended Side Angle With Twist
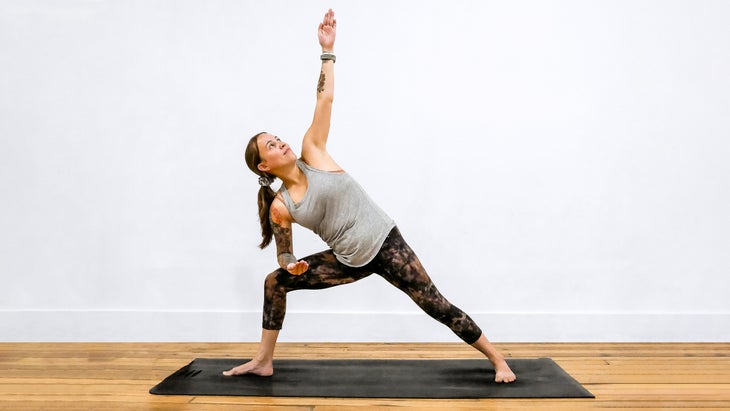
From Extended Triangle Pose, bend your right knee and bring your right forearm toward your right thigh as you lift your left arm toward the ceiling. Welcome to Utthita Parsvakonasana (Extended Side Angle Pose).
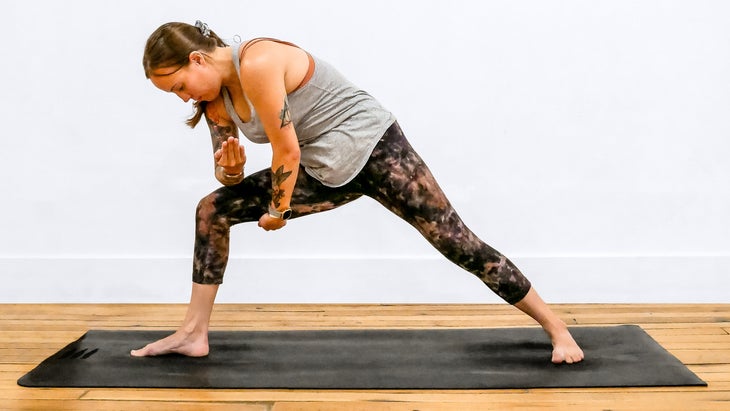
Exhale and roll your left shoulder down toward the mat as you twist from your middle back and bring your left hand to touch your right hamstring. Inhale, unwind, straighten your left arm back toward the ceiling. Continue this twist, 1 breath per movement, for 5–7 breaths. Come back to Extended Side Angle in which your left arm is reaching toward the ceiling or overhead.
Crooked Monkey
From Extended Side Angle, let’s take it down a notch. Bring your hands to the mat and come onto the ball of your left foot in Anjaneyasana (Low Lunge). Set your back knee down.
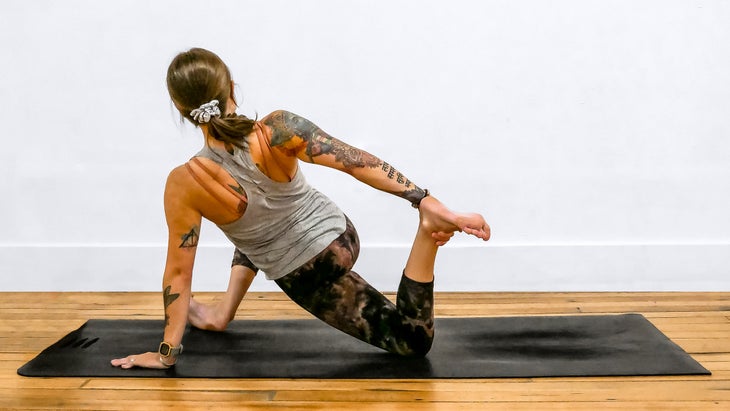
Bring your right hand to the inside of your right foot and roll onto the outer edge of your right foot. Either stay here or bring your right hand to your right thigh and twist to the right into Crooked Monkey. If you like and you can do so without experiencing any knee pain, you can bend your left knee and reach for your ankle or foot. Stay here for 3–5 breaths. Release.
Come to hands and knees, tuck your toes under, and lift your hips up and back into Downward-Facing Dog. Make your way to the front of the mat in Tadasana (Mountain Pose). Repeat poses 4, 5, 6, 7, and 8 on the other side. From Crooked Monkey on the second side, come back to hands and knees.
Ustrasana (Camel) With Bind
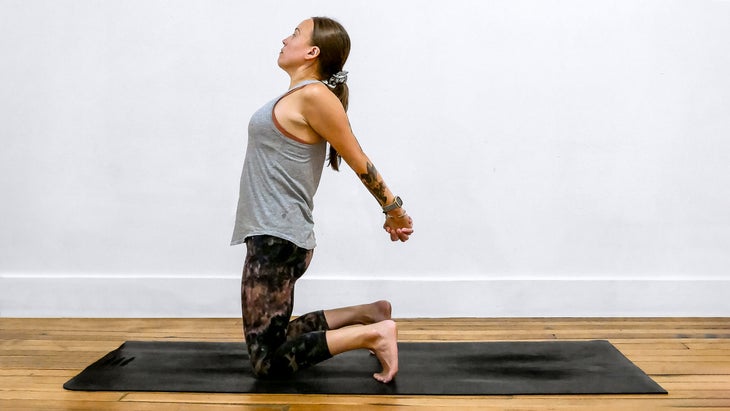
From hands and knees, bring your knees hip-distance apart, walk your hands back, and lift your chest as you come into a kneeling position. Keep your toes tucked under. Interlace your fingers behind your back and lift your chest. If you want to get intense, keep a bend in your elbows to engage your chest. Stay here for 3–5 breaths. Release your bind.
Foot-To-Elbow Crook
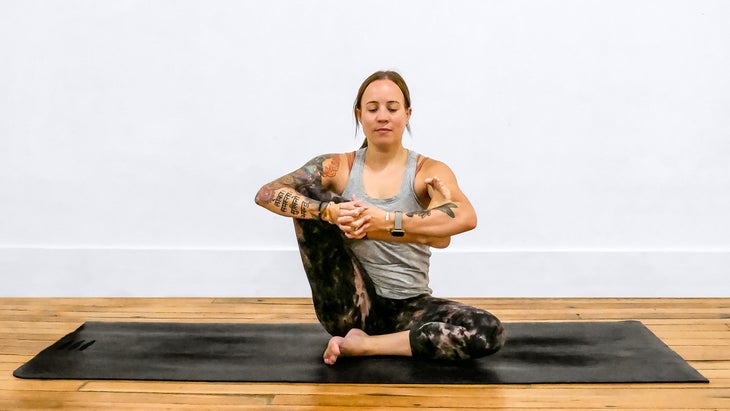
From Camel, release your hands and make your way onto your bum. Bend your left knee and bring the sole of the foot by your right thigh. Then bend your right knee and bring your right foot toward your left elbow crook. If it feels nice, cradle your right shin with both arms and lift your heart. If you want, pause here and close your eyes.
Compass Pose
It’s time for Compass Pose. You got this! Release your right foot but keep hold of the pinky edge with your right hand and bring it toward your right shoulder. Bring your right leg back and your right shoulder forward. Then, lift your right shin and bring your right shoulder under. (It genuinely doesn’t matter where your shoulder to shin ratio is.)
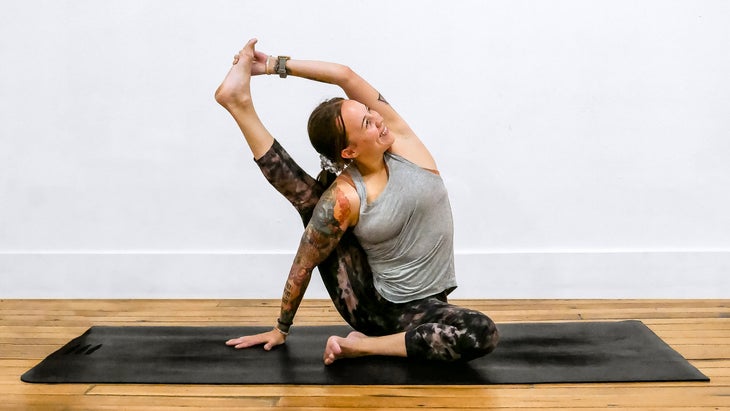
Place your right hand on the mat out to the side of your hip with your fingers pointing away from you. Now, keep in mind that the pose requires a lot of hamstring flexibility, and letting go of the idea that you need to completely straighten your leg. Begin to press your right foot away from your shoulder as you bring your left hand to the outer edge of your right foot. Start to straighten your leg. Once you reach the full depth of your version of this pose, stay here for 3–4 breaths. Release, then do Compass Pose on the left side, then take Savasana (Corpse Pose).
See also: 6 Poses to Calibrate Your Inner Compass
Need more guidance to nail Compass Pose? We’ve got you covered. Join Outside+ today to access our full 45-minute sequence leading to Compass, as well as additional tips and anatomy insights.
About our contributor
Ashlee McDougall is a self-proclaimed yoga nerd. She’s completed more than 1,500 hours of yoga teacher training with expert teachers including Janet Stone and Jason Crandell. She enjoys creating sequences that help you build strength and mobility and is very passionate about offering trauma-aware and inclusive classes. You can follow her on Instagram at @Ashlee.McDougall and take class with her at Bhava Wellness in Tucson, Arizona.