Smoothie Sours
To think that 20 years ago the word beer and smoothie being put together in the same sentence, much less next to each other, would have been unfathomable. And here we stand in 2021 on the edge of the smoothie revolution! Brewers standing up, creating beer, and altering palates in ways that have droves of craft beer enthusiasts lining up to praise the innovation; while others scoff at the sheer thought of making beer not taste just like a “normal” beer. Whichever lane you might reside in, the simple fact is that smoothie beer is here to stay.

The Short History of Smoothie Sours
In the early 2010s, breweries resurrected the nearly forgotten German beer styles of Berliner weisse and Gose. As these “kettle soured” beers grew in popularity brewers began expanding the styles with additions of fruit of all different types. As the styles continued to grow, brewers began pushing the limit of how fruit could be perceived in sour ales. Eventually the level of fruit being used led to a near smoothie-like character, inevitably being called smoothie sour beer. From there the use of crazy adjuncts and ingredients such as cinnamon, chocolate, ice cream, and cheesecake (just to scratch the surface on the options), no longer stood in the way. We hit a smoothie precipice that there is no coming back from.
How to Make a Smoothie Sour
Smoothie sours differ from the traditional sour beer base in the fact that you are trying to create a beer that is well attenuated, yet has a full mouthfeel. At Oakshire Brewing in Eugene, Oregon, where I am Director of Brewing Operations, we build our base on our house hazy IPA recipe, chock full of wheat and oats. A little bit of acid malt for mash pH adjustment and some dextrin malt for the INSANE foam retention that you will get from the fruit additions. We shoot for a base beer between 9.75% and 10.5% ABV. The fruit we use is unfermented and accounts for about 45–50% of the final volume of finished beer, creating a beer that is 5% ABV by the time it is packaged. You are also looking for wort that has a bunch of fermentable sugar. Shoot for a low mash temperature in the 148–149 °F (64–65 °C) range. This will help the yeast beat the acidity and high gravity at the same time.
After a very short boil (40 minutes or so) send the wort to a souring vessel and add your favorite Lactobacillus culture for your sour beer. We have a house culture that has been running for over six years that started from live culture yogurt. It works fantastically and you only need a little to get everything going (for a 5-gallon/19-L batch I recommend 1⁄2 cup of live Lacto culture yogurt).
Our souring target is between 3.40 and 3.55 pH. Any lower than 3.40 and you end up with a base beer that does not interact well with the acidity of nearly any fruit; any higher than 3.55 and you start to lose the essence of the base sour beer. We’re often asked about titratable acidity (TA) in relation to our smoothies, and if we use it. Currently for the smoothie sours we focus on the pH as our indicator as the analysis for all fruit we receive is measured in pH as well. We feel that we are able to better match fruits together along with our base sour by comparing the pH of the fruit to the 3.40–3.55 pH standard that we target on the base. It really is towing a very fine line. If you do not have a pH meter, go by taste. It is alright to taste the wort at this point as it will shortly be boiled and all the Lactobacillus will be boiled off.
After you have reached your optimal souring point (depending on the culture this could be in 18–48 hours), bring the wort back to your kettle and begin to boil. A short 40-minute boil works great for these beers. The kettle additions are simple: Dextrose (corn sugar), yeast nutrient, and whirlfloc. You want to incorporate dextrose as approximately 9–10% of your total fermentable sugars. The goal is to have a beer out of the kettle at 1.097–1.100 specific gravity (SG). After fermentation you’ll have the 10-ish% ABV that you are looking for.
Fermentation and the Road to Adjuncts
Make sure that your wort is thoroughly aerated with oxygen. We are aerating with oxygen at a rate of 9–10 liters per minute. The finished beer will need it, as the fermentation will be tough on the yeast with such a high original gravity (OG) and low pH. The target final gravity (FG) is between 1.020 and 1.024 SG. My preferred yeast is Imperial Yeast Flagship (A07), also known as the “Chico strain.” It can absolutely withstand the high gravity and low pH and achieve the desired fermentation metrics. If you have fermentation controls, I recommend running it at 68 °F (20 °C) to start with a bump to 70 °F (21 °C) after two days. If you are running it at ambient temperature just let it ride; it really won’t hurt the fermentation or final beer. Terminal gravity is usually achieved in about 10 days as the yeast works through the sugar and pH.
The World of Adjuncts
Adjuncts are the meat and bones of smoothie sour beers; however, do not undervalue the importance of your base beer. No amount of extra ingredients will cover flaws of brewing execution and fermentation. That being said, damn are the adjuncts fun.
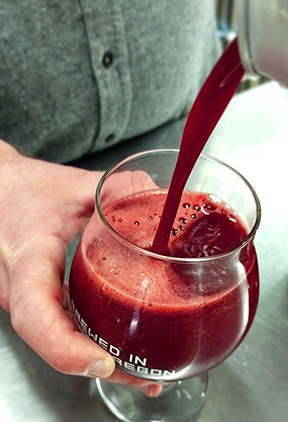
Once you have reached terminal gravity it is time to start thinking about your fruit and other adjunct additions. To really create a smoothie sour beer your fruit is not meant to be refermented. It needs to stay in the full puree state to really get the smoothie feel to encapsulate the drinking experience. If you are simply going to add fruit, the recommendation would be to crash the beer down to 34 °F (1 °C) and transfer off the yeast cake to secondary conditioning to allow more yeast to settle. After another 4–5 days cold, rack the beer off the yeast cake to fruit!
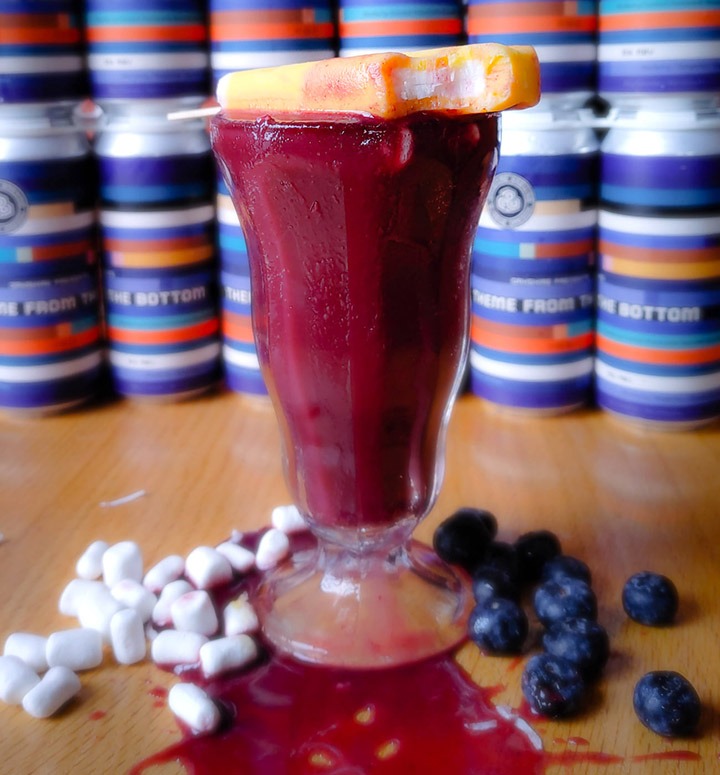
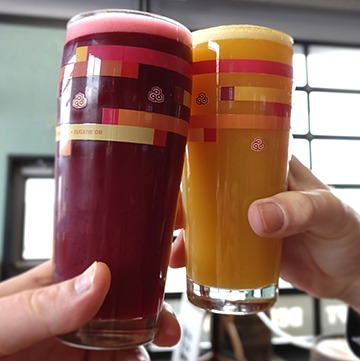
With your first smoothie sours I would suggest going a simpler route and starting with just using fruits, while holding off on the adjuncts. I know the temptation of jumping into using extreme ingredients when you see other brewers using them in the style, but if you don’t first master the fruit, then every other addition is fruitless. The simplest introduction to fruit that can be given is to go with fruit and fruit combinations that you know. Don’t start out attempting to overcomplicate your approach. Using 100% raspberries or blueberries will turn out to be absolutely fantastic. If you feel a tad more adventurous go with known fruit combinations. One of my all-time favorites is POG (passion fruit, orange, guava).
The selection of how the fruit is prepared is important. Fresh fruit is not advisable for smoothie sours as there may be wild yeast on the skins that will cause refermentation. The ideal fruit is aseptic puree found in almost every grocery store.
What, wait, you don’t use freshly picked fruit!?
We don’t, the honest truth. Aseptic fruit puree has a very long shelf life and the right brands add no additional ingredients or preservatives. Oregon Fruit Products makes some of the absolute best, and is available in grocery and homebrew stores all over the country with a wide variety of fruits. There are some other awesome brands out there as well. As you look to find the one that is best for your smoothie beer make sure it is 100% fruit, no preservative aseptic puree and you can’t go wrong.
When you have the fruit additions down and become more curious and adventurous with your adjunct usage there are a few extra steps that are necessary to really bring out the full flavor of all the adjuncts. After fermentation is done and you see a steady FG for three days straight, let the beer hang on for another four days at fermentation temperature. Do not cool or crash the beer. This is going to be integral to the pick up of flavor from your secondary conditioning. As you have carefully selected your adjunct additions; place them in your secondary vessel, and if you have the ability then purge the vessel with CO2. Transfer your base beer onto the adjuncts for 5–7 days. For nearly every adjunct you use this will end up being the perfect amount of time. It allows for the complete absorption of the flavors, without those characteristics becoming overbearing on the base beer. I’ve found that only certain adjuncts can be detrimental to your beer out of the gate if left for too much time. Mainly be careful with spices such as cinnamon, nutmeg, and allspice. Use too much for too long and you have a recipe for disaster. After your 5–7 days you are ready to follow the previously mentioned steps and head to fruit additions.
Packaging
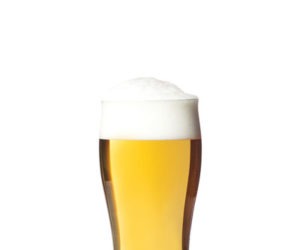
Once your newly created smoothie sour is near ready to drink, it’s time to consider how it will be conditioned and poured. The first and easiest choice would be to condition in a Corny keg. If you are going the kegging route, I recommend adding the fruit puree to the keg and racking the beer on top of it. Once racked and in your kegerator you can begin conditioning. The main point to consider is separation. During conditioning and pouring you will want to make sure you are always shaking the kegs to keep everything mixed. As for carbonation there is no exact standard for when it is carbonated. It is really up to personal preference. You can have near zero carbonation or make it extremely carbonated (though it won’t look or taste it, due to the thickness). It’s really based on personal preference — bubbles or no bubbles. I personally like a good amount of carbonation in these beers. The puree forms a crazy foam head that holds on the entire time you have a smoothie beer in your glass. I think it’s pretty great to explore. Either way, be sure to keep the keg cold at all times after kegging.
Bottling these smoothie beers is a completely different story. There will be no bottle conditioning as the yeast will rip through the fruit and cause literal bottle bombs (really, please don’t attempt to bottle this way). The best way would be to carbonate in a Corny with the aforementioned technique and bottle off the Corny.
Using Weird and Wacky Adjuncts
There really is no limit to the adjuncts that you can put into these beers. That said, here are my favorites:
Marshmallow: Marshmallow has become a staple in Oakshire’s smoothie sour program. We solely use marshmallow creme, or Fluff as many may know it. We use about 3 lbs./gallon (360 g/L) of Fluff in the base beer before we add fruit. Combined with vanilla you end up with a silky and creamy texture to balance out any tartness from the fruit. Going to the grocery store and buying the real stuff is the way to go. Really a game changer. Add between primary fermentation and secondary conditioning when the beer is still warm. After the 5–7 days you can transfer to fruit. Do note that marshmallow fluff is not vegan as it contains egg whites.
Vanilla: The second staple to our smoothie sour base; vanilla beans help to amplify the creaminess. The marshmallow Fluff draws all the taste in and the beans help to round everything out. My ideal usage rate is one bean per gallon (4 L) of finished beer (with fruit). I would add it during secondary conditioning and before fruit for the full effect.
Cinnamon: The quintessential ingredient for making pastry-style cake smoothie sours (yeah, it really is a thing). It can be over the top if used in excess. Start with less and slowly add cinnamon until you reach the level that is right for your taste. Too much and you can easily render the beer undrinkable. Add it in secondary first and when you transfer to fruit see how you feel. Maybe you can add a little more, but don’t overdo it.
Soft-Serve Ice Cream Mix: It may sound crazy but hear me out. This stuff is awesome for adding a ton of flavor and texture. It makes the beer super, super thick. It’s almost a milkshake more than a smoothie. There are so many flavors as well and a lot are non-dairy. We’ve explored vanilla and chocolate so far, but I have my eye on pistachio! We use about 2 lbs. per gallon (240 g/L) of finished beer. All you need to do is blend it up with a little hot water until dissolved and put it at the bottom of your finishing vessel with the fruit before racking. Once you are done give it a big shake to mix everything in and you are good to go!
Cheesecake Mix: Probably the wildest and one of the most delicious ingredients that I have added to a smoothie sour beer. In the same process as the ice cream mix, we utilize New York-style, no-bake cheesecake mix available at almost any grocer or online. A little hot water before transferring onto beer and fruit and shake it up. You literally have a melted cheesecake in a glass. It is a trip!
Coconut: One of my favorites for so many beers, smoothie or not. My preferred blend is 2⁄3 unsweetened toasted coconut to 1⁄3 raw, dried, unsweetened coconut at a rate of 20 lbs. per BBL (0.65 lb./gallon or 78 g/L). Premade toasted coconut can get pricey at about $7/lb. when purchased online, but it is the easy way. You can always make it yourself at home. Start with raw, unsweetened coconut flakes and preheat your oven to 325 °F (163 °C). Spread the flakes out thinly on a baking sheet and bake for approximately five minutes, or until they begin to slightly brown. Pull out to stir and flip the coconut flakes on the sheet to ensure even browning. Place back in the oven for about another five minutes or until golden brown. Keep a watchful eye as they can go from brown to burnt very quickly. Pull out and remove from the baking sheet to let cool. Repeat the process until all of your coconut has been toasted.
The only thing you need to worry about is the absorption of the beer into the coconut. It will likely result in the loss of 15% of the beer, but dang does it taste good. You can easily add it to a secondary bucket and put the base beer on top of it. Drawing off the bottom will yield the most beer before you add it to fruit.
Whichever way that you end up approaching your smoothie sours, some of the aforementioned tips will help you create a successful and delicious beer. And the amazing part is there is almost no flavor that you can think of that would be out of the question. You can take these beers as far as your imagination will let you!
Brew Your Own Smoothie Sour
Because most of these beers have the same ingredients except for the fruit and adjuncts, it seems easiest to start with the base recipe that we use for every batch and then talk about some of the potential flavor combinations we have used vs. writing out individual recipes. Shoot for an OG of 1.097–1.100 and an FG of 1.020–1.024 and a souring target of 3.40–3.55 pH.
Grist Bill:
2-row malt (55%)
Malted white wheat (14%)
Dextrin malt (7%)
Acidulated malt (3%)
Rolled oats (12%)
Dextrose (boil) (9%)
Mash Temperature:
148–149 °F (64–65 °C)
Mash Additions:
Calcium chloride and calcium sulfate (gypsum)
My Favorite Fruit & Adjunct Additions:
Pineapple Dreamsicle: A journey down memory lane. Everyone remembers dreamsicles (or creamsicles). Orange and vanilla all packed into a cold, delicious treat. I like to take that memory to the next level with secondary fruit and marshmallow additions to really amplify the feel. My favorite iteration incorporates the addition of pineapple puree.
Lemon Blackberry Cinnamon Roll Cheesecake: Probably one of the most ambitious smoothie beers that we have attempted, but also one of the most delicious. Starting with our smoothie sour base we add cinnamon, vanilla, marshmallow, and graham cracker. The beer is then finished on 1⁄4 lemon puree (careful of the tartness level) to ¾ blackberry puree and a lot of cheesecake mix. This beer is a freaking trip.
Strawberry Ice Cream: Straight up strawberries and cream. Same base with vanilla and marshmallow, but the non-dairy, soft-serve ice cream mix adds this next level of depth and complexity. We brewed this originally with our friends at Urban South-HTX and the ice cream treatment has become a staple of our program since.