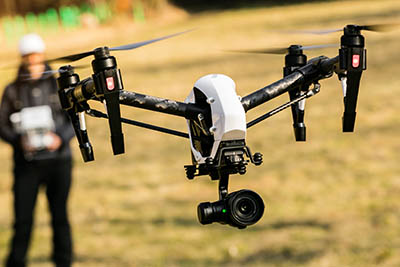
Drone photography is by far one of the most exciting new trends in the world of photography. It enables you to capture images that are impossible to take with conventional cameras. However, buying your first drone can be incredibly frustrating and confusing – especially if you don’t know much about drone photography. There are so many different models that come on the market.
Drones provide many possibilities to create fantastic landscapes, panoramic shots, and captivating 4K video footage.
I’d like to share some tips and advice that I’ve learned from my personal experience with drone photography. Hopefully, they’ll help you to be a successful drone photographer/videographer.
In this beginner’s guide, you’ll learn how to choose a suitable drone for photography or filming 4K video and how to take stunning photos with it.
You don’t need any prior experience with drones or photography to master drone photography. Let’s get started!
Choose a drone based on your needs and skills
Don’t overcomplicate things. There are so many different drones out there with different sizes, designs, and filming capabilities.
Determining what you want to do with your drone is the first step towards success. For example, if you’re looking for an easy-to-fly drone that offers professional stabilization and a 4K video camera for under $500 – check out the Mavic, Mini, Tello, and Phantom.
My DJI drone’s 4 Pro camera has a large depth of field, 100Mbps high-resolution, cinema-quality 4K video capability, and comes with the H.265 codec, which is ideal for most drone work.
Premium-quality drone models are more expensive and can cost you more than $20,000. Popular high-quality quadcopters include Skydio and Parrot.
What are your objectives in drone photography? Some drones fly further than others, and come with better equipment, for example, lighting to shoot at night. Once you’ve decided what you want to achieve with your drone, examine the features and choose one that meets your requirements.
Understand the features of your drone
Take the time to learn about each feature of your drone. Once you know what it’s capable of, you can take full advantage of its abilities. It’s up to you whether you choose a simple or more advanced drone. Just make sure that whatever model you buy matches your skills and photography/videography needs.
Ensure you know its vital features:
- Weight
- Flight time
- Range and altitude
- Payload
- Camera quality
- Battery life
Knowing the specs of your drone will ensure you get the most out of it. How much weight can it carry? How long can it stay in the air? What distance can it travel before it loses the signal from its remote controller?
Read the instruction manual carefully
Get to know your drone and camera system. Practice using the different buttons and controls, understand the best way to control your camera for stable shots, and learn how to change its settings.
Here are two things I learned very quickly when I started doing drone photography:
- Don’t fly in high winds
Winds over 15 miles per hour (24 kph) are too strong. It only takes a few seconds of flying into a strong wind to make your drone challenging to control. If there are gusts, your drone can quickly disappear out of view, so wait until the wind dies down.
- Don’t use electronic devices when flying
Using headphones or Bluetooth earpieces can interfere with your drone’s wireless connection. Also, avoid other metallic objects close by that could interfere with signals from the controller and camera.
Learn how to control your drone
You will need to spend some time learning how to fly your drone. Practice taking off and landing at home before going out to fly.
If your drone has GPS mode, then you need to ensure you read the instructions to work out how to fly it safely on GPS mode.
Learn about your drone camera. Start by learning about the various settings on the camera. Doing so will give you a better idea of what kind of results you can expect from it. Be sure you know how to optimize all the lens settings before you take off!
Don’t forget the essential add-ons
There are several add-ons you should consider before you purchase. The first one is a high-quality camera mount (if not included) to make sure you can connect your camera securely to the drone for better stability.
It’s also handy to have extra batteries. Having a standby means that you can swap the dead one out for a fully charged battery in a flash without wasting time.
Another essential piece of kit is a prop guard. It acts as a propeller protector in case of a crash and is helpful when you need to transport the drone in a car because it protects it from any external damage as well.
Other accessories I’ve found handy include:
- Extra SD card for storage
- LED lights to avoid problems while flying at night
- Extra sets of propellers on hand – just in case – so you don’t have to worry
Test drive your drone
Before you try to do drone photography, learn to maneuver your drone under different conditions. Doing so will help you get to grips with the controls and make filming your aerial footage easier.
It might be worth finding out if there are any local restrictions in places where you plan to fly your drone. If not, even public locations can provide superb opportunities to take your film-making skills to the next level.
Know the federal, state, and local drone regulations
Don’t think that you can just do whatever you want with a drone! Do you want to fly your drone for commercial purposes, like aerial videography and photography? Then you must be aware of the rules and regulations of flying a drone as a pilot. Being aware of the drone regulations in place will avoid any trouble with the FAA.
Before flying, you should get the FAA Remote Pilot Certificate, especially for commercial flying purposes. It’s vital to study the laws and understand what they permit and prohibit if you plan to develop drone videography services.
Learn beginner drone photography techniques
We often lose sight of the fundamental principles of photography, but they are still relevant for photography using a drone.
It is critical to understand the fundamentals, such as the rule of thirds, golden ratio, and leading lines, to deal with drone shooting like a professional.
There are some basic techniques such as:
- Frequency: be patient and film regularly throughout the day. You never know what you might capture!
- Following: This technique is when you follow a subject and capture it from different angles. However, this can be challenging, and you will need to work on your drone skills to succeed in doing it.
- Establishing shots: The idea here is that you don’t follow. Instead, you fly over the primary area of interest and gain a panoramic view. The panoramic view helps set the scene before zooming in to focus on something that interests you.
- Flipping the perspective. With a drone, you see things from above you wouldn’t be able to capture with a regular camera. Look for dividing lines, unique patterns, or contrasting colors.
Different types of drone photography
There are different types of photography you can do with a drone. But it’s impossible to list them all. So, below are some of the most common types.
- Aerial surveying and construction photography. You take video or photographs from your drone to capture a feature of the environment or changes over time (time-lapse). It includes aerial videography or single photos.
- Commercial drone filming: this is when you use the images obtained from a drone for commercial purposes. An example would be when you are covering an event for TV or when you are filming real estate shots for websites such as Zillow or Trulia.
- Drone journalism: journalists use drones to cover some stories. For instance, protest marches, natural disasters, or social or sports events.
Learn to fly in ATTI mode
What is ATTI mode, and what are the benefits?
Did you buy a DJI drone? The ATTI mode allows you to disable the GPS – so you fly it manually.
The stability of the drone is strongly dependent on GPS positioning. The more stable the GPS signal, the easier it is for your drone to hold its position in one place. That’s why, if possible, you should always fly your drone with a stable GPS connection.
But I recommend first learning how to fly in ATTI mode so that you get used to the controls and develop your drone skills. An unstable GPS signal can cause problems, so it’s best to learn to fly with ATTI. If you are proficient enough, you could even take your aerial photos in this mode of flight.
What are the benefits? Greater flying skill, non-dependent on GPS, and by having this skill you can keep your focus on the subject instead of being distracted by GPS readings. It’s also handy if the GPS ever malfunctions.
Using ISO 100
This is maybe one of the handiest tips I ever learned. Using ISO 100 for drone filming or photography is best because drones with low sensors don’t work well with a high ISO setting. Allowing more light into the sensor, you can capture crisp shots with little to no blur.
Experiment with different angles and shots – remember you’re shooting a moving target! Keep trying until it works for you. Use any available editing tools on your computer to enhance.
Aspect ratios
While 3:2 is the most popular for digital cameras, drone cameras mostly use 16:9 and 4:3 formats. These are better for video shoots. If you’re unsure which one to pick, try both of them and see which one works best for you.
Prepare a pre-flight checklist
Try to develop smart drone flying habits! Before you send your drone up, you should perform a quick safety check to ensure everything is working correctly. While you’re doing this, make sure there are no people or animals in the area that could get hurt by your drone.
Before you begin, these are the things that you need to check:
- Fly zone
- Surroundings
- Battery
- Controls
- Settings
- Propellers
- Motor
- Weather
Pay attention to the weather forecast
The weather is a key factor in photography, so make sure you know the forecast before going up. Weather forecasts are readily available online, so there is no excuse for not looking at a weather app before planning a flight! The weather can make the difference between a disaster – or capturing spectacular footage with your drone!
Editing and post-production tips
Here are some basic steps you should follow when dealing with post-production drone footage:
- Download files from the SD card to your computer
- Add them to Photoshop (or your preferred editing app) and synchronize the layers
- Make basic color and contrast corrections in your editing software
- Straighten the horizon for a pro result
- Achieve a more natural look by adjusting the white balance
- Get more impacting colors by adjusting saturation and vibrancy sliders
Finally, export the final video with rendering codecs like H.264 or H.265 that are compatible with YouTube, Vimeo, or any other distribution platform you are using.
Pro-tip: Use the 3×3 grid overlay to compose your composition
The ‘thirds grid’ is a grid overlay you can use in your favorite photo editing software to help compose your photo or video better. The grid will show you a set of lines and angles that you can use as a framework for your composition.
In Photoshop, open the “Edit” menu and select “Preferences” – then select “Guide, Grids & Slices” – customize your grid to show 1 gridline every 100 and 3 subdivisions – and you’ll see a 3×3 grid appear.
Always be developing your skills
We’ve looked at the basic steps to take to get your drone up in the air safely and start taking photos/videos. But that’s only the start of your journey in aerial photography/videography. Once you get to know your drone and camera inside out and practice flying, the world of opportunities drone photography/videography offers is virtually limitless.
Develop the fundamental navigation and photography skills – and your imagination and creativity will drive you to continually develop your skills and seek new challenges.
This short guide is by no means an exhaustive one, but it will prevent you from making some common novice blunders! There are also lots of other great resources here on this site to help you develop as a photographer – I encourage you to use them!
Have fun with your drone, experiment, and keep improving your skills.
Contributors