In our DAW Basics series, we’re going to show you around the latest version of Apple’s GarageBand, guiding you through the steps you need to take to create your own song, and taking stock of the program’s most essential features along the way.
Following on from our first tutorial, which showed you how to program a lead synth melody and chord sequence in GarageBand, we're detailing how to put together a simple drum beat that can accompany your melodic creation.

Step 1: Open up a New Project, or an existing project that contains some material you’d like to add a drum pattern to. In my case, I’m opening up the project I started in our first edition of this series.
When the prompt above appears, select Software Instrument. If you’re working with an existing project, select Track and then New Track at the top of the window to access the same options.

Step 2: Now we need to select a drum kit to work with. Select Electronic Drum Kit in the Library bar on the right, then choose a specific drum kit that you like the sound of. I’ve gone with 808 Flex.
This will load the samples from the kit selected into your Software Instrument track. These are usually triggered by using a MIDI keyboard, or by entering in MIDI information with your keyboard and mouse.
If you’re using a MIDI keyboard, ignore the next few steps and hit Record at the top of the window (the red circle). This will allow you to play in drum sounds and create a region automatically.

Step 3: We’re going to program in a drum pattern with our keyboard and mouse. Our next step is to create an empty region, so we can program in the notes (or samples) that will form our drum pattern.
To do this, we’ve got to create an empty region in the Software Instrument track we just created. This creates a space for our drum beat to sit in on the timeline. Right-click the space within the track and hit Create MIDI Region to create an empty region.
Then, drag the bottom right corner of the region (the green box) to the right so that it covers twice the amount of time in the timeline. This means the region will last for two bars.

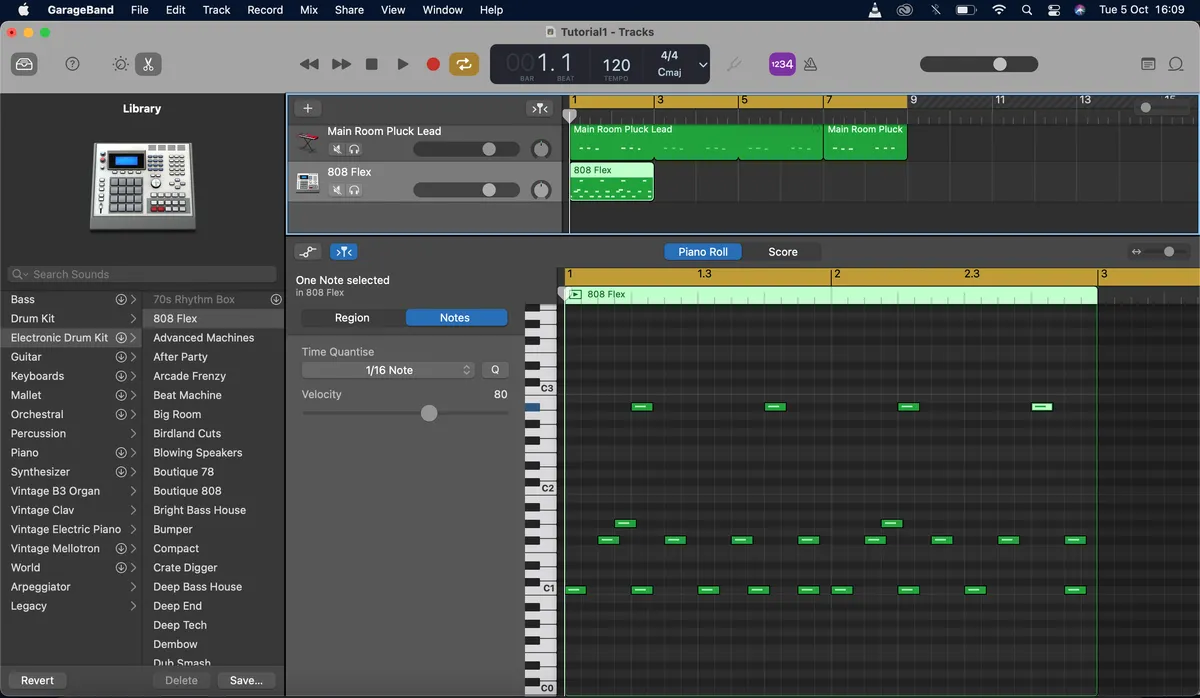
Step 4: The region we’ve created is a space in which to enter notes. Double-click the region to open up the Piano Roll, a zoomed-in map of the region which allows us to enter notes that the Software Instrument (our drum kit) will play.
As we’re working with a drum kit and not a pitched instrument, our Piano Roll will only have sounds available on a certain number of keys. These will be between the C1 and C3 you can see running up the side - make sure you only enter notes in the region that line up with those notes.

Step 5: Let’s start entering some notes into our region, to create our drum pattern. Notes are entered by pressing the Command key while clicking into the region. The vertical placement of the note determines which key of the piano roll it plays (and which sound in the drum kit) and the horizontal placement determines what time in the region’s duration it will play.
A good place to start is with a kick drum pattern - you can usually find a kick drum on C1 of the Piano Roll. Enter in a pattern like the one you can see here that fills up the 2 bars of your region.
Step 6: Now we want to add some evenly spaced hi-hats and a regular clap or snare - these are the building blocks of many conventional drum patterns. The hi-hats are going to play on the “off-beat”, which is the space between the 1, 2, 3, and 4 of the metronome. The claps are playing on every 2 and 4.
Add these in and press play, and you’ll recognise this type of beat instantly. I’ve added a second hi-hat that sounds one 16th-note after the first, once every bar - this gives the pattern a bit of rhythmic flavour.

Step 7: Now we’re going to loop this pattern, so it matches the chord sequence and synth pattern we created in the last tutorial. We can loop regions by clicking and dragging on the top-right corner, towards the right. Before we loop it, let’s duplicate it, so that we have a new copy of the region at the end of the chord sequence which we can edit as a variation.
To duplicate the region, use the Copy and Paste commands as if you're copying text: Ctrl + C and Ctrl + V will work. When your duplicate has been dragged to the end of the sequence, click and drag on the top-right corner of your original region to loop it three times.

Step 8: Now we want to edit our duplicate region to create a variation on our original drumbeat. Double-click the duplicate region, and either remove some of your original notes, or add in some more - experiment until you find a pattern that sounds good. I’ve taken away a couple kick drums, and added an extra clap and a reversed hi-hat sound at the end of the bar.

Step 9: There you have it - your first beat in GarageBand. Activate the yellow Cycle bar on the timeline and drag it to the length of your beat so that you can hear it play on a loop.
Finally, to shape the sound of your drum kit, hit the Controls knob at the top (it’s a circle surrounded by dots, next to a pair of scissors) and experiment with the Effects panel that appears at the bottom of the screen. I’ve added some Drive and Reverb to give the drum kit a more engaging sound.