
Wondering how best to cook dried chickpeas? From making a creamy hummus to a crunchy roasted snack, you have plenty of options. Let us walk you through your choices.
Why should I used dried chickpeas instead of canned?
Canned chickpeas, or garbanzo beans, are inexpensive, convenient, and most of us have a can or two stashed in a forgotten corner of the pantry. You may be wondering why anyone would bother cooking dried chickpeas when it’s far quicker to just open a can.
It turns out there are a few reasons why you might want to keep a bag of dried chickpeas on hand.
- Canned chickpeas are much higher in moisture than dried chickpeas, making them unsuitable for frying. If you’ve ever tried making falafel with canned chickpeas, you know what we’re talking about. To get that crispy, golden crust and tender interior, you need to use soaked dried chickpeas.
- Cooking dried chickpeas lets you decide on the firmness of the final bean. Whether you want soft, tender beans to make the creamiest hummus, or prefer beans with a little more bite for your bowl of soup, cooking them yourself gives you that option.
- If you’re watching your salt and preservative intake, cooking dried chickpeas gives you complete control over how much sodium is in your food and eliminates the need for any preservatives.
- Dried chickpeas are also less expensive and use less packaging than the canned variety.
Do I need to soak dried chickpeas?
If you’re cooking them on the stovetop, then ideally, yes. You can skip the soaking step but they’ll just take longer to cook and may result in a little digestive discomfort. (Beano, anyone?) If you’re using the slow cooker or pressure cooker, you can cook soaked or unsoaked chickpeas.
As with other beans, an overnight soak is believed to reduce that bloaty, gassy effect chickpeas can cause during digestion, so if you’re sensitive (or don’t want to offend your dinner guests), go ahead and let those chickpeas soak in cool water at room temperature for 10 to 12 hours before cooking.
What if I forgot to soak the chickpeas?
Forgot to soak your beans? If you’ve got an hour to spare, toss them into a saucepan, cover with water, and bring to a boil for 1 minute. Remove from the heat and let them soak for 1 hour.
With either method, drain and rinse your beans before cooking.
How to cook chickpeas on the stovetop
Cooking chickpeas on the stovetop requires nothing more than a pot, water, and a little patience. Toss your chickpeas into a pot, cover with a couple of inches of water, partially cover with a lid, and bring to a gentle boil. Adjust the heat and let the chickpeas gently bubble away until they are tender. You don’t need to babysit them. Have a cup of tea. Read a book. Check your stocks.
Start checking them after 1 hour and continue to cook until you’ve reached the texture you’re after. If you want to season with salt, add a big pinch towards the end of cooking.
The total cooking time for your chickpeas will depend on their age. That said, if your bag of chickpeas hails from the Regan era, we’d recommend tossing them out and buying new ones. No amount of simmering is going to make those babies tender.
Use your slow cooker
Cooking chickpeas in your slow cooker is, well, as the name suggests, slow, but almost completely hands-off. Simply cover 1 pound dried chickpeas with 7 cups of water and a few big pinches of salt if desired. Cook on high for 3 to 4 hours or low for 6 to 8 hours, or until tender.
Use your Instant Pot or pressure cooker
If you’ve got an Instant Pot or pressure cooker, the process of cooking dried chickpeas just got a whole lot faster. Toss 1 pound of dried chickpeas into the pressure cooker, top with 6 cups water, and 1 teaspoon of salt, if desired. Tighten the lid and cook on high pressure for 12 minutes, if using soaked chickpeas, and 50 minutes for unsoaked, followed by 10 minutes of natural pressure release. Finish releasing the pressure manually and check on them. If they’re not as tender as you’d like, pop the lid back on, bring up to pressure, and cook for a few minutes more.
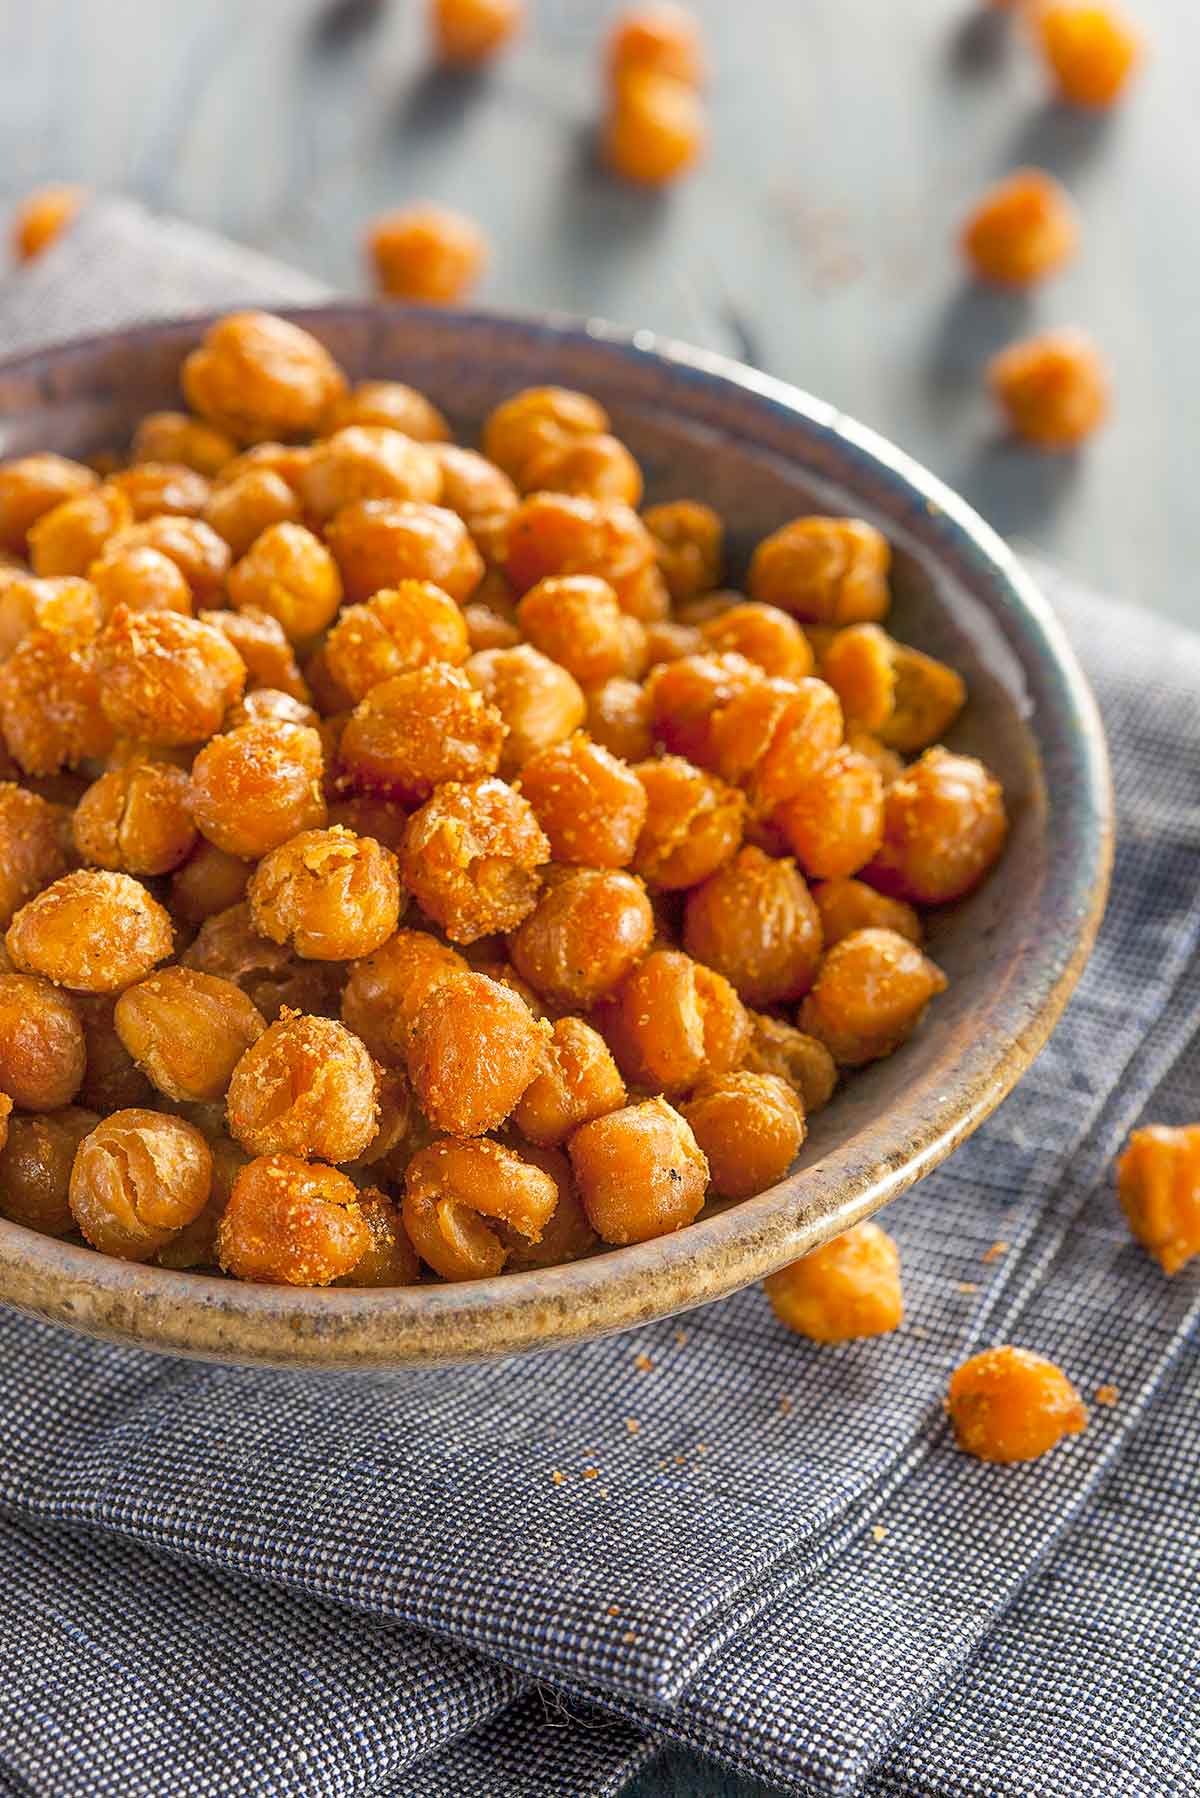
How do I make crispy chickpeas?
Ah, you’ve come to the right place. If you love noshing on those crispy, seasoned chickpeas as much as I do, you’ll be delighted to know that you can make them at home at a fraction of the cost of the packaged ones. And you can use either the canned or dried variety with equally good results.
Crispy air-fryer chickpeas
When it comes to making the crispiest, crunchiest chickpeas, the air fryer is our favorite tool. Make sure your chickpeas, whether cooked from dry or canned, are drained and dry before frying. Toss 1 cup of them into the basket of the air fryer, and cook at 400°F (204°C) for 10 minutes. Transfer to a bowl and toss with 1 teaspoon oil and seasoning of your choice. Return them to the air fryer and cook at 300°F (150°C) for 10 minutes more.
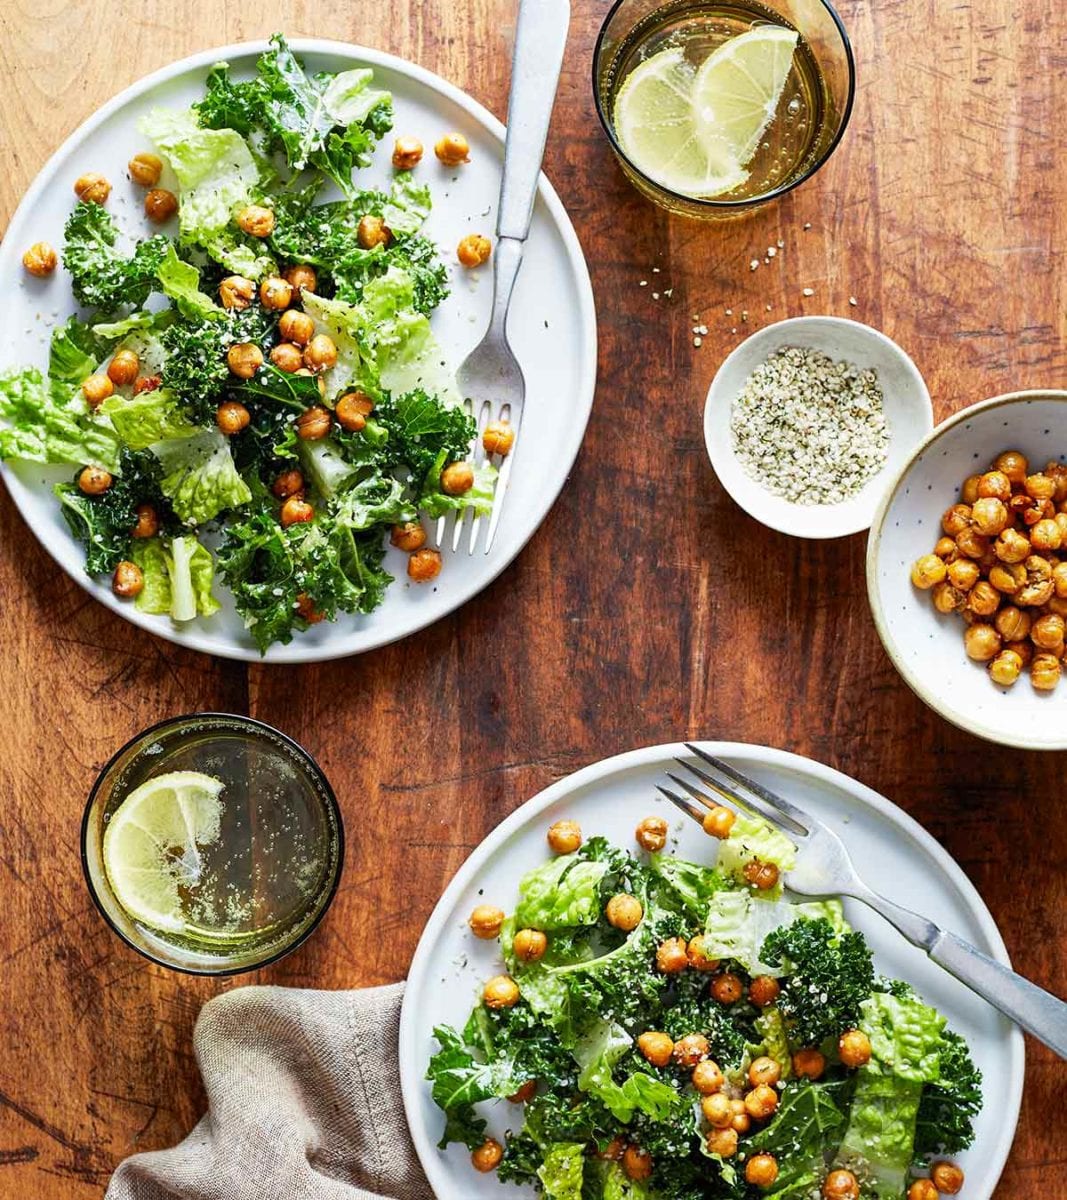
Crispy oven-roasted chickpeas
No air fryer? No problem. Make sure your chickpeas, whether canned or soaked and cooked, are drained and dry before frying. Toss your chickpeas on a rimmed baking sheet and slide into a 400°F (204°C) oven. Bake for 20 minutes. Transfer the chickpeas to a bowl and toss with a little olive oil and seasoning of your choice and then return to the sheet pan. Pop them back into the oven and cook until they are golden and crunchy, about 15 minutes more.


I’d like to roast them, but with sprouted chickpeas. Will it work?
Definitely, Simon. Just proceed as you would with soaked chickpeas.
I love chickpeas and keep them in my fridge all the time for salads, hummus, a quick chana masala or even snacking.
I do them in the oven. 300˚ for 90 minutes to a couple hours. It’s insane how the time can vary but, nevertheless, it’s so easy. At the end, if they’re nearly done, I just turn off the oven and leave them in the residual heat.
I don’t soak mine. I don’t soak any beans. I want them to absorb flavors as they’re cooking and not just get soft. I put onion (either chopped or a root end chunk), a cracked (not crushed) clove of garlic, salt (yes, I salt all my beans right upfront) and cumin and/or turmeric in the pot with the chickpeas. I remove the garlic and the whole onion (the chopped onion cooks down to nothing) before I put them in a big canning jar to be available at a moment’s notice.
The cooking liquid will get thicker and thicker in the fridge. I just pour it off and add fresh water every few days.
Gas is never a problem for me. Maybe my digestive system has learned to deal with it because I eat a lot of beans.
Thanks, Rainey. That sounds like a great combination of ingredients to make a very flavorful pot of chickpeas. Your hummus must taste amazing!