We Made Ina Garten’s Famous Chocolate Cake—and Here’s What We Discovered

Updated: Feb. 27, 2023
Ina Garten's chocolate cake recipe has a secret.
Our editors and experts handpick every product we feature. We may earn a commission from your purchases.
I’m a sucker for a good cake recipe. Even if it’s not someone’s birthday, I’ll jump at the chance to whip up a multi-tiered treat. When I stumbled across this Ina Garten chocolate cake (aka Beatty’s Chocolate Cake), I knew I had to make it.
This beauty has over 2,000 reviews and maintains a 5-star rating! So, on a snowy day, I gathered up my ingredients and put her recipe to the test. Here’s what happened when I tried to bake like the Barefoot Contessa. And if you don’t want to whip it up at home, you can order it online and have it shipped to your doorstep.
Check out our best-ever chocolate cake recipes.
The Famous Ina Garten Chocolate Cake Recipe

Ingredients
- Butter and flour, for greasing pans
- 1-3/4cups all-purpose flour
- 2 cups sugar
- ¾ cups good cocoa powder
- 2 teaspoons baking soda
- 1 teaspoon baking powder
- 1 teaspoon kosher salt
- 1 cup buttermilk, shaken
- 1/2 cup vegetable oil
- 2 extra-large eggs, at room temperature
- 1 teaspoon pure vanilla extract
- 1 cup freshly brewed hot coffee
Frosting:
- 6 ounces good semisweet chocolate (Ina recommends Callebaut)
- 2 sticks unsalted butter, at room temperature
- 1 extra-large egg yolk, at room temperature
- 1 teaspoon pure vanilla extract
- 1-1/4 cups sifted confectioners’ sugar
- 1 tablespoon instant coffee powder
Tools You’ll Need
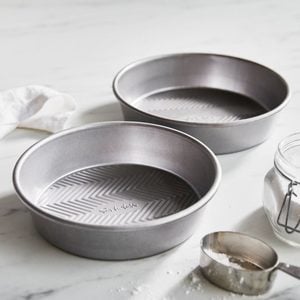

- 8-inch cake pans: It seems like a 9″ cake pan is close enough—but using a larger cake pan will create thin layers. For optimal height, use two 8″ cake pans.
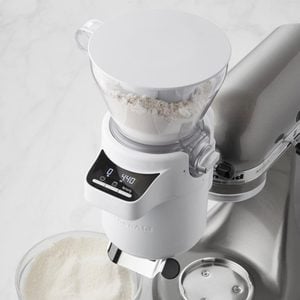
- KitchenAid Sifter & Scale attachment: This KitchenAid attachment is a splurge at $129, but it’s a must for bakers who want to work quickly.
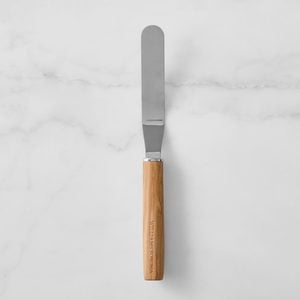
- Offset spatula: The Taste of Home Test Kitchen cooks use an offset spatula for a picture-perfect frosting finish.
Directions
Step 1: Get ready to bake
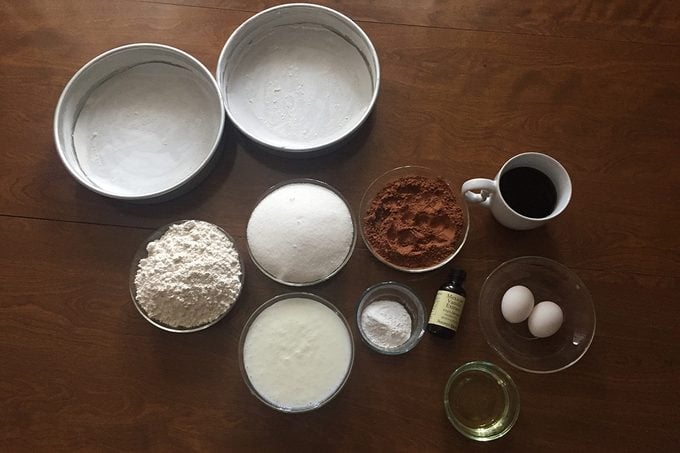
I started by prepping my pans and ingredients. First, I preheated the oven to 350°F. Next, I used butter to grease two 8-inch by 2-inch round cake pans, then I placed a parchment circle on the bottom of the pan, buttered the paper, then lightly coated the surface with flour. (If you’ve never done this before, check out our no-fail guide to how to grease a cake pan.)
Next, I measured out all of my ingredients. This technique, called mise en place, may create a few extra dishes, but it makes the baking process a whole lot easier. When everything is pre-measured there’s no need to stop and level a cup of flour or worry that you forgot to add an ingredient.
Get more of Ina’s best cooking tips.
Step 2: Sift dry ingredients
Once my ingredients were ready to go, I used my KitchenAid Sifter & Scale attachment to quickly combine the flour, sugar, cocoa, baking soda, baking powder and salt in the bowl of my stand mixer. I mixed the dry ingredients on low until they were well combined.
You can use a traditional sifter or even a mesh sieve if you don’t have one of these fancy KitchenAid attachments.
Step 3: Combine wet ingredients
Then, in a separate bowl, I combined the buttermilk, oil, eggs and vanilla. Before adding the buttermilk I made sure to give it a few quick whisks since Ina specifically mentions in the ingredients section that the buttermilk needs to be shaken. I turned my mixer back on low, then slowly incorporated the wet ingredients with the dry.
Editor’s Tip: Buttermilk is an invaluable baking ingredient. It adds a hard-to-put-your-finger-on (but delicious) flavor while also creating a more tender cake.
Step 4: Add the secret ingredient
At this point in the recipe, the batter looked (and smelled!) delicious—but I still hadn’t added Ina’s secret ingredient: freshly brewed hot coffee. With my mixer on low, I added the coffee until it was just combined.
Don’t miss all our secret baking tips to take your treats from good to great!
Editor’s Tip: Adding coffee to your chocolate cake won’t make it taste like mocha. Instead coffee and instant espresso help to accentuate chocolate’s natural flavors.
Step 5: Bake
I divided the batter between my prepared cake pans and popped them in the preheated oven. As I poured the mixture, I realized that the batter was really runny. It made sense—since the recipe called for 2-1/2 cups of liquid—but I was a touch concerned that the cakes wouldn’t firm up.
Step 6: Remove the cakes
After 35 minutes, I checked on the cakes—and they were perfect! Clearly, I had nothing to worry about. Ina knew what she was doing. I set my timer again—this time for 30 minutes—to let the cakes cool. Once time was up, I worked a butter knife around the edge of each pan to help loosen the cakes, then flipped them onto a wire rack to cool.
Step 7: Melt chocolate
While the cakes cooled, I started on Ina’s chocolate buttercream frosting. First, I chopped and melted the chocolate in a double boiler. If you don’t have a double boiler, it’s super easy to make one. All you need to do is nestle a heat-proof bowl over a few inches of simmering water. And, voila! Double boiler. Once the chocolate melts, set it aside and let it cool to room temperature.
Learn how to make Ina Garten’s outrageous brownies and more easy ways to melt chocolate.
Step 8: Beat butter until fluffy
For the next step, I used a hand mixer to beat the butter on medium speed until it was light and fluffy. About three minutes should do it. Then, I added the vanilla and continued to beat for another three minutes.
Now, you likely noticed that the original Ina Garten chocolate cake recipe calls for an egg yolk. I chose to omit this ingredient because the FDA recommends cooking egg yolks until firm. If you choose to add the egg yolk, you’ll end up with a richer, more decadent frosting. But honestly, it tasted great without the yolk, too.
Step 9: Finish the frosting
When the butter and vanilla was light and fluffy, I added the confectioners’ sugar and mixed it until creamy.
Then, I measured out 2 teaspoons of hot tap water, and dissolved the instant coffee powder in it. While continuing to beat on a low speed, I added the chocolate and coffee to the butter, mixing until blended.
Step 10: Frost the cake
Since the frosting contains melted chocolate, it firms up the longer it sits, so I knew I needed to work quickly. I started by placing four small pieces of parchment paper on the edges of my cake plate. These would catch any frosting drips and keep my cake plate clean as I worked. It’s a frosting technique the Taste of Home Test Kitchen uses.
I placed the first cake, flat side up, on my plate. I used an offset spatula to spread a generous layer of frosting over the first layer. Then, I placed the second cake on top of the frosting layer. I used my spatula to frost the top and sides of the cake. After smoothing the surface, I created texture by gently working my spatula from side to side, creating waves in the icing. To finish, I slid the parchment pieces out from under the cake. Want to try more recipes? Learn how to make chocolate cake from Matilda.
Check out more of the Test Kitchen’s frosting tips for a stunning cake.
The Verdict
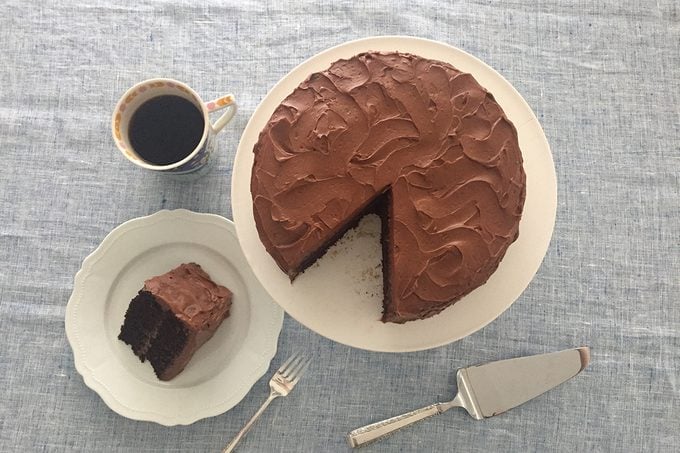
I cut myself a slice of cake and—Oh. My. Gosh. It was so good. The coffee really boosted the chocolate flavor, creating a dark, rich cake. And the frosting? To die for. It was thick, luscious and extremely decadent. I only needed a small piece to feel satisfied.
I asked a few family members to try the cake, too. They all agreed it was delicious, but one mentioned that it was a bit dark for her taste. She prefers sweeter cakes and is an avid fan of milk chocolate, so keep that in mind if you’re baking for a major sweet tooth! Another tester thought that a fruit curd—like lemon or raspberry—in the middle layer would take this Ina Garten chocolate cake to the next level.
Wait, I’ve Seen This Recipe Before!
If this cake looks familiar, it’s because Ina’s recipe is the same as Hershey’s Black Magic Cake. She admits on her show, The Barefoot Contessa, that the recipe came from her friend Michael’s grandmother. Looking for more magic cake recipes? Learn how to make these 4-ingredient magic cake and chocolate magic cake at home.
Tips for Ina Garten’s Chocolate Cake
Can I make this cake in cupcake form?
Yes! The ingredients are the same, and you can prepare them the same way. When it comes time to bake, Ina recommends reducing the cook time to 25-30 minutes for cupcakes. The recipe will yield 24 cupcakes.
The ingredients for the buttercream frosting will only make enough to frost 12 cupcakes, so double that part of the recipe to frost the whole batch.
How can I decorate my cake like a pro?
If you’re practicing your cake decorating skills or have a specific idea in mind for a birthday cake, there are lots of ways to turn regular buttercream frosting into a work of art.
You can make a dripped effect with homemade chocolate ganache or use your offset spatula to carve swirls or waves into thick layers of frosting. The easiest way to make your cake look fancy is to sprinkle chopped candy over the top or up the sides. For more ideas, check out our tips for fun cake decorating ideas.
How should I serve the cake?
Ina is known for her simple yet elevated recipes, and with this tip, you can serve cake just like the queen of the Hamptons. Before plating your slices of cake, make a homemade creme anglaise. It sounds fancy, but the easiest way to make this is by defrosting a good vanilla ice cream. Drizzle the melted ice cream over a serving dish, and place the slice of cake on top. Garnish with a couple fresh strawberries, and serve.
Next, try out Ina’s recipe for applesauce cake with bourbon raisins AKA one of her favorite Thanksgiving desserts.
Ina Garten’s Top-Rated Cookbooks

Originally Published: May 06, 2022